Arduino Nano - Button Count - LCD

This tutorial instructs you how to use Arduino Nano to count the button's press and display the value on LCD display. It is possible to adapt this for alternative sensors, rather than just the button.

In this tutorial, we will be debouncing the button without using the delay() function. For further information on why debouncing is necessary, please refer to Why do we need debouncing?.

Hardware Preparation

1×Arduino Nano
1×USB A to Mini-B USB cable
1×Push Button
1×(Optional) Panel-mount Push Button
1×LCD I2C
1×Breadboard
1×Jumper Wires
1×(Optional) 9V Power Adapter for Arduino Nano
1×(Recommended) Screw Terminal Adapter for Arduino Nano

Or you can buy the following sensor kits:

1×DIYables Sensor Kit (30 sensors/displays)
1×DIYables Sensor Kit (18 sensors/displays)
Disclosure: Some of the links provided in this section are Amazon affiliate links. We may receive a commission for any purchases made through these links at no additional cost to you. We appreciate your support.

Overview of LCD I2C and Button

If you are unfamiliar with LCD I2C and button (pinout, how it works, how to program ...), the following tutorials can help you learn:

Wiring Diagram

The wiring diagram between Arduino Nano and Button LCD I2C

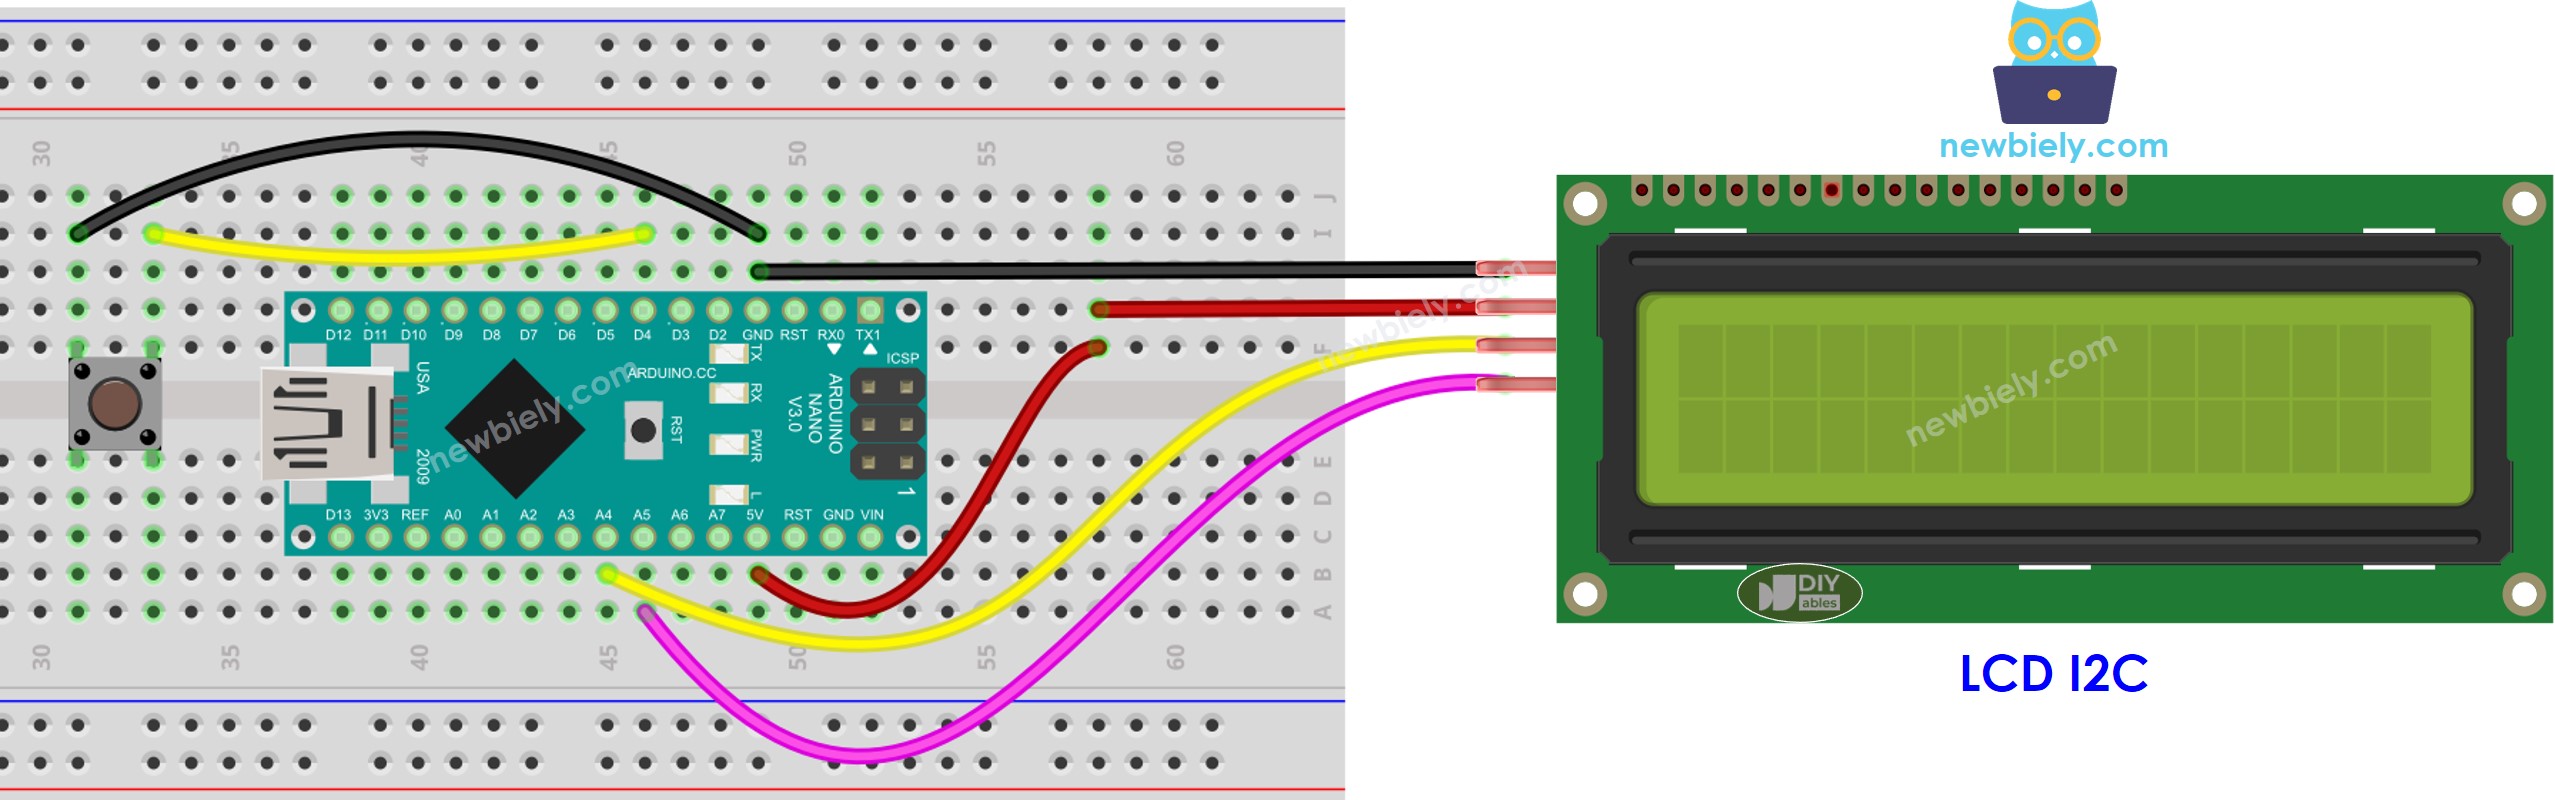
This image is created using Fritzing. Click to enlarge image

Arduino Nano Code - displaying button count on LCD I2C

/* * This Arduino Nano code was developed by newbiely.com * * This Arduino Nano code is made available for public use without any restriction * * For comprehensive instructions and wiring diagrams, please visit: * https://newbiely.com/tutorials/arduino-nano/arduino-nano-button-count-lcd */ #include <LiquidCrystal_I2C.h> #include <ezButton.h> LiquidCrystal_I2C lcd(0x27, 16, 2); // I2C address 0x27 (from DIYables LCD), 16 column and 2 rows ezButton button(4); // create ezButton object for pin D4 unsigned long prev_count = 0; void setup() { Serial.begin(9600); lcd.init(); // Initialize the LCD I2C display lcd.backlight(); // open the backlight button.setDebounceTime(50); // set debounce time to 50 milliseconds button.setCountMode(COUNT_FALLING); } void loop() { button.loop(); // MUST call the loop() function first unsigned long count = button.getCount(); if (prev_count != count) { Serial.println(count); // print count to Serial Monitor lcd.clear(); lcd.setCursor(0, 0); // start to print at the first row lcd.print("Count: "); lcd.print(count); prev_count != count; } }

Detailed Instructions

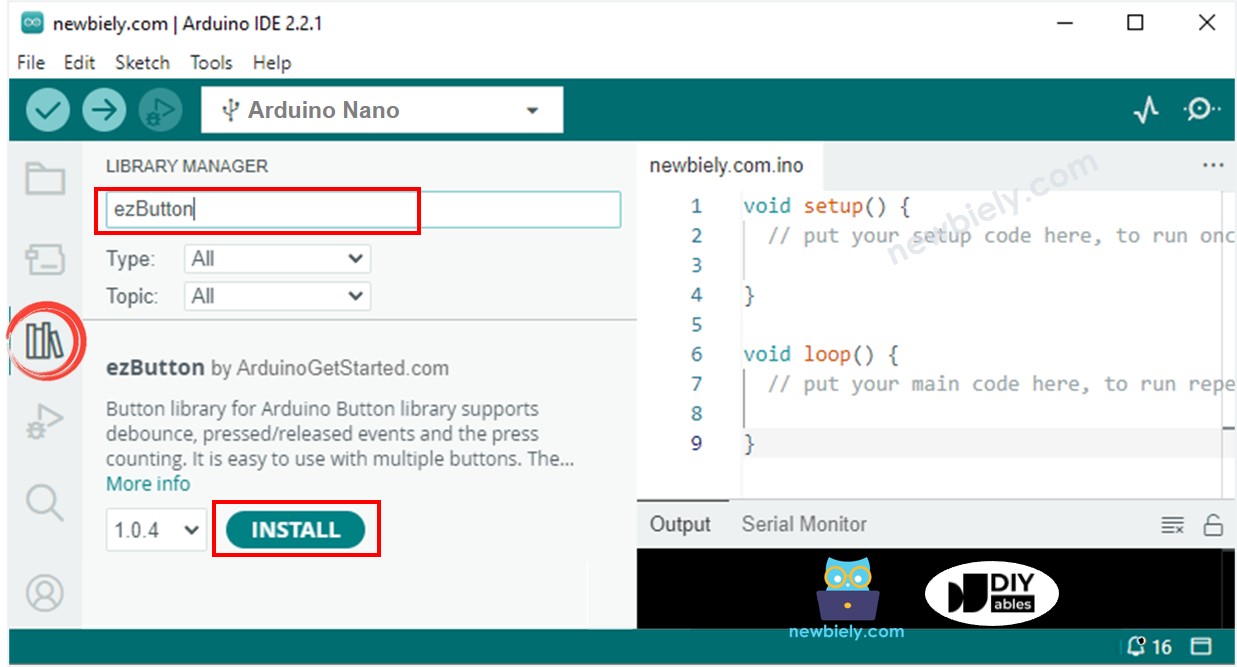
  • Click to the Libraries icon on the left bar of the Arduino IDE.
  • Search for “ezButton” and locate the button library by ArduinoGetStarted.
  • Press the Install button to install the ezButton library.
Arduino Nano button library
  • Search for “LiquidCrystal I2C” and then locate the LiquidCrystal_I2C library created by Frank de Brabander.
  • Click the Install button to install the LiquidCrystal_I2C library.
Arduino Nano LiquidCrystal I2C library
  • Copy the code and open it in the Arduino IDE.
  • Hit the Upload button to transfer it to the Arduino Nano.
  • Press the button a few times.
  • Check out the count changing on the LCD.

※ NOTE THAT:

The I2C address of LCD can differ depending on the manufacturer. In the code, we have used 0x27 which is specified by DIYables manufacturer.

Video Tutorial

※ OUR MESSAGES

  • As freelancers, We are AVAILABLE for HIRE. See how to outsource your project to us
  • Please feel free to share the link of this tutorial. However, Please do not use our content on any other websites. We invested a lot of effort and time to create the content, please respect our work!