Arduino Nano - Force Sensor
This tutorial instructs you how to use Arduino Nano with the force sensor. In detail, we will learn:
- How the force sensor work
- How to connect the force sensor to Arduino Nano
- How to program Arduino Nano to read the value from the force sensor
As a typical application, You can put your things on the force sensor, and then if the Arduino Nano detects a change in force, it means someone has grabbed your belongings.
Hardware Preparation
Or you can buy the following kits:
| 1 | × | DIYables Sensor Kit (18 sensors/displays) |
Additionally, some of these links are for products from our own brand, DIYables .
Overview of Force Sensor
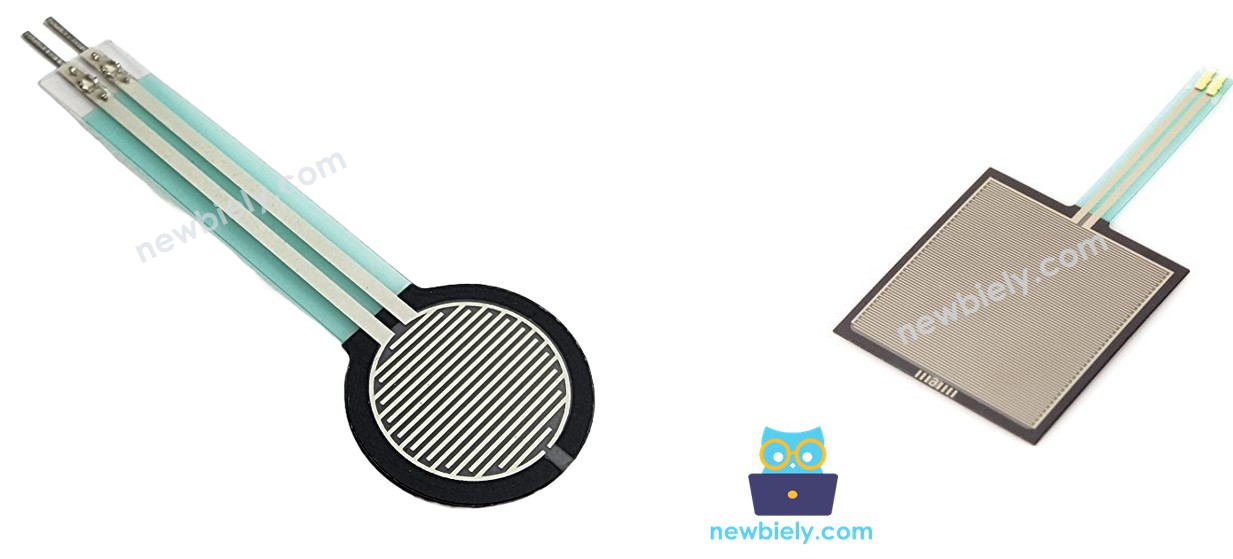
The force sensor is referred to as a force sensing resistor, force sensitive resistor, or simply FSR. It is essentially a resistor that changes its resistive value in response to the amount of pressure applied. The force sensor has the following characteristics:
- It is inexpensive and straightforward to use.
- It is adept at recognizing physical pressure and squeezing.
- It is not suitable for determining the number of pounds of weight it is bearing.
The force sensor is used in a variety of portable electronics, such as electronic drums, mobile phones, and handheld gaming devices.
The Force Sensor Pinout
A force sensor has two pins which are symmetric and do not need to be distinguished as it is a type of resistor.
How It Works
The force sensor is essentially a resistor that varies its resistance depending on the amount of pressure applied. As the pressure increases, the resistance between the two terminals decreases.
Wiring Diagram
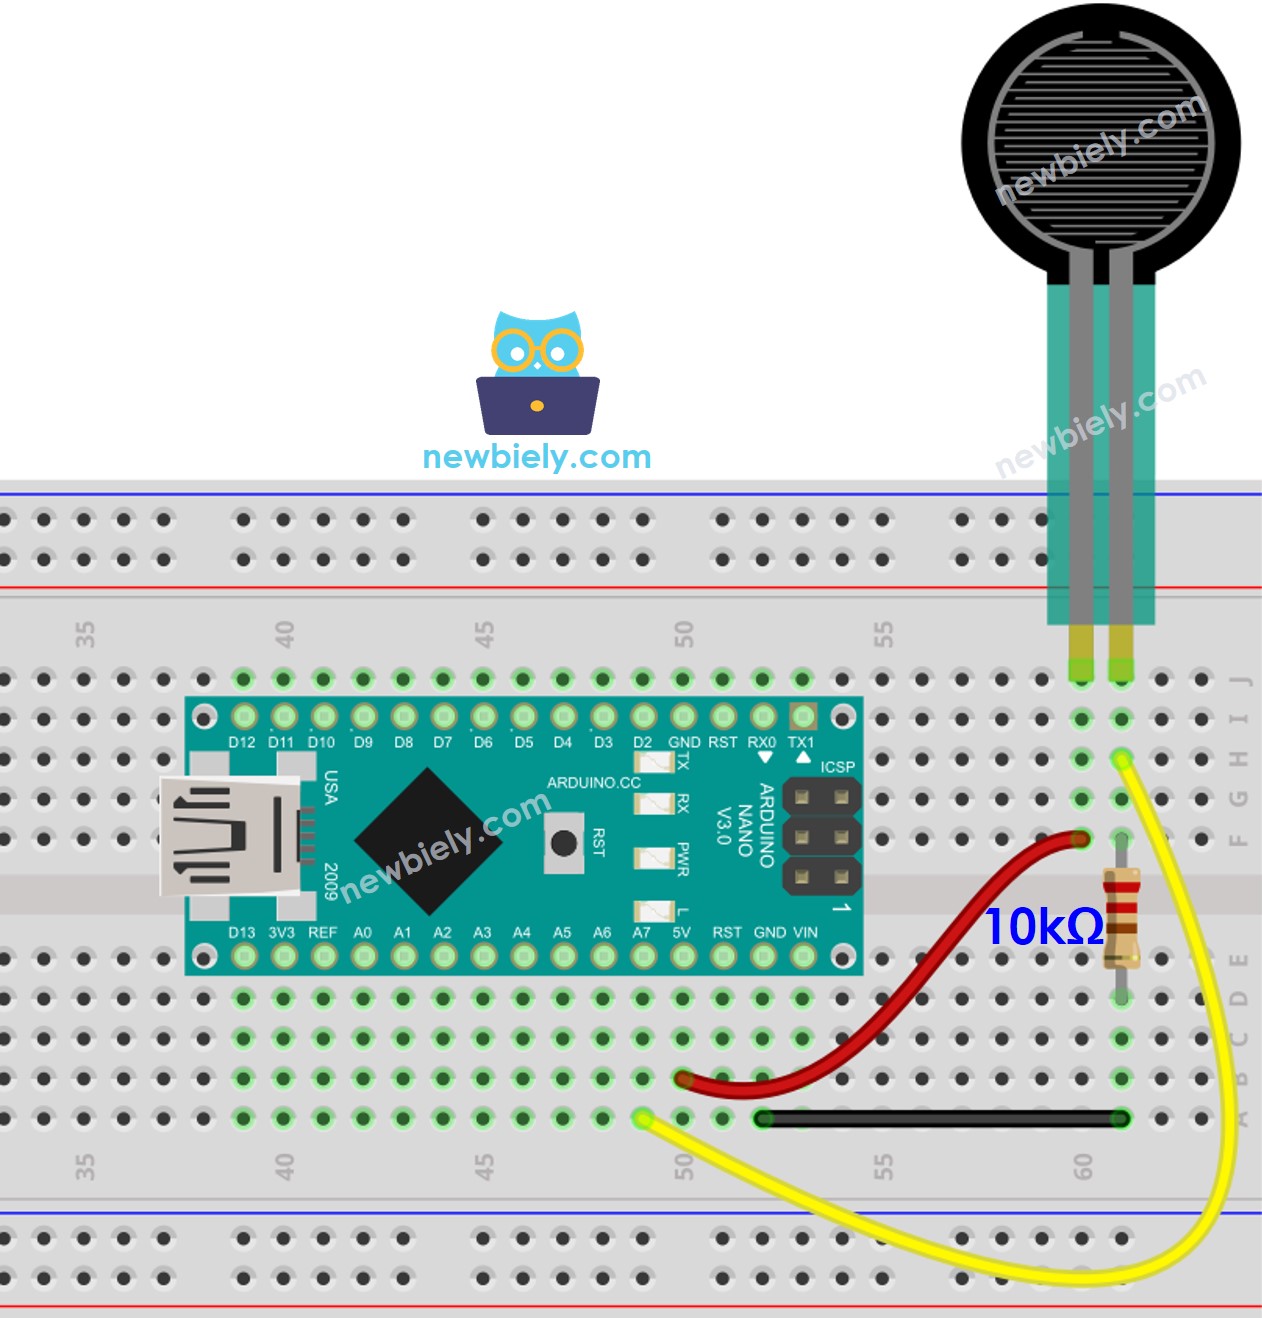
This image is created using Fritzing. Click to enlarge image
See The best way to supply power to the Arduino Nano and other components.
How To Program For Force Sensor
Arduino Nano's pins A0 to A7 can be used as analog inputs. These analog input pins convert the voltage (ranging from 0v to VCC) into integer values (ranging from 0 to 1023), referred to as ADC value or analog value. We can connect the force sensor to an analog input pins and use analogRead() function to read the analog value.
Arduino Nano Code
Detailed Instructions
- Copy the code and open it in the Arduino IDE.
- Click the Upload button to transfer the code to the Arduino Nano.
- Press the force sensor.
- Check the results in the Serial Monitor.