Arduino UNO R4 - Multi-Function Shield
The Multi-Function Shield is a great companion for the Arduino Uno R4 — whether you have the Minima or WiFi variant. In this guide, you will learn to:
- Attach the Multi-Function Shield to the Arduino Uno R4 board.
- Show numbers, floating-point values, and text on the 4-digit 7-segment display.
- Respond to button presses from the three onboard push buttons.
- Control the four LEDs — switching them on, off, or making them blink.
- Trigger short or timed beeps on the buzzer.
- Read the analog value from the potentiometer knob.
- Measure ambient temperature using the LM35 sensor.
The Arduino Uno R4 shares the same Uno form factor as the classic Uno R3, so the Multi-Function Shield plugs in directly without any extra wiring. The Uno R4 features the Renesas RA4M1 (Minima) or RA4M1 + ESP32-S3 (WiFi) microcontroller, offering more memory, faster clock speed, and a 14-bit ADC compared to the original Uno.

Watch this step-by-step video tutorial demonstrating all examples of the Multi-Function Shield:
Hardware Preparation
Or you can buy the following kits:
| 1 | × | DIYables STEM V4 IoT Starter Kit (Arduino included) | |
| 1 | × | DIYables Sensor Kit (18 sensors/displays) |
Additionally, some of these links are for products from our own brand, DIYables .

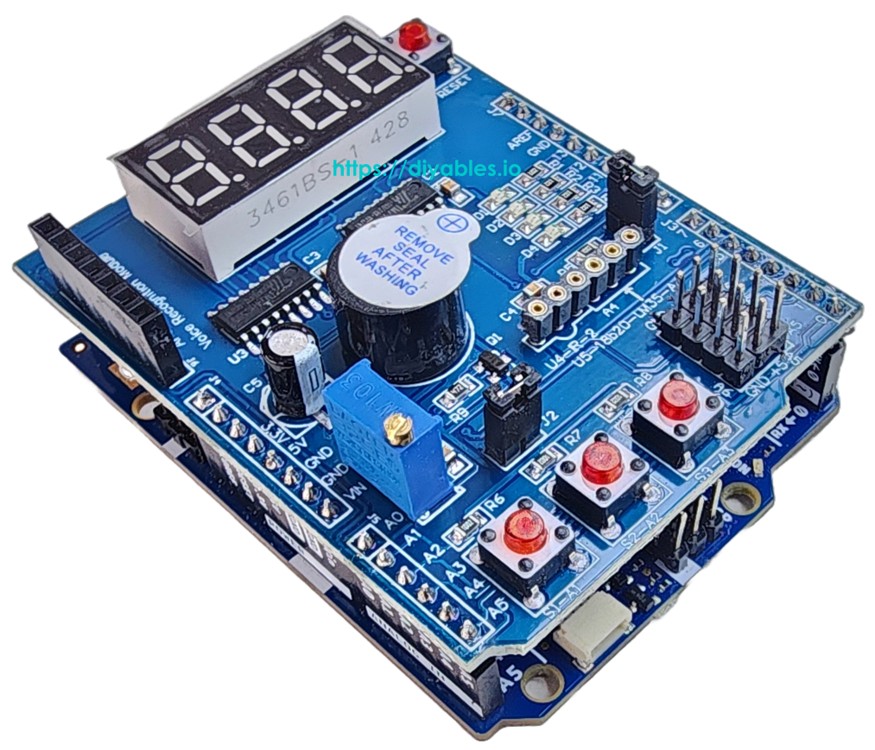
Overview of Multi-Function Shield
The Multi-Function Shield packs multiple components onto a single board that plugs directly into any Uno-compatible header. Here is what is included:
- A 4-digit 7-segment display controlled via a 74HC595 shift register — capable of showing integers, decimals, letters A–Z, and symbols such as the degree sign (°).
- Three push buttons (S1, S2, S3) wired as active LOW with built-in pullup resistors — ready for detecting presses and releases with debounce.
- Four LEDs (D1–D4), also active LOW — individually controllable for on/off/toggle/blink, plus a convenience function to blink all at once.
- An active-LOW buzzer — programmable for single beeps or timed sequences.
- A potentiometer on analog pin A0 — returns raw ADC counts or a 0–100% reading.
- An LM35 temperature sensor on analog pin A4 — outputs Celsius readings (remove jumper J1 to enable it).
Since the Uno R4 maintains the classic Uno pin layout, every pin mapping is identical to the original Uno:
| Function | Pin | Function | Pin |
|---|---|---|---|
| LED D1 | 13 | Button S1 | A1 |
| LED D2 | 12 | Button S2 | A2 |
| LED D3 | 11 | Button S3 | A3 |
| LED D4 | 10 | Potentiometer | A0 |
| Buzzer | 3 | LM35 Temp Sensor | A4 |
| Display LATCH | 4 | ||
| Display CLOCK | 7 | ||
| Display DATA | 8 |
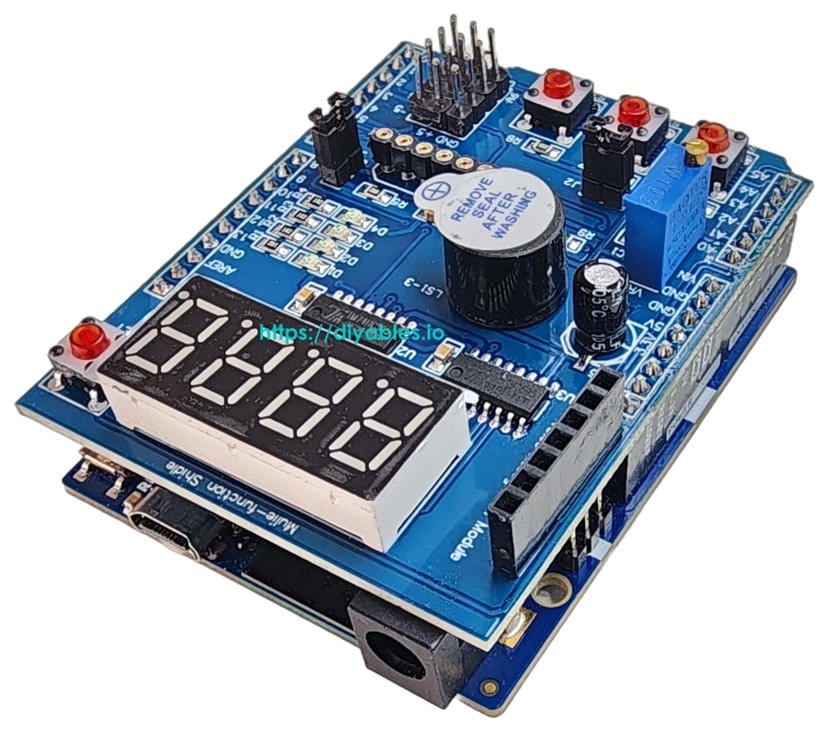
Wiring Diagram
No jumper wires or breadboard needed — simply align the Multi-Function Shield with the Uno R4 headers and press it into place. The shield seats onto the board exactly like it does on the classic Uno R3.
This image is created using Fritzing. Click to enlarge image
See The best way to supply power to the Arduino Uno R4 and other components.
How to Install the Library
- Plug the Arduino Uno R4 into your computer using a USB Type-C cable.
- In the Arduino IDE, verify that the correct board (Arduino Uno R4 Minima or WiFi) and serial port are selected.
- Click the Libraries icon in the left sidebar.
- Type "DIYables_MultiFuncShield" into the search box and locate the library published by DIYables.
- Hit Install to add the library to your IDE.
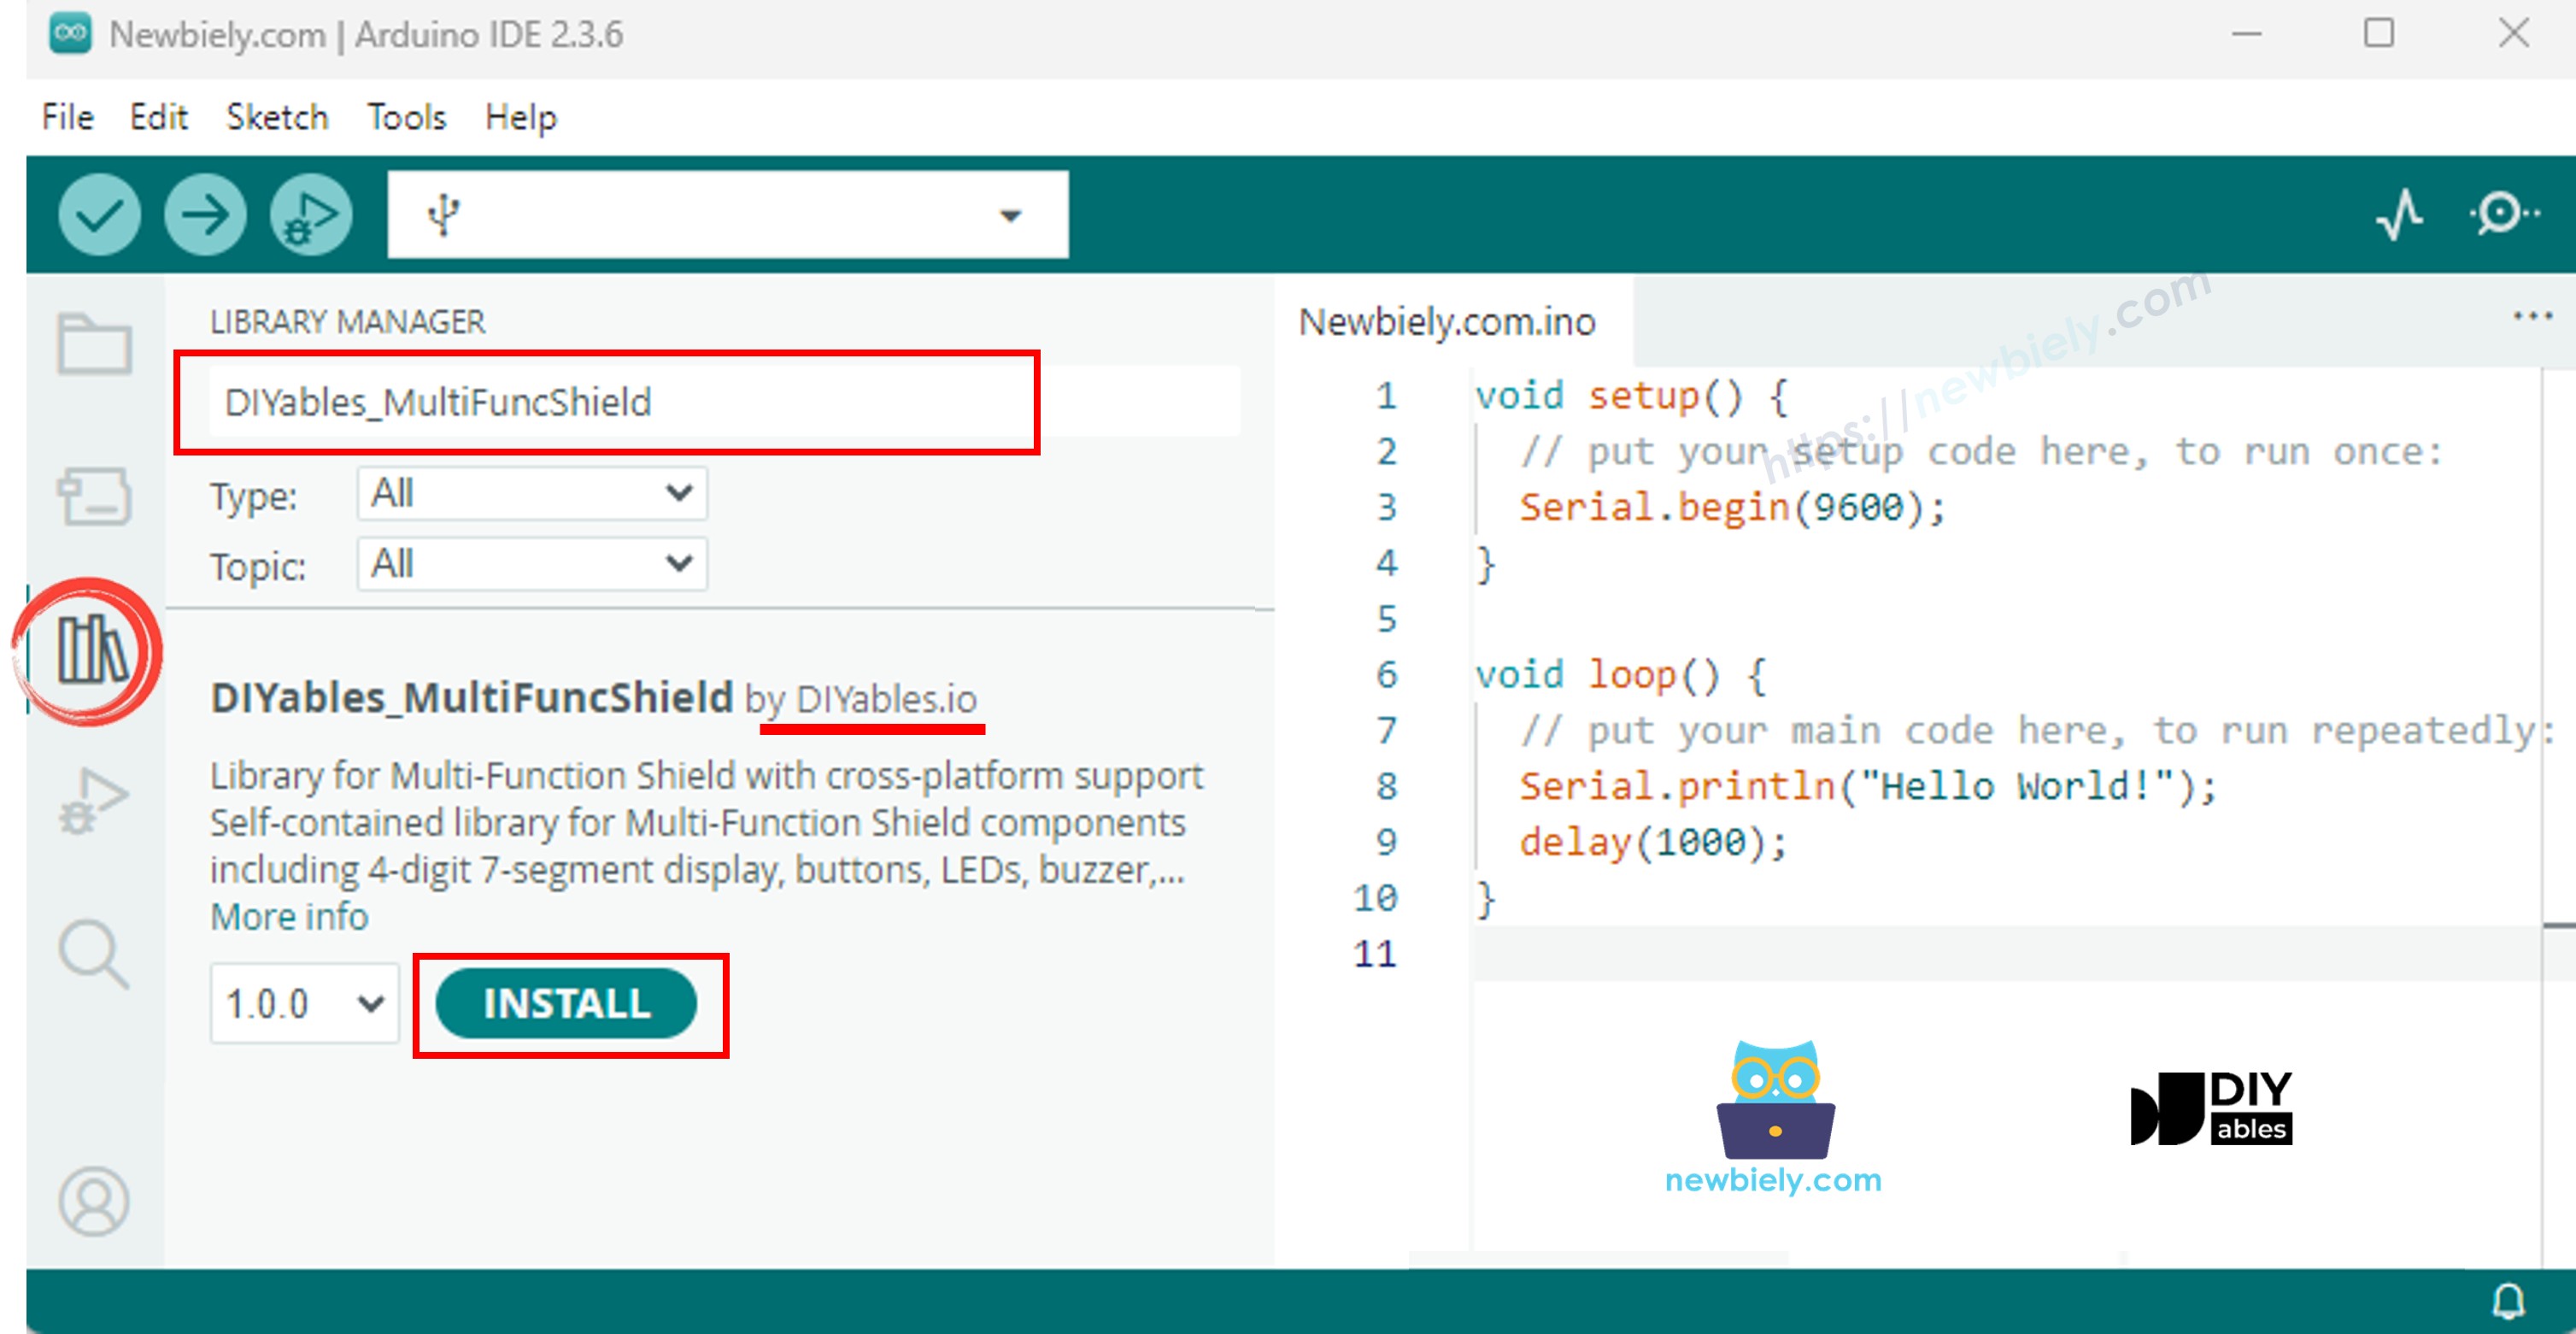
No additional dependencies are needed — the library is entirely self-contained.
Minimal Sketch Structure
All sketches that use the Multi-Function Shield share this skeleton:
Calling MFS.begin() configures every component on the shield. Calling MFS.loop() on each iteration keeps the display multiplexing, button debounce, LED blink timing, and buzzer scheduling running smoothly.
7-Segment Display Example
This example shows how to put numbers, floats, text strings, and special symbols on the 4-digit display.
How to Run
- Place the Multi-Function Shield on top of the Arduino Uno R4.
- Connect the board to your PC with a USB Type-C cable.
- Open Arduino IDE and select the board and port.
- Paste the code above into the editor.
- Press Upload.
The display will rotate through seven different presentations — an integer, zero-padded integer, floating-point number, text, text with a decimal dot, a degree symbol, and dashes — switching every 3 seconds.
Display Methods at a Glance
| Method | What It Does | Usage Example | ||
|---|---|---|---|---|
| print(int) | Shows an integer value | MFS.display.print(42) | ||
| print(int, true) | Shows an integer with leading zeros | MFS.display.print(42, true) → 0042 | ||
| print(float, dp) | Shows a floating-point number | MFS.display.print(3.14, 2) | ||
| print(text) | Shows a string (A-Z, 0-9, -, _) | MFS.display.print("HELP") | ||
| setNumber(pos, val) | Places one digit at a position (1–4) | MFS.display.setNumber(1, 5) | ||
| setChar(pos, ch) | Places a character at a position | MFS.display.setChar(2, 'A') | ||
| setChar(pos, SegChars) | Places a special symbol | MFS.display.setChar(3, SegChars | DEGREE) | |
| setDot(pos) | Lights up the dot at a position | MFS.display.setDot(2) | ||
| clear() | Blanks the entire display | MFS.display.clear() | ||
| show() | Pushes manual changes to the display | MFS.display.show() |
The print() overloads call show() internally. When building a display manually with setNumber(), setChar(), or setDot(), call clear() first and show() at the end.
Supported special characters through SegChars: DASH, UNDERSCORE, C, E, F, DEGREE.
LED Example
Light the four LEDs in sequence, then blink them all together.
How to Run
- Paste the code into Arduino IDE and press Upload.
Watch the LEDs turn on one at a time with a half-second gap, then all four start blinking in unison.
LED Methods at a Glance
| Method | What It Does |
|---|---|
| turnON() | Switches the LED on |
| turnOFF() | Switches the LED off |
| toggle() | Flips the current state |
| blink(interval) | Blinks with equal on and off duration |
| blink(onTime, offTime) | Blinks with custom on and off durations |
| isOn() | Returns true when the LED is lit |
Whole-group shortcuts available on MFS:
| Method | What It Does |
|---|---|
| allLedsOn() | Lights up all four LEDs |
| allLedsOff() | Turns off all four LEDs |
| allLedsBlink(interval) | Blinks all four LEDs together |
| allLedsBlink(onTime, offTime) | Blinks all with custom timing |
LEDs operate in active LOW mode. Use MFS.led1 through MFS.led4 or the indexed form MFS.led(1) to MFS.led(4).
Buzzer Example
Play a short beep at regular intervals.
How to Run
- Paste the code into Arduino IDE and press Upload.
A brief beep sounds every 2 seconds.
Buzzer Methods at a Glance
| Method | What It Does |
|---|---|
| beep(ms) | Produces a beep lasting the given milliseconds |
| beep(ms, delayMs) | Waits delayMs, then beeps for ms |
| stop() | Silences the buzzer right away |
| isBeeping() | Returns true while the buzzer is active |
Potentiometer Example
Read the potentiometer and print the value and percentage to Serial.
How to Run
- Paste the code into Arduino IDE and press Upload.
- Open the Serial Monitor.
- Rotate the potentiometer knob and watch the value update on the monitor.
Potentiometer Methods at a Glance
| Method | Return Type | What It Does |
|---|---|---|
| readPot() | int | Raw ADC reading (0–16383 on Uno R4's 14-bit ADC) |
| readPotPercent() | float | Scaled percentage from 0.0 to 100.0 |
Temperature Sensor (LM35) Example
Read the LM35 sensor and show the temperature in Celsius on the display and Serial Monitor.
Remember: Jumper J1 must be removed from the shield before using the LM35 sensor, because pin A4 is shared with the I2C SDA line.
How to Run
- Pull out jumper J1 on the Multi-Function Shield.
- Paste the code into Arduino IDE and press Upload.
- Open the Serial Monitor.
- The current temperature appears on the display and is printed to Serial.
Temperature values are smoothed using a 4-sample moving average. On the very first reading, the buffer is pre-filled so you get a stable value immediately.
Arduino Uno R4 Multi-Function Shield - Full Demo
The below is a step-by-step video tutorial demonstrating all examples of the Multi-Function Shield:
Platform Support
The library supports all Arduino platforms (architectures=*).