Arduino UNO R4 - Bluetooth and Bluetooth Low Energy
Overview
Ready to make your Arduino Uno R4 talk to your smartphone? This tutorial will show you exactly how to set up Bluetooth Low Energy (BLE) with the DIYables Bluetooth App. Once you're done, you'll be controlling your Arduino projects wirelessly right from your phone — and here's the best part: you won't need any extra Bluetooth modules or additional hardware!
What makes this even better is that the Arduino Uno R4 comes with BLE support built right in. That means you can connect it straight to the DIYables Bluetooth App on both Android and iOS devices without buying anything extra.
Important heads-up: While the Arduino Uno R4 supports BLE (Bluetooth Low Energy), it doesn't work with Classic Bluetooth. But don't worry — the DIYables Bluetooth App supports both BLE and Classic Bluetooth on Android, plus BLE on iOS. So regardless of whether you have an Android or iPhone, you're good to go with both platforms.
Features
- Wireless Freedom: Control your Arduino from up to 10 metres away without any cables
- Cross-Platform Compatible: Works seamlessly on both Android and iOS devices
- Zero Hassle Connection: No pairing dance required — BLE connects automatically without fiddling with phone Bluetooth settings
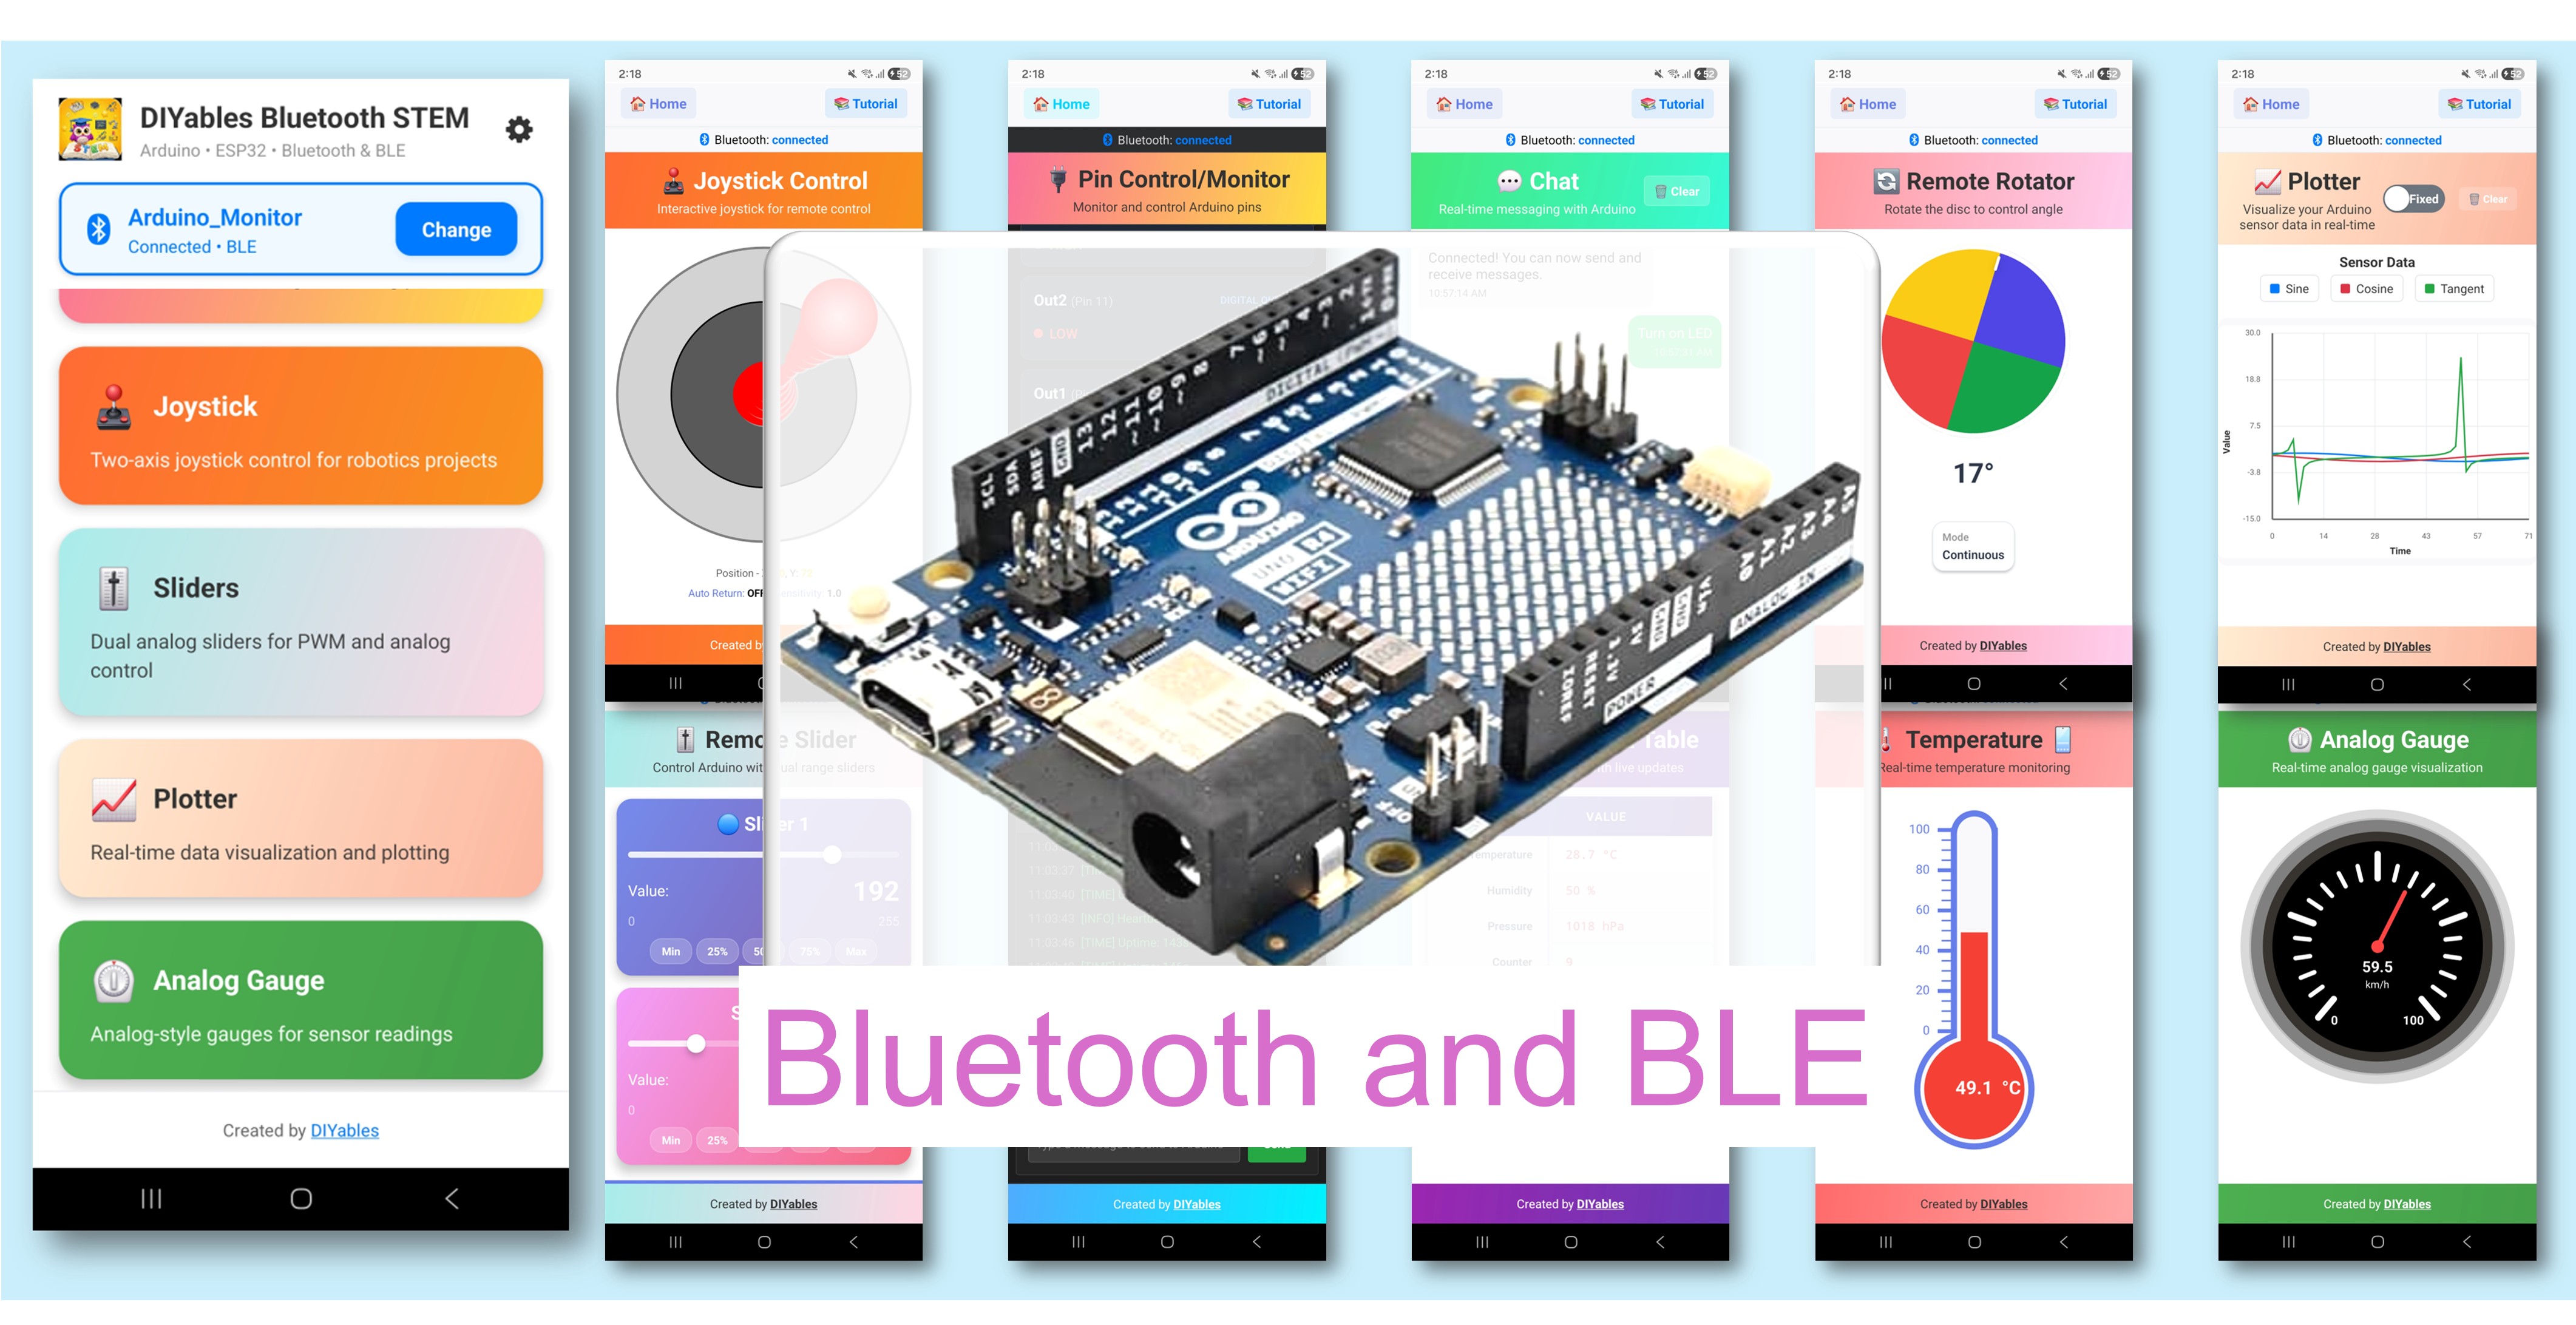
- Rich Widget Collection: Get access to sliders, joystick, monitor, plotter, gauge, temperature display, chat, table, rotator, and tons more
- Battery Friendly: BLE sips power compared to Classic Bluetooth — great for portable projects
- Beginner-Friendly Setup: Just one library installation and you're handling all the communication
Hardware Preparation
Or you can buy the following kits:
| 1 | × | DIYables STEM V4 IoT Starter Kit (Arduino included) | |
| 1 | × | DIYables Sensor Kit (18 sensors/displays) |
Additionally, some of these links are for products from our own brand, DIYables .

Firmware Requirement
> Pro Tip: For the best experience, it's highly recommended to upgrade to the latest firmware for the WiFi module on your Arduino Uno R4. Follow this step-by-step guide: How to Upgrade the Firmware on Arduino Uno R4 WiFi
Software Setup
Detailed Instructions
Let's get everything set up — just follow along:
- Brand new to the Arduino Uno R4? No problem! Check out the Arduino Uno R4 getting started guide first to get familiar with the basics.
- Grab a Micro USB cable and connect your Arduino Uno R4 board to your computer.
- Open up the Arduino IDE on your computer.
- Make sure you've selected the Arduino Uno R4 board and chosen the right COM port.
Install Board Core
- Jump into Tools Board Boards Manager...
- Type "Arduino SAMD Boards" in the search box
- Install version 1.8.13 or newer from Arduino
Install DIYables Bluetooth Library
- Click on the Libraries icon sitting on the left sidebar of your Arduino IDE.
- Type "DIYables Bluetooth" in the search, and look for the DIYables Bluetooth library by DIYables
- Hit that Install button to get the library
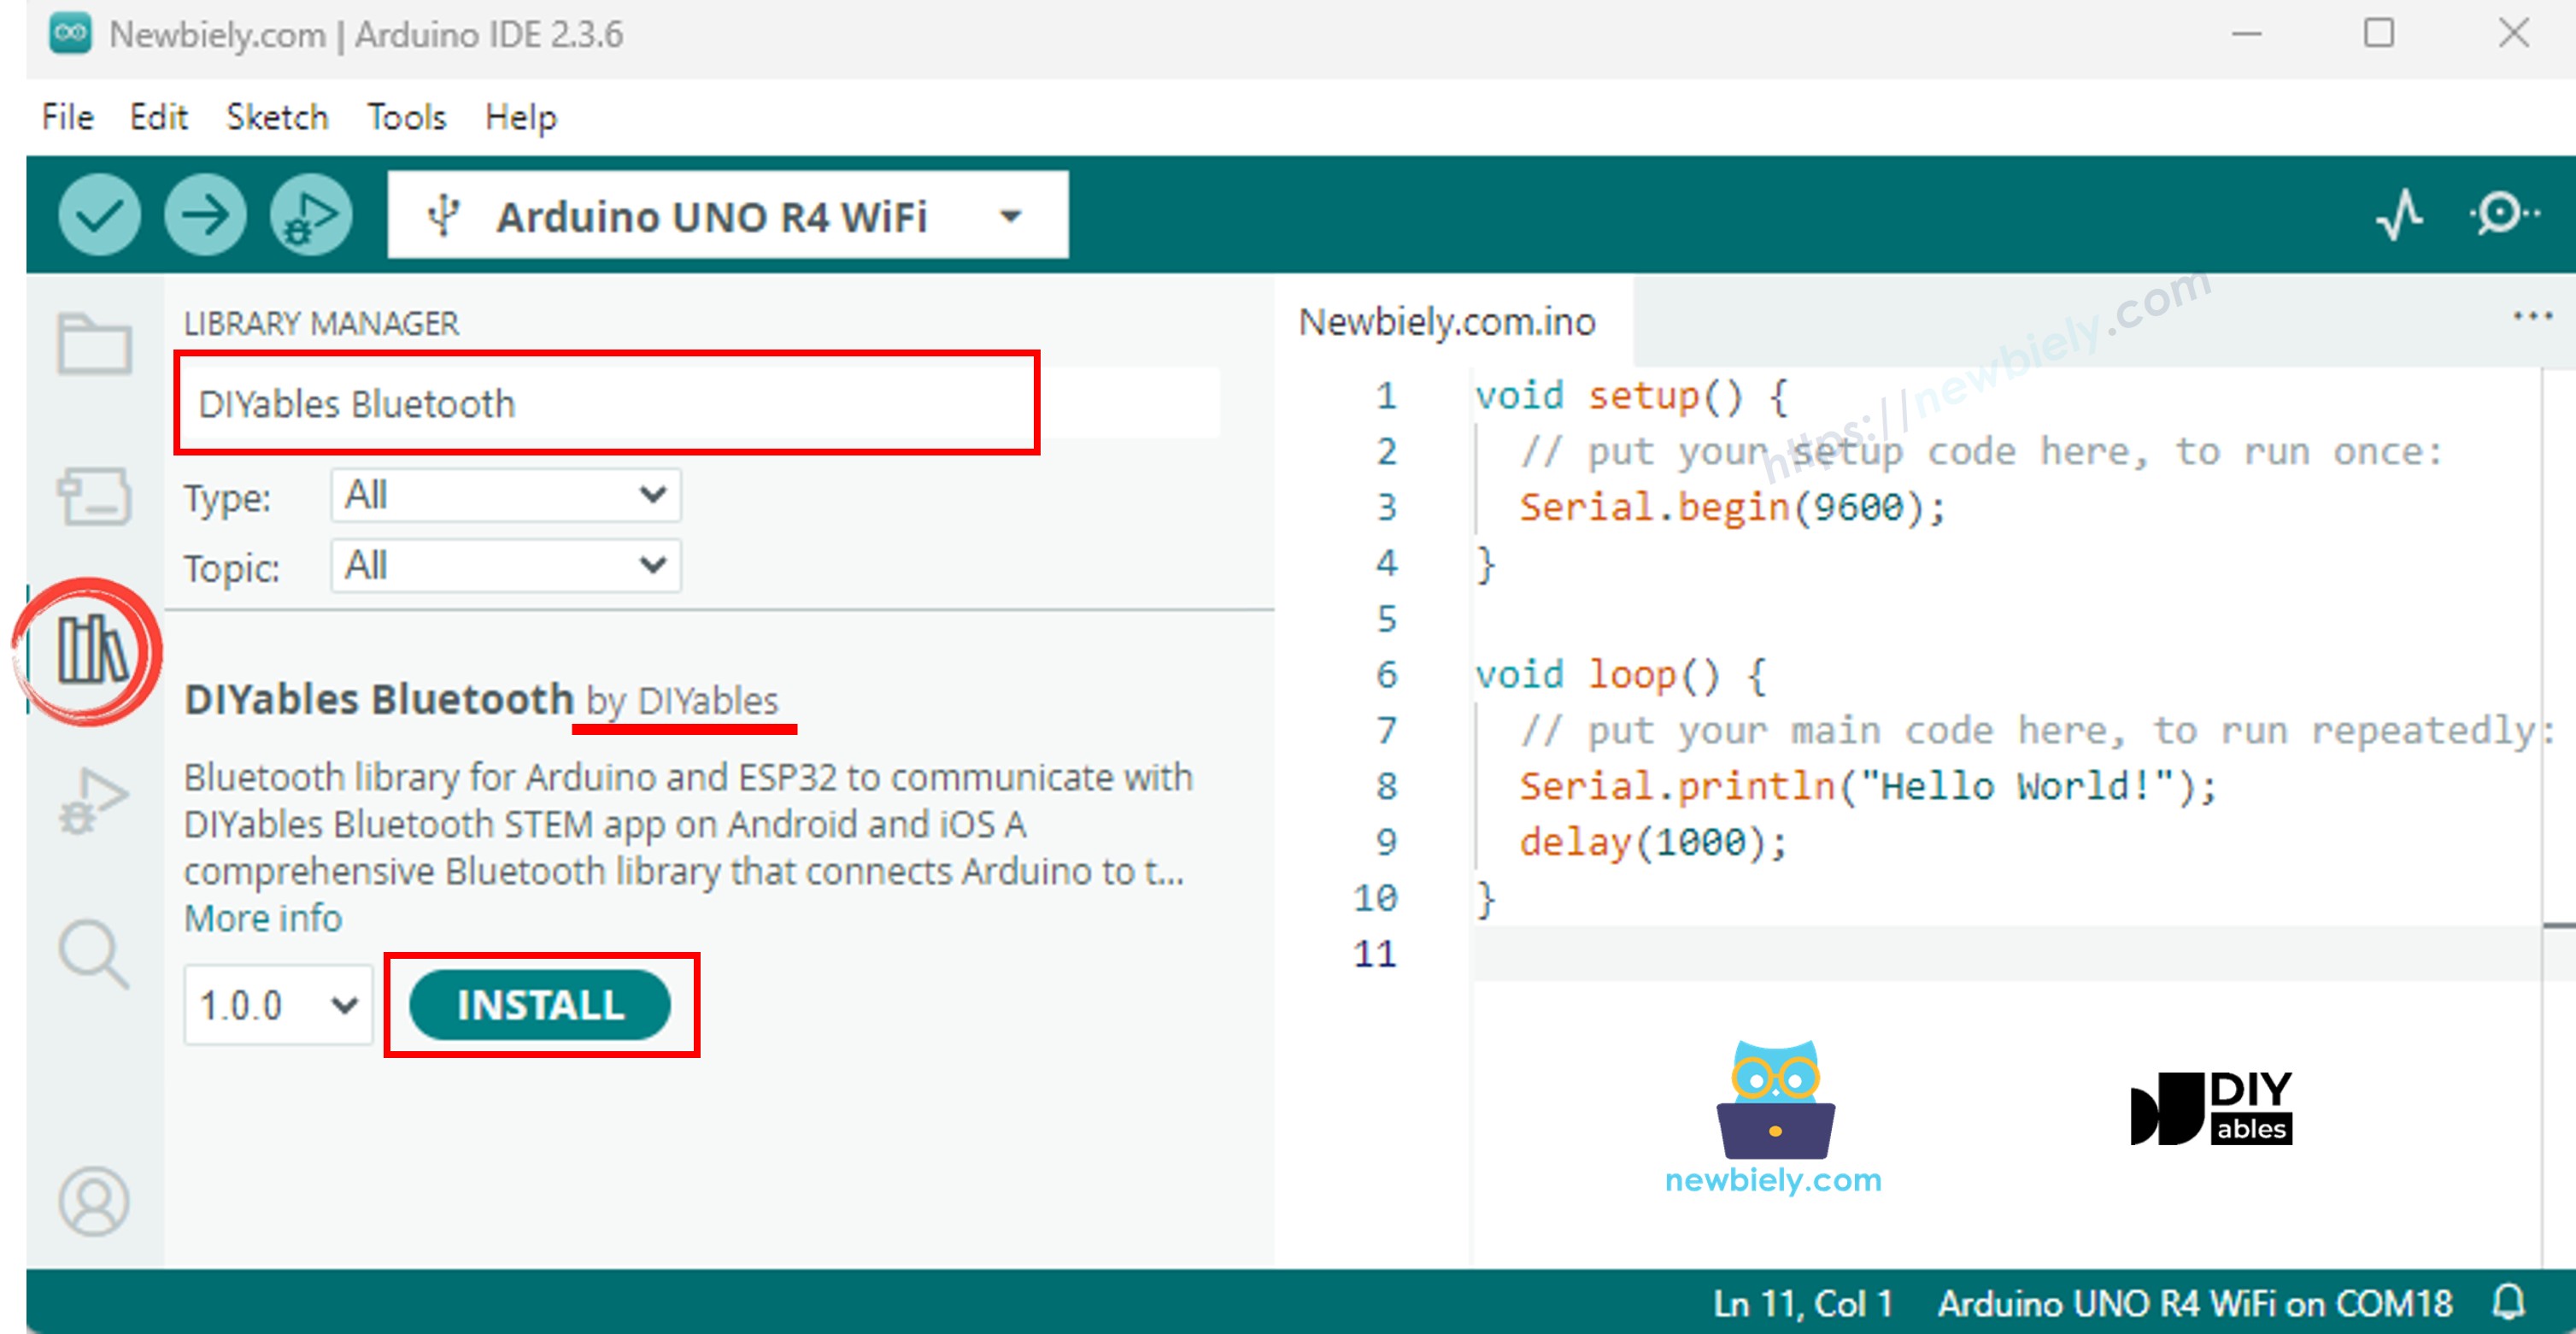
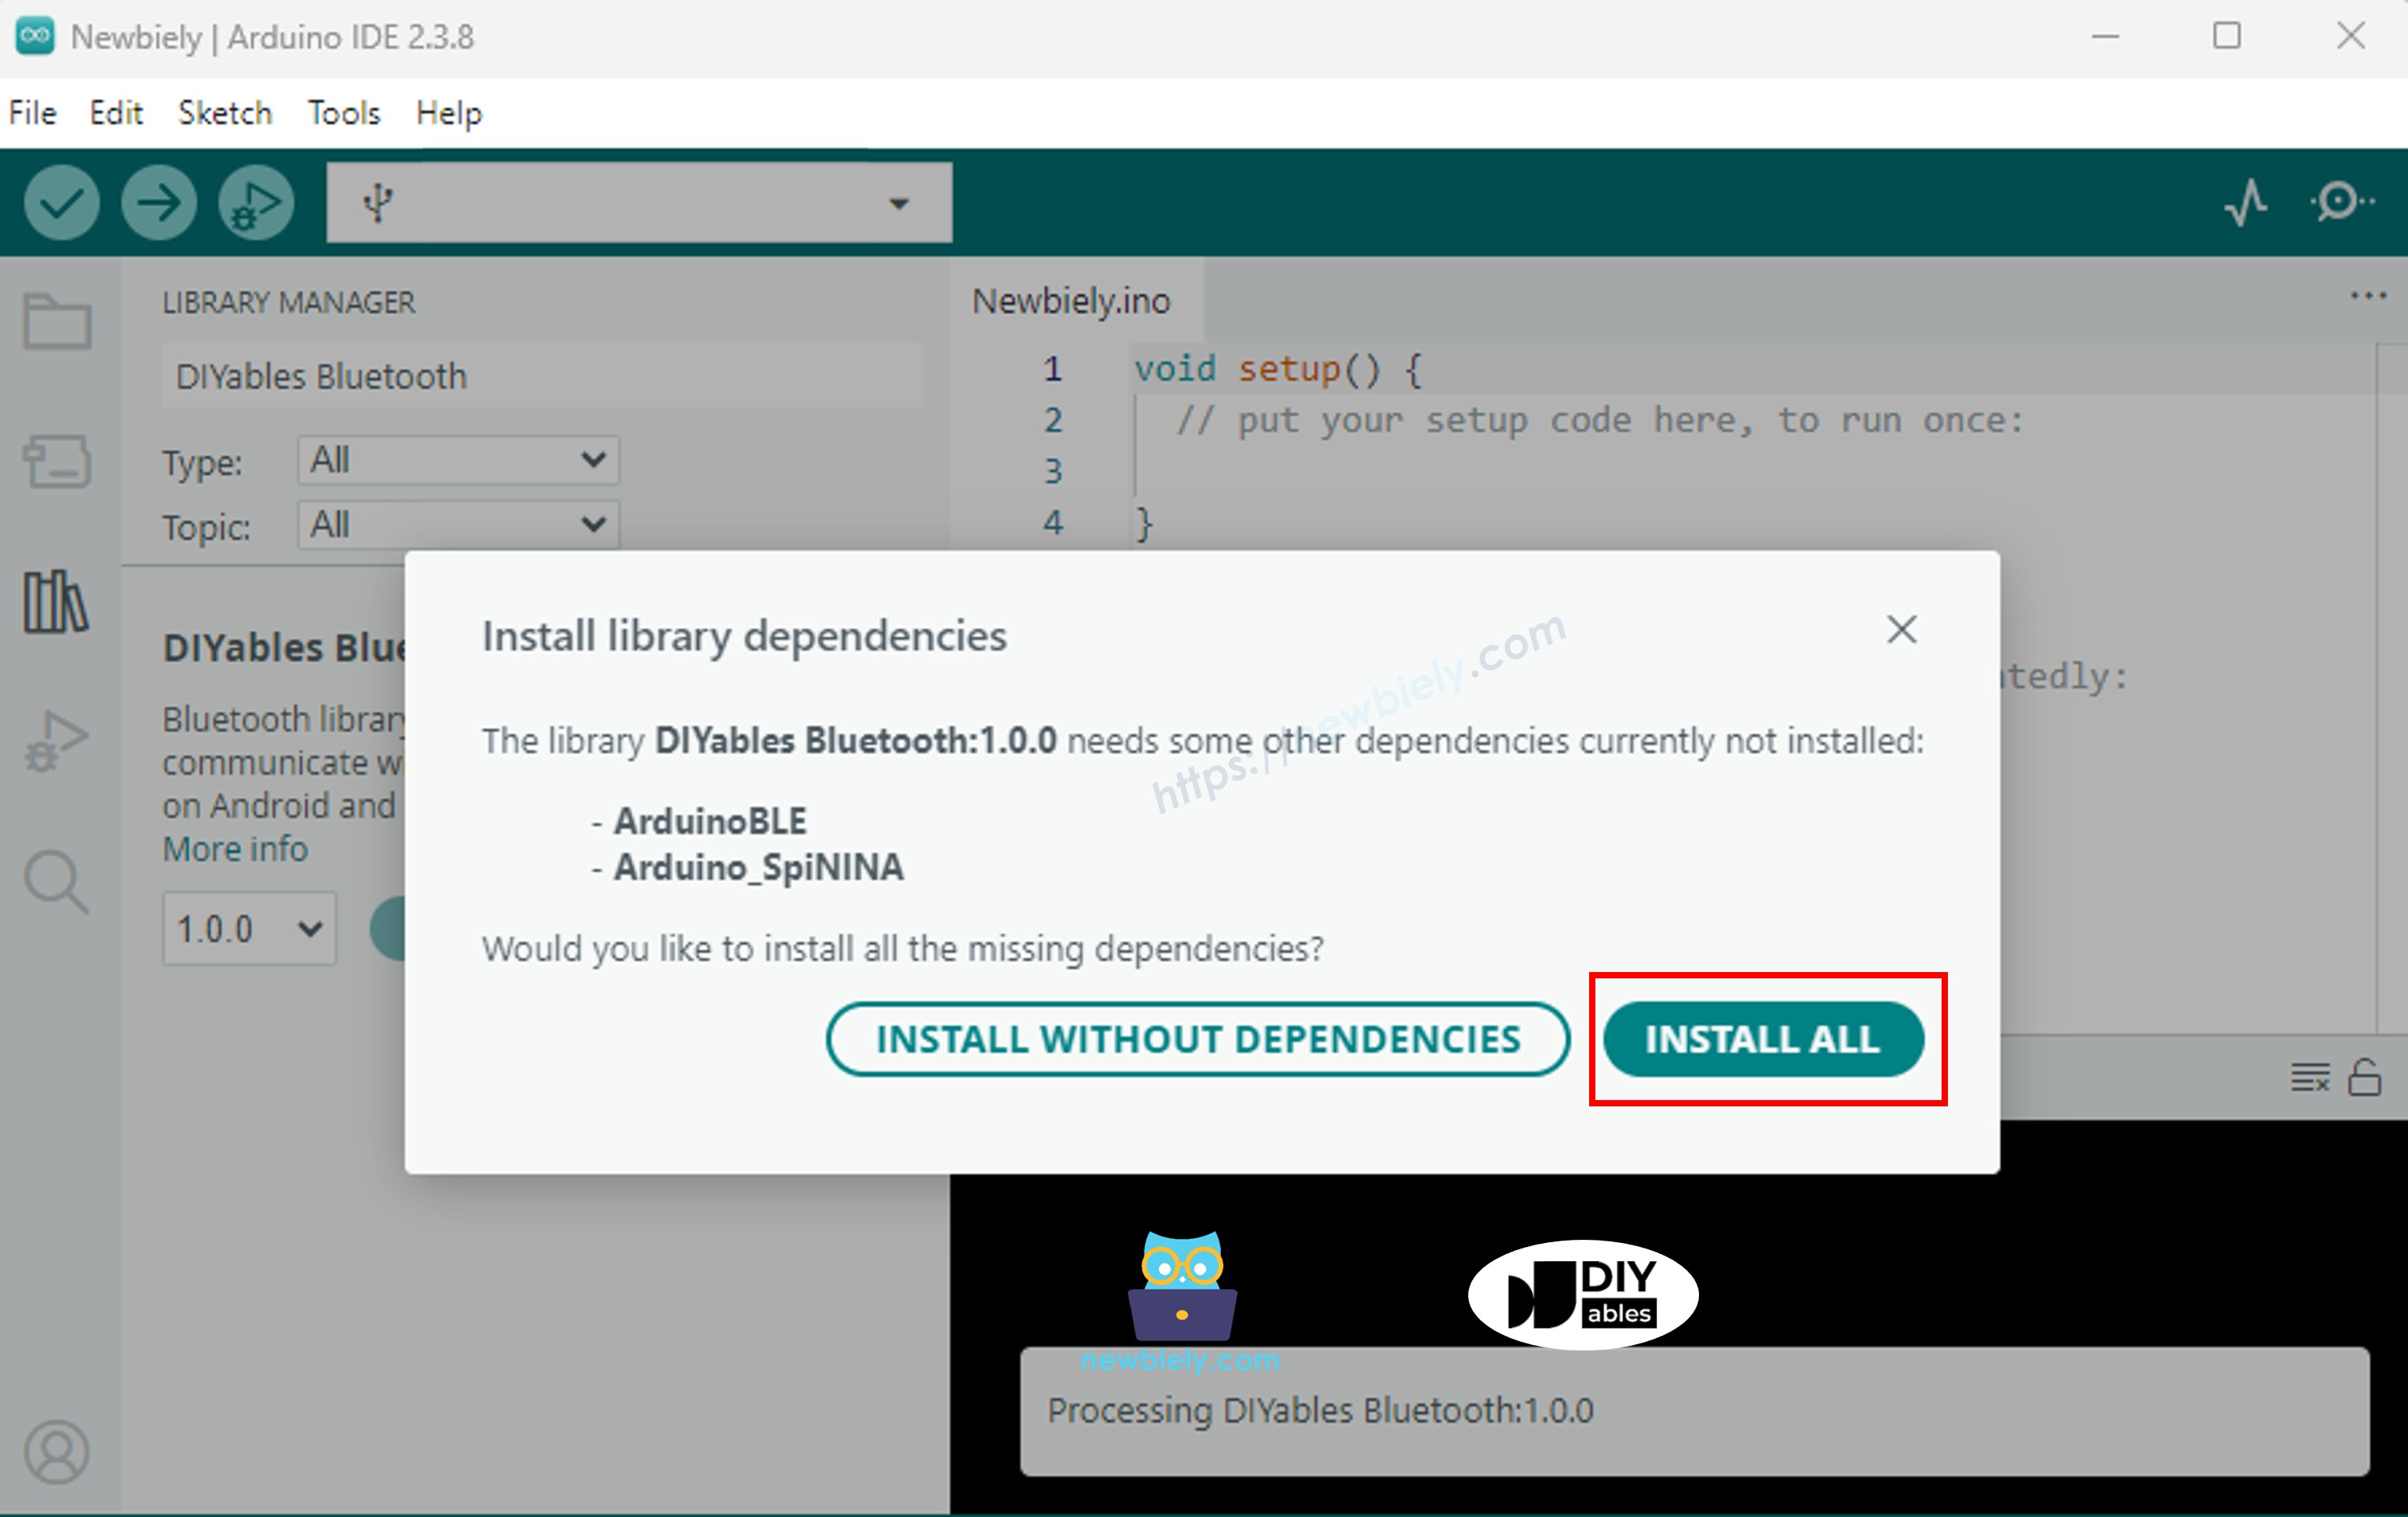
- The IDE will ask if you want to install some other libraries that this one depends on
- Go ahead and click Install All to grab everything (this includes ArduinoBLE 1.3.6 or newer).
Mobile App
- Grab the DIYables Bluetooth App for your phone: Android version here | iOS version here
Good to know: The DIYables Bluetooth App handles both BLE and Classic Bluetooth on Android devices, and BLE on iOS. Since your Arduino Uno R4 uses BLE, you're covered on both Android and iOS. And here's a nice bonus — with BLE, you don't need to manually pair anything. Just scan and connect!
- Launch the DIYables Bluetooth App
- First time opening it? The app needs a couple of permissions. Say yes to these:
- Nearby Devices permission (if you're on Android 12 or newer) / Bluetooth permission (for iOS folks) - this lets the app find and connect to Bluetooth devices
- Location permission (only if you're on Android 11 or older) - older Android versions need this to scan for BLE devices
- Double-check that Bluetooth is switched on in your phone's settings
- From the home screen, tap that Connect button. The app will start hunting for nearby BLE devices.

- Spot your Arduino Uno R4 in the list of discovered devices and tap it to connect.
Examples
All the examples you'll find below are built using the ArduinoBLE platform (BLE-only), which works perfectly with your Arduino Uno R4.
- Arduino Uno R4 - Bluetooth Slider - Adjust values using one or two sliders
- Arduino Uno R4 - Bluetooth Pin Control - Switch digital output pins on and off
- Arduino Uno R4 - Bluetooth Monitor - Get a wireless serial monitor — send and receive text over the air
- Arduino Uno R4 - Bluetooth Plotter - Visualize sensor data as live charts
- Arduino Uno R4 - Bluetooth Analog Gauge - Show values on analog-style gauge dials
- Arduino Uno R4 - Bluetooth Temperature - View temperature and humidity data
- Arduino Uno R4 - Bluetooth Joystick - Capture 2D joystick input straight from the app
- Arduino Uno R4 - Bluetooth Rotator - Adjust rotary or dial values using the app
- Arduino Uno R4 - Bluetooth Chat - Exchange text messages back and forth
- Arduino Uno R4 - Bluetooth Table - Organize and display data in neat table layouts
- Arduino Uno R4 - Bluetooth RTC - Keep your real-time clock in sync using the app
- Arduino Uno R4 - Bluetooth Multiple Apps - Combine multiple app widgets in a single sketch
Troubleshooting
| What's Happening | Why It's Happening | How to Fix It |
|---|---|---|
| Can't see the device when scanning in the app | Your Bluetooth firmware is probably outdated | Bump that firmware up to version 1.4.8 or newer using Tools → Firmware Updater |
| BLE.begin() keeps returning false | Either old firmware or you've got the wrong board core | Update both your Bluetooth firmware and the Arduino SAMD core |
| Connection works but no data comes through | Your ArduinoBLE library needs an update | Upgrade ArduinoBLE to version 1.3.6 or later via Library Manager |
| Compile fails with ArduinoBLE.h No such file error | ArduinoBLE library isn't installed yet | Head to Library Manager and install ArduinoBLE |
| Compile errors mentioning the board | You've got the wrong board core | Install Arduino SAMD Boards version 1.8.13 or newer |
| App connects then drops right away | Could be interference or power fluctuations | Make sure you have solid USB power and keep your phone within 5 metres |
Notes
- Stick with the ArduinoBLE_ examples — don't use Esp32BLE_ or Esp32Bluetooth_. Those are meant for completely different hardware.
- Remember to keep your board powered (either via USB or an external power source) so the BLE advertisement stays active and discoverable.