Arduino Nano - MySQL
The Arduino Nano can collect sensor data and store it in a MySQL database. It can also retrieve data (such as commands) from the MySQL database to control devices like LEDs, motors, and actuators.
This tutorial will guide you on how to use the Arduino Nano and Ethernet module to interact with MySQL database. Specifically, we will cover:
- The best way for the Arduino Nano to communicate with a MySQL database
- How to program Arduino Nano to insert data into a MySQL database
- How to program Arduino Nano to update data in a MySQL database
- How to program Arduino Nano to retrieve data from a MySQL database

Hardware Preparation
Or you can buy the following kits:
| 1 | × | DIYables Sensor Kit (18 sensors/displays) |
Additionally, some of these links are for products from our own brand, DIYables .
Arduino Nano - MySQL
If you're new to system architecture, it's okay to think of the MySQL Database and MySQL Server as the same thing for now. As you gain more knowledge, you'll understand the differences between them.
There are two methods for the Arduino Nano to communicate with a MySQL database:
- Connecting directly to the MySQL Server using a MySQL connection (the direct approach)
- Communicating with the MySQL Server indirectly through an HTTP connection (the indirect approach)
Let's explore the best option.
Arduino Nano interacts directly to MySQL Server
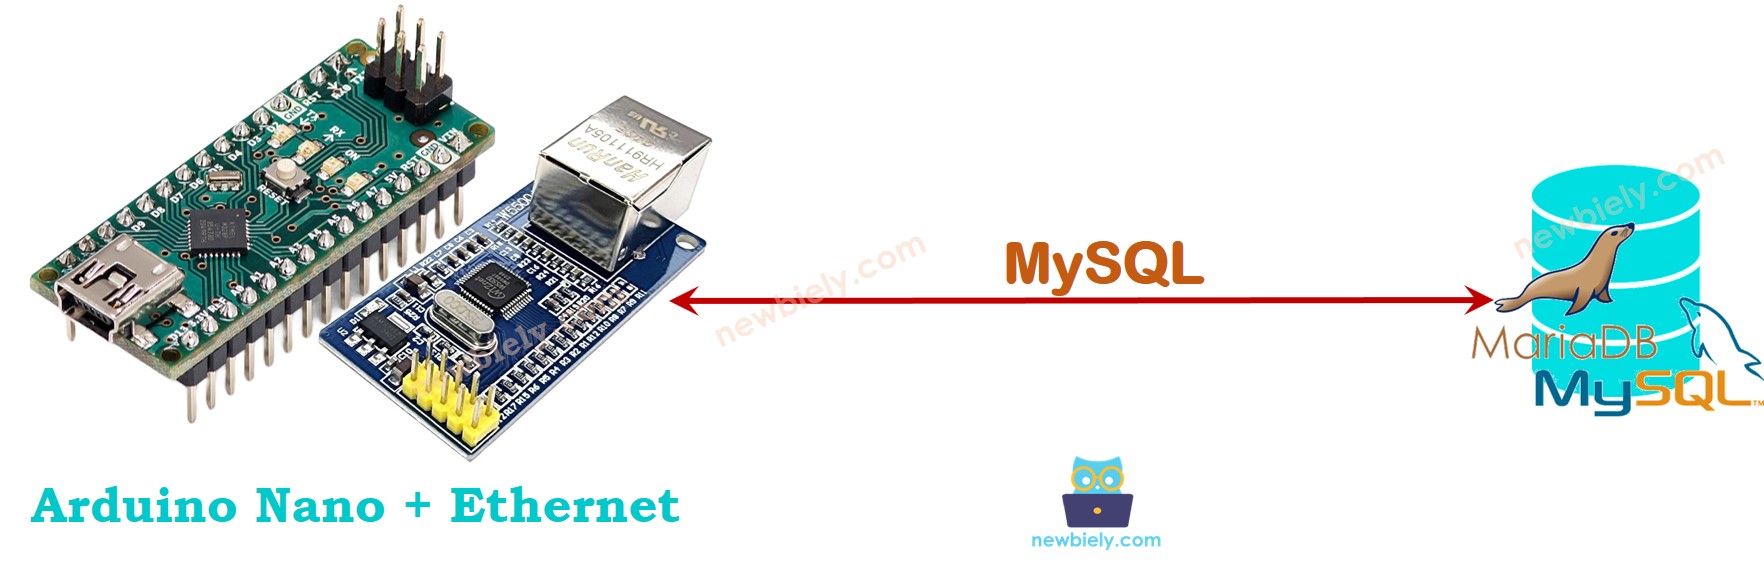
This might seem simpler, but it has several drawbacks:
- Allowing a MySQL user account to remotely access the MySQL database poses security risks, even if the account has limited privileges.
- Processing data on the Arduino Nano and/or MySQL server increases the complexity of both the Arduino Nano code and the MySQL scripts, and it consumes a lot of the Arduino Nano's resources (memory and CPU).
- In some cases, the MySQL server may return a large amount of data to the Arduino Nano, which could cause the Nano to run out of memory.
- Most available MySQL libraries do not support SSL/TLS, meaning that sensitive data, like usernames and passwords, will be sent in plain text, creating an additional security risk.
Arduino Nano interacts indirectly to MySQL Server via HTTP/HTTPS
The indirect approach addresses all the issues that the direct method has. Before we dive into how it overcomes the drawbacks of the direct approach, let's first look at how it works.
How It Works
- Step 1: Arduino Nano sends an HTTP request to the web server.
- Step 2: The web server runs a PHP script.
- Step 3: The PHP script gets data from the HTTP request, processes it, and interacts with the MySQL database.
- Step 4: The PHP script processes the result and sends it back to Arduino Nano in an HTTP response.
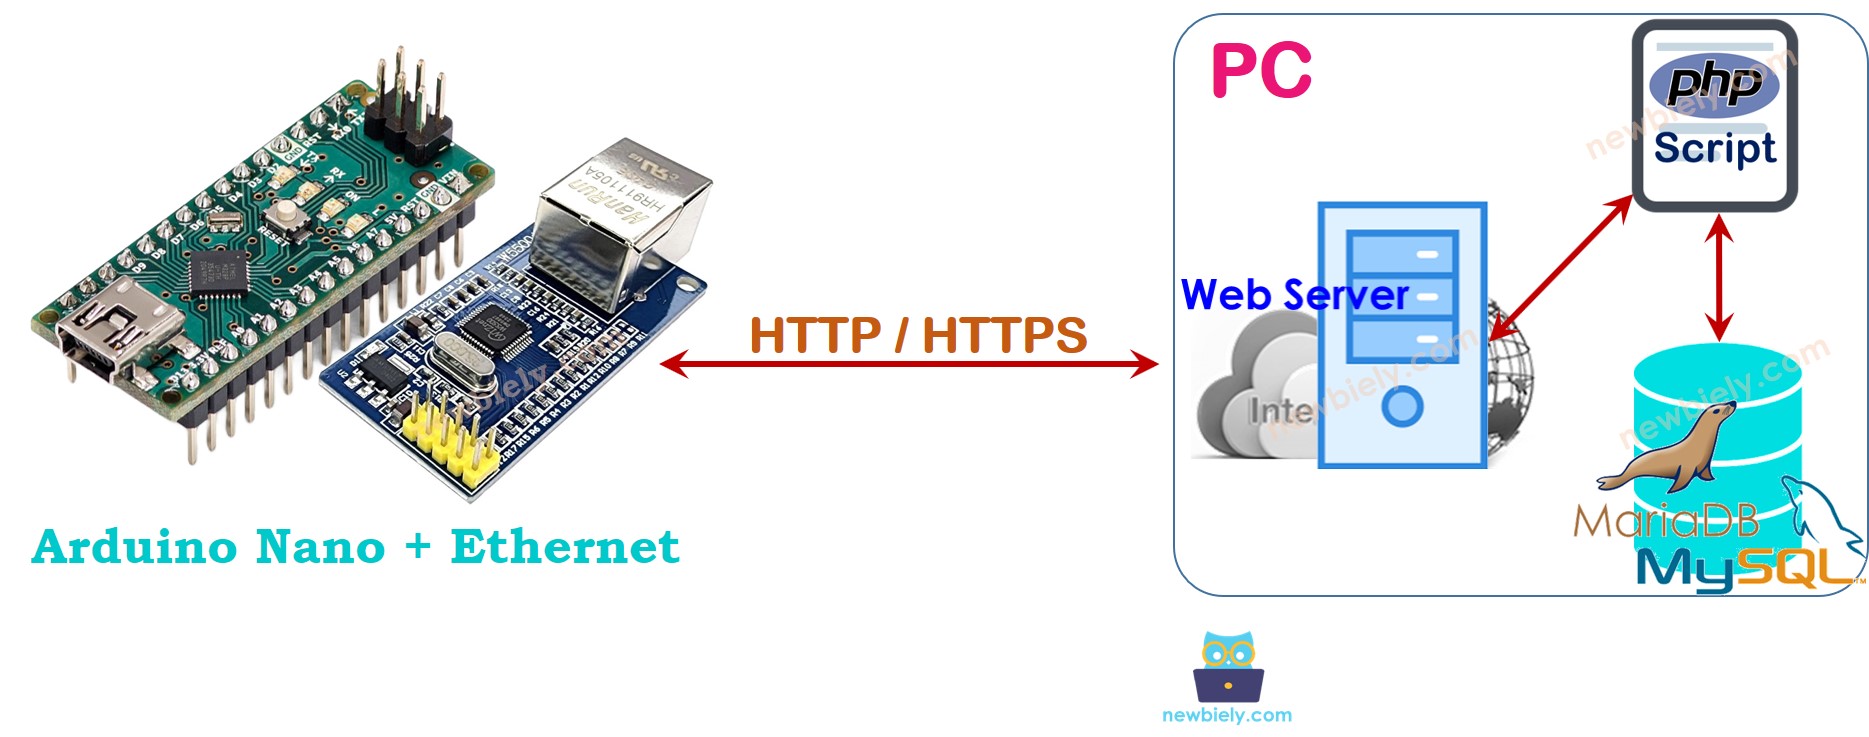
In this tutorial, both the web server and the MySQL server will be installed on a PC.
It might seem complicated, but it’s not. Here’s how the indirect method solves the problems of the direct approach:
- By installing MySQL and HTTP servers on the same machine, we can restrict the MySQL user account to access only the localhost. Also, the MySQL username and password are stored securely on the server (step 3), improving security.
- Data is processed by a PHP script (steps 3 and 4), reducing the workload and complexity for both Arduino Nano and the MySQL server. Processing data with PHP code is much easier than using Arduino Nano code or MySQL scripts.
- The PHP script can filter the data and send only what’s needed to the Arduino Nano (step 4), preventing memory overload.
- Most Ethernet/WiFi libraries support TLS/SSL, allowing us to make HTTPS requests. Using HTTPS ensures data is encrypted and securely exchanged online.
In step 1, we can use a different username and password for authentication between Arduino Nano and the web server. For security reasons, the HTTP username and password should not be the same as the MySQL credentials.
The following tutorial will show how to use the indirect method with Arduino Nano and MySQL, explaining its many advantages.
Wiring Diagram between Arduino Nano and W5500 Ethernet module
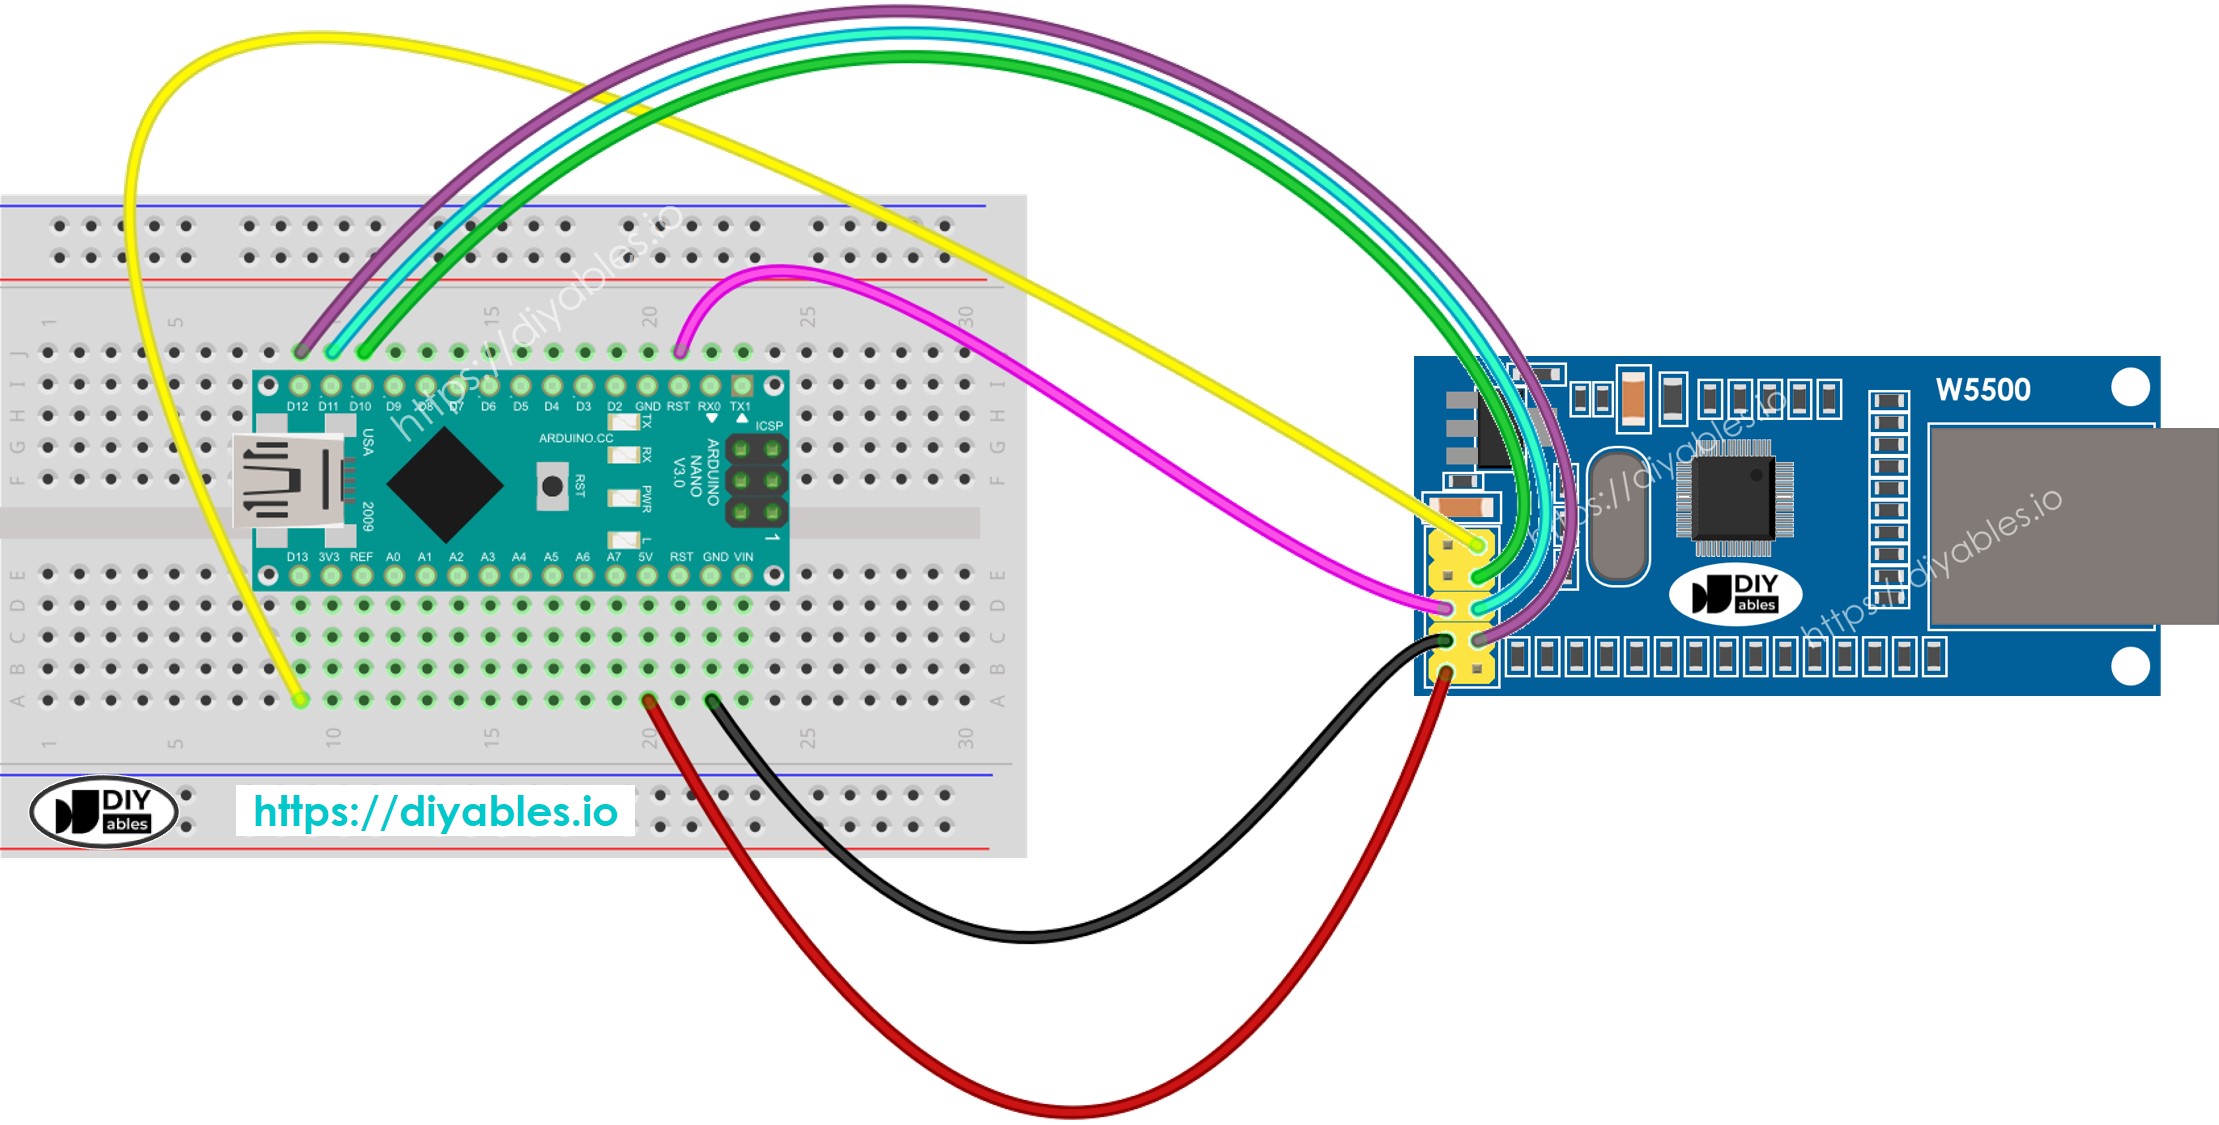
This image is created using Fritzing. Click to enlarge image
See The best way to supply power to the Arduino Nano and other components.
Arduino Nano - MySQL via HTTP/HTTPS
Here are the steps we need to follow:
- Install MySQL server, web server, and PHP on your PC.
- Enable the MySQL and web servers.
- Create a MySQL user account.
- Set up a MySQL database.
- Create a MySQL table.
- Write one or more PHP script files.
- Write the Arduino Nano code.
We’ll take it one step at a time. Let’s go through the process gradually.
1. Install MySQL server, Web server, and PHP on your PC
Fortunately, the XAMPP package includes all of these.
We just need to install it once:
- Obtain XAMPP from this link
- Execute the installation.
Once you have installed, you will observe the C:\xampp\htdocs folder on your computer. This is where you should place your PHP code (as will be discussed later).
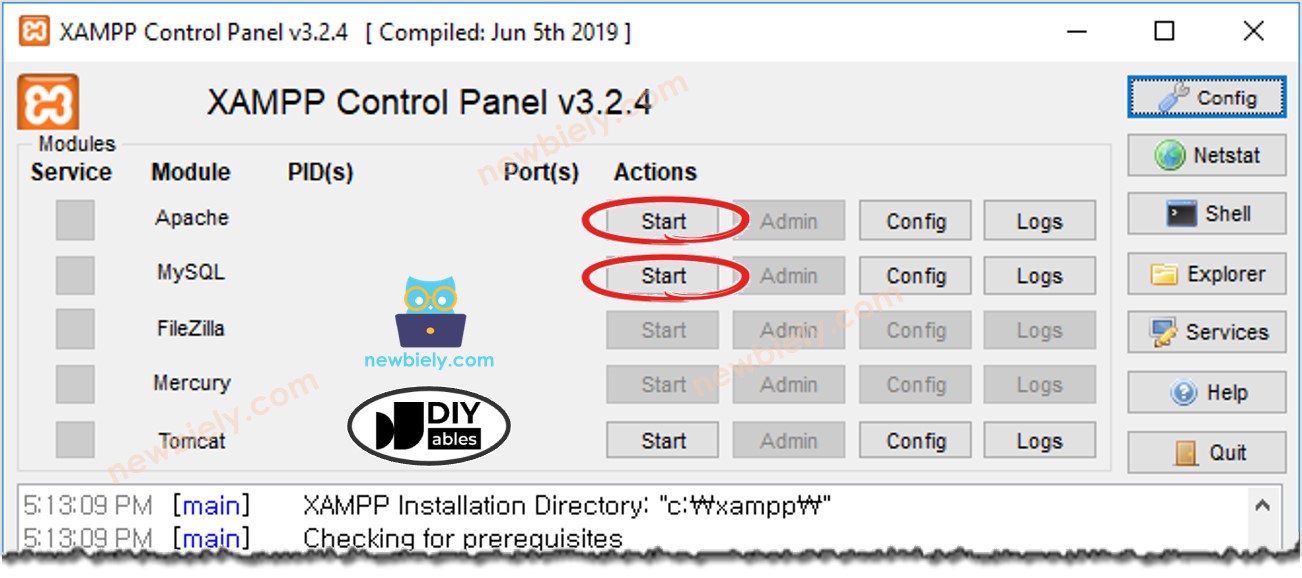
2. Enable MySQL and Web server
- Open the XAMPP Control Panel.
- Press the Start button to activate MySQL and the Web server. (See the image below.)
3. Create a MySQL User account
We will create a MySQL account that can connect to the MySQL database from localhost only:
- Even if the username and password are exposed, attackers will not be able to access the MySQL database unless they have control of the computer.
- Since PHP and MySQL are installed on the same PC, PHP can use this username and password to connect to the MySQL database.
Let's make a MySQL user account with the username Arduino and the password ArduinoGetStarted.com:
- Start up Command Prompt on your computer. Keep this window open until the tutorial is finished.
- Enter the following command into the Command Prompt:
- By default, MySQL has a root account that does not have a password.
- It is recommended to add a password to it.
Enter the your-root-password for the root account by typing this command in the Command Prompt:
- Enter this command in Command Prompt:
- Enter your root password and press the Enter key.
- Create a MySQL user account with the username Arduino and password ArduinoGetStarted.com by copying the commands below and pasting them into the Command Prompt:
You have now created a MySQL user account. Remember the username and password, as they will be needed for the PHP script.
4. Create a MySQL database
Let us generate a database titled db_arduino by entering the following command in the Command Prompt:
5. Create a MySQL table
Let's make a table called tbl_temp by copying the commands below and pasting them into the Command Prompt:
6. Write one or more PHP files
Create a PHP file. Name it insert_temp.php. Retrieve temperature from HTTP Request. Insert the temperature into the database
- Should be "Temperature 27.5 is saved".
- Put this file in the C:\xampp\htdocs directory.
- Find out your PC's IP address. If you don't know how to, search it on Google.
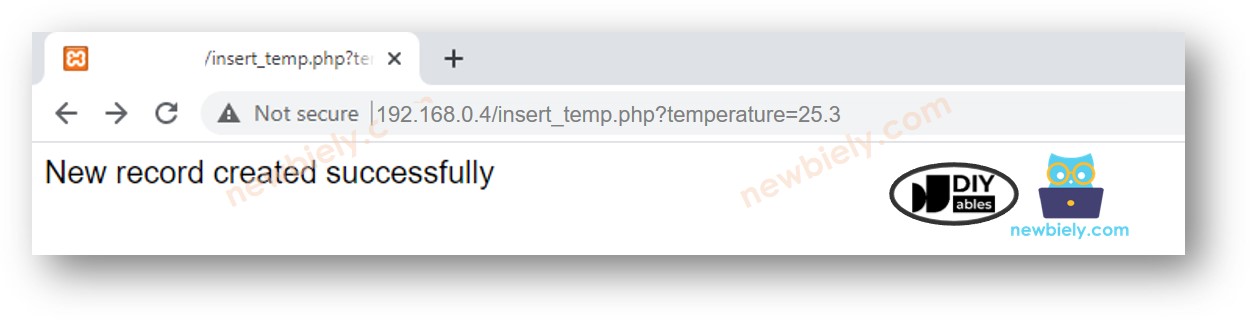
- To test the PHP code, open a web browser (e.g. Chrome) and go to this link: http://192.168.0.26/insert_temp.php?temperature=27.5. Remember to substitute the IP address with your own.
- The web browser should display "Temperature 27.5 is saved".
- Verify if data is stored in the database by entering the following command on the Command Prompt:
It is evident that the temperature of 27.5 is stored in the database. The following action is to compose an Arduino Nano code that will generate a similar HTTP Request to your PC.
7. Write Arduino Nano code
We will be utilizing the Arduino Nano and Ethernet Shield for the test.
The Arduino Nano code below sends an HTTP request to your PC, with a temperature of 29.1°C, to be inserted into the database.
Detailed Instructions
- Connect the Arduino Nano to the Ethernet module according to the above wiring diagram.
- Connect an Ethernet Cable to the Ethernet module.
- Connect the Arduino Nano to a PC using a USB cable.
- Launch the Arduino IDE on your PC.
- Select Arduino Nano board and corresponding COM port
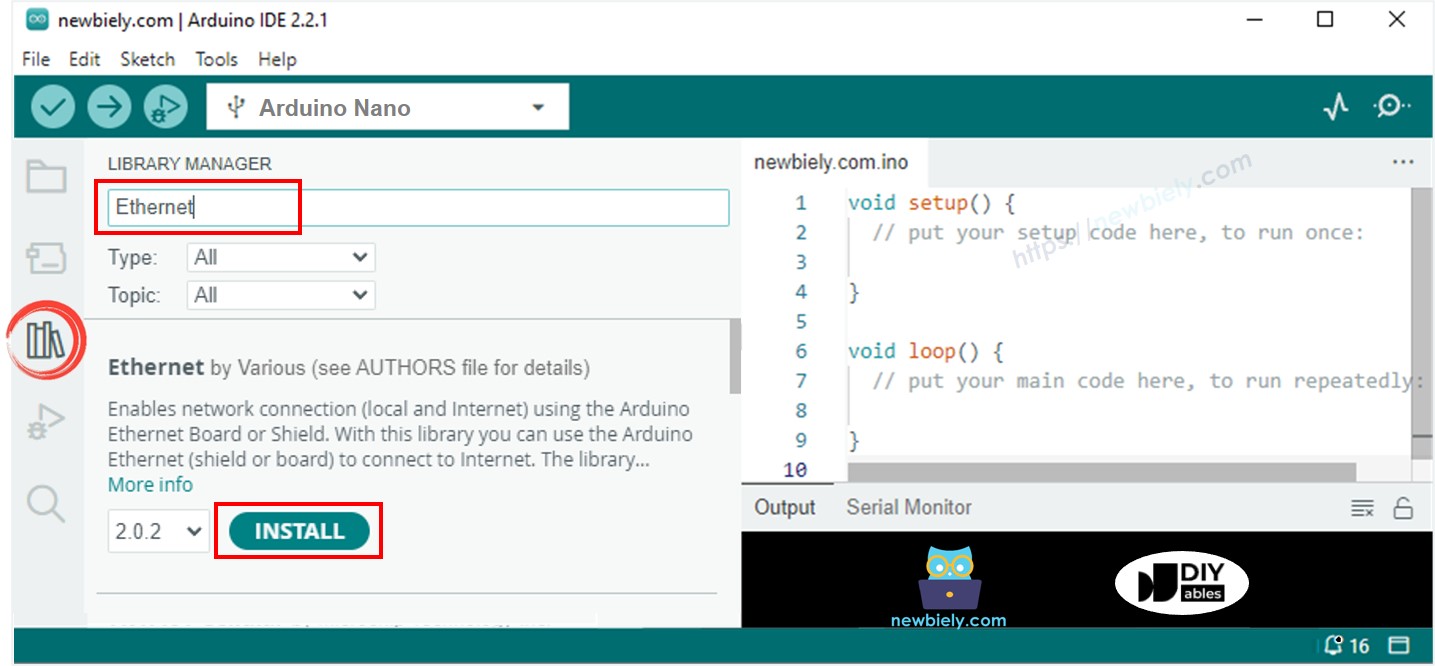
- Click to the Libraries icon on the left bar of the Arduino IDE.
- Search “Ethernet”, then find the Ethernet library by Various
- Click Install button to install Ethernet library.
- Modify the code to reflect the IP address of the PC.
- Compile and upload the code to the Arduino Nano.
- Open the Serial Monitor.
- The output on the Serial Monitor will display the IP address of the Ethernet Shield.
- Verify if the data is stored in the database by entering the following command in the Command Prompt:
It is evident that the database holds the temperature of 29.1.
How Arduino Nano insert, update or get data to/from MySQL database
In the example above, we learned how to insert data into a MySQL database. Updating and retrieving data from the database works similarly. You just need to adjust the MySQL queries in the PHP script. For more information, you can visit W3Schools.
※ NOTE THAT:
To build a highly secure system, we would need to take extra steps (e.g., preventing MySQL injection, converting HTTPS to a REST API, using JSON format for data, etc.). However, this tutorial is designed for beginners to learn with Arduino Nano, so we’ve kept it as simple as possible. Once you complete this tutorial, you can expand on it to add more advanced features.