Arduino Nano ESP32 - Web Apps Chat
Overview
This tutorial demonstrates using the DIYablesWebChatPage class from the DIYables ESP32 WebApps Library on an Arduino Nano ESP32. The board runs a WebSocket server; a browser connects to it and exchanges plain text messages in real time. The sketch can parse incoming messages and respond with text, LED control, or any other action.
Watch this step-by-step video tutorial demonstrating how to use WebChat with the DIYables ESP32 WebApps app:
What This Tutorial Covers
- Connecting a browser to an Arduino Nano ESP32 chat interface over WebSocket
- Parsing incoming chat messages and generating replies in the sketch
- Controlling the built-in LED through typed commands
- Accessing the chat page from a smartphone or PC on the same WiFi network
Hardware Preparation
Or you can buy the following kits:
| 1 | × | DIYables Sensor Kit (18 sensors/displays) |
Additionally, some of these links are for products from our own brand, DIYables .
Setup Instructions
Steps
Follow these instructions step by step:
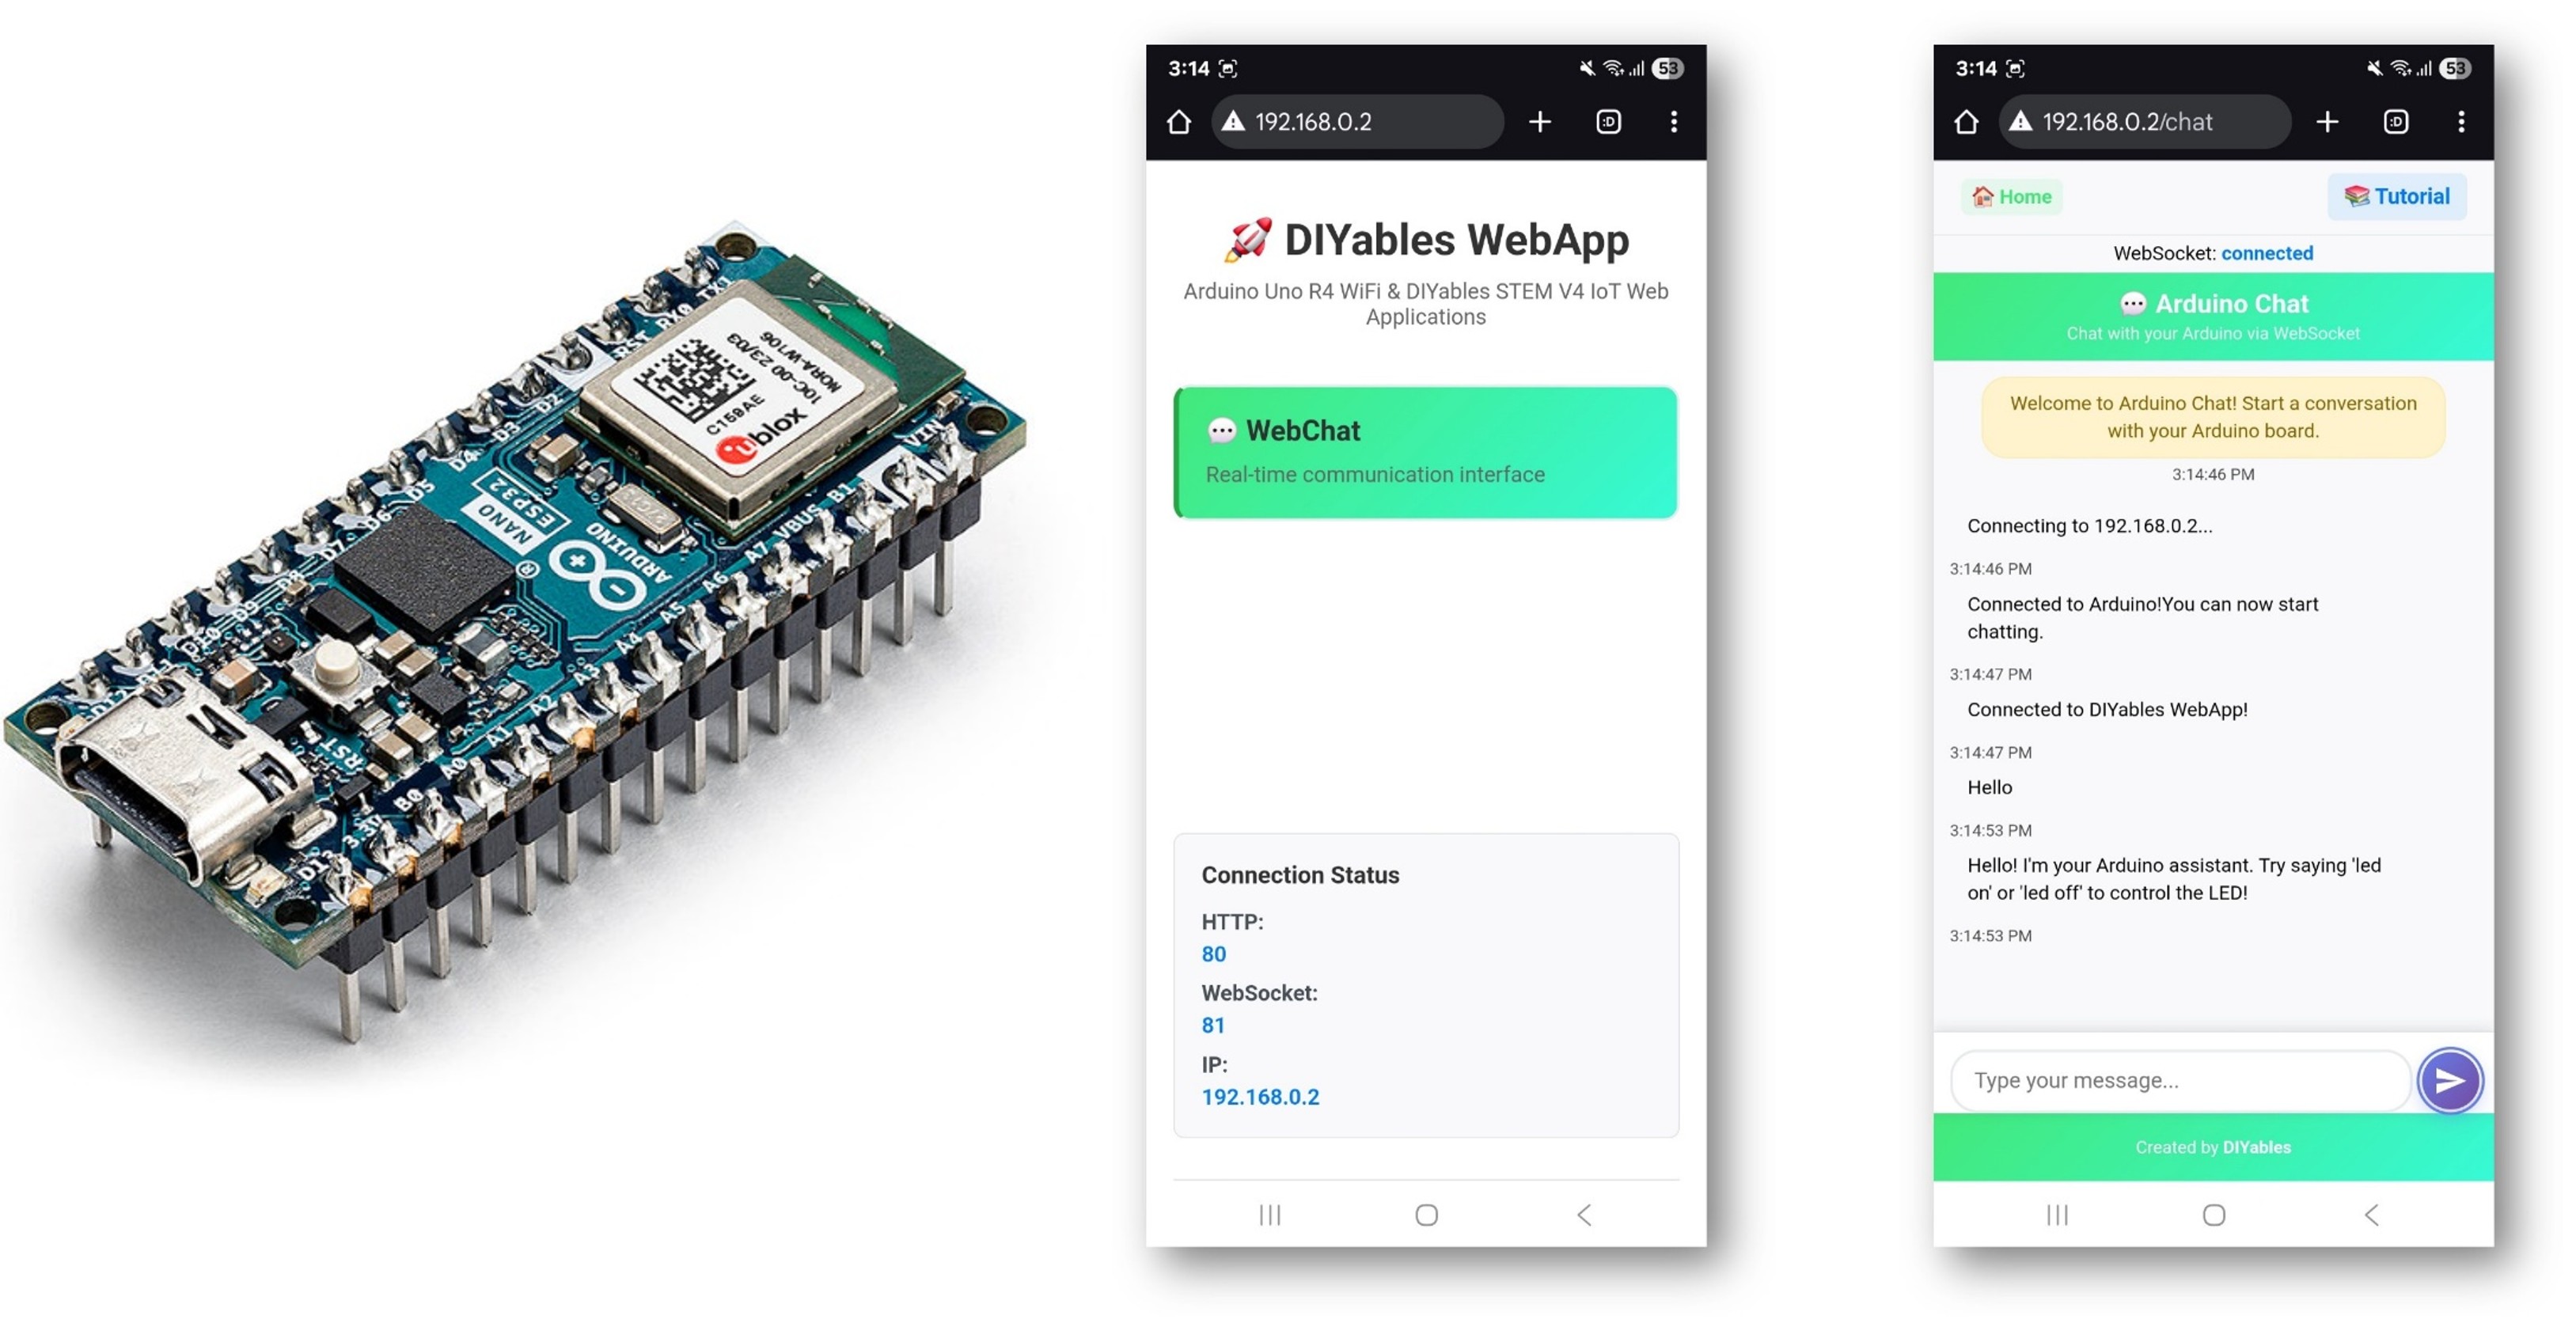
- If this is your first time using the Arduino Nano ESP32, refer to the tutorial on setting up the Arduino Nano ESP32 development environment.
- Connect the Arduino Nano ESP32 board to your computer using a USB cable.
- Launch the Arduino IDE on your computer.
- Select the appropriate board (e.g. Arduino Nano ESP32) and COM port.
- Navigate to the Libraries icon on the left bar of the Arduino IDE.
- Search "DIYables ESP32 WebApps", then find the DIYables ESP32 WebApps Library by DIYables
- Click Install button to install the library.
- Search for DIYables ESP32 WebApps created by DIYables and click the Install button.
- You will be asked for installing some other library dependencies
- Click Install All button to install all library dependencies.
- On Arduino IDE, Go to File Examples DIYables ESP32 WebApps WebChat example, or copy the above code and paste it to the editor of Arduino IDE
- Update the WiFi credentials in the sketch:
- Click Upload button on Arduino IDE to upload code to Arduino Nano ESP32
- Open the Serial Monitor
- The Serial Monitor output should resemble the following:
- If nothing appears, press the reset button on the board.
- Note the IP address shown in the output and enter it in a browser on a smartphone or PC connected to the same network.
- Example: http://192.168.0.2
- The home page displays links to registered applications:
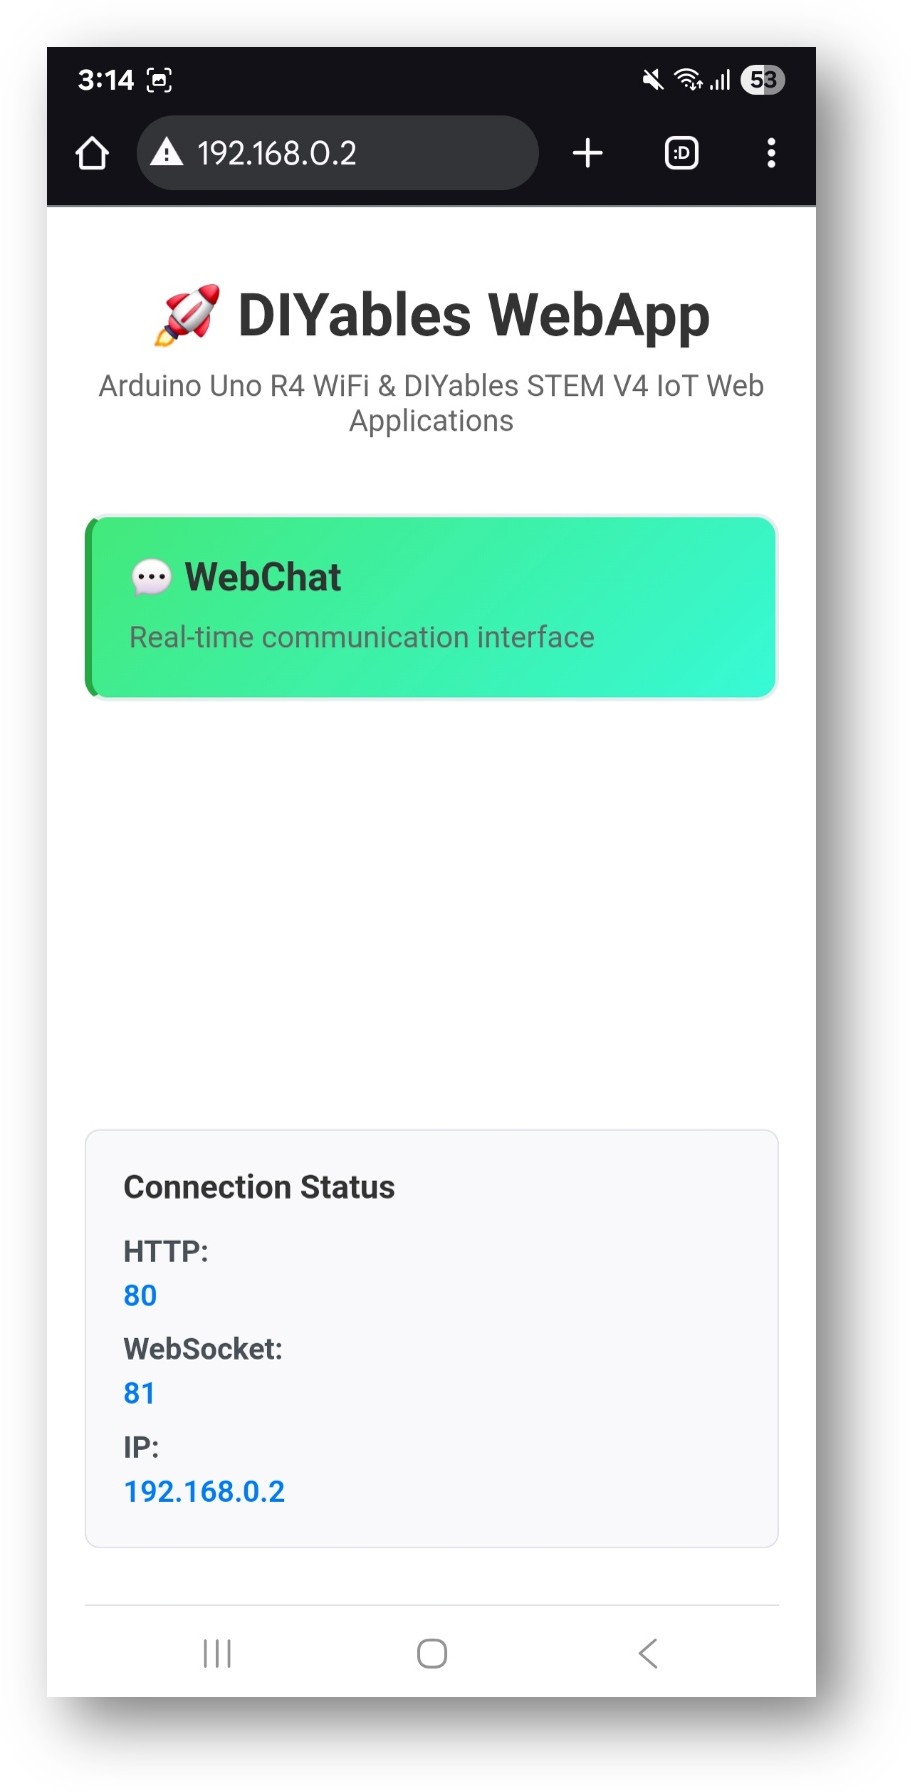
- Select the Chat link to open the chat interface:
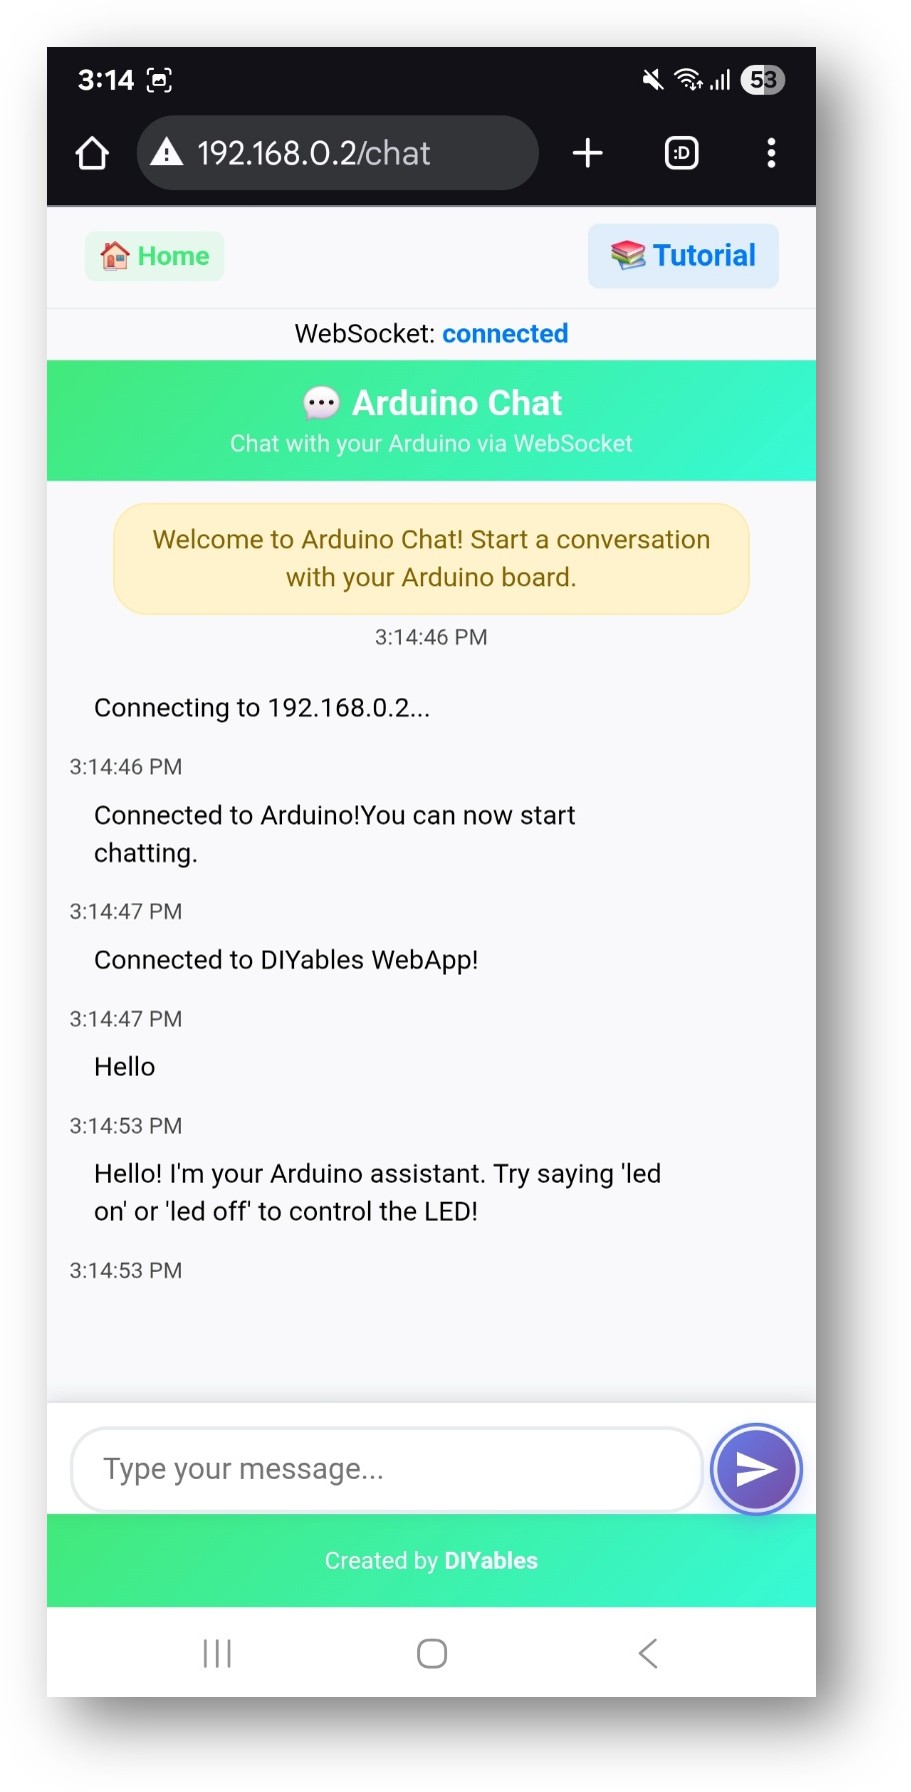
- The page is also accessible directly at http://192.168.0.2/chat.
Supported Commands
The example sketch recognizes the following chat inputs:
LED Control
- led on or turn on led — Turns on the built-in LED
- led off or turn off led — Turns off the built-in LED
- blink or blink led — Blinks the LED
Status and Information
- hello or hi — Returns a greeting
- help — Lists recognized commands
- time — Reports board uptime
- status — Reports system status
- how are you? — Returns a status message
- what can you do? — Lists capabilities
- what is your name? — Returns the board name
Example Session
Code Structure
The sketch is organized around three components:
- WebApp Server — manages HTTP routing and WebSocket connections
- Chat Page — registers the /chat route and provides the browser UI
- Message Handler — a callback invoked for each incoming chat message
The message handler receives the text, parses it, and sends a reply using chatPage.sendToWebChat().
Adding Commands
To extend the command set, add conditions inside the message handler callback:
Controlling Other Hardware
The same pattern applies to any peripheral:
Troubleshooting
Board does not respond to messages
- Check the Serial Monitor for error output
- Verify that the WebSocket status indicator in the browser shows "connected"
- Reload the page
WiFi connection fails
- Confirm the SSID and password
- The Arduino Nano ESP32 connects to 2.4 GHz networks only; 5 GHz is not supported
- Move the board closer to the router if the signal is weak
Chat page not reachable
- Confirm the IP address from the Serial Monitor
- Ensure the browser device is on the same WiFi network as the board
- Try the home page first (http://[IP]/) to verify the server is running
LED does not respond
- The example uses the built-in LED, which works without wiring
- Verify the command spelling matches the recognized strings
- Check the Serial Monitor for the raw message received by the board