Arduino Nano ESP32 - Web Apps Custom WebApp

Overview

The CustomWebApp example in the DIYables ESP32 WebApps Library provides a starting template for building browser-based interfaces that integrate with the existing DIYables web apps ecosystem on the Arduino Nano ESP32. The template establishes two-way WebSocket communication between a browser and the board: the browser can send text commands to the board, and the board can push data back to the browser at any time.

The example consists of four files that must be kept together in the same sketch folder:

  • CustomWebApp.ino — main sketch with application logic
  • CustomWebApp.h — header defining the page class interface
  • CustomWebApp.cpp — class implementation and WebSocket message routing
  • custom_page_html.h — embedded HTML, CSS, and JavaScript for the browser page
Arduino Nano ESP32 Custom WebApp

What This Tutorial Covers

  • Running the default custom app template on Arduino Nano ESP32
  • Understanding the app identifier system that isolates messages between multiple apps
  • Modifying the template to handle custom hardware commands
  • Sending sensor data to the browser at runtime
  • Customizing the HTML, CSS, and JavaScript of the embedded web page
  • Managing multiple custom apps in one project without message conflicts

Hardware Preparation

1×Arduino Nano ESP32
1×USB Cable Type-A to Type-C (for USB-A PC)
1×USB Cable Type-C to Type-C (for USB-C PC)
1×Recommended: Screw Terminal Expansion Board for Arduino Nano
1×Recommended: Breakout Expansion Board for Arduino Nano
1×Recommended: Power Splitter for Arduino Nano ESP32

Or you can buy the following kits:

1×DIYables Sensor Kit (18 sensors/displays)
Disclosure: Some of the links provided in this section are Amazon affiliate links. We may receive a commission for any purchases made through these links at no additional cost to you.
Additionally, some of these links are for products from our own brand, DIYables .

Steps

Follow these instructions step by step:

  • If this is your first time using the Arduino Nano ESP32, refer to the tutorial on setting up the Arduino Nano ESP32 development environment.
  • Connect the Arduino Nano ESP32 board to your computer using a USB cable.
  • Launch the Arduino IDE on your computer.
  • Select the appropriate board (e.g. Arduino Nano ESP32) and COM port.
  • Navigate to the Libraries icon on the left bar of the Arduino IDE.
  • Search "DIYables ESP32 WebApps", then find the DIYables ESP32 WebApps Library by DIYables
  • Click Install button to install the library.
  • Search for DIYables ESP32 WebApps created by DIYables and click the Install button.
Newbiely | Arduino IDE 2.3.8
──
File
Edit
Sketch
Tools
Help
Arduino Nano ESP32
Library Manager
Type:
All
Topic:
All
DIYables ESP32 WebApps by DIYables
A comprehensive library designed for ESP32 that provides multiple professional web applications including Web Monitor, Chat, Digital Pin Control, Sliders, Joystick, Analog Gauge, Rotator Control, and Temperature Display via WebSocket communication. Features modular architecture for memory efficiency, automatic config handling, and perfect for IoT projects, robotics, sensor monitoring, servo/stepper control, temperature monitoring, and remote ESP32 control. More info
1.0.1
INSTALL
Newbiely.ino
···
1 void setup() {
Output
Serial Monitor
Ln 1, Col 1
Arduino Nano ESP32 on COM15
1
  • You will be asked for installing some other library dependencies
  • Click Install All button to install all library dependencies.
  • In the Arduino IDE, go to File Examples DIYables ESP32 WebApps CustomWebApp. The IDE opens four files: CustomWebApp.ino, CustomWebApp.h, CustomWebApp.cpp, and custom_page_html.h.
  • Update the WiFi credentials in CustomWebApp.ino:
const char WIFI_SSID[] = "YOUR_WIFI_NETWORK"; const char WIFI_PASSWORD[] = "YOUR_WIFI_PASSWORD";
  • Click Upload button on Arduino IDE to upload code to Arduino Nano ESP32
  • Open the Serial Monitor
  • The Serial Monitor output should resemble the following:
Newbiely | Arduino IDE 2.3.8
──
File
Edit
Sketch
Tools
Help
Arduino Nano ESP32
Newbiely.ino
···
8 Serial.println("Hello World!");
Output
Serial Monitor
Message (Enter to send message to 'Arduino Nano ESP32' on 'COM15')
New Line
9600 baud
Starting Custom WebApp... INFO: Added app / INFO: Added app /custom DIYables WebApp Library Platform: Arduino Nano ESP32 Network connected! IP address: 192.168.0.2 HTTP server started on port 80 Configuring WebSocket server callbacks... WebSocket server started on port 81 WebSocket URL: ws://192.168.0.2:81 WebSocket server started on port 81 ========================================== DIYables WebApp Ready! ========================================== Web Interface: http://192.168.0.2 WebSocket: ws://192.168.0.2:81 Available Applications: Home Page: http://192.168.0.2/ Custom WebApp: http://192.168.0.2/custom ==========================================
Ln 11, Col 1
Arduino Nano ESP32 on COM15
2
  • If nothing appears, press the reset button on the board.
  • Enter the IP address from the Serial Monitor into a browser on the same network.
  • Example: http://192.168.0.2
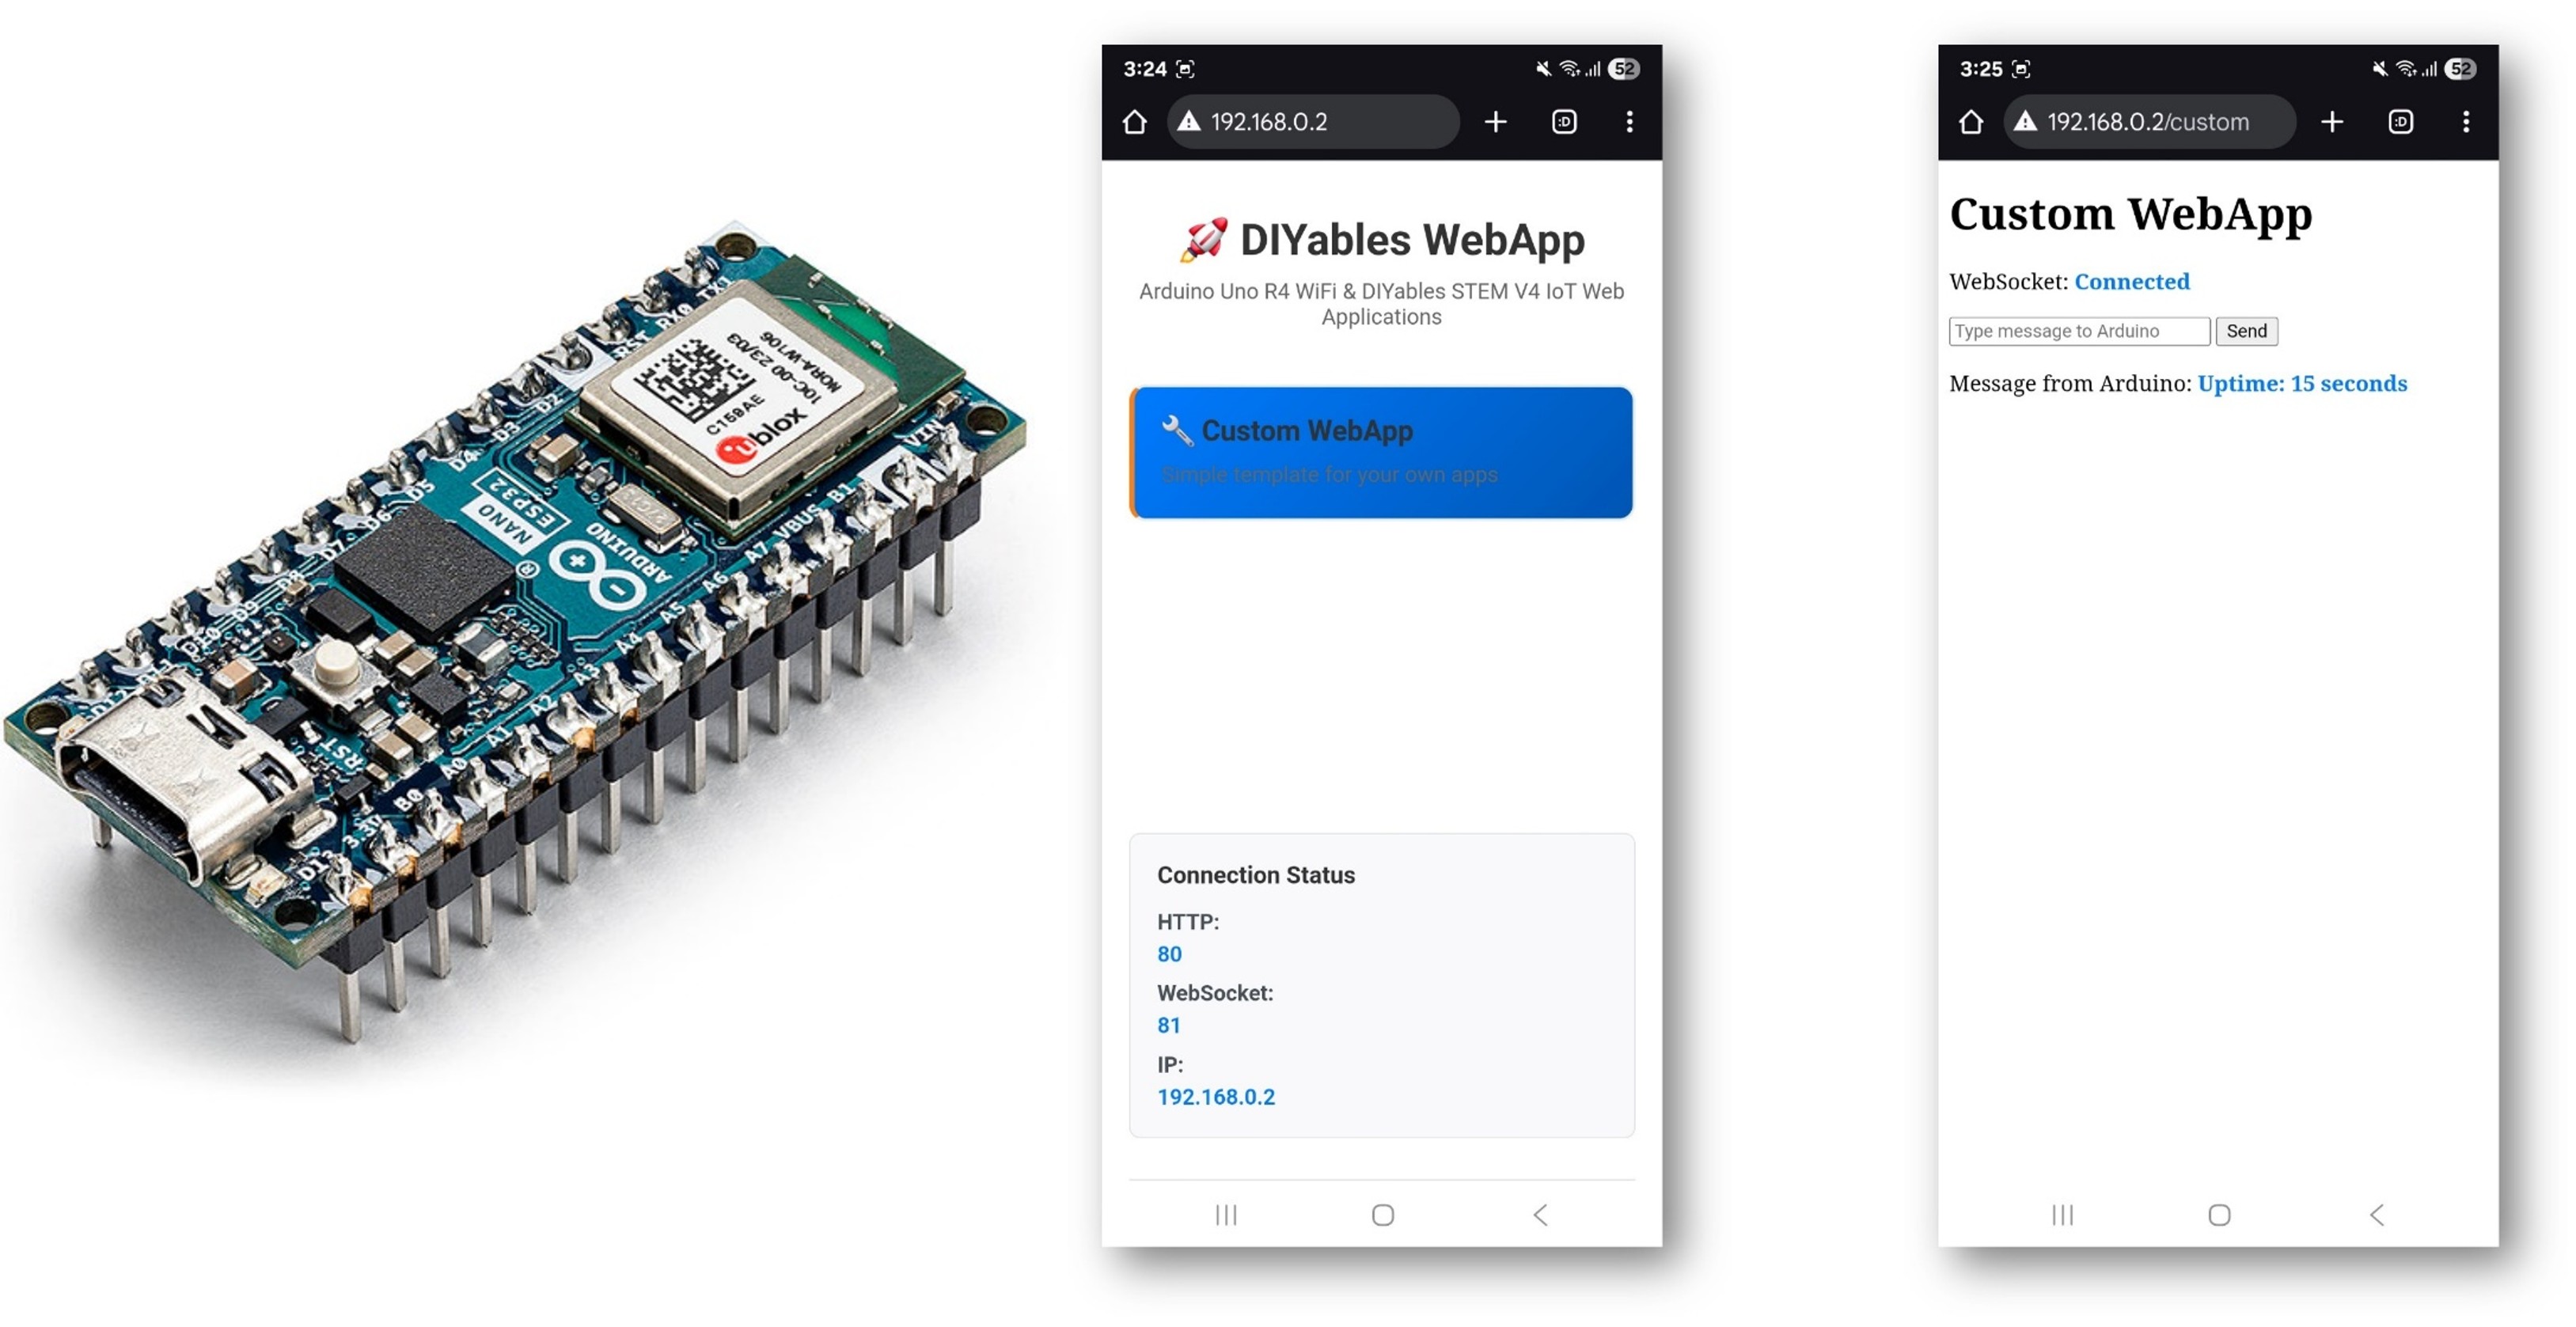
  • The home page shows a card for the custom application:
Arduino Nano ESP32 DIYables WebApp Home page with Web Custom app
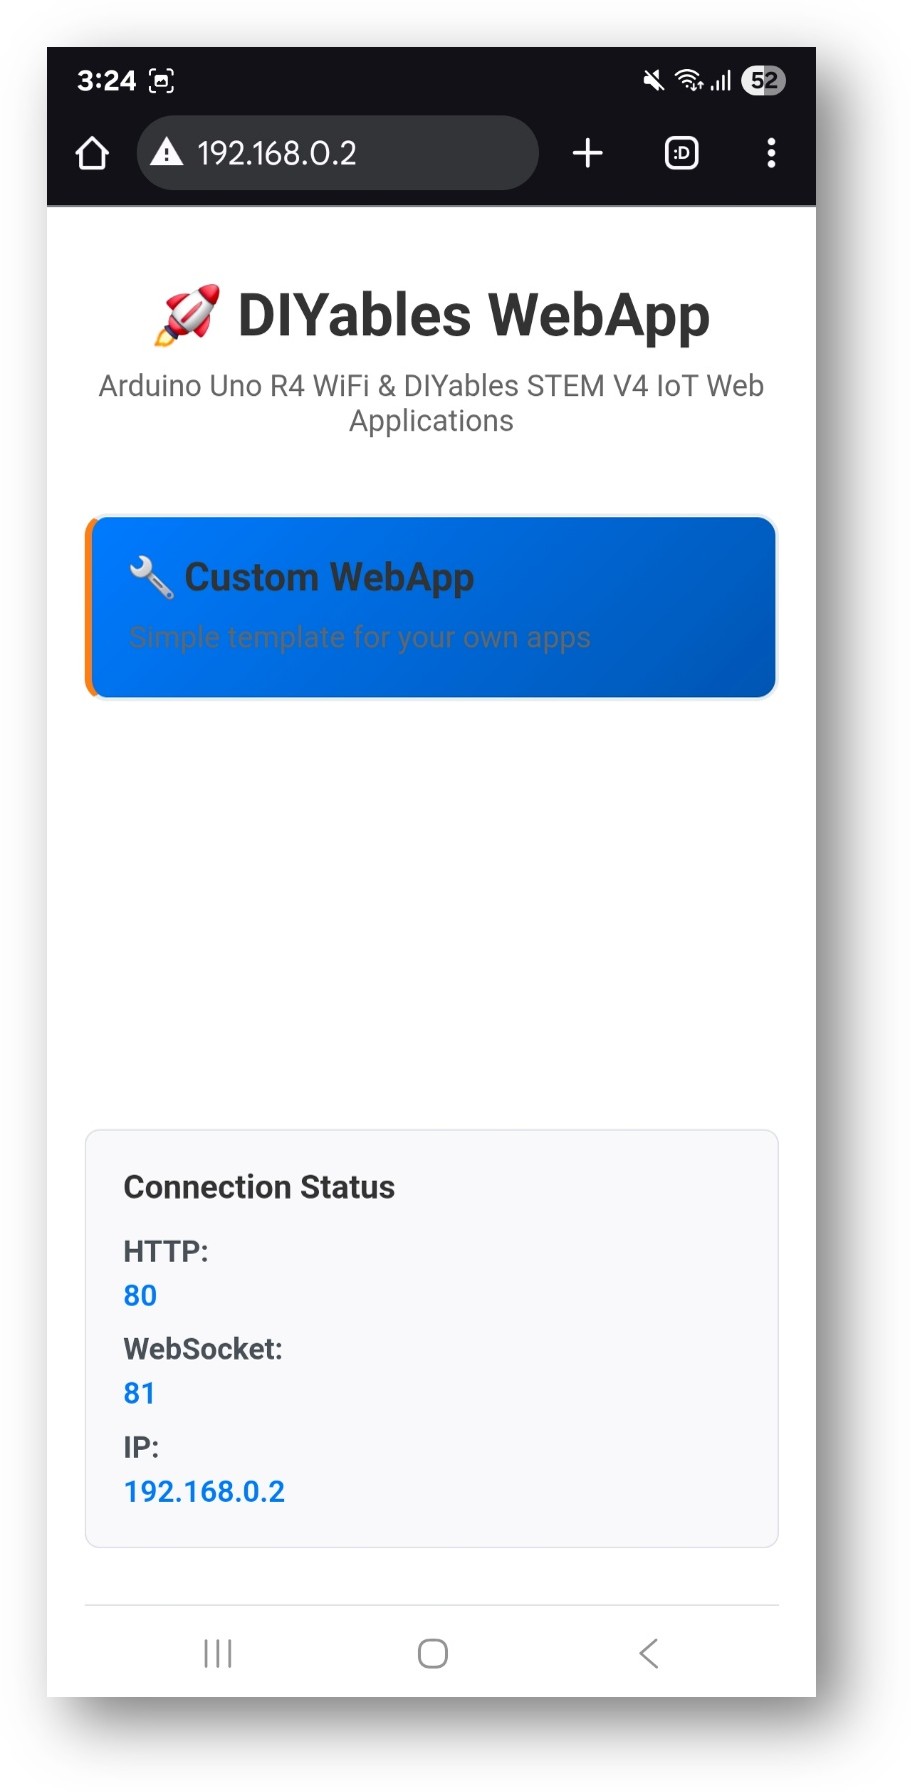
  • Select the Custom WebApp card to open the page:
Arduino Nano ESP32 DIYables WebApp Web Custom app
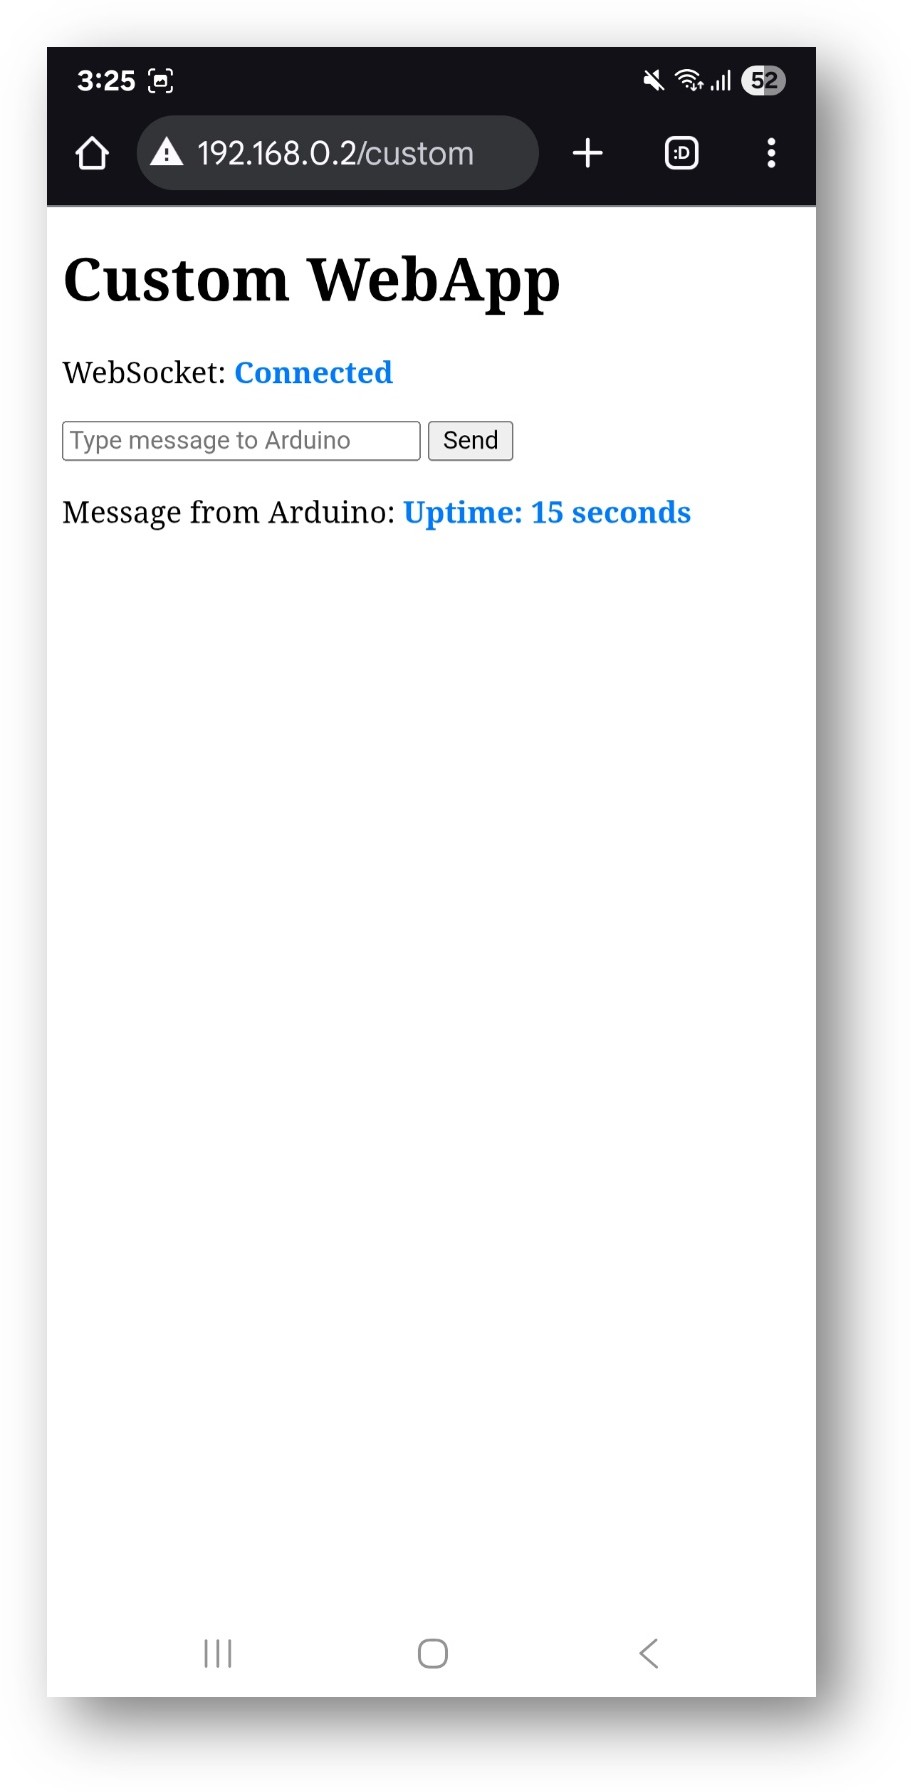
  • The page is also directly accessible at http://192.168.0.2/custom.

Verifying the Default Template

The default template demonstrates basic two-way communication:

  • Type any text into the input field on the page and click Send. The board receives the message and echoes it back. The web page displays: Echo: <your message>
  • The board sends an uptime message to all connected browsers every 5 seconds: Arduino uptime: X seconds
  • All received messages are printed in the Serial Monitor.

App Identifier System

The library allows multiple web apps to share one WebSocket server on port 81. Each app is isolated by a short prefix string called the app identifier. The identifier is prepended to every message in both directions.

Board side (CustomWebApp.h / CustomWebApp.cpp)

// CustomWebApp.h class CustomWebAppPage : public DIYablesWebAppPageBase { private: static const String APP_IDENTIFIER; }; // CustomWebApp.cpp const String CustomWebAppPage::APP_IDENTIFIER = "CUSTOM:"; // Receiving: strip identifier before passing to callback void CustomWebAppPage::handleWebSocketMessage(const String& message) { if (message.startsWith(APP_IDENTIFIER)) { String payload = message.substring(APP_IDENTIFIER.length()); // invoke user callback with payload } } // Sending: prepend identifier before broadcasting void CustomWebAppPage::sendToWeb(const String& message) { broadcastToAllClients(APP_IDENTIFIER + message); }

Browser side (custom_page_html.h)

const APP_IDENTIFIER = 'CUSTOM:'; // Receiving ws.onmessage = function(event) { if (event.data.startsWith(APP_IDENTIFIER)) { let message = event.data.substring(APP_IDENTIFIER.length); // display message } }; // Sending ws.send(APP_IDENTIFIER + userInput);

The identifier value in the .cpp file and the .h file must match exactly. When creating additional custom apps, assign a distinct identifier to each one.

Reserved identifiers — the following are already used by built-in apps and must not be reused:

  • App identifiers: CHAT:, MONITOR:, PLOTTER:, DIGITAL_PINS:, JOYSTICK:, SLIDER:, TABLE:, RTC:, ROTATOR:, GAUGE:
  • Sub-protocol identifiers: TIME:, DATETIME:, JOYSTICK_CONFIG:, PLOTTER_DATA:, PLOTTER_CONFIG:, SLIDER_VALUES:, TABLE_CONFIG:, TABLE_DATA:, VALUE_UPDATE:, PIN_CONFIG:, PIN_STATES:, PIN_UPDATE:

Adapting the Template

Handling Hardware Commands

Extend the callback in CustomWebApp.ino to respond to specific commands:

customPage.onCustomMessageReceived([](const String& message) { Serial.println("Received: " + message); if (message == "led_on") { digitalWrite(LED_BUILTIN, HIGH); customPage.sendToWeb("LED turned ON"); } else if (message == "led_off") { digitalWrite(LED_BUILTIN, LOW); customPage.sendToWeb("LED turned OFF"); } else if (message.startsWith("servo:")) { int angle = message.substring(6).toInt(); // servo.write(angle); customPage.sendToWeb("Servo moved to " + String(angle) + " degrees"); } else if (message == "get_temperature") { float temp = readTemperatureSensor(); customPage.sendToWeb("Temperature: " + String(temp) + " C"); } });

Sending Sensor Data from the Loop

void loop() { webAppsServer.loop(); static unsigned long lastSend = 0; if (millis() - lastSend > 3000) { int lightLevel = analogRead(A0); customPage.sendToWeb("Light: " + String(lightLevel)); lastSend = millis(); } }

Customizing the Web Page (HTML)

Edit custom_page_html.h to add buttons and display elements:

<div> <h3>Device Control</h3> <button onclick="send('led_on')">LED ON</button> <button onclick="send('led_off')">LED OFF</button> <label>Servo Angle:</label> <input type="range" id="servoSlider" min="0" max="180" value="90" onchange="send('servo:' + this.value)"> </div> <div> <h3>Sensor Data</h3> <div>Temperature: <span id="tempValue">--</span></div> <div>Light Level: <span id="lightValue">--</span></div> </div>

Customizing Message Processing (JavaScript)

Update ws.onmessage in custom_page_html.h to parse specific fields:

ws.onmessage = function(event) { if (event.data.startsWith(APP_IDENTIFIER)) { let message = event.data.substring(APP_IDENTIFIER.length); if (message.startsWith('Temperature:')) { document.getElementById('tempValue').textContent = message.split(':')[1].trim(); } else if (message.startsWith('Light:')) { document.getElementById('lightValue').textContent = message.split(':')[1].trim(); } } };

Customizing the URL Path

Change the path where the page is served by modifying the constructor in CustomWebApp.cpp:

// Default: accessible at /custom CustomWebAppPage::CustomWebAppPage() : DIYablesWebAppPageBase("/custom") {} // Change to a descriptive path CustomWebAppPage::CustomWebAppPage() : DIYablesWebAppPageBase("/temperature") {}

The path must start with / and must not duplicate paths used by built-in apps (/chat, /monitor, /plotter, /web-digital-pins, /web-joystick, /web-slider, /web-table, /web-rtc, /web-rotator, /web-gauge).

Managing Multiple Custom Apps

When adding more than one custom page, each must have a unique identifier, a unique path, and a unique class name.

File Structure

MyProject/ ├── MyProject.ino ├── TemperatureApp.h ├── TemperatureApp.cpp ├── temperature_page_html.h ├── MotorApp.h ├── MotorApp.cpp ├── motor_page_html.h ├── SensorApp.h ├── SensorApp.cpp └── sensor_page_html.h

Registering Multiple Apps

#include "TemperatureApp.h" #include "MotorApp.h" #include "SensorApp.h" DIYablesHomePage homePage; TemperatureMonitorPage tempPage; MotorControllerPage motorPage; SensorDashboardPage sensorPage; void setup() { webAppsServer.addApp(&homePage); webAppsServer.addApp(&tempPage); webAppsServer.addApp(&motorPage); webAppsServer.addApp(&sensorPage); webAppsServer.begin(WIFI_SSID, WIFI_PASSWORD); tempPage.onTemperatureMessageReceived([](const String& message) { // handle temperature commands }); motorPage.onMotorMessageReceived([](const String& message) { // handle motor commands }); }

Unique Identifiers per App

// TemperatureApp.cpp const String TemperatureMonitorPage::APP_IDENTIFIER = "TEMP:"; // MotorApp.cpp const String MotorControllerPage::APP_IDENTIFIER = "MOTOR:"; // SensorApp.cpp const String SensorDashboardPage::APP_IDENTIFIER = "SENSOR:";

The matching JavaScript constants in each *_page_html.h file must use the same string values.

※ OUR MESSAGES

  • As freelancers, We are AVAILABLE for HIRE. See how to outsource your project to us
  • Please feel free to share the link of this tutorial. However, Please do not use our content on any other websites. We invested a lot of effort and time to create the content, please respect our work!