Arduino Nano ESP32 - Web Apps Web Rotator

Overview

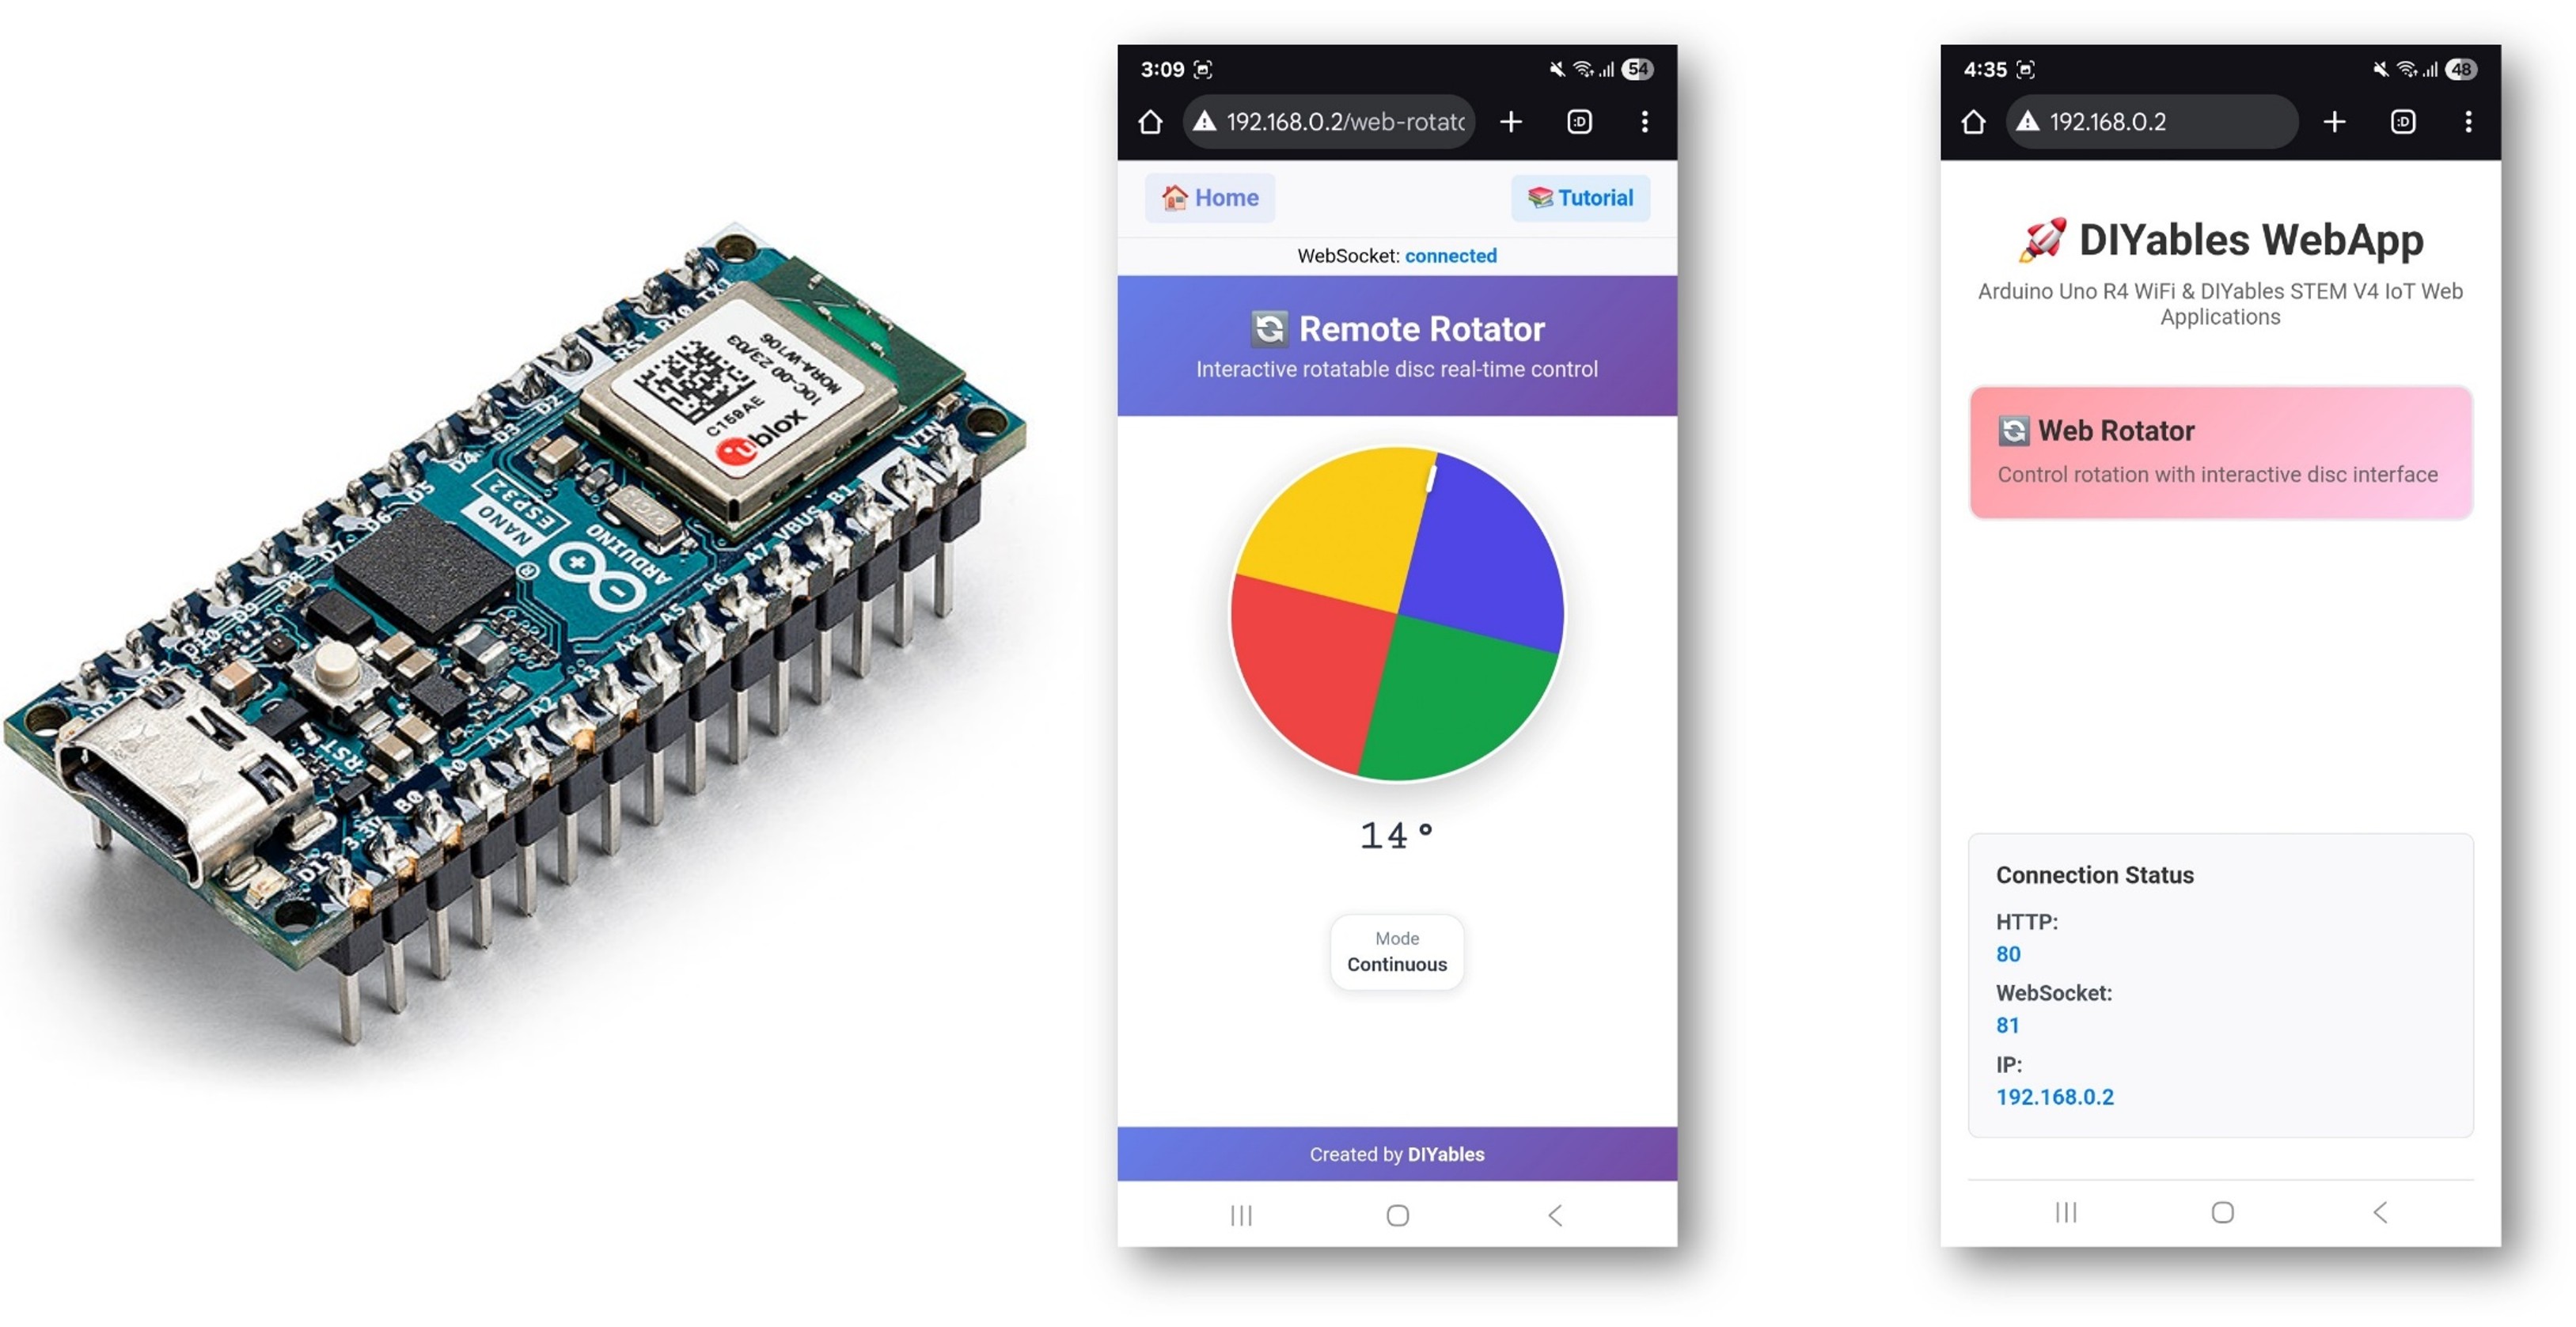
This tutorial covers the DIYablesWebRotatorPage class from the DIYables ESP32 WebApps Library. The browser page renders a draggable disc that reports its current angle to the Arduino Nano ESP32 over WebSocket. The disc operates in either a continuous (0–360°) or a limited-range mode. The configuration is set in the constructor and sent to the browser automatically on connection.

Arduino Nano ESP32 Web Rotator

Watch this step-by-step video tutorial demonstrating how to use a servo motor with the Web Rotator app:

What This Tutorial Covers

  • Selecting between continuous and limited rotation modes
  • Receiving angle values in a sketch callback
  • Driving a servo motor from the reported angle
  • Supplying the current angle to newly connected browsers

Hardware Preparation

1×Arduino Nano ESP32
1×USB Cable Type-A to Type-C (for USB-A PC)
1×USB Cable Type-C to Type-C (for USB-C PC)
1×Servo Motor (optional for testing)
1×Breadboard
1×Jumper Wires
1×Recommended: Screw Terminal Expansion Board for Arduino Nano
1×Recommended: Breakout Expansion Board for Arduino Nano
1×Recommended: Power Splitter for Arduino Nano ESP32

Or you can buy the following kits:

1×DIYables Sensor Kit (18 sensors/displays)
Disclosure: Some of the links provided in this section are Amazon affiliate links. We may receive a commission for any purchases made through these links at no additional cost to you.
Additionally, some of these links are for products from our own brand, DIYables .

Buy Note: For controlling multiple servo motors, use the PCA9685 16 Channel PWM Servo Driver Module to save MCU pins and simplify wiring.

Steps

Follow these instructions step by step:

  • If this is your first time using the Arduino Nano ESP32, refer to the tutorial on setting up the Arduino Nano ESP32 development environment.
  • Connect the Arduino Nano ESP32 board to your computer using a USB cable.
  • Launch the Arduino IDE on your computer.
  • Select the appropriate board (e.g. Arduino Nano ESP32) and COM port.
  • Navigate to the Libraries icon on the left bar of the Arduino IDE.
  • Search "DIYables ESP32 WebApps", then find the DIYables ESP32 WebApps Library by DIYables
  • Click Install button to install the library.
  • Search for DIYables ESP32 WebApps created by DIYables and click the Install button.
Newbiely | Arduino IDE 2.3.8
──
File
Edit
Sketch
Tools
Help
Arduino Nano ESP32
Library Manager
Type:
All
Topic:
All
DIYables ESP32 WebApps by DIYables
A comprehensive library designed for ESP32 that provides multiple professional web applications including Web Monitor, Chat, Digital Pin Control, Sliders, Joystick, Analog Gauge, Rotator Control, and Temperature Display via WebSocket communication. Features modular architecture for memory efficiency, automatic config handling, and perfect for IoT projects, robotics, sensor monitoring, servo/stepper control, temperature monitoring, and remote ESP32 control. More info
1.0.1
INSTALL
Newbiely.ino
···
1 void setup() {
Output
Serial Monitor
Ln 1, Col 1
Arduino Nano ESP32 on COM15
1
  • You will be asked for installing some other library dependencies
  • Click Install All button to install all library dependencies.
  • On Arduino IDE, Go to File Examples DIYables ESP32 WebApps WebRotator example, or copy the above code and paste it to the editor of Arduino IDE
/* * DIYables WebApp Library - Web Rotator Example * * This example demonstrates the Web Rotator application: * - Interactive rotatable disc control * - Two modes: Continuous rotation and Limited angle range * - Real-time angle feedback with WebSocket communication * - Touch and mouse support for desktop and mobile * * Features: * - Configurable rotation modes (continuous or limited) * - Beautiful conic gradient disc with visual indicator * - Real-time angle display and feedback * - WebSocket communication for live updates * - Professional responsive UI design * * Hardware: ESP32 Boards * * Setup: * 1. Update WiFi credentials below * 2. Upload the sketch to your Arduino * 3. Open Serial Monitor to see the IP address * 4. Navigate to http://[esp32-ip]/web-rotator in your web browser */ #include <DIYables_ESP32_Platform.h> #include <DIYablesWebApps.h> // WiFi credentials - UPDATE THESE WITH YOUR NETWORK const char WIFI_SSID[] = "YOUR_WIFI_SSID"; const char WIFI_PASSWORD[] = "YOUR_WIFI_PASSWORD"; // Create WebApp server and page instances ESP32ServerFactory serverFactory; DIYablesWebAppServer webAppsServer(serverFactory, 80, 81); DIYablesHomePage homePage; // Rotator configuration constants const int ROTATOR_MODE = ROTATOR_MODE_CONTINUOUS; // Change to ROTATOR_MODE_LIMITED for limited rotation const float MIN_ANGLE = 0.0; // Minimum angle for limited mode const float MAX_ANGLE = 180.0; // Maximum angle for limited mode // Create WebRotator page with configuration //DIYablesWebRotatorPage webRotatorPage(ROTATOR_MODE_CONTINUOUS); DIYablesWebRotatorPage webRotatorPage(ROTATOR_MODE_LIMITED, MIN_ANGLE, MAX_ANGLE); // Variables for angle tracking float currentAngle = 0.0; void setup() { Serial.begin(9600); delay(1000); // TODO: Initialize your hardware pins here Serial.println("DIYables ESP32 WebApp - Web Rotator Example"); // Add pages to server webAppsServer.addApp(&homePage); webAppsServer.addApp(&webRotatorPage); // Set 404 Not Found page (optional - for better user experience) webAppsServer.setNotFoundPage(DIYablesNotFoundPage()); // Set callback functions for WebRotator webRotatorPage.onRotatorAngleFromWeb(onRotatorAngleReceived); // Start server webAppsServer.begin(WIFI_SSID, WIFI_PASSWORD); if (ROTATOR_MODE == ROTATOR_MODE_LIMITED) { Serial.println("\nRotator Mode: Limited"); Serial.print("Angle Range: "); Serial.print(MIN_ANGLE); Serial.print("° to "); Serial.print(MAX_ANGLE); Serial.println("°"); } else { Serial.println("\nRotator Mode: Continuous Rotation"); } Serial.println("\nTurn the disc in your web browser to control the rotator!"); } void loop() { // Handle web server and WebSocket connections webAppsServer.loop(); // Simulate rotator movement or control actual hardware here // For demonstration, we'll just echo back the received angle delay(10); } /** * Callback function called when angle is received from web interface * This is where you would control your actual rotator hardware */ void onRotatorAngleReceived(float angle) { currentAngle = angle; Serial.print("Rotator angle received: "); Serial.print(angle, 1); Serial.println("°"); // TODO: Add your rotator control code here // Examples: // - Control servo motor: servo.write(map(angle, 0, 360, 0, 180)); // - Control stepper motor: stepper.moveTo(angle * stepsPerDegree); // - Control DC motor with encoder feedback // - Send commands to external rotator controller // Note: No echo back to avoid interfering with smooth web interface rotation } /** * Example function to change rotator mode at runtime * Call this function to switch between continuous and limited modes */ void setRotatorMode(int mode, float minAng = 0, float maxAng = 360) { webRotatorPage.setRotatorMode(mode, minAng, maxAng); Serial.print("Rotator mode changed to: "); if (mode == ROTATOR_MODE_LIMITED) { Serial.print("Limited ("); Serial.print(minAng); Serial.print("° to "); Serial.print(maxAng); Serial.println("°)"); } else { Serial.println("Continuous"); } } /** * Example function to send angle updates to web interface * Call this function when your rotator position changes */ void sendAngleUpdate(float angle) { currentAngle = angle; webRotatorPage.sendToWebRotator(angle); Serial.print("Angle update sent to web: "); Serial.print(angle, 1); Serial.println("°"); }
  • Update the WiFi credentials in the sketch:
const char WIFI_SSID[] = "YOUR_WIFI_NETWORK"; const char WIFI_PASSWORD[] = "YOUR_WIFI_PASSWORD";
  • Click Upload button on Arduino IDE to upload code to Arduino Nano ESP32
  • Open the Serial Monitor
  • The Serial Monitor output should resemble the following:
Newbiely | Arduino IDE 2.3.8
──
File
Edit
Sketch
Tools
Help
Arduino Nano ESP32
Newbiely.ino
···
8 Serial.println("Hello World!");
Output
Serial Monitor
Message (Enter to send message to 'Arduino Nano ESP32' on 'COM15')
New Line
9600 baud
DIYables WebApp - Web Rotator Example INFO: Added app / INFO: Added app /web-rotator DIYables WebApp Library Platform: Arduino Nano ESP32 Network connected! IP address: 192.168.0.2 HTTP server started on port 80 Configuring WebSocket server callbacks... WebSocket server started on port 81 WebSocket URL: ws://192.168.0.2:81 WebSocket server started on port 81 ========================================== DIYables WebApp Ready! ========================================== Web Interface: http://192.168.0.2 WebSocket: ws://192.168.0.2:81 Available Applications: Home Page: http://192.168.0.2/ Web Rotator: http://192.168.0.2/web-rotator ==========================================
Ln 11, Col 1
Arduino Nano ESP32 on COM15
2
  • If nothing appears, press the reset button on the board.
  • Enter the IP address from the Serial Monitor into a browser on the same network.
  • Example: http://192.168.0.2
  • The home page shows a card for the rotator application:
Arduino Nano ESP32 DIYables WebApp Home page with Web Rotator app
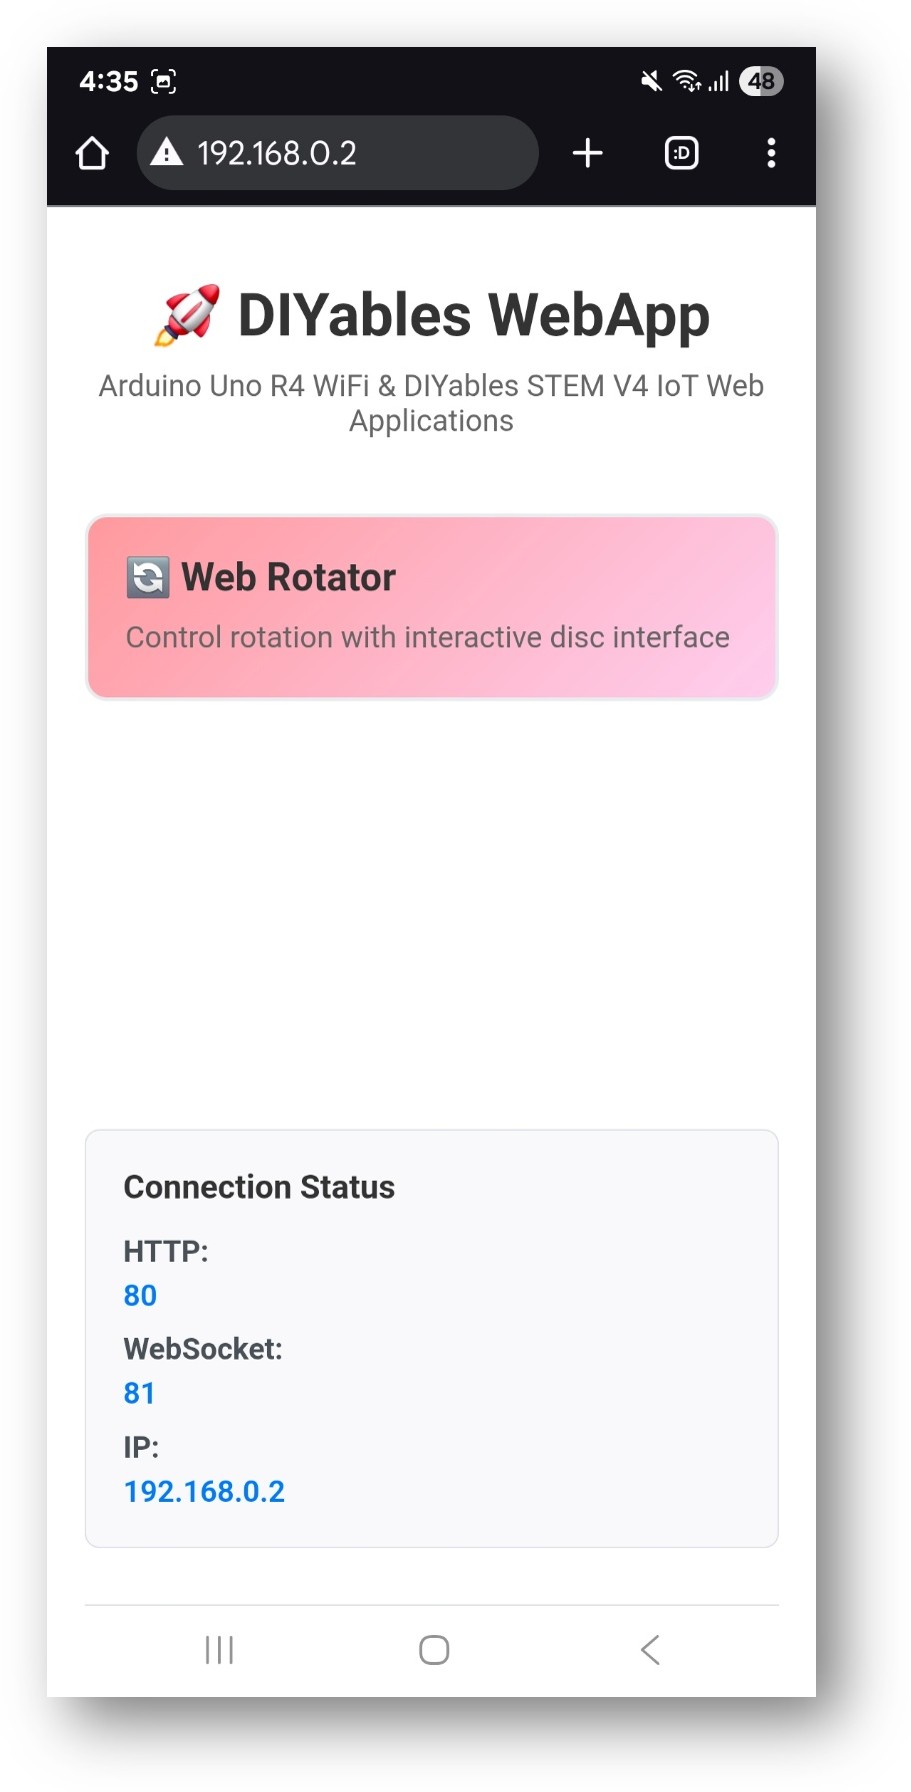
  • Select the Web Rotator card to open the disc control page:
Arduino Nano ESP32 DIYables WebApp Web Rotator app
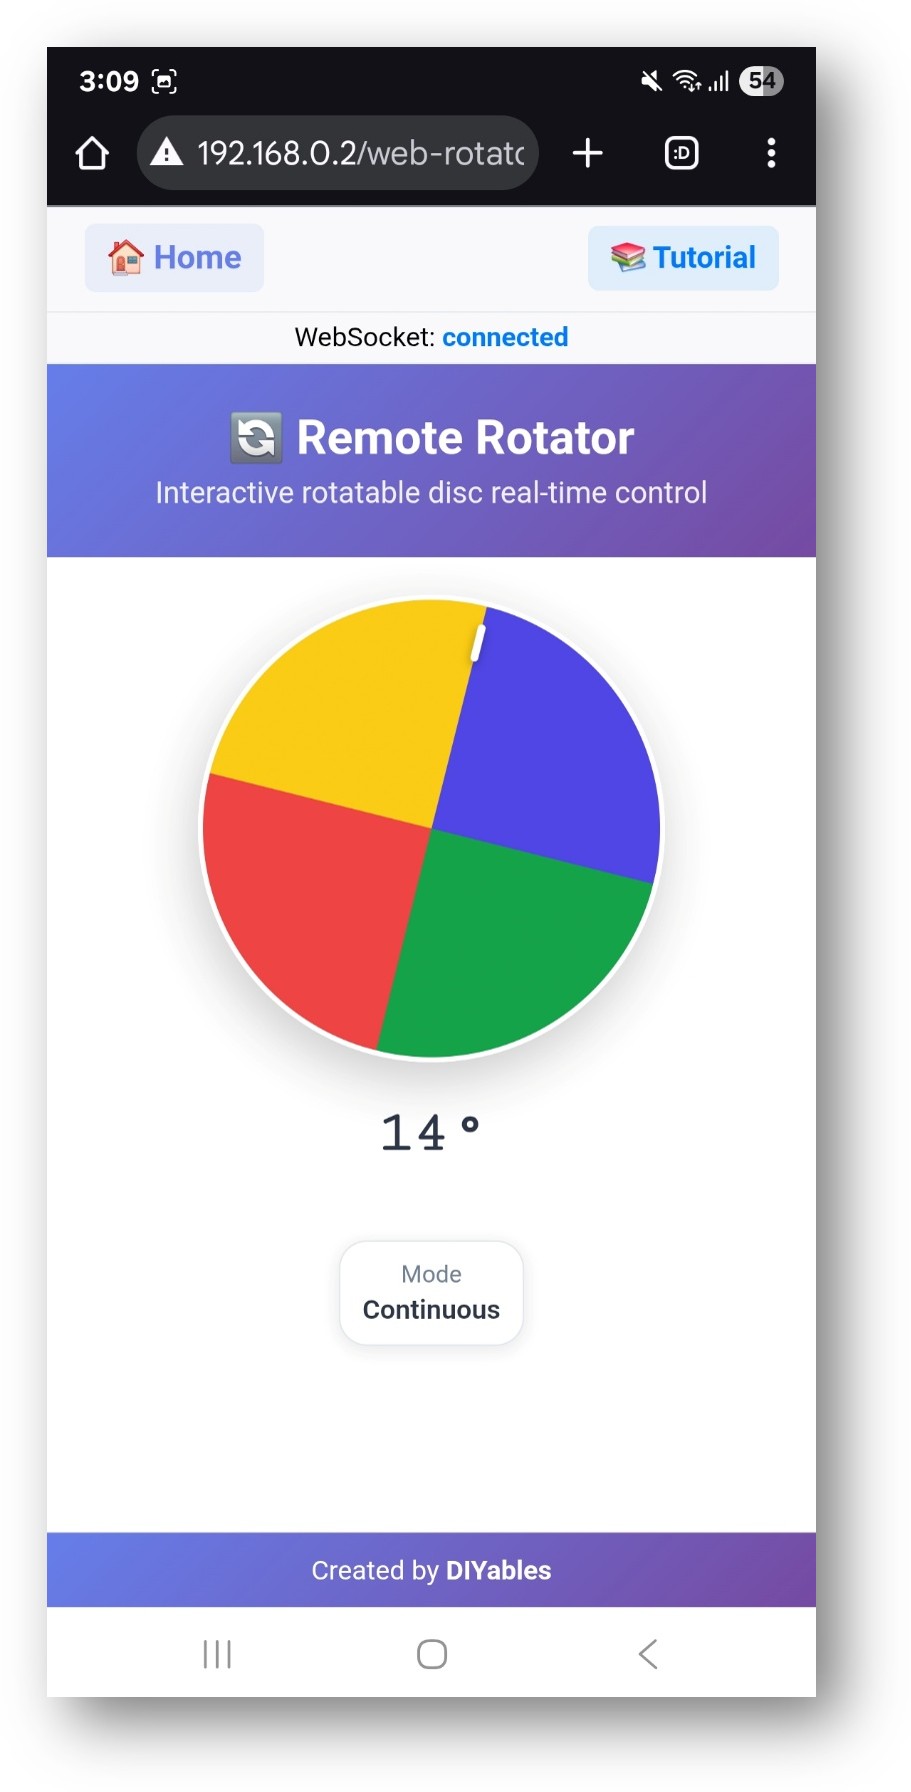
  • The page is also directly accessible at http://192.168.0.2/web-rotator.
  • Drag the disc and observe the angle reported in the Serial Monitor.

Rotation Modes

Continuous Mode (full 0–360°)

DIYablesWebRotatorPage webRotatorPage(ROTATOR_MODE_CONTINUOUS);

Limited-Range Mode

// Allows rotation between 0 and 180 degrees DIYablesWebRotatorPage webRotatorPage(ROTATOR_MODE_LIMITED, 0.0, 180.0);

Callbacks

Receiving Angle Updates

Called each time the user rotates the disc:

webRotatorPage.onRotatorValueFromWeb([](float angle) { currentAngle = angle; Serial.println("Angle: " + String(angle)); // Apply to servo or stepper here });

Supplying Angle to the Browser

Called when a browser connects and requests the current angle:

webRotatorPage.onRotatorValueToWeb([]() { webRotatorPage.sendToWebRotator(currentAngle); });

Servo Motor Example

Map the browser angle (0–180°) to a standard servo:

#include <Servo.h> Servo myServo; void setup() { myServo.attach(9); // ... server and page setup ... webRotatorPage.onRotatorValueFromWeb([](float angle) { myServo.write((int)angle); Serial.println("Servo angle: " + String((int)angle)); }); }

Troubleshooting

Disc angle does not trigger the callback

  • Confirm onRotatorValueFromWeb is registered before webAppsServer.begin()
  • Verify the WebSocket status in the browser shows "connected"

Servo moves to wrong position

  • Check that the angle range matches the servo's physical range (typically 0–180°)
  • Use limited-range mode when the mechanical range is less than 360°

Page not reachable

  • Verify the IP address from the Serial Monitor
  • Ensure both the board and browser device are on the same 2.4 GHz network

※ OUR MESSAGES

  • As freelancers, We are AVAILABLE for HIRE. See how to outsource your project to us
  • Please feel free to share the link of this tutorial. However, Please do not use our content on any other websites. We invested a lot of effort and time to create the content, please respect our work!