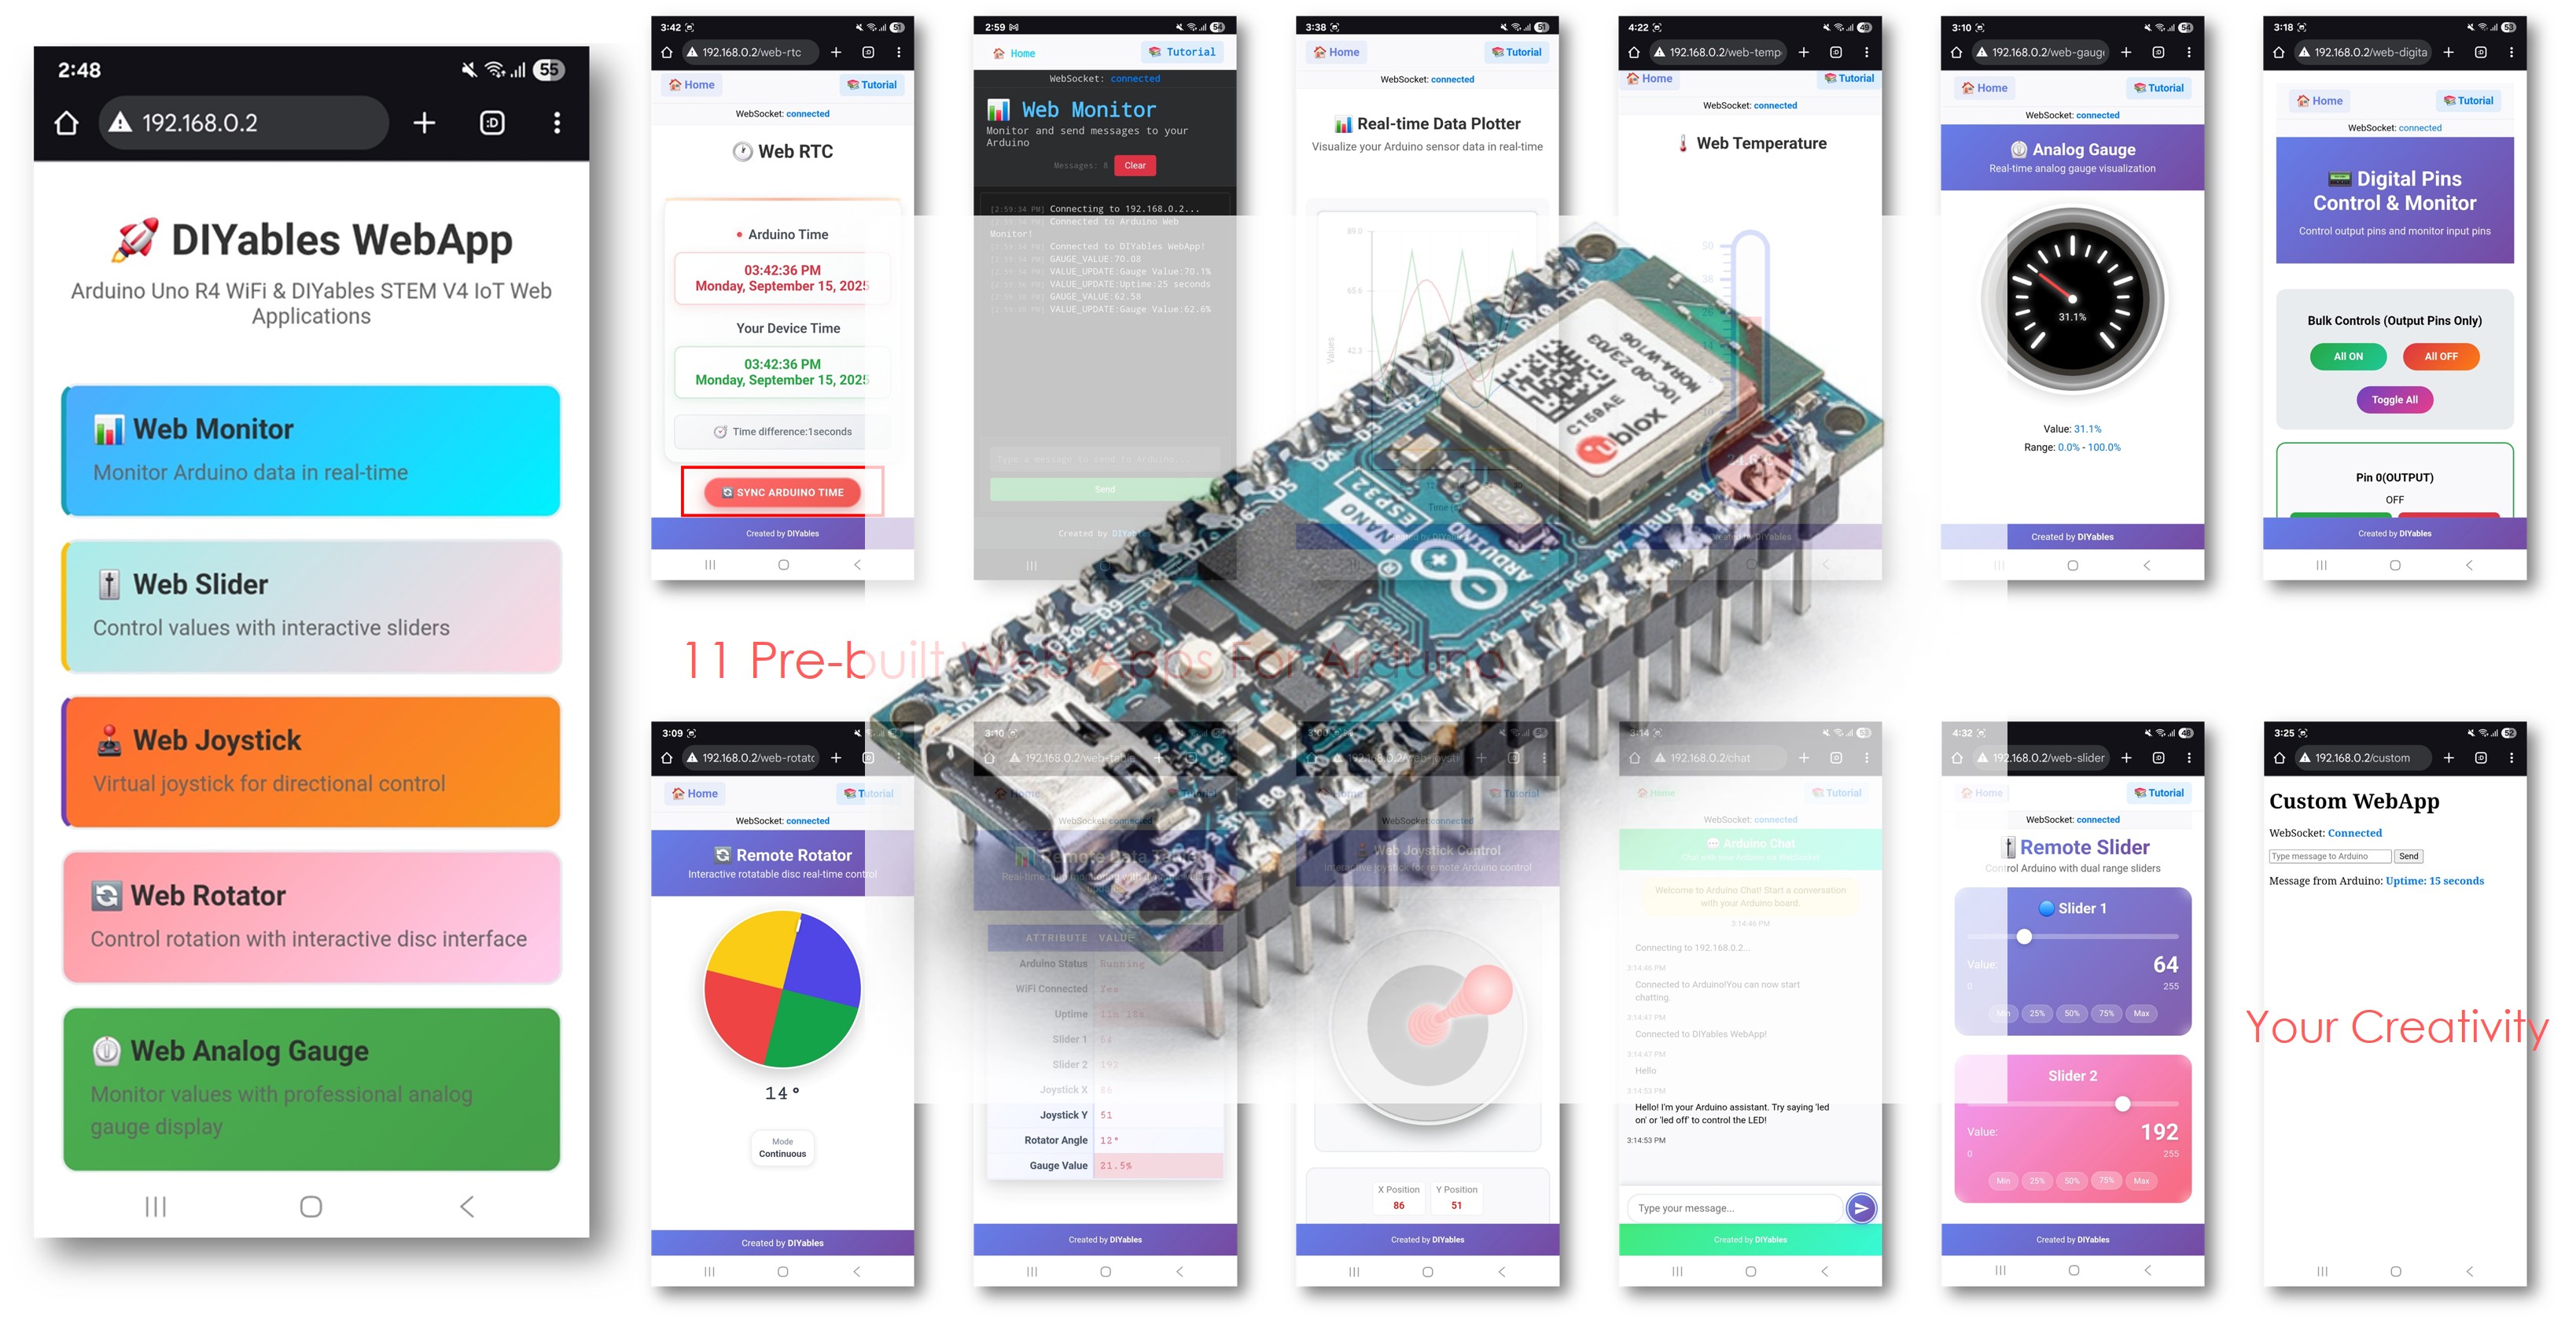
This tutorial shows how to run several web application pages at the same time on an Arduino Nano ESP32 using the DIYables ESP32 WebApps Library. Each page is independent; you register only the ones your project requires. The home page lists all registered apps automatically.
What This Tutorial Covers
Registering multiple page objects with one server instance
Configuring state variables shared across pages
Pre-configuring digital pin modes for the web digital pins page
Configuring joystick sensitivity and auto-return from the sketch
Disclosure: Some of the links provided in this section are Amazon affiliate links. We may receive a commission for any purchases made through these links at no additional cost to you. Additionally, some of these links are for products from our own brand, DIYables .
Connect the Arduino Nano ESP32 board to your computer using a USB cable.
Launch the Arduino IDE on your computer.
Select the appropriate board (e.g. Arduino Nano ESP32) and COM port.
Navigate to the Libraries icon on the left bar of the Arduino IDE.
Search "DIYables ESP32 WebApps", then find the DIYables ESP32 WebApps Library by DIYables
Click Install button to install the library.
Search for DIYables ESP32 WebApps created by DIYables and click the Install button.
Newbiely | Arduino IDE 2.3.8
──
☐
✕
File
Edit
Sketch
Tools
Help
Arduino Nano ESP32
Library Manager
DIYables ESP32 WebApps
Type:
All
Topic:
All
DIYables ESP32 WebAppsby DIYables
A comprehensive library designed for ESP32 that provides multiple professional web applications including Web Monitor, Chat, Digital Pin Control, Sliders, Joystick, Analog Gauge, Rotator Control, and Temperature Display via WebSocket communication. Features modular architecture for memory efficiency, automatic config handling, and perfect for IoT projects, robotics, sensor monitoring, servo/stepper control, temperature monitoring, and remote ESP32 control.
More info
1.0.1
INSTALL
Newbiely.ino
···
1
voidsetup() {
Output
Serial Monitor
Ln 1, Col 1
Arduino Nano ESP32 on COM15
1
You will be asked for installing some other library dependencies
Click Install All button to install all library dependencies.
On Arduino IDE, Go to File Examples DIYables ESP32 WebApps MultipleWebApps example, or copy the above code and paste it to the editor of Arduino IDE
/* * DIYables WebApp Library - Multiple WebApps Example * * This example demonstrates multiple web apps of the DIYables WebApp library: * - Home page with links to multiple web apps * - Web Monitor: Real-time serial monitoring via WebSocket * - Web Slider: Dual slider control * - Web Joystick: Interactive joystick control * - Web Rotator: Interactive rotatable disc control * - Web Analog Gauge: Professional circular gauge for sensor monitoring * - Web Table: Two-column data table with real-time updates * - Web Plotter: See WebPlotter example for real-time data visualization * * Features: * - Simplified callback system - no manual command parsing needed * - Automatic state synchronization and JSON handling * - All protocol details handled by the library * - Template for hardware control * * Hardware: ESP32 Boards * * Setup: * 1. Update WiFi credentials below * 2. Upload the sketch to your Arduino * 3. Open Serial Monitor to see the IP address * 4. Navigate to the IP address in your web browser */#include <DIYables_ESP32_Platform.h>#include <DIYablesWebApps.h>// WiFi credentials - UPDATE THESE WITH YOUR NETWORKconstchar WIFI_SSID[] = "YOUR_WIFI_SSID";constchar WIFI_PASSWORD[] = "YOUR_WIFI_PASSWORD";// Create WebApp server and page instancesESP32ServerFactory factory;DIYablesWebAppServerwebAppsServer(factory, 80, 81);DIYablesHomePage homePage;DIYablesWebMonitorPage webMonitorPage;DIYablesWebSliderPage webSliderPage;DIYablesWebJoystickPage webJoystickPage(false, 5); // autoReturn=false, sensitivity=5DIYablesWebRotatorPage webRotatorPage(ROTATOR_MODE_CONTINUOUS); // Continuous rotation mode (0-360°)DIYablesWebAnalogGaugePage webAnalogGaugePage(0.0, 100.0, "%"); // Range: 0-100%, units: %DIYablesWebTablePage webTablePage;// Variables to track statesint currentSlider1 = 64; // Slider 1 value (0-255)int currentSlider2 = 128; // Slider 2 value (0-255)int currentJoystickX = 0; // Current joystick X value (-100 to 100)int currentJoystickY = 0; // Current joystick Y value (-100 to 100)int currentRotatorAngle = 0; // Current rotator angle (0-360°)float currentGaugeValue = 50.0; // Current gauge value (0.0-100.0)voidsetup() {Serial.begin(9600);delay(1000);// TODO: Initialize your hardware pins hereSerial.println("DIYables ESP32 WebApp - Multiple Apps Example");// Add all web applications to the serverwebAppsServer.addApp(&homePage);webAppsServer.addApp(&webMonitorPage);webAppsServer.addApp(&webSliderPage);webAppsServer.addApp(&webJoystickPage);webAppsServer.addApp(&webRotatorPage);webAppsServer.addApp(&webAnalogGaugePage);webAppsServer.addApp(&webTablePage);// Add more web apps here (e.g., WebPlotter)// Set 404 Not Found page (optional - for better user experience)webAppsServer.setNotFoundPage(DIYablesNotFoundPage());// Configure table structure (only attribute names, values will be updated dynamically) webTablePage.addRow("Arduino Status"); webTablePage.addRow("WiFi Connected"); webTablePage.addRow("Uptime"); webTablePage.addRow("Slider 1"); webTablePage.addRow("Slider 2"); webTablePage.addRow("Joystick X"); webTablePage.addRow("Joystick Y"); webTablePage.addRow("Rotator Angle"); webTablePage.addRow("Gauge Value");// Start the WebApp serverif (!webAppsServer.begin(WIFI_SSID, WIFI_PASSWORD)) {while (1) {Serial.println("Failed to start WebApp server!");delay(1000); } } setupCallbacks();}void setupCallbacks() {// Web Monitor callback - echo messages back webMonitorPage.onWebMonitorMessage([](const String& message) {Serial.println("Web Monitor: " + message); webMonitorPage.sendToWebMonitor("Arduino received: " + message); });// Web Slider callback - handle slider values webSliderPage.onSliderValueFromWeb([](int slider1, int slider2) {// Store the received values currentSlider1 = slider1; currentSlider2 = slider2;// Print slider values (0-255) without String concatenationSerial.print("Slider 1: ");Serial.print(slider1);Serial.print(", Slider 2: ");Serial.println(slider2);// Update table with new slider values using String() conversion webTablePage.sendValueUpdate("Slider 1", String(slider1)); webTablePage.sendValueUpdate("Slider 2", String(slider2));// TODO: Add your control logic here based on slider values// Examples:// - Control PWM: analogWrite(LED_PIN, slider1);// - Control servos: servo.write(map(slider1, 0, 255, 0, 180));// - Control motor speed: analogWrite(MOTOR_PIN, slider2);// Update gauge based on slider1 value (map 0-255 to 0-100) currentGaugeValue = map(slider1, 0, 255, 0, 100); webAnalogGaugePage.sendToWebAnalogGauge(currentGaugeValue);char gaugeStr[16]; snprintf(gaugeStr, sizeof(gaugeStr), "%.1f%%", currentGaugeValue); webTablePage.sendValueUpdate("Gauge Value", String(gaugeStr)); });// Handle slider value requests webSliderPage.onSliderValueToWeb([]() { webSliderPage.sendToWebSlider(currentSlider1, currentSlider2); });// Web Joystick callback - handle joystick movement webJoystickPage.onJoystickValueFromWeb([](int x, int y) {// Store the received values currentJoystickX = x; currentJoystickY = y;// Print joystick position values (-100 to +100)Serial.print("Joystick - X: ");Serial.print(x);Serial.print(", Y: ");Serial.println(y);Serial.print(x);Serial.print(", Y: ");Serial.println(y);// Update table with new joystick values webTablePage.sendValueUpdate("Joystick X", String(x)); webTablePage.sendValueUpdate("Joystick Y", String(y));// TODO: Add your control logic here based on joystick position// Examples:// - Control motors: if (x > 50) { /* move right */ }// - Control servos: servo.write(map(y, -100, 100, 0, 180));// - Control LEDs: analogWrite(LED_PIN, map(abs(x), 0, 100, 0, 255)); });// Handle joystick values requests (when web page loads/reconnects) webJoystickPage.onJoystickValueToWeb([]() { webJoystickPage.sendToWebJoystick(currentJoystickX, currentJoystickY); });// Web Rotator callback - handle rotation angle changes webRotatorPage.onRotatorAngleFromWeb([](float angle) {// Store the received angle currentRotatorAngle = (int)angle;// Print rotator angle (0-360°)Serial.println("Rotator angle: " + String(angle) + "°");// Update table with new rotator angle webTablePage.sendValueUpdate("Rotator Angle", String(angle, 0) + "°");// TODO: Add your control logic here based on rotator angle// Examples:// - Control servo: servo.write(map(angle, 0, 360, 0, 180));// - Control stepper motor: stepper.moveTo(angle);// - Control directional LED strip: setLEDDirection(angle); });// Handle analog gauge value requests (when web page loads/reconnects) webAnalogGaugePage.onGaugeValueRequest([]() { webAnalogGaugePage.sendToWebAnalogGauge(currentGaugeValue); });// Handle table data requests (when web page loads/reconnects) webTablePage.onTableValueRequest([]() {// Send initial values to the table webTablePage.sendValueUpdate("Arduino Status", "Running"); webTablePage.sendValueUpdate("WiFi Connected", "Yes"); webTablePage.sendValueUpdate("Uptime", "0 seconds"); webTablePage.sendValueUpdate("Slider 1", String(currentSlider1)); webTablePage.sendValueUpdate("Slider 2", String(currentSlider2)); webTablePage.sendValueUpdate("Joystick X", String(currentJoystickX)); webTablePage.sendValueUpdate("Joystick Y", String(currentJoystickY)); webTablePage.sendValueUpdate("Rotator Angle", String(currentRotatorAngle) + "°"); webTablePage.sendValueUpdate("Gauge Value", String(currentGaugeValue, 1) + "%"); });}voidloop() {// Handle WebApp server communicationswebAppsServer.loop();// Update table with current uptime every 5 secondsstaticunsignedlong lastUptimeUpdate = 0;if (millis() - lastUptimeUpdate > 5000) { lastUptimeUpdate = millis();unsignedlong uptimeSeconds = millis() / 1000;String uptimeStr = String(uptimeSeconds) + " seconds";if (uptimeSeconds >= 60) { uptimeStr = String(uptimeSeconds / 60) + "m " + String(uptimeSeconds % 60) + "s"; } webTablePage.sendValueUpdate("Uptime", uptimeStr); }// Simulate sensor data updates every 3 secondsstaticunsignedlong lastSensorUpdate = 0;if (millis() - lastSensorUpdate > 3000) { lastSensorUpdate = millis();// Simulate a sensor reading that varies over timefloat sensorValue = 50.0 + 30.0 * sin(millis() / 10000.0); // Oscillates between 20-80 currentGaugeValue = sensorValue;// Update gauge and table webAnalogGaugePage.sendToWebAnalogGauge(currentGaugeValue); webTablePage.sendValueUpdate("Gauge Value", String(currentGaugeValue, 1) + "%"); }// TODO: Add your main application code heredelay(10);}
Click Upload button on Arduino IDE to upload code to Arduino Nano ESP32
Open the Serial Monitor
The Serial Monitor output should resemble the following:
Newbiely | Arduino IDE 2.3.8
──
☐
✕
File
Edit
Sketch
Tools
Help
Arduino Nano ESP32
Newbiely.ino
···
8Serial.println("Hello World!");
Output
Serial Monitor
Message (Enter to send message to 'Arduino Nano ESP32' on 'COM15')
New Line
9600 baud
DIYables WebApp - Multiple Apps Example
INFO: Added app /
INFO: Added app /web-monitor
INFO: Added app /web-slider
INFO: Added app /web-joystick
INFO: Added app /web-rotator
INFO: Added app /web-gauge
INFO: Added app /web-table
DIYables WebApp Library
Platform: Arduino Nano ESP32
Network connected!
IP address: 192.168.0.2
HTTP server started on port 80
Configuring WebSocket server callbacks...
WebSocket server started on port 81
WebSocket URL: ws://192.168.0.2:81
WebSocket server started on port 81
==========================================
DIYables WebApp Ready!
==========================================
Web Interface: http://192.168.0.2
WebSocket: ws://192.168.0.2:81
Available Applications:
Home Page: http://192.168.0.2/
Web Monitor: http://192.168.0.2/web-monitor
Web Slider: http://192.168.0.2/web-slider
Web Joystick: http://192.168.0.2/web-joystick
Web Rotator: http://192.168.0.2/web-rotator
Web Analog Gauge: http://192.168.0.2/web-gauge
Web Table: http://192.168.0.2/web-table
==========================================
Ln 11, Col 1
Arduino Nano ESP32 on COM15
2
If nothing appears, press the reset button on the board.
Note the IP address and enter it in a browser on a device connected to the same WiFi network.
Example: http://192.168.0.2
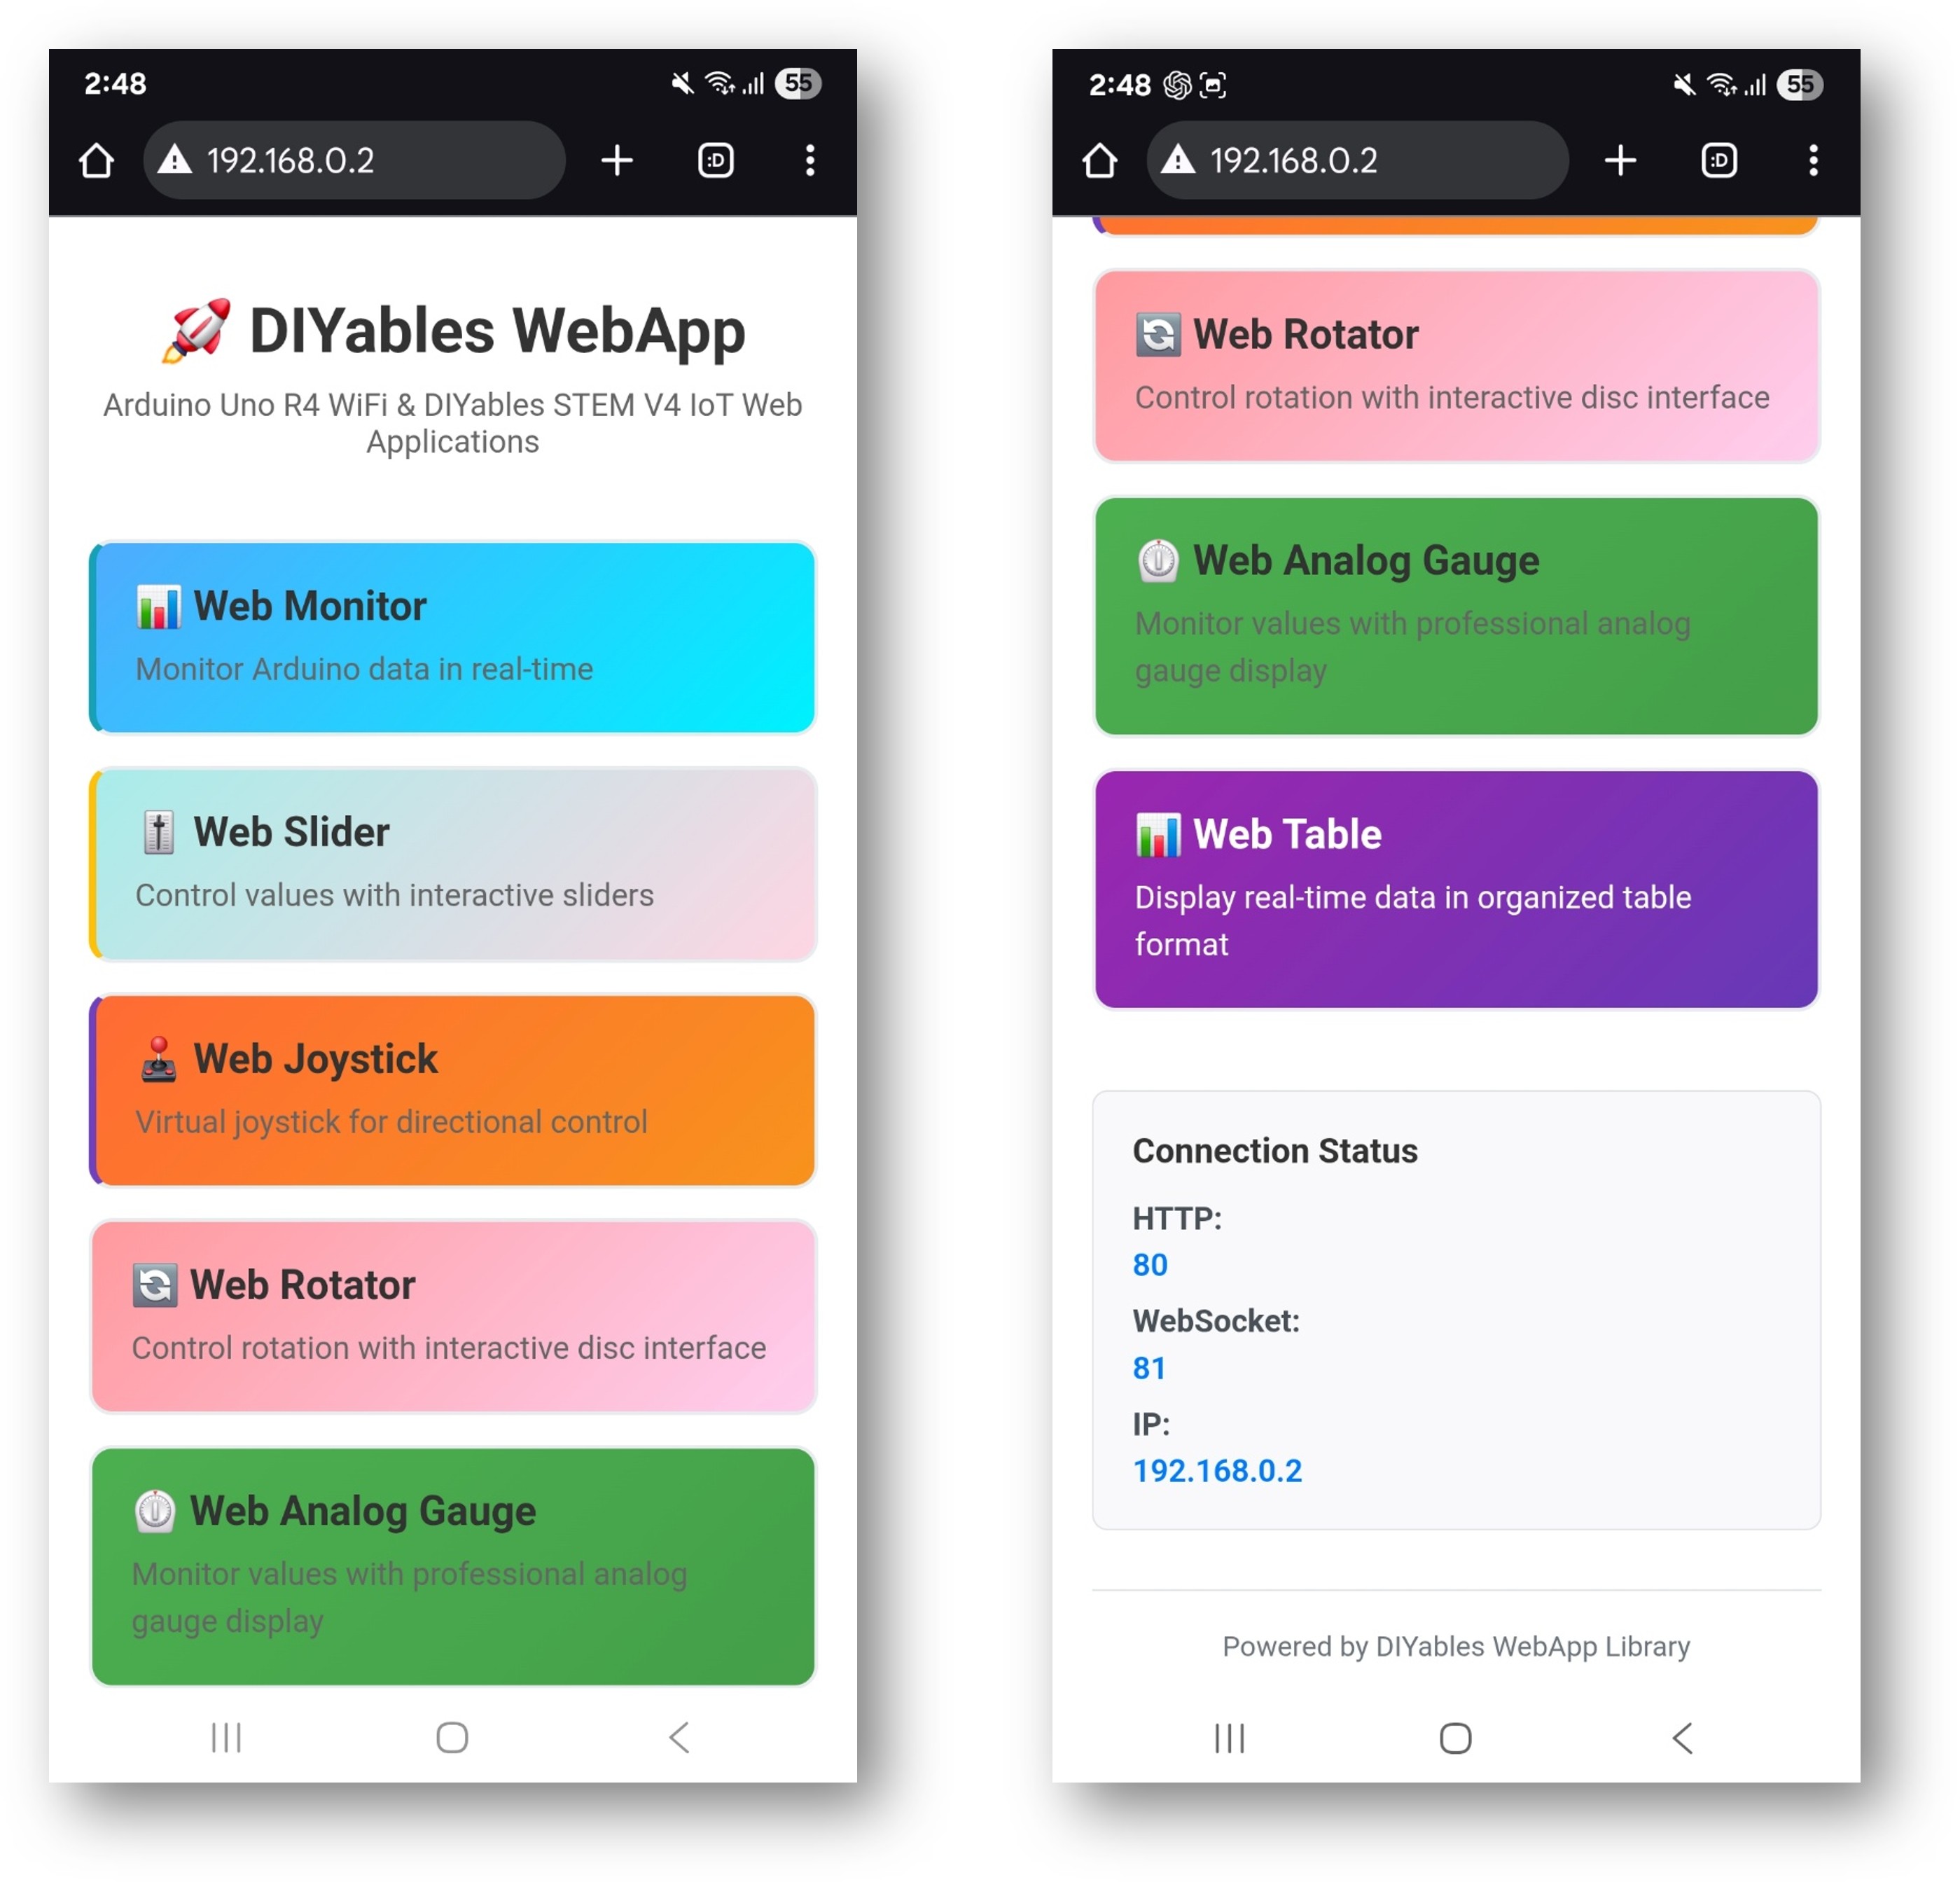
The home page shows cards for all registered applications:
Select any card to open that application. Each page is also accessible directly by its path, for example http://192.168.0.2/web-monitor or http://192.168.0.2/web-slider.
Application URLs
Application
URL Path
Home Page
http
//[board-ip]/
Web Monitor
http
//[board-ip]/web-monitor
Web Slider
http
//[board-ip]/web-slider
Web Joystick
http
//[board-ip]/web-joystick
Web Rotator
http
//[board-ip]/web-rotator
Web Analog Gauge
http
//[board-ip]/web-gauge
Web Table
http
//[board-ip]/web-table
Configuration Details
Digital Pin Setup
Output pins are writable from the browser; input pins display their current state:
webDigitalPinsPage.enablePin(2, WEB_PIN_OUTPUT); // General outputwebDigitalPinsPage.enablePin(3, WEB_PIN_OUTPUT); // General outputwebDigitalPinsPage.enablePin(4, WEB_PIN_OUTPUT); // General outputwebDigitalPinsPage.enablePin(13, WEB_PIN_OUTPUT); // Built-in LEDwebDigitalPinsPage.enablePin(8, WEB_PIN_INPUT); // Sensor inputwebDigitalPinsPage.enablePin(9, WEB_PIN_INPUT); // Switch input
Joystick Configuration
// autoReturn=false: joystick stays at released position// sensitivity=5: updates only when movement exceeds 5%DIYablesWebJoystickPage webJoystickPage(false, 5);
Shared State Variables
State variables keep all pages consistent with the actual hardware values:
int pinStates[16] = { LOW }; // Digital pin states for pins 0-13int currentSlider1 = 64; // Slider 1 value (0-255), starts at 25%int currentSlider2 = 128; // Slider 2 value (0-255), starts at 50%int currentJoystickX = 0; // Last joystick X (-100 to 100)int currentJoystickY = 0; // Last joystick Y (-100 to 100)
Built-in Chat Commands
The example sketch handles the following chat inputs:
hello — Returns a greeting
time — Reports board uptime in seconds
status — Reports system status and LED state
help — Lists recognized commands
ledon — Turns on the built-in LED
ledoff — Turns off the built-in LED
Example exchange:
User: hello
ESP32: Hello! I'm your Arduino. How can I help you?
User: led on
ESP32: Built-in LED is now ON
User: time
ESP32: I've been running for 1245 seconds.
User: status
ESP32: Status: Running smoothly! LED is ON
Adapting the Example
Using Joystick with Motor Control
Map joystick X/Y values to left and right motor speeds using the callback:
Each registered page increases flash and RAM usage. Remove pages not used by your project. The modular design means calling addApp() only for the pages you need is sufficient — unused page classes are not linked.
Please feel free to share the link of this tutorial. However, Please do not use our content on any other websites. We invested a lot of effort and time to create the content, please respect our work!