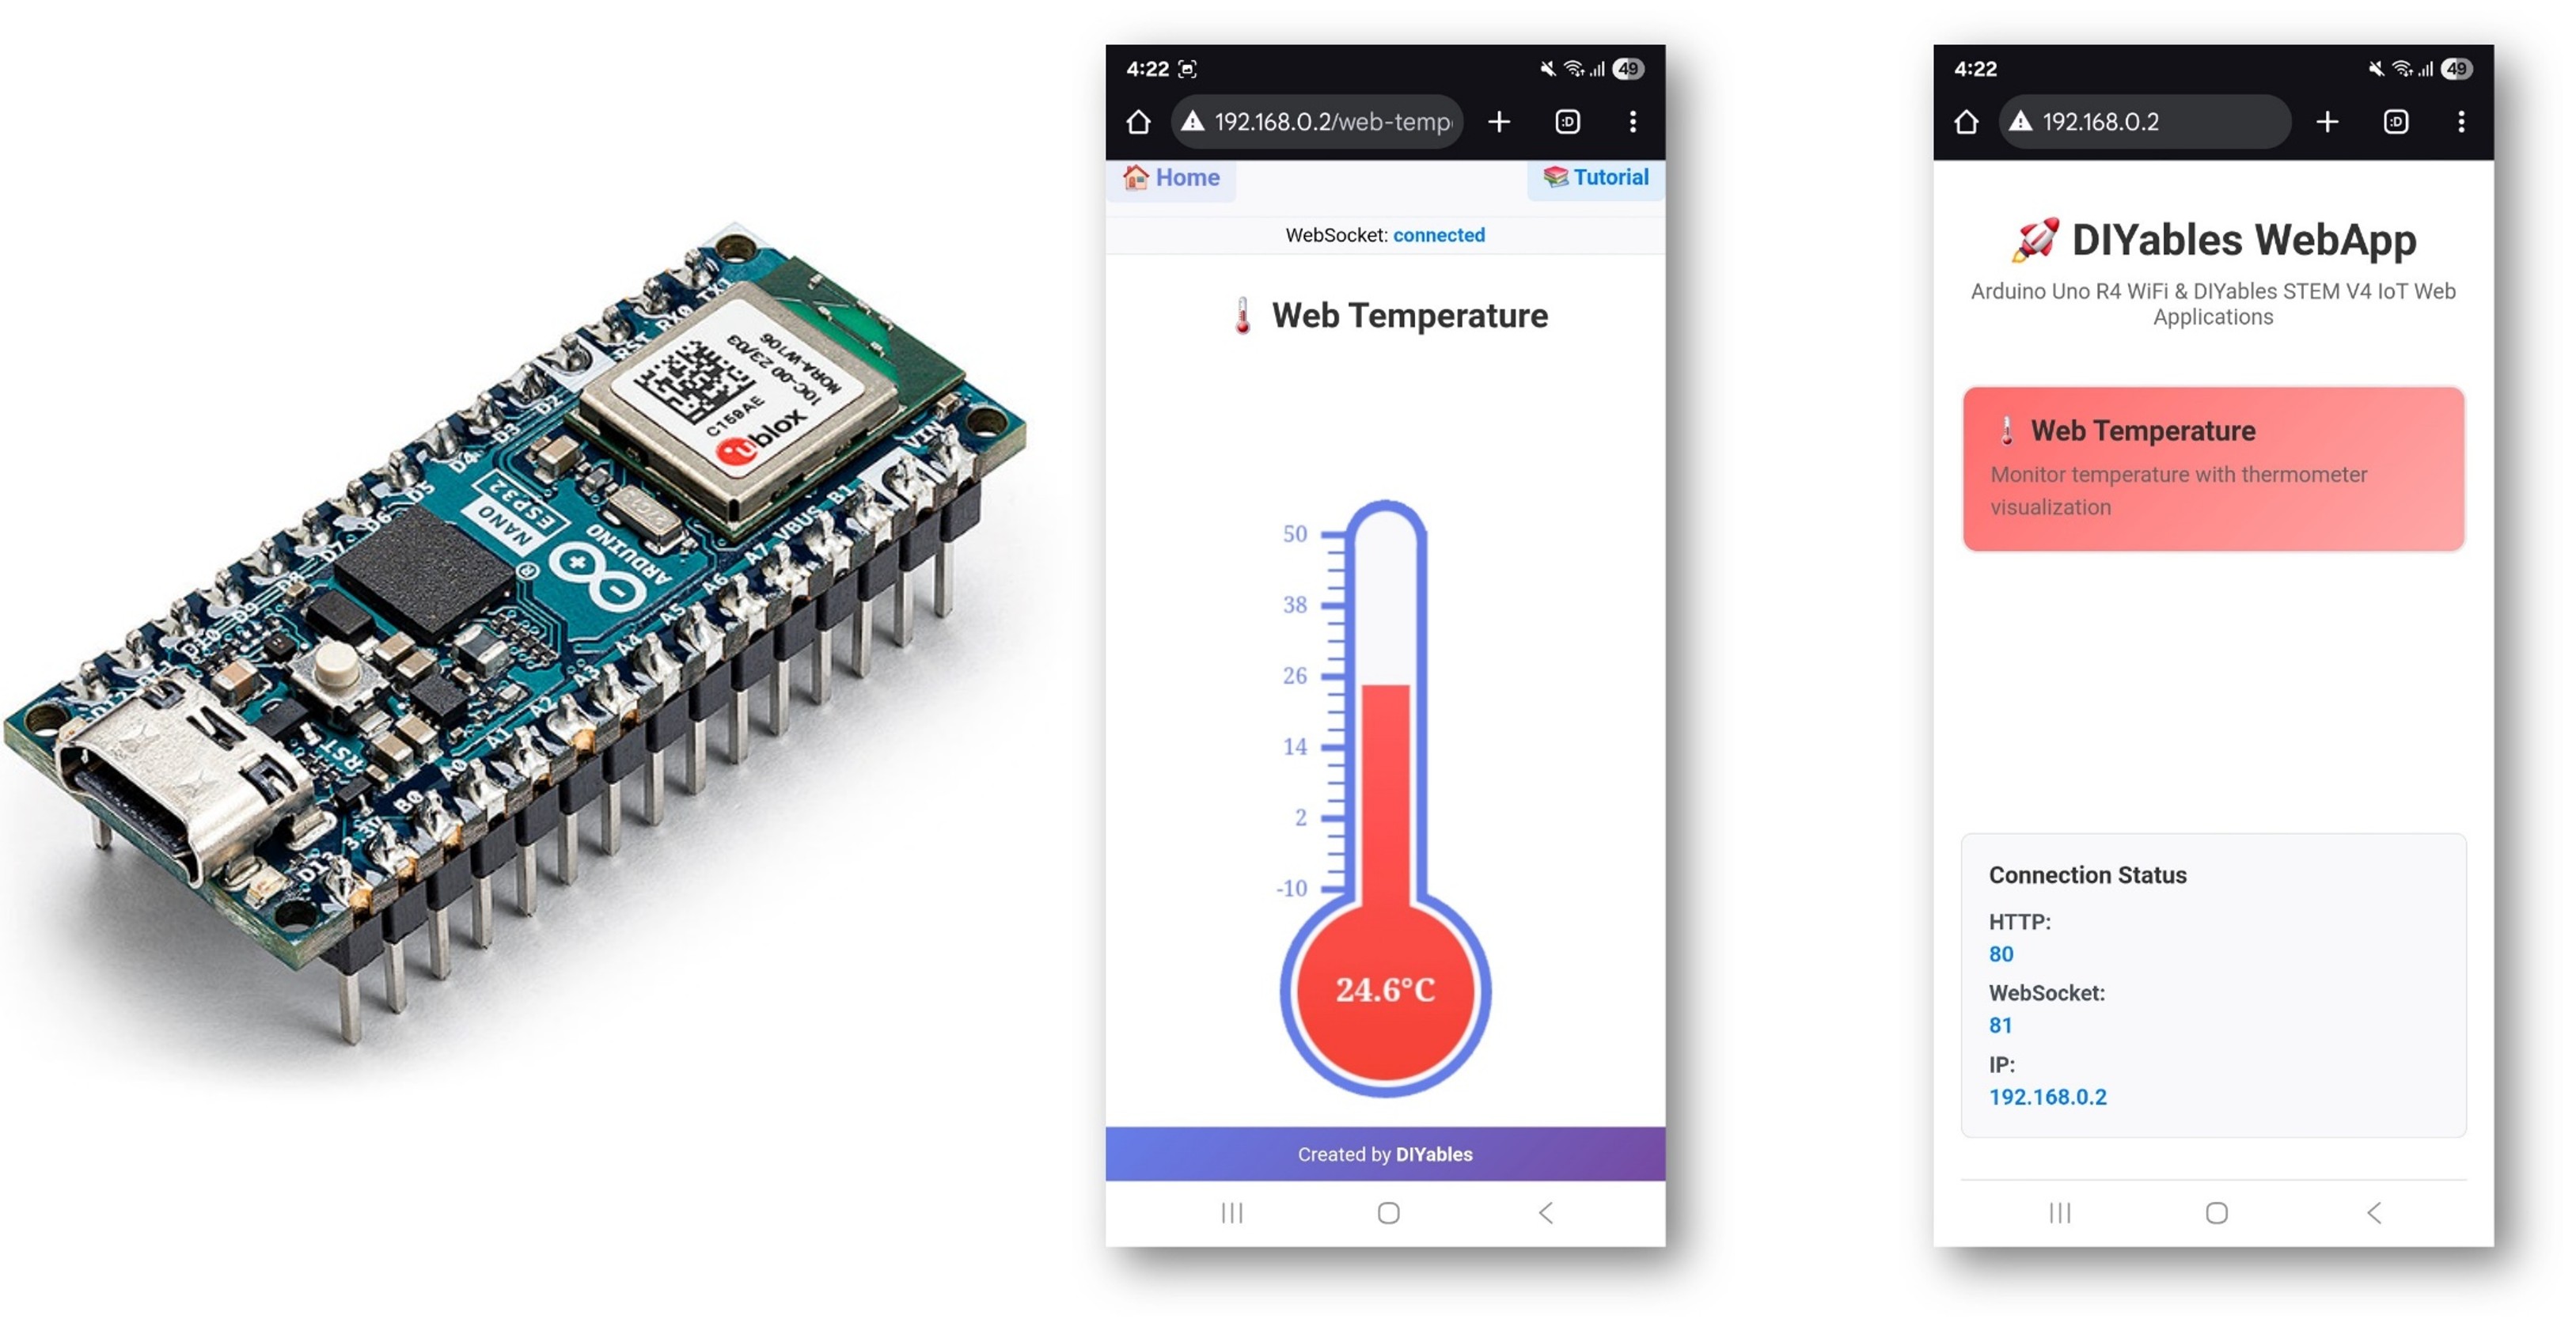
Arduino Nano ESP32 - Web Apps Web Temperature
Overview
This tutorial covers the DIYablesWebTemperaturePage class from the DIYables ESP32 WebApps Library. The browser page renders a mercury-style thermometer that displays a real-time temperature value received from the Arduino Nano ESP32 over WebSocket. The temperature range, units, and scale are configured in the constructor and transmitted to the browser on connection.
Watch a demonstration of the Web Temperature app with a DS18B20 sensor:
What This Tutorial Covers
- Configuring the thermometer range and units in the constructor
- Supplying temperature readings via a callback
- Sending updated values from real sensors (DS18B20, DHT22)
- Accessing the thermometer page from a browser
Hardware Preparation
Or you can buy the following kits:
| 1 | × | DIYables Sensor Kit (18 sensors/displays) |
Additionally, some of these links are for products from our own brand, DIYables .
Buy Note: Many DS18B20 sensors available in the market are unreliable. We strongly recommend buying the sensor from the DIYables brand using the link provided above. We tested it, and it worked reliably.
Steps
Follow these instructions step by step:
- If this is your first time using the Arduino Nano ESP32, refer to the tutorial on setting up the Arduino Nano ESP32 development environment.
- Connect the Arduino Nano ESP32 board to your computer using a USB cable.
- Launch the Arduino IDE on your computer.
- Select the appropriate board (e.g. Arduino Nano ESP32) and COM port.
- Navigate to the Libraries icon on the left bar of the Arduino IDE.
- Search "DIYables ESP32 WebApps", then find the DIYables ESP32 WebApps Library by DIYables
- Click Install button to install the library.
- Search for DIYables ESP32 WebApps created by DIYables and click the Install button.
- You will be asked for installing some other library dependencies
- Click Install All button to install all library dependencies.
- On Arduino IDE, Go to File Examples DIYables ESP32 WebApps WebTemperature example, or copy the above code and paste it to the editor of Arduino IDE
- Update the WiFi credentials in the sketch:
- Click Upload button on Arduino IDE to upload code to Arduino Nano ESP32
- Open the Serial Monitor
- The Serial Monitor output should resemble the following:
- If nothing appears, press the reset button on the board.
- Enter the IP address from the Serial Monitor into a browser on the same network.
- Example: http://192.168.0.2
- The home page shows a card for the temperature application:

- Select the Web Temperature card to open the thermometer page:
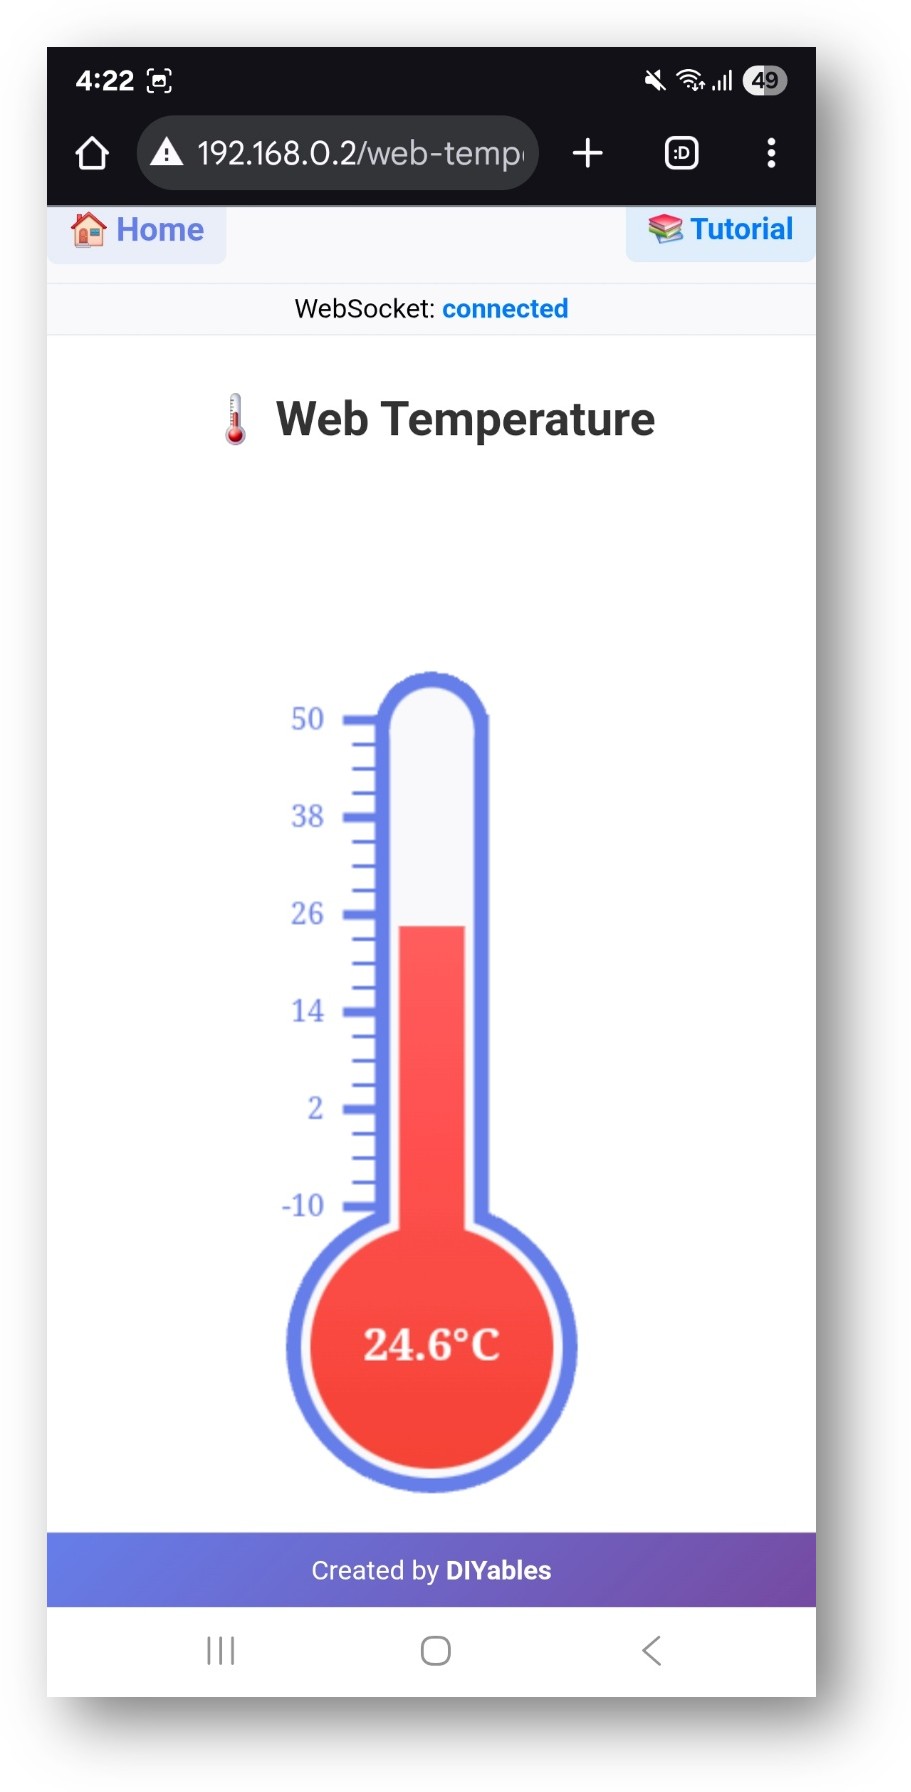
- The page is also directly accessible at http://192.168.0.2/web-temperature.
Thermometer Configuration
Constructor
Set the minimum temperature, maximum temperature, and unit string in the constructor. These values are sent to the browser on connection and determine the scale of the thermometer.
Common configurations:
| Min | Max | Unit |
|---|---|---|
| -10.0 | 50.0 | °C |
| 32.0 | 122.0 | °F |
| 263.15 | 323.15 | K |
Callback
Register onTemperatureValueRequested to supply a reading each time the browser requests an update:
Sending a Value
Inside the callback function, read the sensor and call sendTemperatureValue():
Reading from Real Sensors
DS18B20 (1-Wire)
DHT22 (Single-Wire)
Troubleshooting
Thermometer shows no value
- Verify onTemperatureValueRequested is registered before webAppsServer.begin()
- Confirm sendTemperatureValue() is called inside the callback
Sensor returns NaN
- For DS18B20: verify OneWire data pin and pull-up resistor (4.7 kΩ between data and 3.3 V)
- For DHT22: add a 10 kΩ pull-up on the data line; minimum read interval is 2 s
Mercury level does not match expected value
- Check that the reported value is within the configured min/max range
- Values outside the range are clamped at the thermometer boundaries
Page not reachable
- Check the IP address from the Serial Monitor
- Confirm the board and browser device are on the same WiFi network