Arduino Nano ESP32 - Web Apps Web Monitor
Overview
This tutorial covers the DIYablesWebMonitorPage class from the DIYables ESP32 WebApps Library. The page provides a terminal-style interface in the browser. Text sent from the sketch appears in the browser display; text typed in the browser is delivered to a sketch callback. This allows monitoring and commanding the Arduino Nano ESP32 from any device on the same network without a USB serial connection.
Watch this step-by-step video tutorial demonstrating how to use WebMonitor with the DIYables ESP32 WebApps:
What This Tutorial Covers
- Sending sketch output to the browser monitor using sendToWebMonitor()
- Receiving browser-typed commands in a sketch callback
- Processing built-in commands such as LED control and status queries
- Accessing the monitor interface from a smartphone or PC
Hardware Preparation
Or you can buy the following kits:
| 1 | × | DIYables Sensor Kit (18 sensors/displays) |
Additionally, some of these links are for products from our own brand, DIYables .
Steps
Follow these instructions step by step:
- If this is your first time using the Arduino Nano ESP32, refer to the tutorial on setting up the Arduino Nano ESP32 development environment.
- Connect the Arduino Nano ESP32 board to your computer using a USB cable.
- Launch the Arduino IDE on your computer.
- Select the appropriate board (e.g. Arduino Nano ESP32) and COM port.
- Navigate to the Libraries icon on the left bar of the Arduino IDE.
- Search "DIYables ESP32 WebApps", then find the DIYables ESP32 WebApps Library by DIYables
- Click Install button to install the library.
- Search for DIYables ESP32 WebApps created by DIYables and click the Install button.
- You will be asked for installing some other library dependencies
- Click Install All button to install all library dependencies.
- On Arduino IDE, Go to File Examples DIYables ESP32 WebApps WebMonitor example, or copy the above code and paste it to the editor of Arduino IDE
- Update the WiFi credentials in the sketch:
- Click Upload button on Arduino IDE to upload code to Arduino Nano ESP32
- Open the Serial Monitor
- The Serial Monitor output should resemble the following:
- If nothing appears, press the reset button on the board.
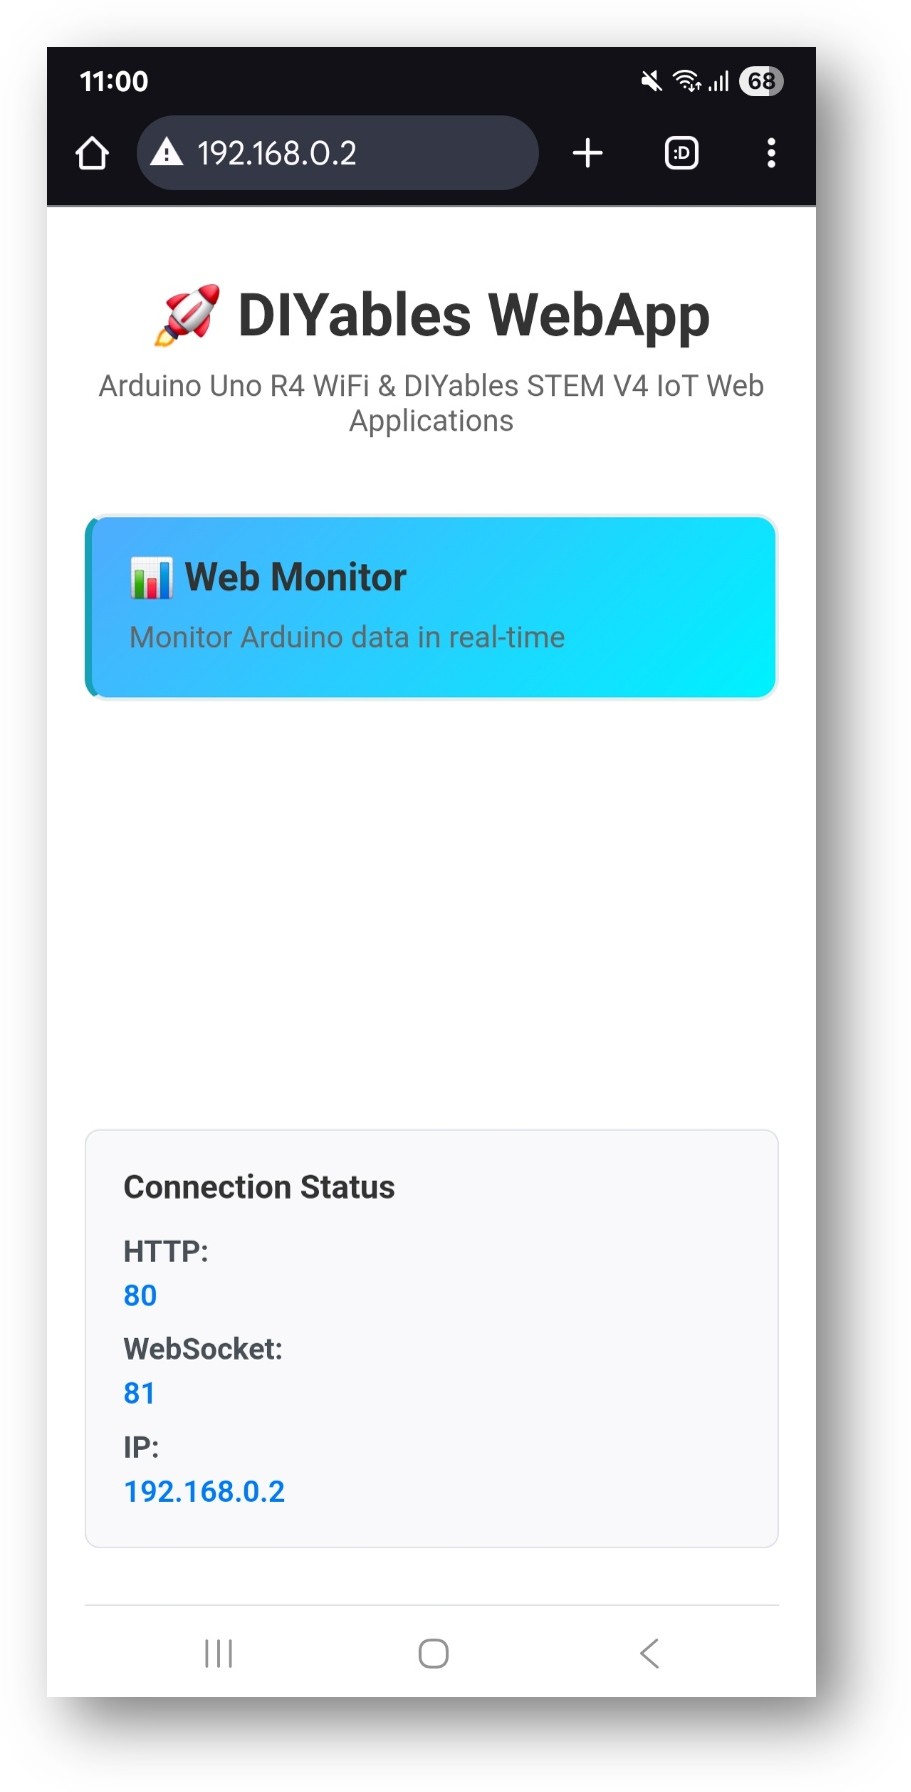
- Enter the IP address from the Serial Monitor into a browser on the same network.
- Example: http://192.168.0.2
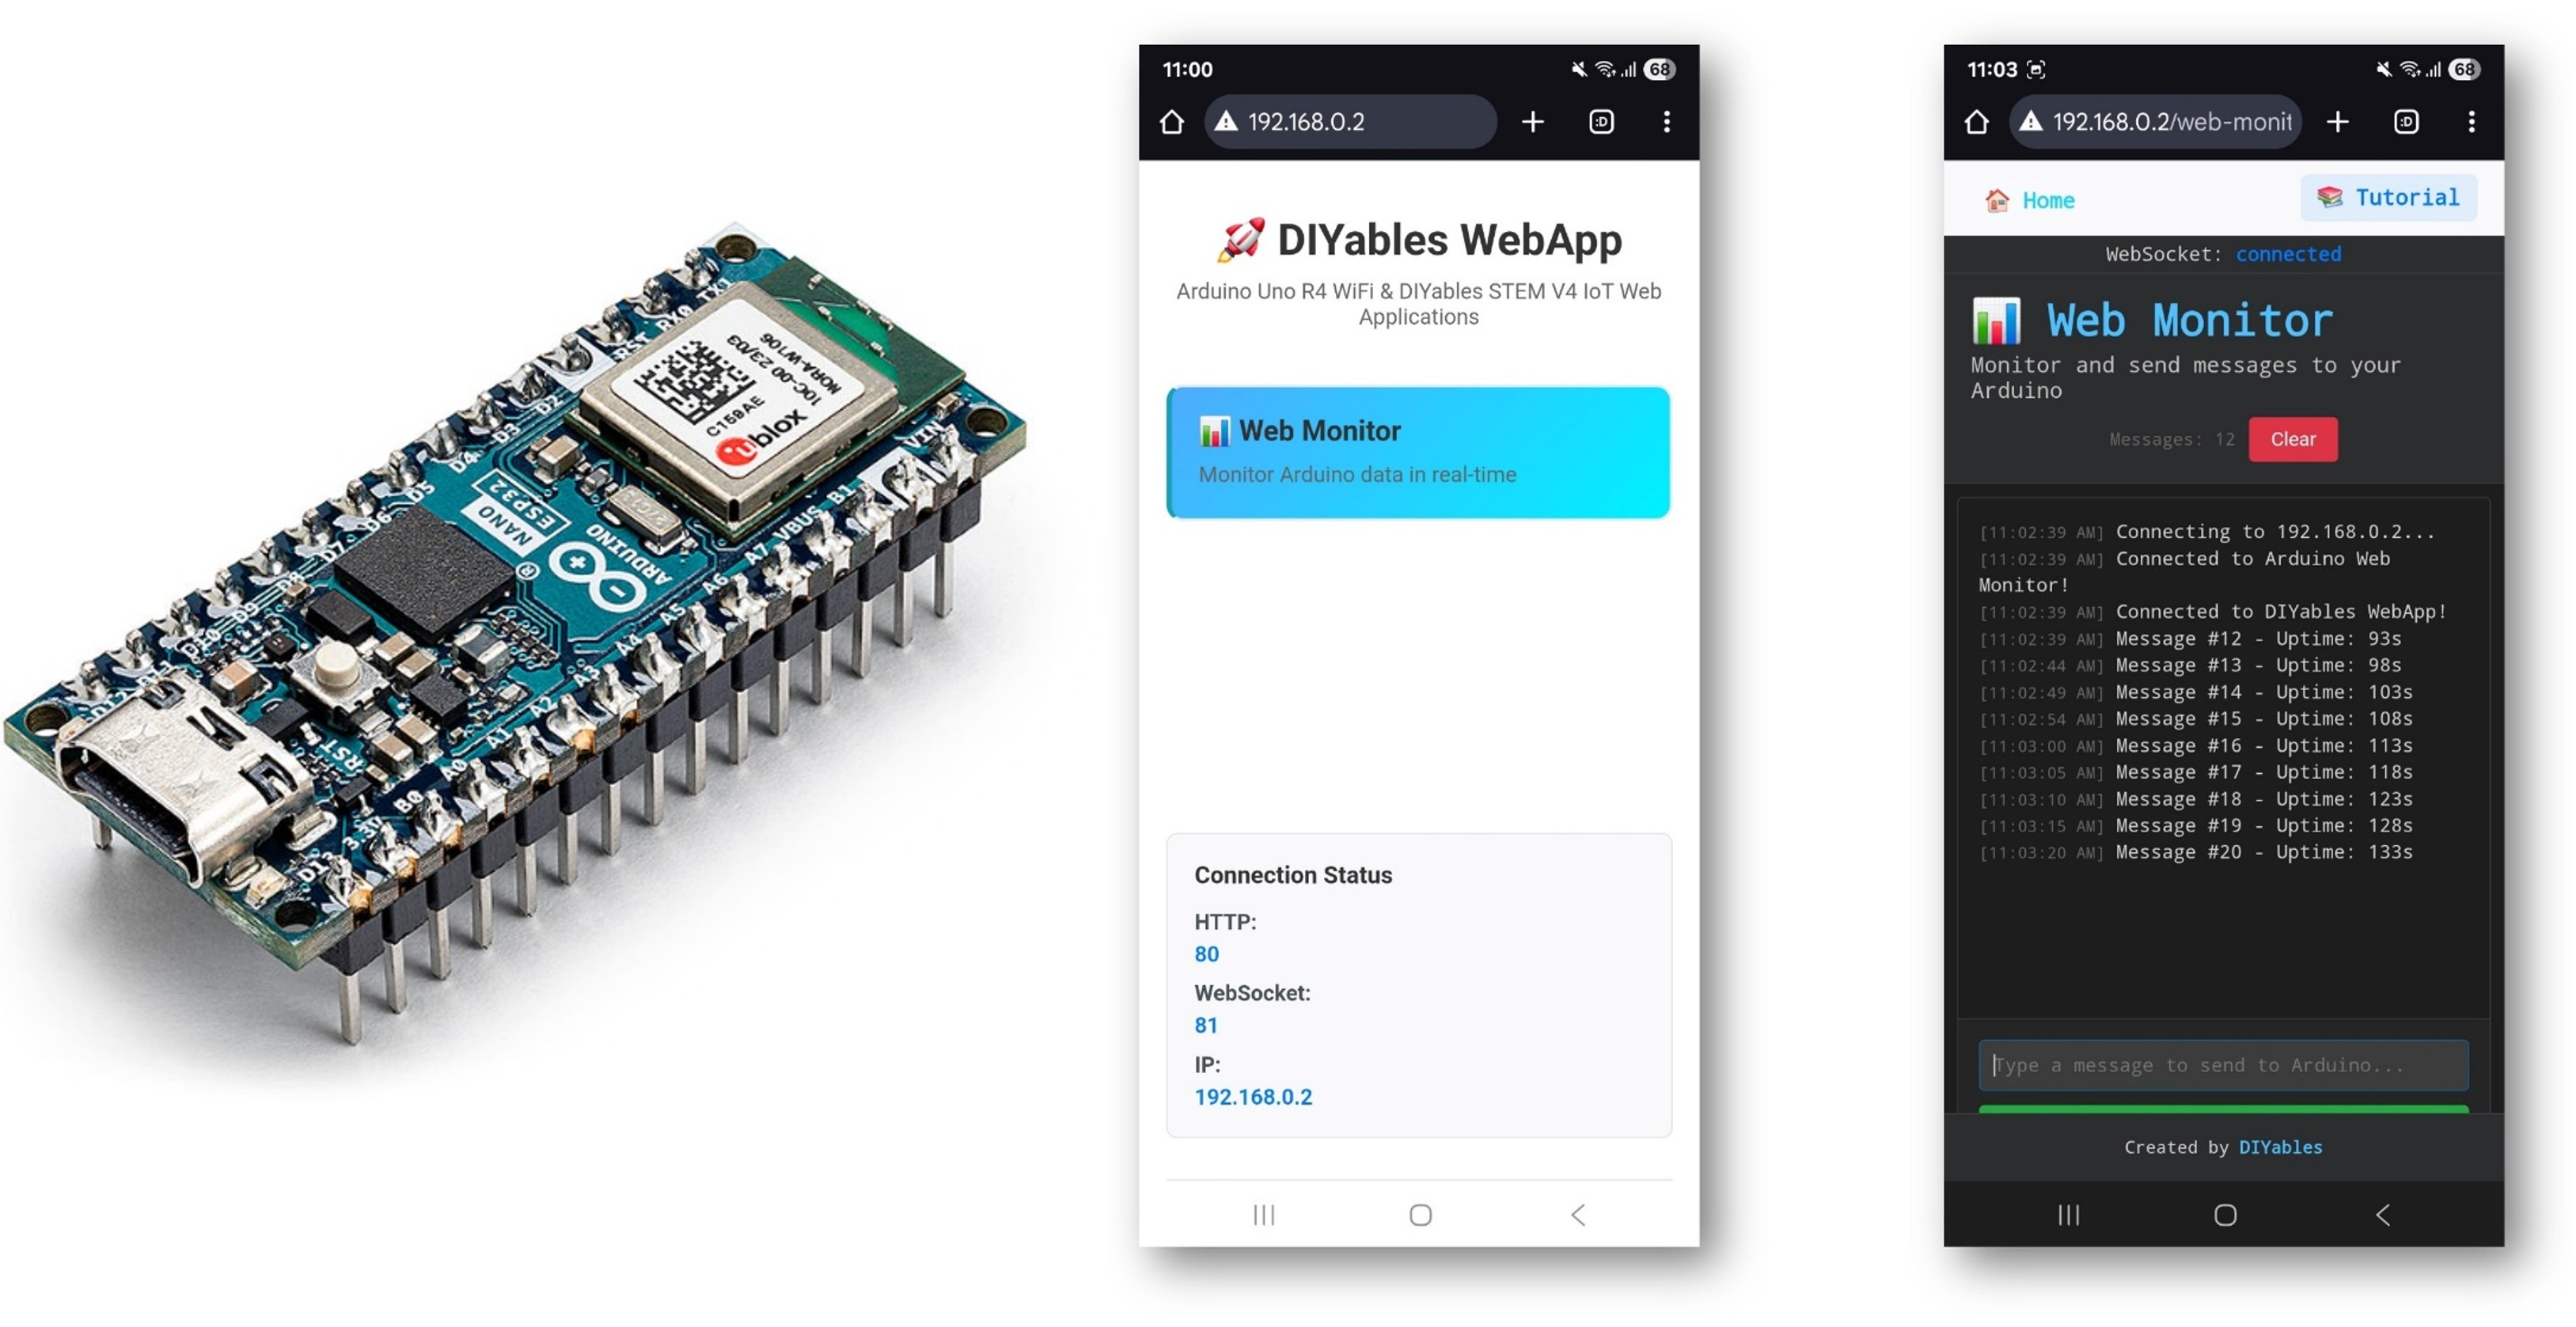
- The home page shows a card for the monitor application:
- Select the Web Monitor card to open the terminal interface:
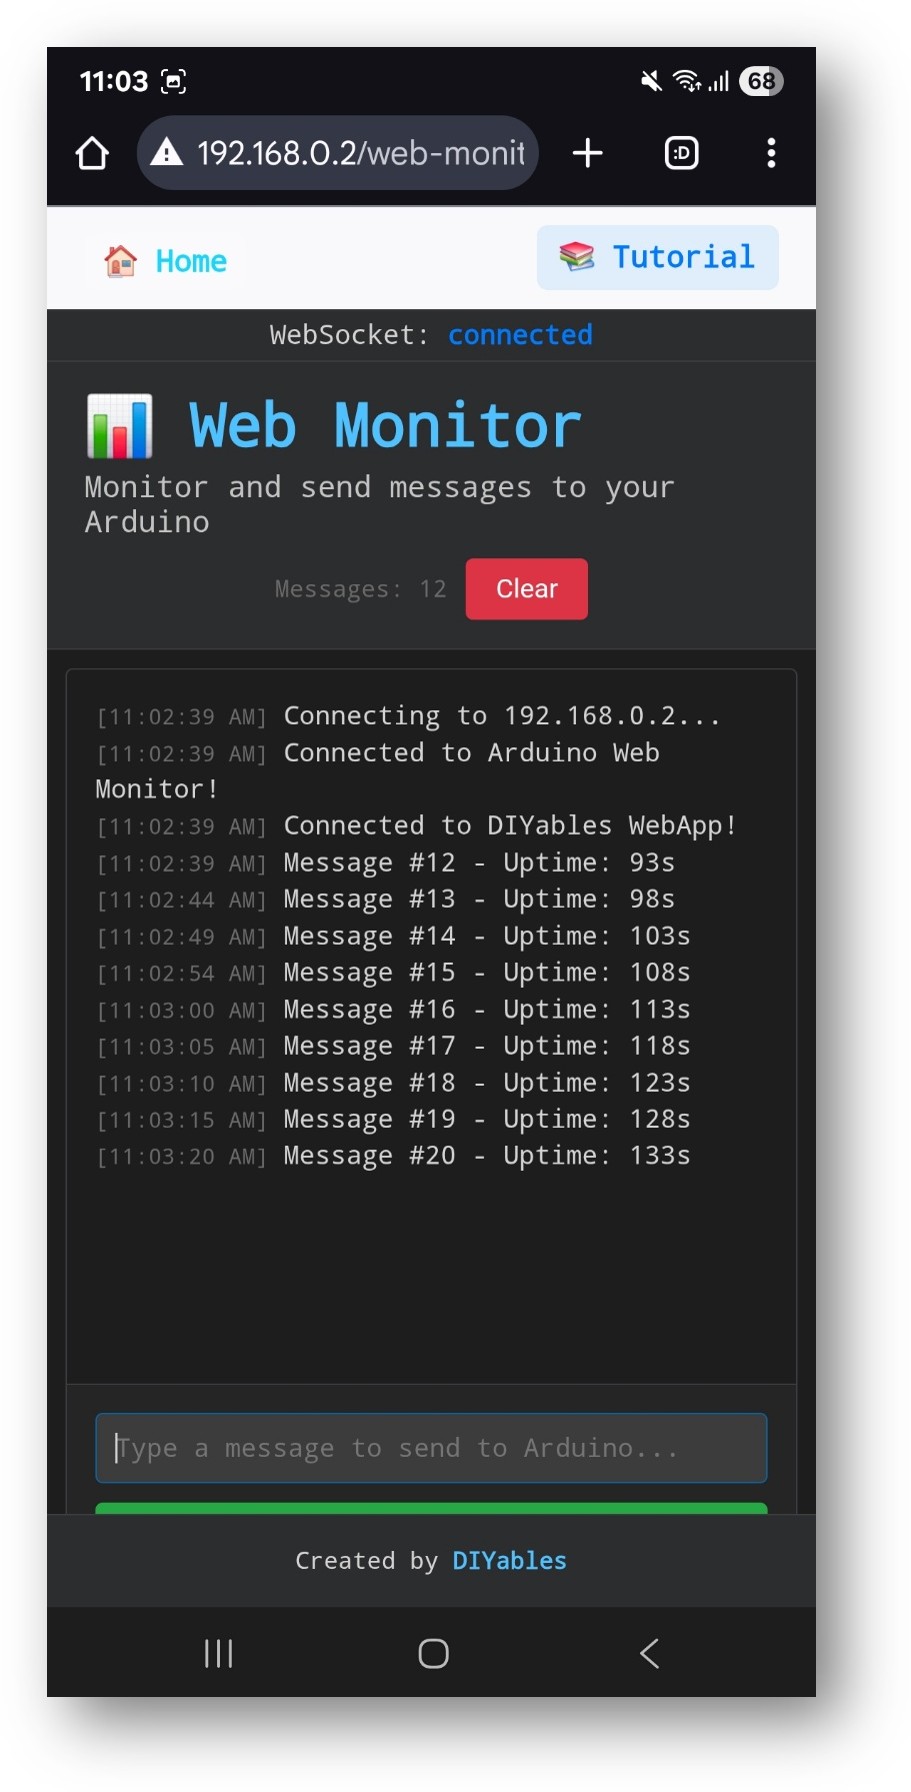
- The page is also directly accessible at http://192.168.0.2/web-monitor.
- Type commands in the input field and press Enter. The board responds and the reply appears in the terminal.
Built-in Commands
The example sketch recognizes the following commands entered in the browser:
| Command | Action |
|---|---|
| led on | Turns on the built-in LED |
| led off | Turns off the built-in LED |
| led toggle | Toggles the LED state |
| blink | Blinks the LED 3 times |
| status | Prints board status and uptime |
| help | Lists recognized commands |
| reset counter | Resets the message counter |
| memory | Reports free heap memory |
| test | Sends a test message |
| echo [text] | Returns the supplied text |
| repeat [n] [text] | Repeats the text n times |
Sending Data from the Sketch
Call sendToWebMonitor() anywhere in the sketch to push text to the browser:
Receiving Commands from the Browser
Register a callback to process text typed in the browser input field:
Troubleshooting
Monitor shows no output from the sketch
- Verify sendToWebMonitor() is being called; add a Serial.println() alongside it to confirm execution
- Check the WebSocket status indicator in the browser
- Ensure webAppsServer.loop() runs on every loop() iteration without blocking delays
Commands sent from browser are not received
- Confirm onWebMonitorMessage is registered before webAppsServer.begin()
- Check the Serial Monitor for the raw command text
Cannot open the page
- Verify the IP address shown in the Serial Monitor
- Ensure the browser device and board are on the same 2.4 GHz WiFi network