
Arduino UNO R4 - NTC Thermistor Temperature Sensor
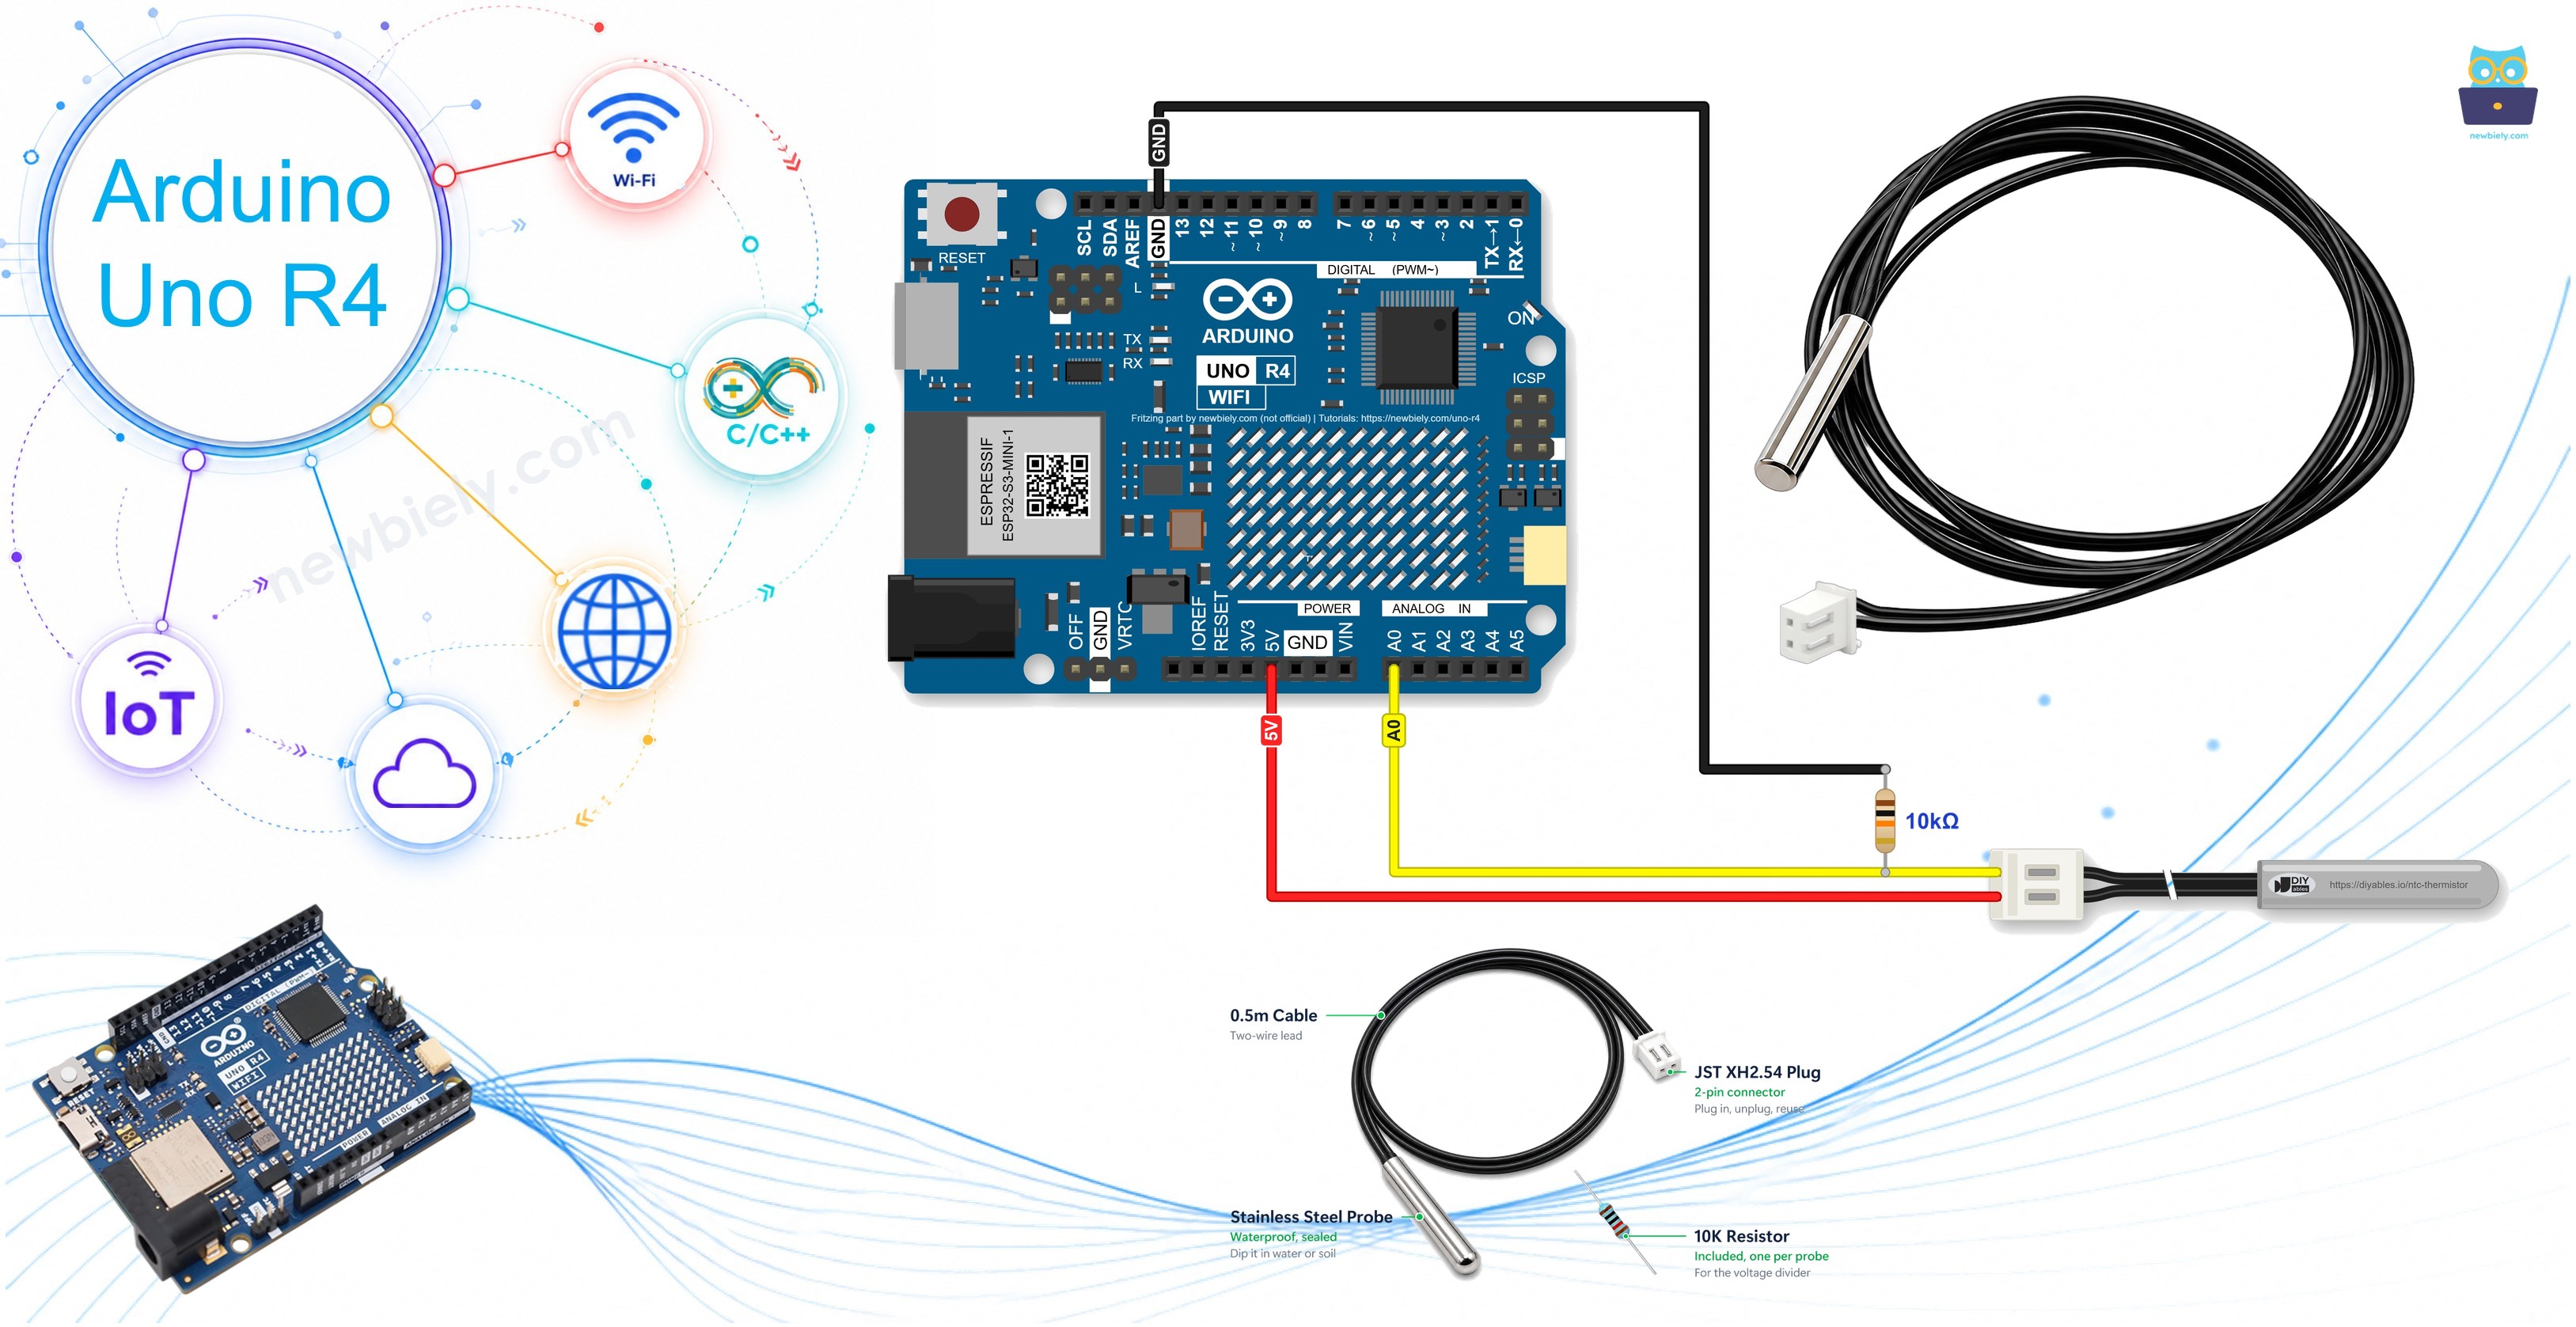
In this guide, we will learn how to use a waterproof 10K NTC thermistor probe with the Arduino UNO R4. The steel tip of this probe holds no chip at all, only a tiny resistor that reacts strongly to heat. That makes it cheap, tough and happy under water, so it fits places where a normal sensor board would not survive: a fish tank, a fridge, or a jar of home brew. In detail, we will learn:
- What an NTC thermistor is, and why its resistance drops when the tip gets warmer.
- How to build a voltage divider from the probe and its 10K resistor on the 5V and A0 pins of the Arduino UNO R4 WiFi or Minima.
- How to switch the ADC of the Arduino UNO R4 to 14 bits and average ten readings.
- How to turn the reading into ohms, and the ohms into °C and °F with the B (beta) formula.
Hardware Preparation
Or you can buy the following kits:
| 1 | × | DIYables STEM V4 IoT Starter Kit (Arduino included) | |
| 1 | × | DIYables STEM V4B IoT Starter Kit (Arduino included) | |
| 1 | × | DIYables Sensor Kit (18 sensors/displays) |
Additionally, some of these links are for products from our own brand, DIYables .
Overview of NTC Thermistor Temperature Sensor
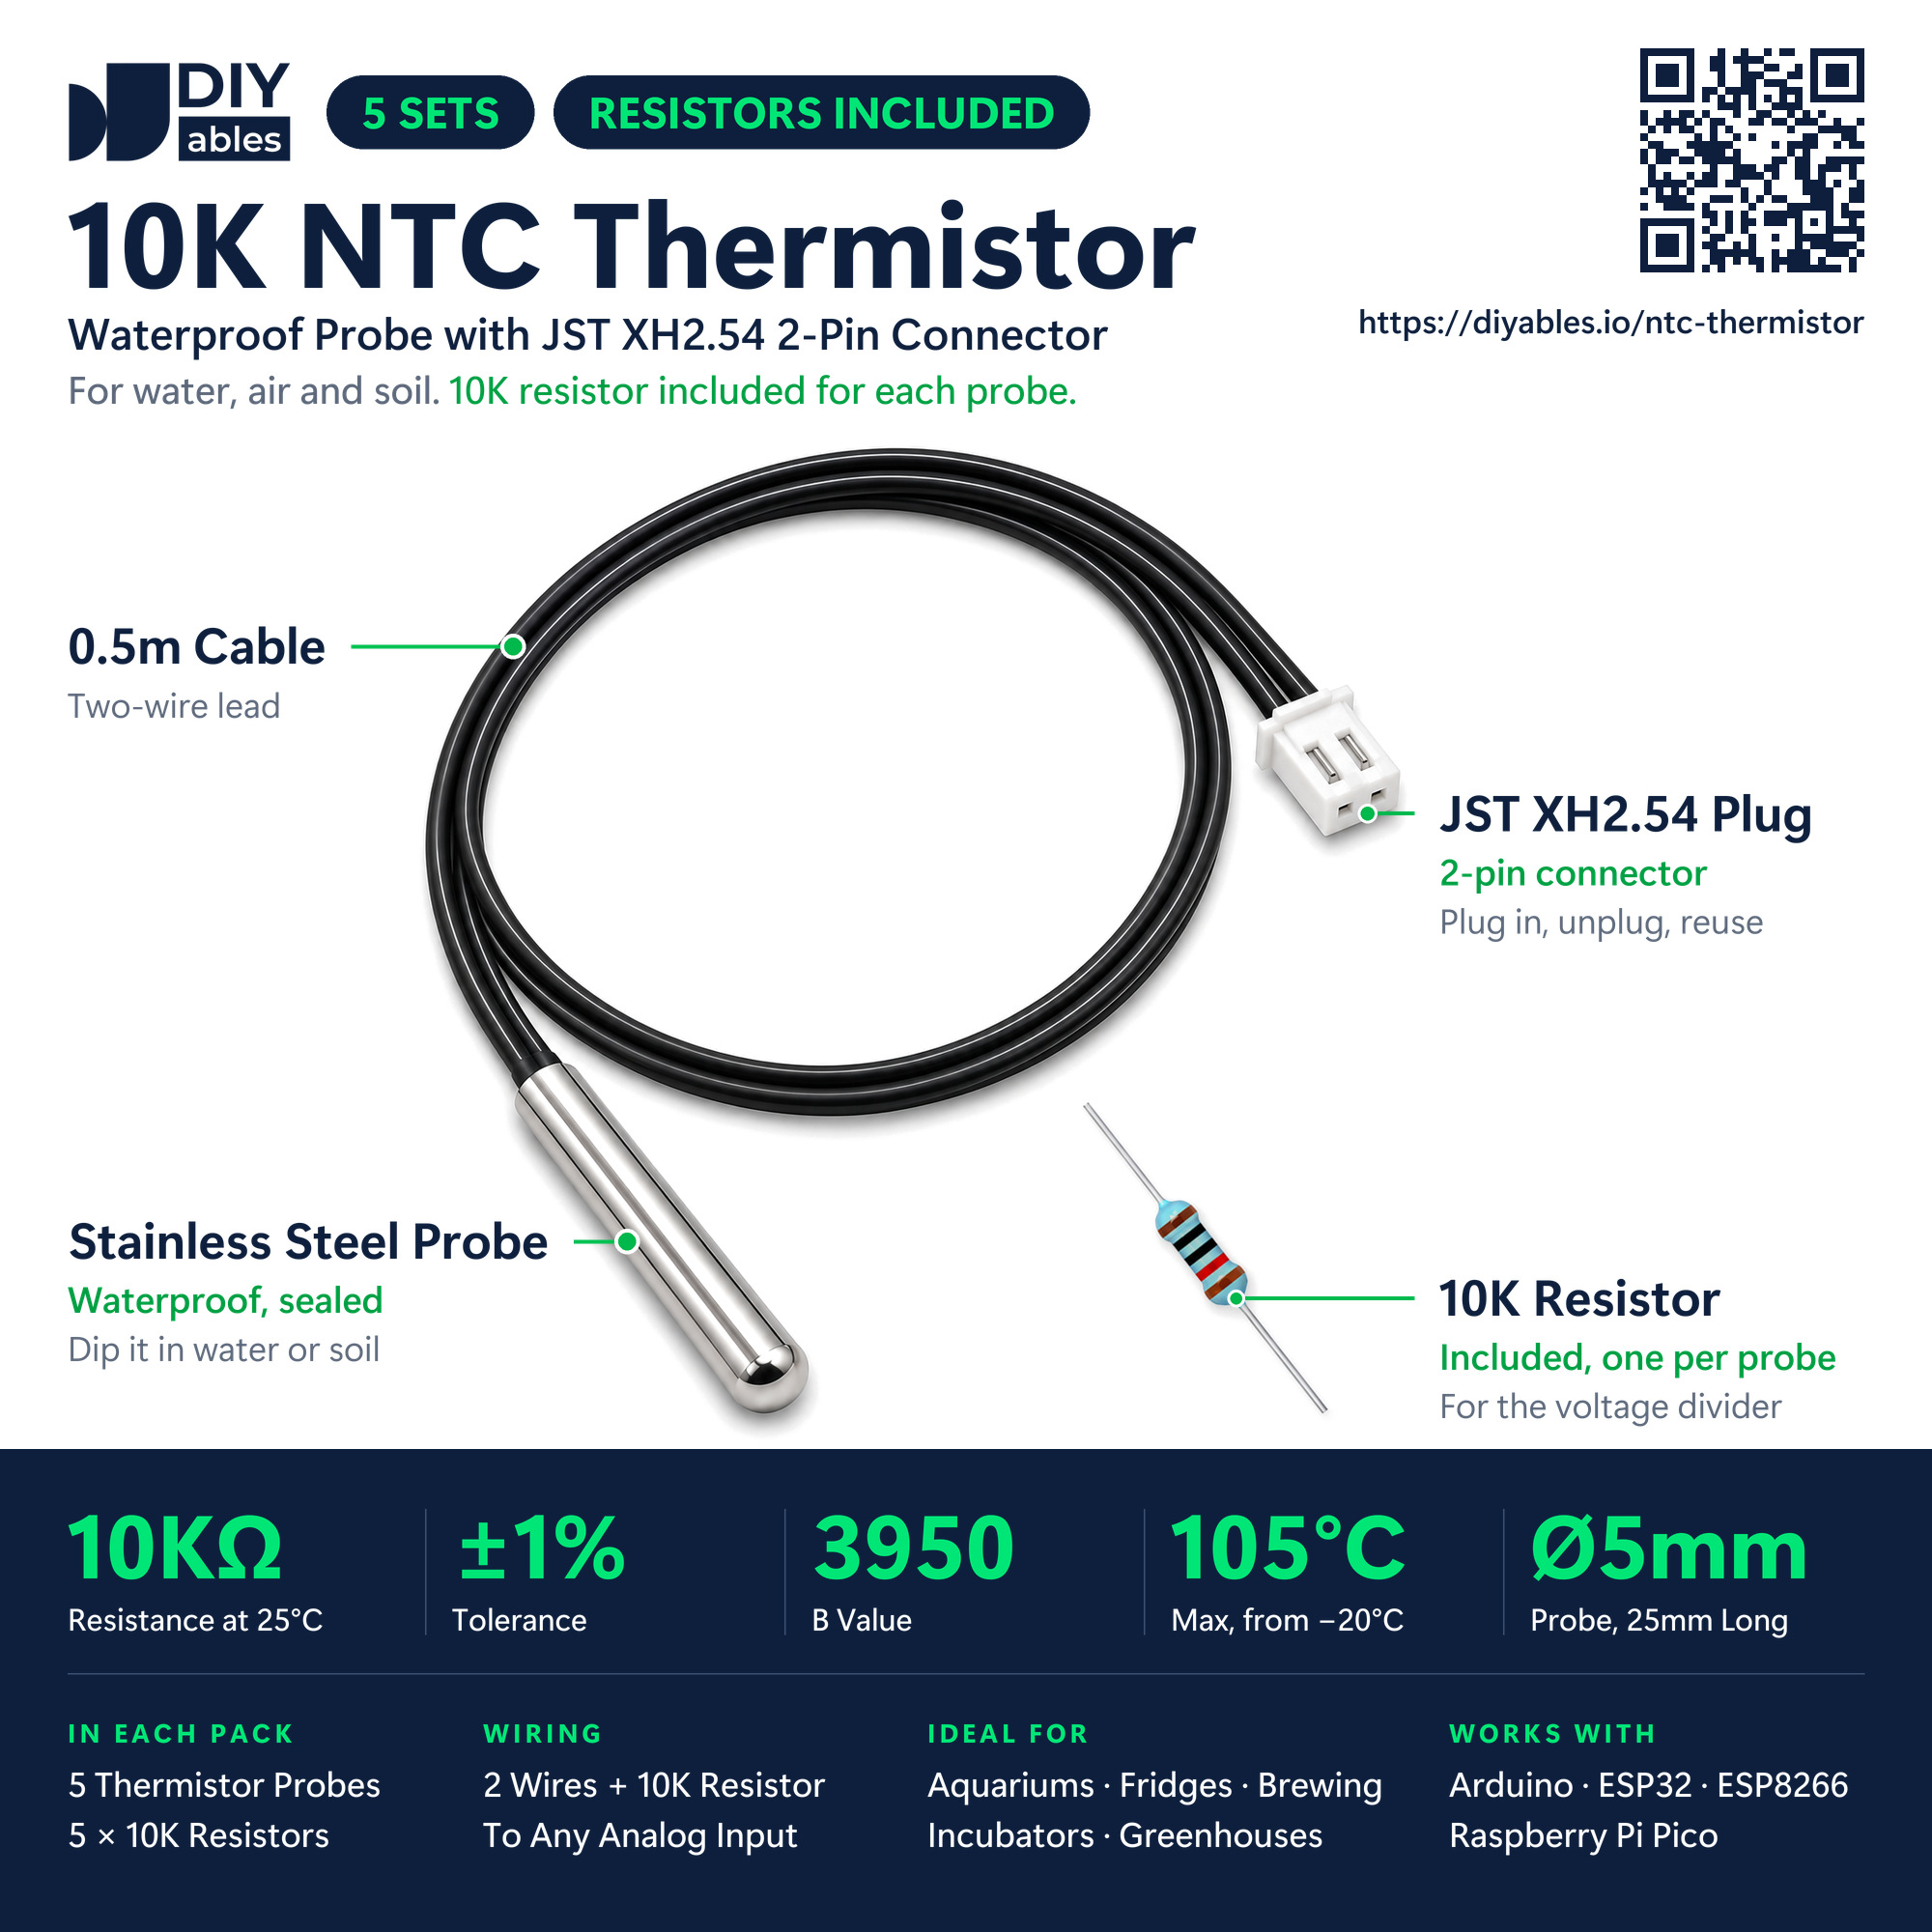
The DIYables probe seals a 10K NTC thermistor inside a stainless-steel tube with a round end, 5mm wide and 25mm long. A black two-wire cable, 0.5m long, runs from the tube to a white JST XH2.54 2-pin plug. There is no small board and no chip here, so the Arduino UNO R4 cannot read the probe on its own. It needs a second resistor of the same value. That is why every probe in the pack of five comes with its own matching 10K resistor.
| DIYables 10K NTC Thermistor Probe | |
|---|---|
| Sensor type | NTC thermistor |
| Resistance at 25°C | 10kΩ, ±1% |
| B value (beta) | 3950 |
| Temperature range | -20°C to 105°C |
| Probe | stainless steel, waterproof, 5mm x 25mm, round tip |
| Cable | 0.5m, 2 wires |
| Connector | JST XH2.54, 2 pins |
| Dissipation constant | 5mW/°C (typical) |
| In the pack | 5 probes and 5 matching 10K resistors |
The two wires have no polarity, because a thermistor is simply a resistor. Push a male jumper wire into each hole of the white plug, then:
- Either probe wire: connect to the 5V pin of the Arduino UNO R4.
- The other probe wire: connect to A0, and also to one leg of the 10K resistor.
- The free leg of the 10K resistor: connect to GND.
How It Works
A thermistor is a resistor whose value changes a lot with temperature. NTC stands for Negative Temperature Coefficient: when the tip warms up, its resistance goes down. The Arduino UNO R4 cannot measure ohms, but it can measure a voltage. With the 10K resistor placed below the probe, a warmer probe lifts the voltage on A0, and a colder probe lets it sink. The code reads that voltage, works out the resistance of the probe, and turns the resistance into degrees.
| Temperature | Probe resistance | Voltage on A0 | analogRead() at 14 bits |
|---|---|---|---|
| 5°C | about 25.9kΩ | 1.39V | 4560 |
| 15°C | about 15.8kΩ | 1.94V | 6341 |
| 25°C | 10.0kΩ | 2.50V | 8192 |
| 40°C | about 5.3kΩ | 3.27V | 10707 |
| 85°C | about 1.1kΩ | 4.51V | 14777 |
The resistance does not follow a straight line, so the code uses the B-parameter equation (often called the beta formula):
1/T = 1/T0 + (1/B) × ln(R/R0)
- T is the temperature in kelvin. Subtract 273.15 to get °C.
- T0 = 298.15K (25°C), and R0 = 10000Ω is the probe's resistance at that temperature.
- B = 3950, the B value of this probe.
- R is the resistance that the Arduino UNO R4 has just worked out.
If you search online you will also find the Steinhart-Hart equation. It needs three calibration numbers instead of one and wins only over very wide ranges, so this guide keeps the simpler B formula. At ordinary room temperatures the UNO R4 reading is typically about 1°C from a reference thermometer, mainly because of the 10K resistor tolerance and the ADC.
Two other temperature pages for the Arduino UNO R4 may fit your project better:
- A waterproof probe that is digital, with no resistor and no math: Arduino UNO R4 - Temperature Sensor (DS18B20).
- Hotter than 105°C, such as an oven or a grill: Arduino UNO R4 - MAX6675 Thermocouple Module.
Wiring Diagram
The probe and the 10K resistor make a voltage divider between 5V and GND, and A0 reads the point in the middle. Use the 5V pin, not 3.3V. By default, analogRead() on the Arduino UNO R4 measures against 5V, so a divider fed from that same 5V gives a clean ratio. If your USB port gives 4.9V instead of 5V, both sides move together, and the temperature does not change.
In the diagram, the resistor joins the A0 wire and the GND wire directly. On your desk, a small breadboard makes this three-way joint easy. No breadboard? Twist or solder the resistor legs onto the jumper wires, then cover the bare metal with tape or heat-shrink tubing.
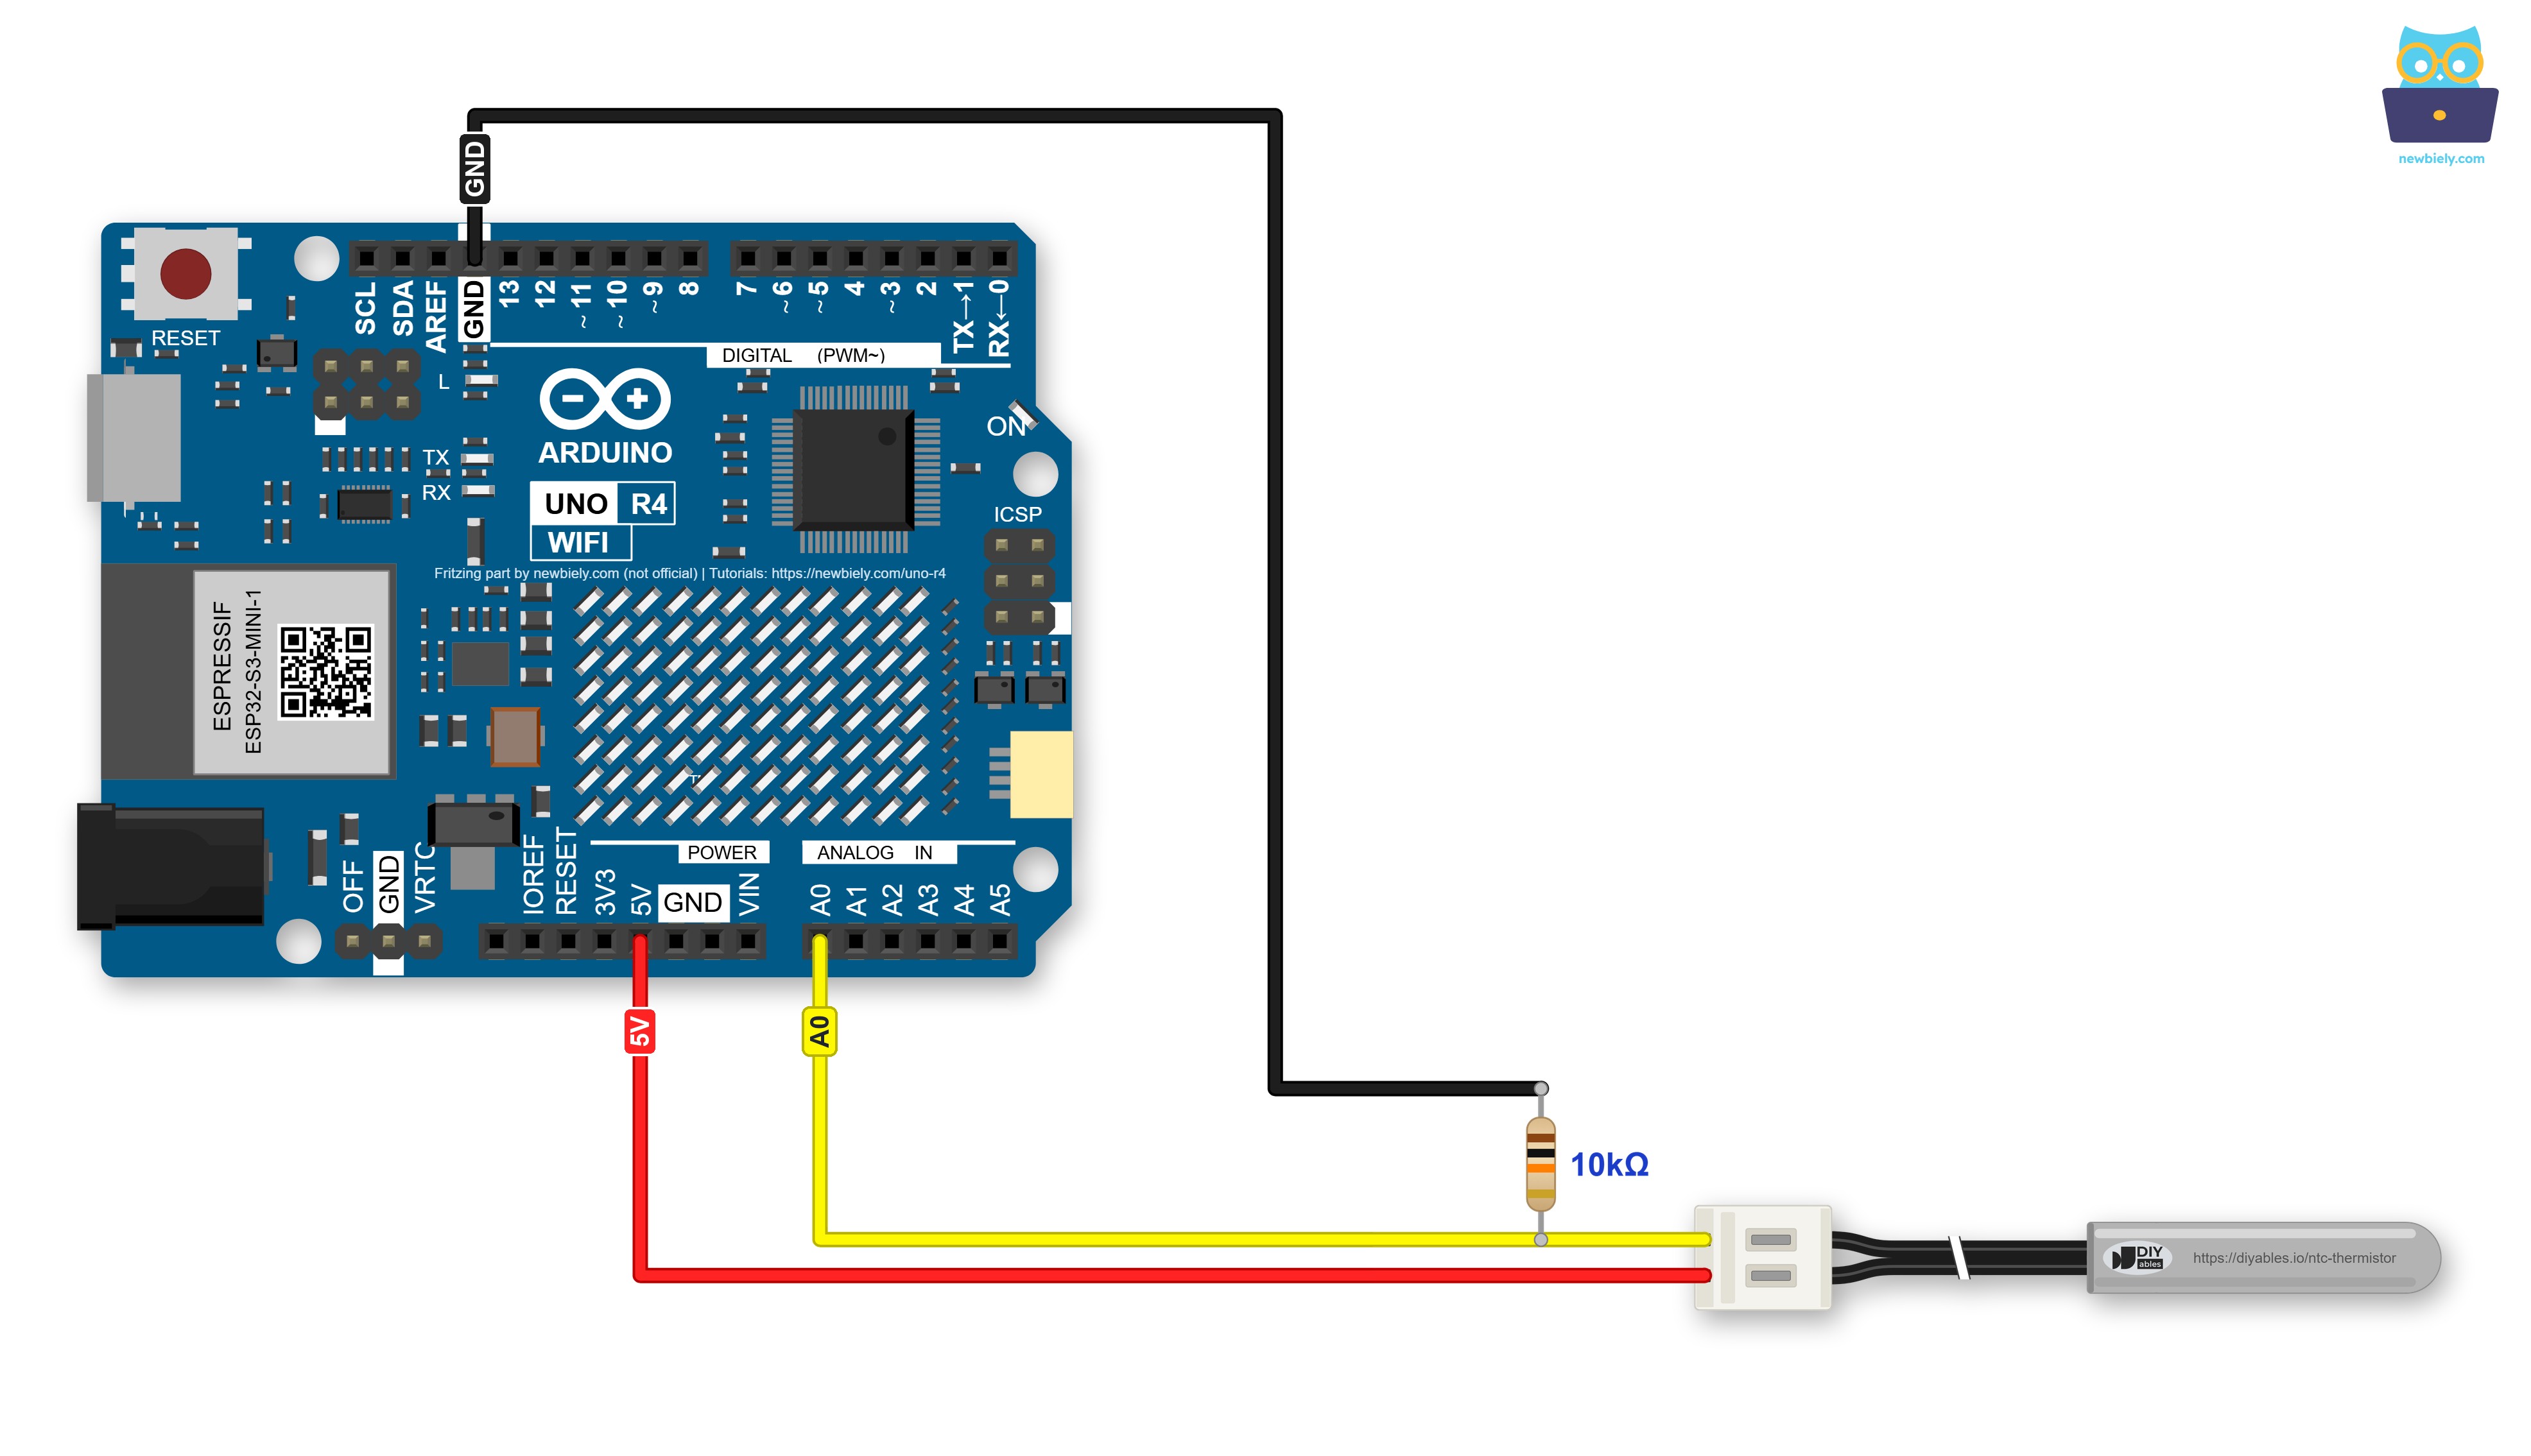
This image is created using Fritzing. Click to enlarge image
| NTC Probe Part | Arduino UNO R4 Pin |
|---|---|
| Probe wire A (either one) | 5V |
| Probe wire B | A0 |
| 10K resistor, first leg | A0 |
| 10K resistor, second leg | GND |
If the project will run for a long time, or sit inside a box, it is better to fix the wires with screws. A Screw Shield V2 or a Proto Screw Terminal Block Shield solves this. Plug it into the Arduino UNO R4 and screw the wires in. The wiring stays the same. Only the wires now go to the screw terminals, as shown below.
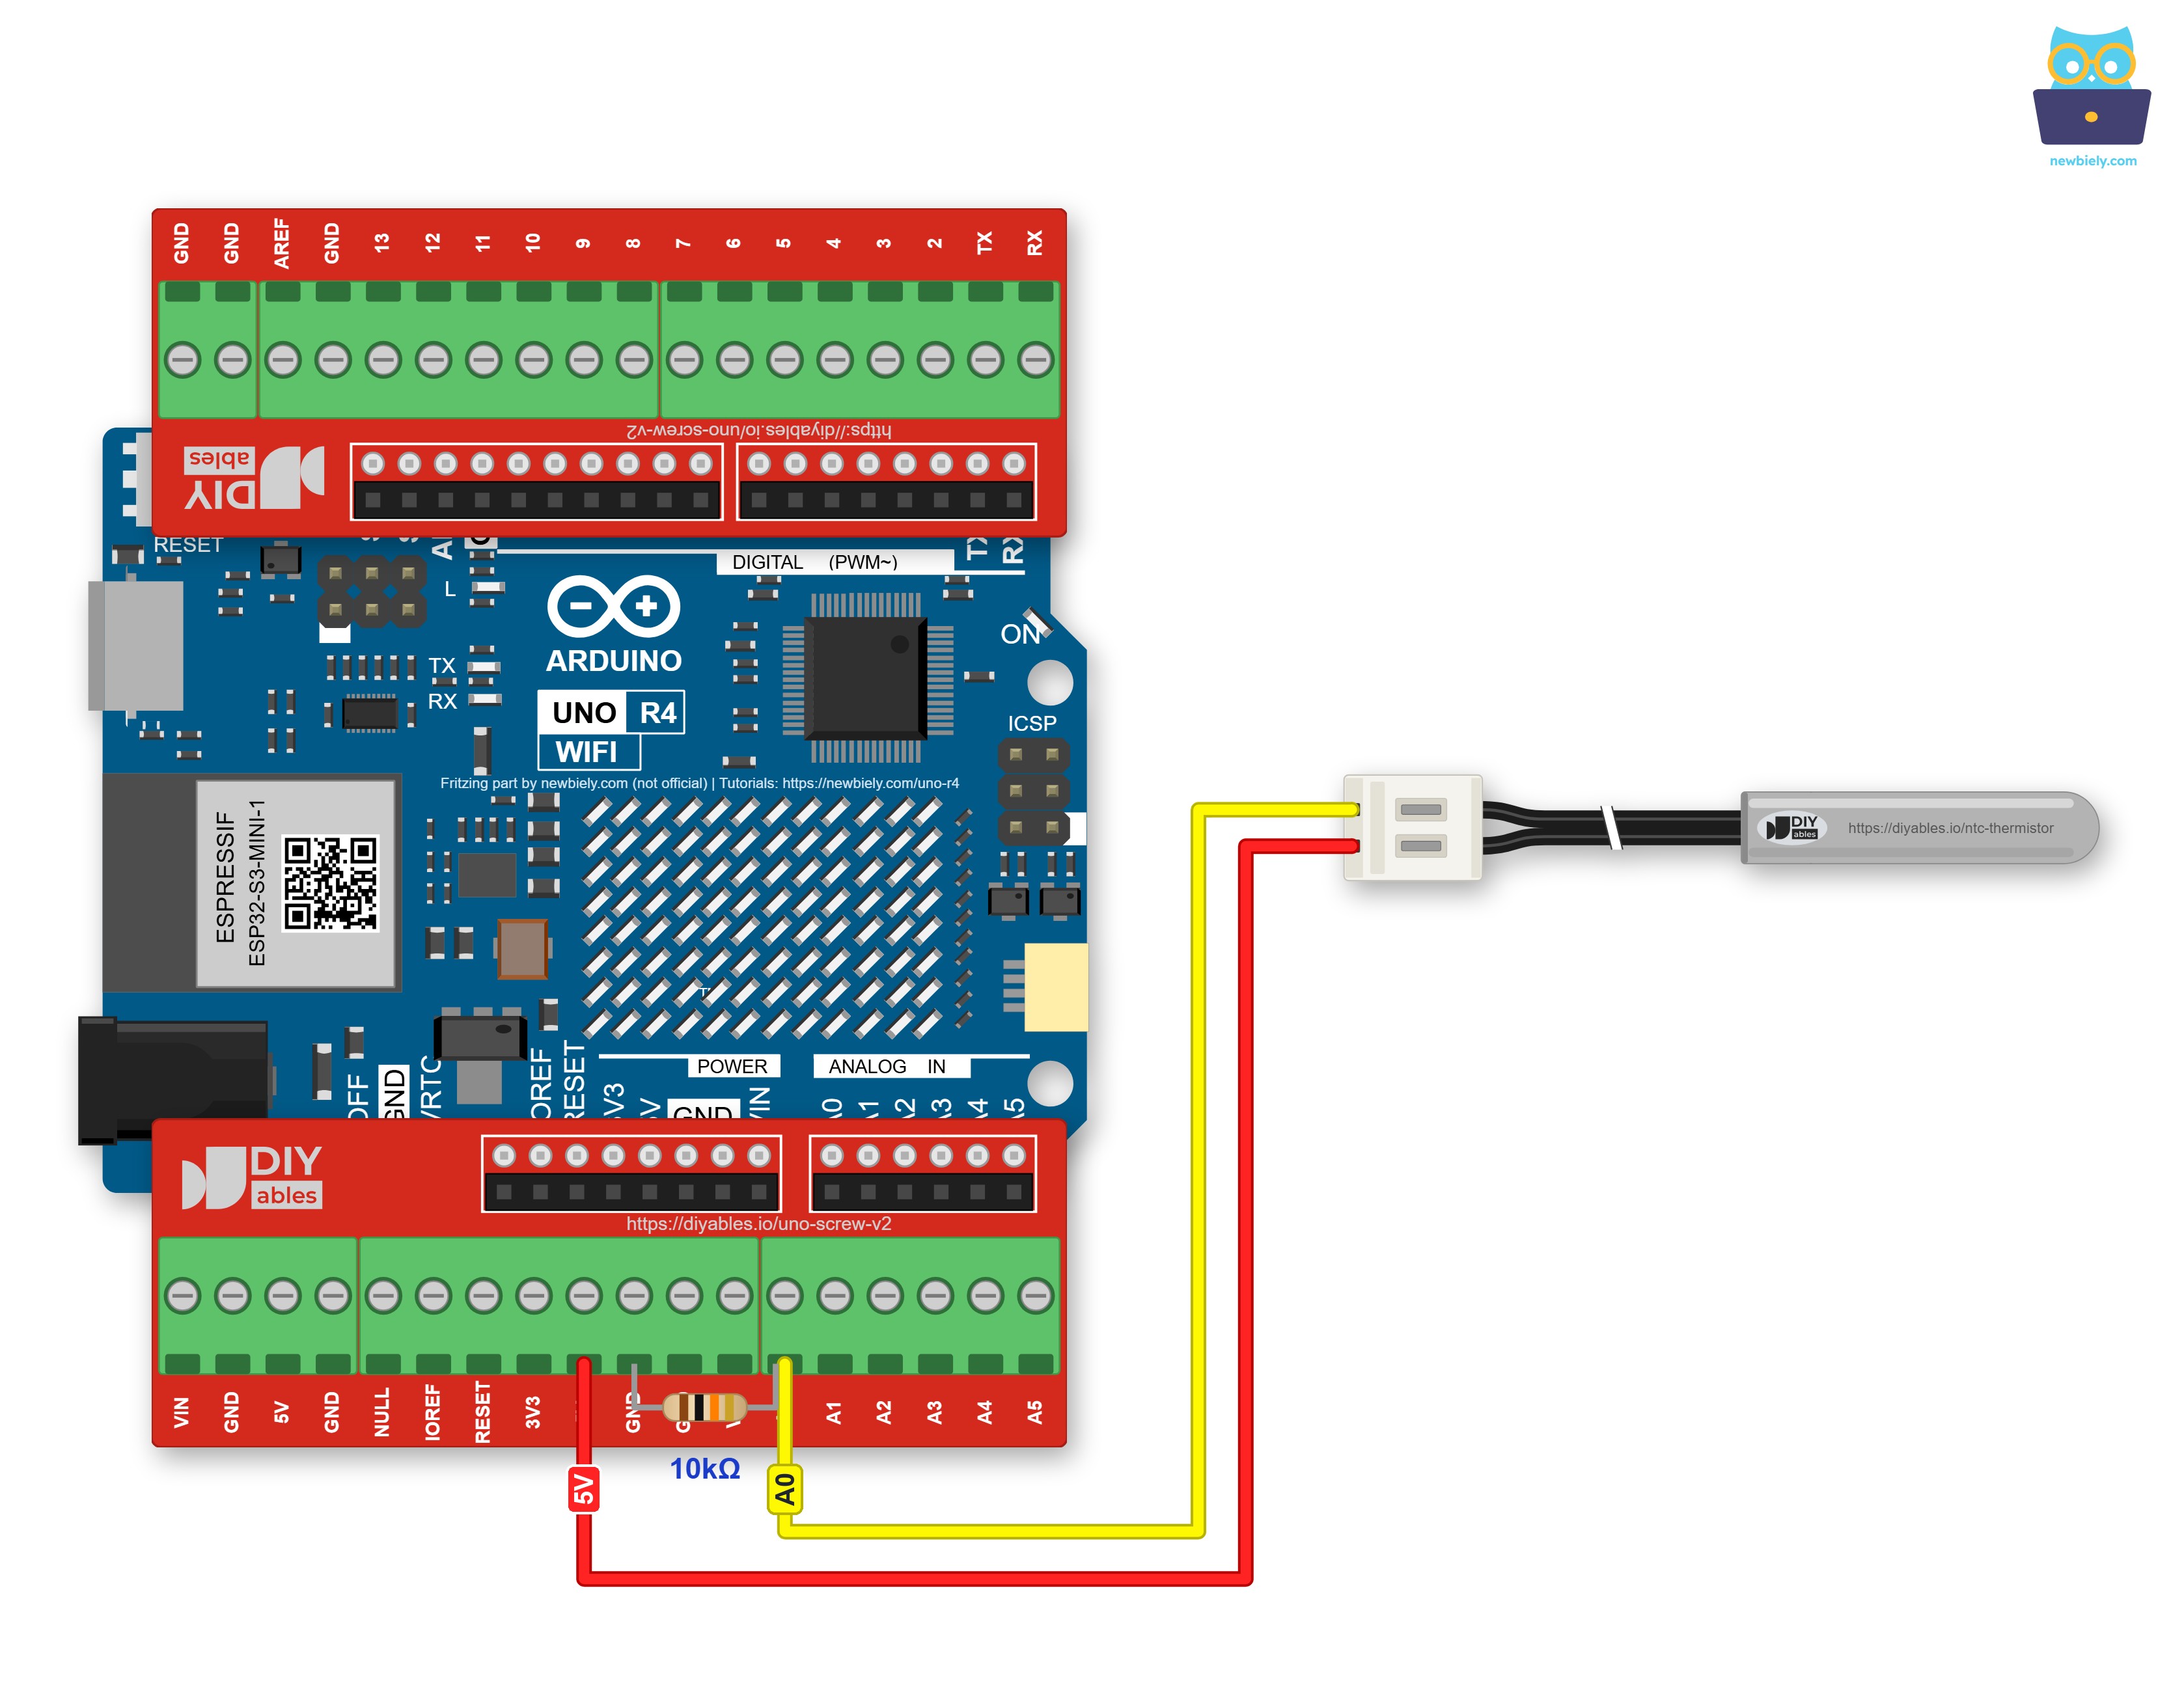
This image is created using Fritzing. Click to enlarge image
See The best way to supply power to the Arduino Uno R4 and other components.
Look at the 10K resistor in this picture: it is screwed straight into the shield. One leg sits in a GND terminal, and the other leg shares the A0 terminal with the yellow probe wire, so the GND wire is not needed.
※ NOTE THAT:
- Only the steel tip is waterproof. Keep the white plug and the resistor joint dry, above the water line.
- The probe cable can be made longer with extra wire. Just keep the run away from motor and mains cables, which can add noise to the reading.
How To Program For NTC Thermistor
No library is needed. analogRead() and the math function log() are already part of the Arduino core.
- Name the pin, and write down the values of the probe:
- Ask for 14-bit readings in setup(). analogRead() then returns 0 to 16383:
- Read A0 ten times and take the average:
- Work out the resistance of the probe from the ratio:
- Apply the B formula. In C++, log() is the natural logarithm (ln):
- Before the math, check that the average is not close to 0 (probe unplugged) or close to 16383 (short circuit). Then the sketch never prints "inf" or "nan".
※ NOTE THAT:
Prefer the usual 0 to 1023 range? Remove analogReadResolution(14); and use 1023.0 in place of 16383.0. The temperature stays the same, only the steps get coarser: around 25°C, one step is about 0.1°C at 10 bits and less than 0.01°C at 14 bits. The real accuracy still depends on the probe and the resistor, not on the number of bits.
Arduino UNO R4 Code - Thermistor Temperature in Celsius and Fahrenheit
The sketch below puts all these steps together. About once a second, it prints the averaged 14-bit reading, the resistance of the probe, and the temperature in both units. It also tells you when the probe looks unplugged or shorted.
Detailed Instructions
Follow these instructions step by step:
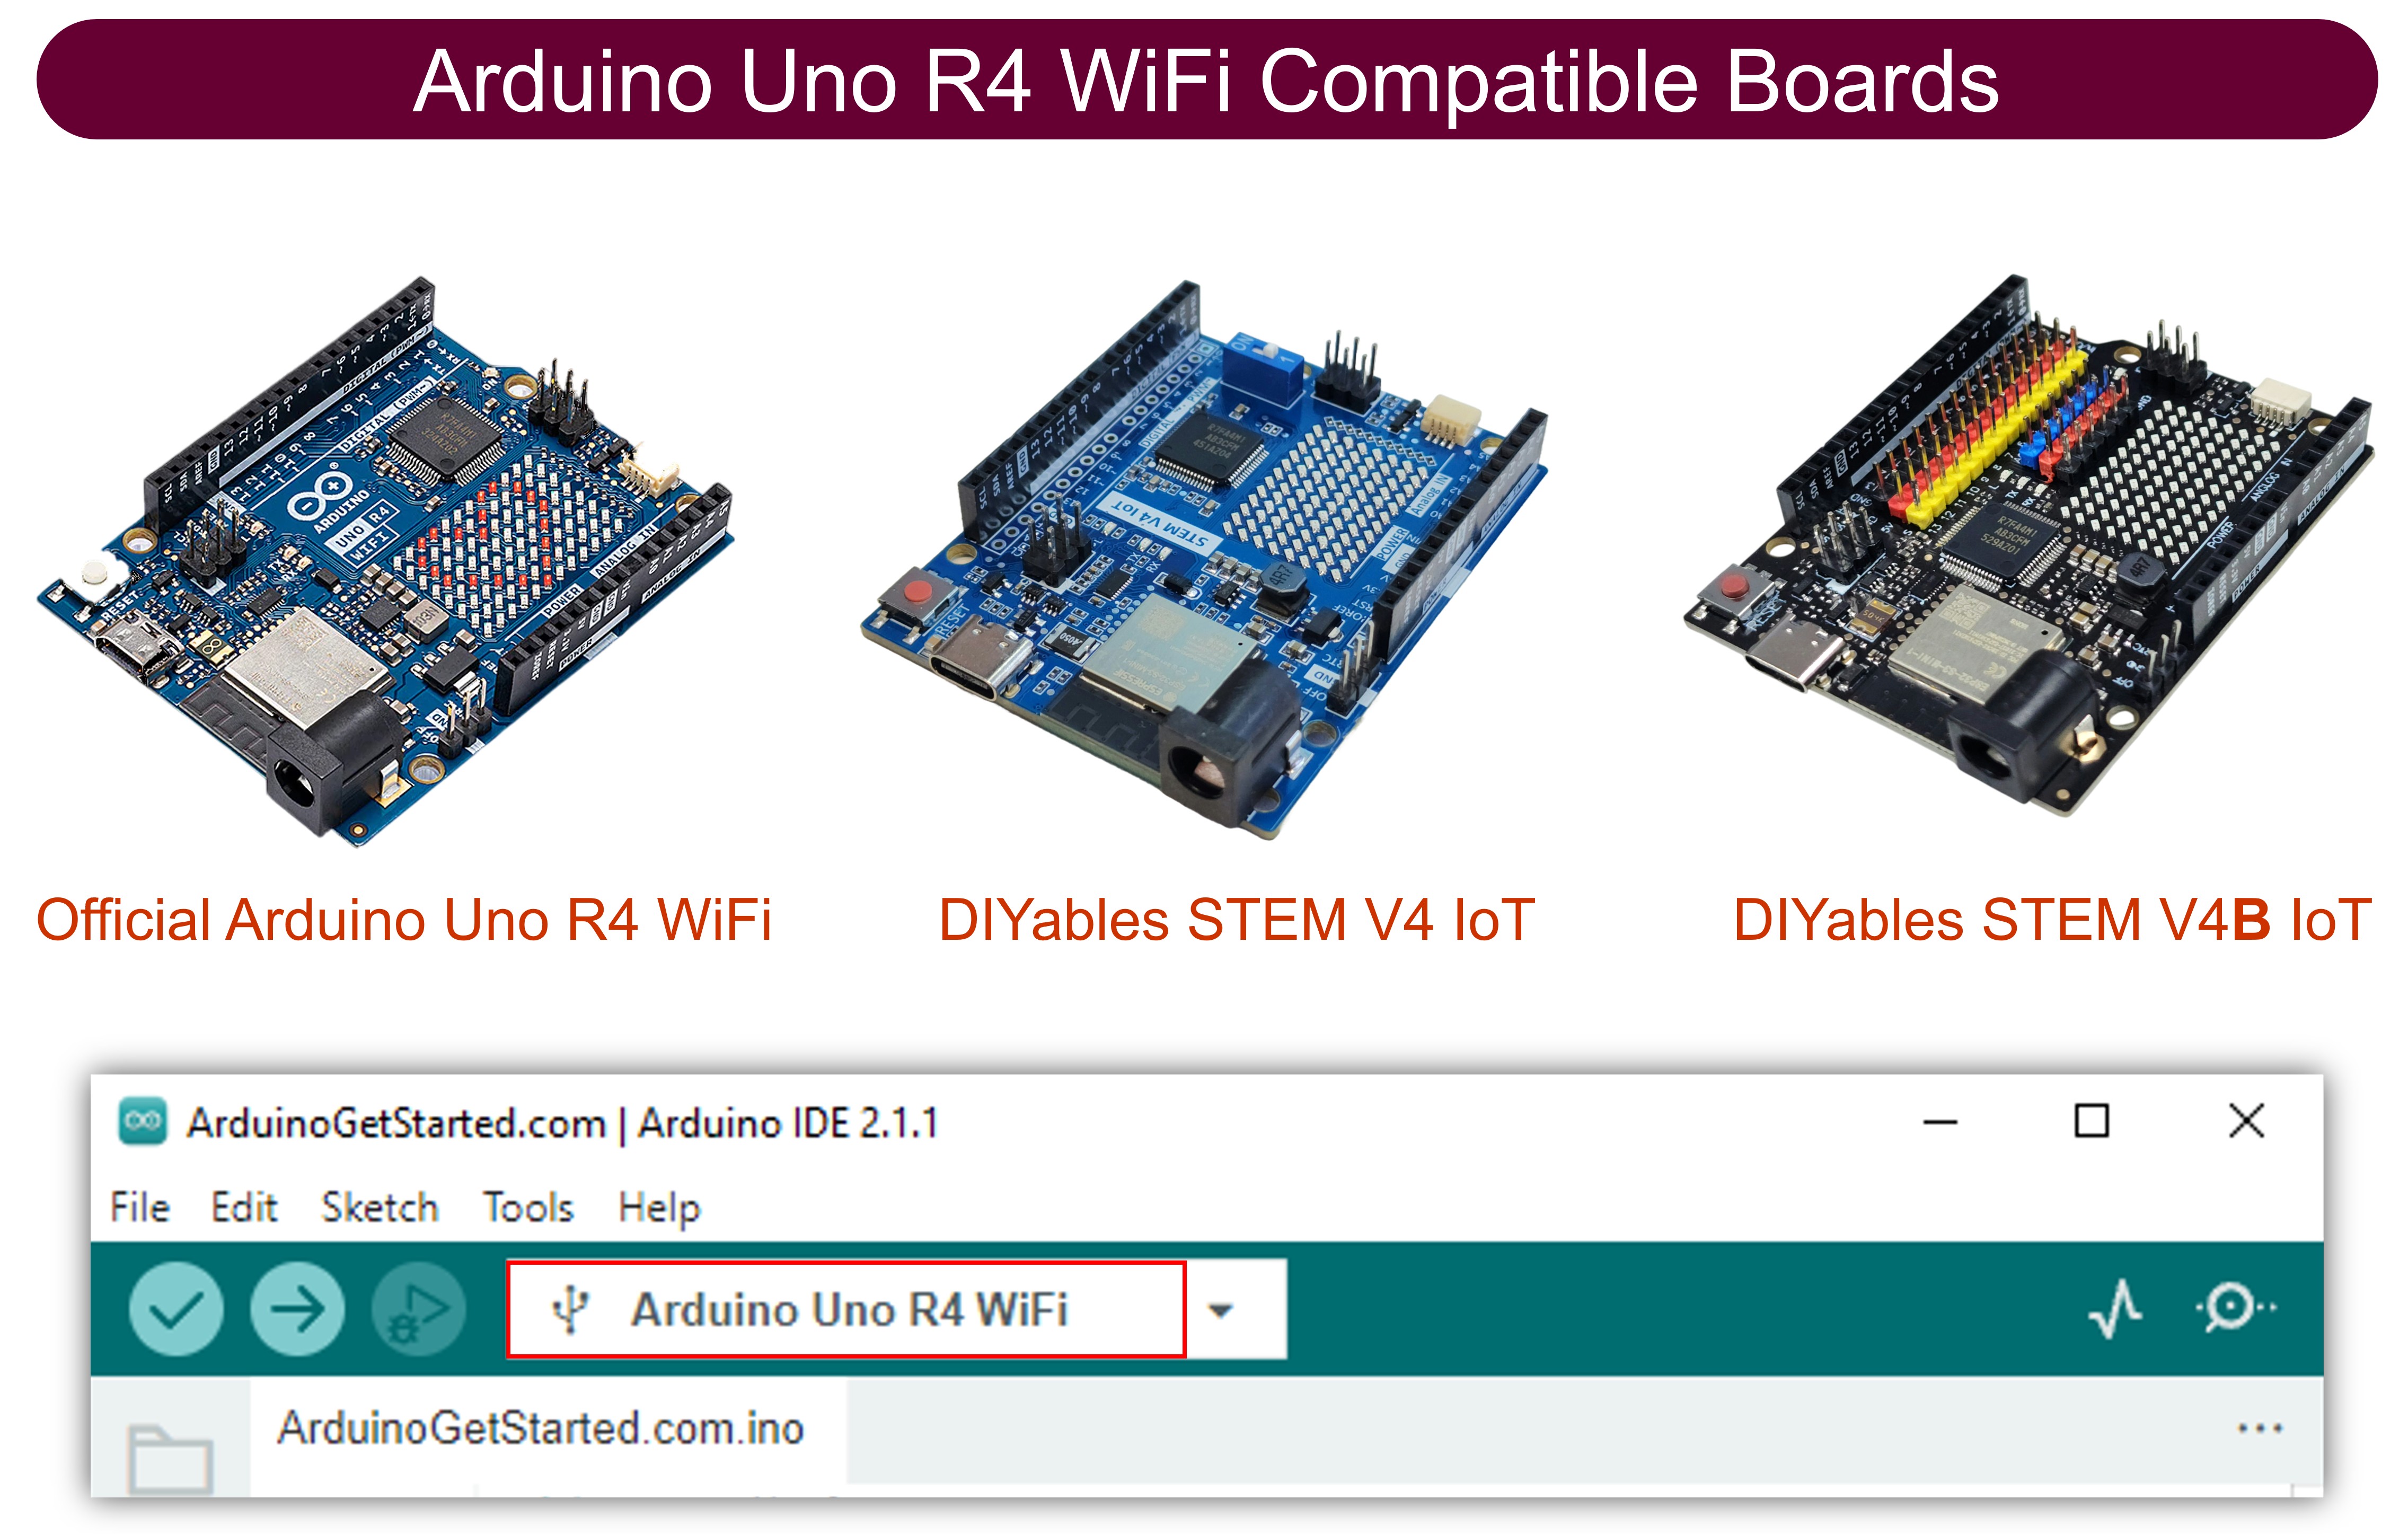
- If this is your first time using the Arduino Uno R4 WiFi/Minima, refer to the tutorial on setting up the environment for Arduino Uno R4 WiFi/Minima in the Arduino IDE.
- Wire the probe and the 10K resistor to the Arduino UNO R4 as the wiring diagram shows.
- Connect the Arduino UNO R4 to your computer with a USB Type-C cable.
- Launch the Arduino IDE on your computer.
- Select the appropriate Arduino UNO R4 board (e.g., Arduino UNO R4 WiFi or Arduino UNO R4 Minima) and COM port.
- Copy the code above into the Arduino IDE and click the Upload button.
- Open the Serial Monitor at 9600 baud. Let the probe lie on the desk for a few lines.
- Take a glass of cold water from the fridge and put the steel tip into it.
The first three lines show the room air. In the cold water, the value falls fast at first, then more and more slowly. The steel tube has to cool down too, so give the probe several seconds before you trust a new number.
Want to test your probe? Fill a glass with crushed ice and a little water, stir, and wait a minute. The Serial Monitor should show close to 0°C.
If the Serial Monitor says "A0 is near 0V", a wire has slipped out of the white plug, or A0 is not connected. "A0 is near 5V" usually means that the 10K resistor is missing, or that the A0 wire touches 5V somewhere.
Project Ideas
Some ways to use the probe with the Arduino UNO R4:
- Fridge alarm: beep a buzzer when the fridge stays above 8°C for ten minutes.
- Aquarium watch: show the water temperature on the 12x8 LED matrix of the Arduino UNO R4 WiFi.
- Home brew log: send the fermentation temperature over WiFi to a web page once a minute.
- Seed tray heater: switch a heating pad with a relay to hold a set temperature.
- Two zones: add a second probe and resistor on A1, then compare the inside and the outside of a cool box.