
Arduino UNO R4 - BTS7960 Motor Driver
In this guide, we will learn how to use the DIYables BTS7960 43A motor driver with the Arduino UNO R4. Think of the drive wheel motor of a robot lawn mower: it pushes through thick grass, climbs small slopes, and pulls a big current when a wheel gets stuck. A small driver board gets hot and gives up in that job, but the BTS7960 is built for heavy loads like this. In detail, we will learn:
- What sits on the BTS7960 board, and what each pin of its 2 x 4 control header does.
- How RPWM, LPWM, R_EN and L_EN together choose the direction, the speed, a hard brake or a free coast.
- How to wire the module, a 12V DC motor and a 12V power adapter to the Arduino UNO R4 WiFi or Minima.
- How to write a sketch that speeds the motor up, slows it down, brakes, runs it backward and lets it coast.
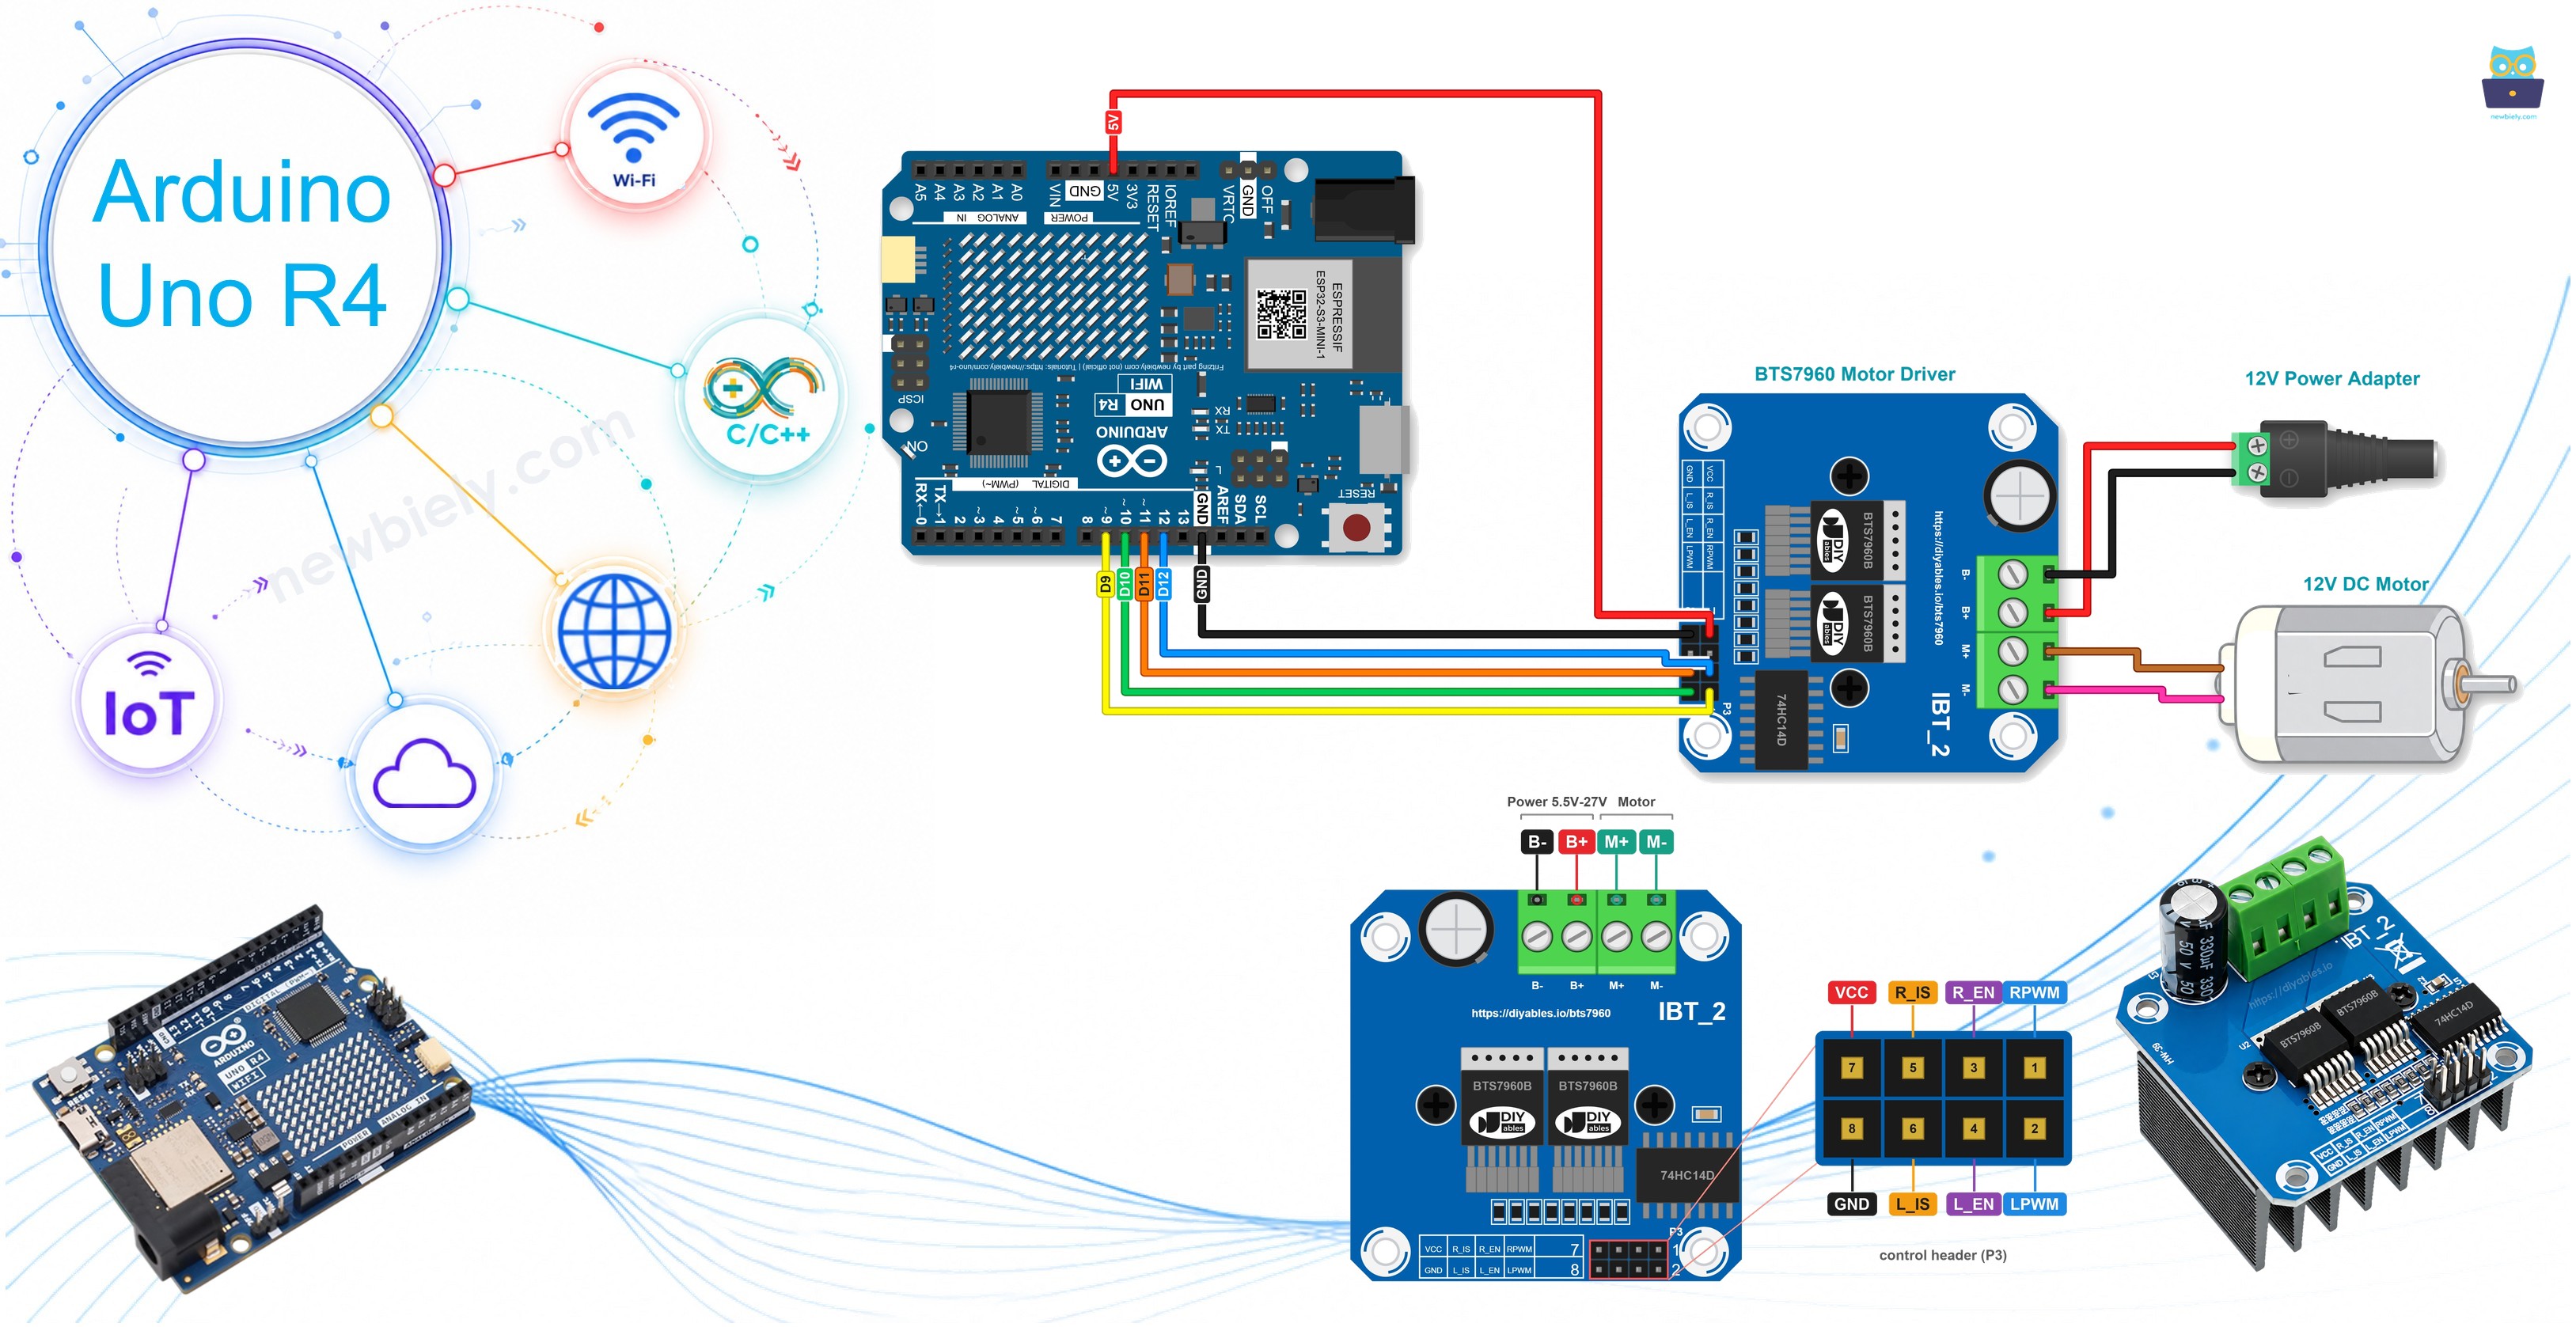
Hardware Preparation
Or you can buy the following kits:
| 1 | × | DIYables STEM V4 IoT Starter Kit (Arduino included) | |
| 1 | × | DIYables STEM V4B IoT Starter Kit (Arduino included) | |
| 1 | × | DIYables Sensor Kit (18 sensors/displays) |
Additionally, some of these links are for products from our own brand, DIYables .
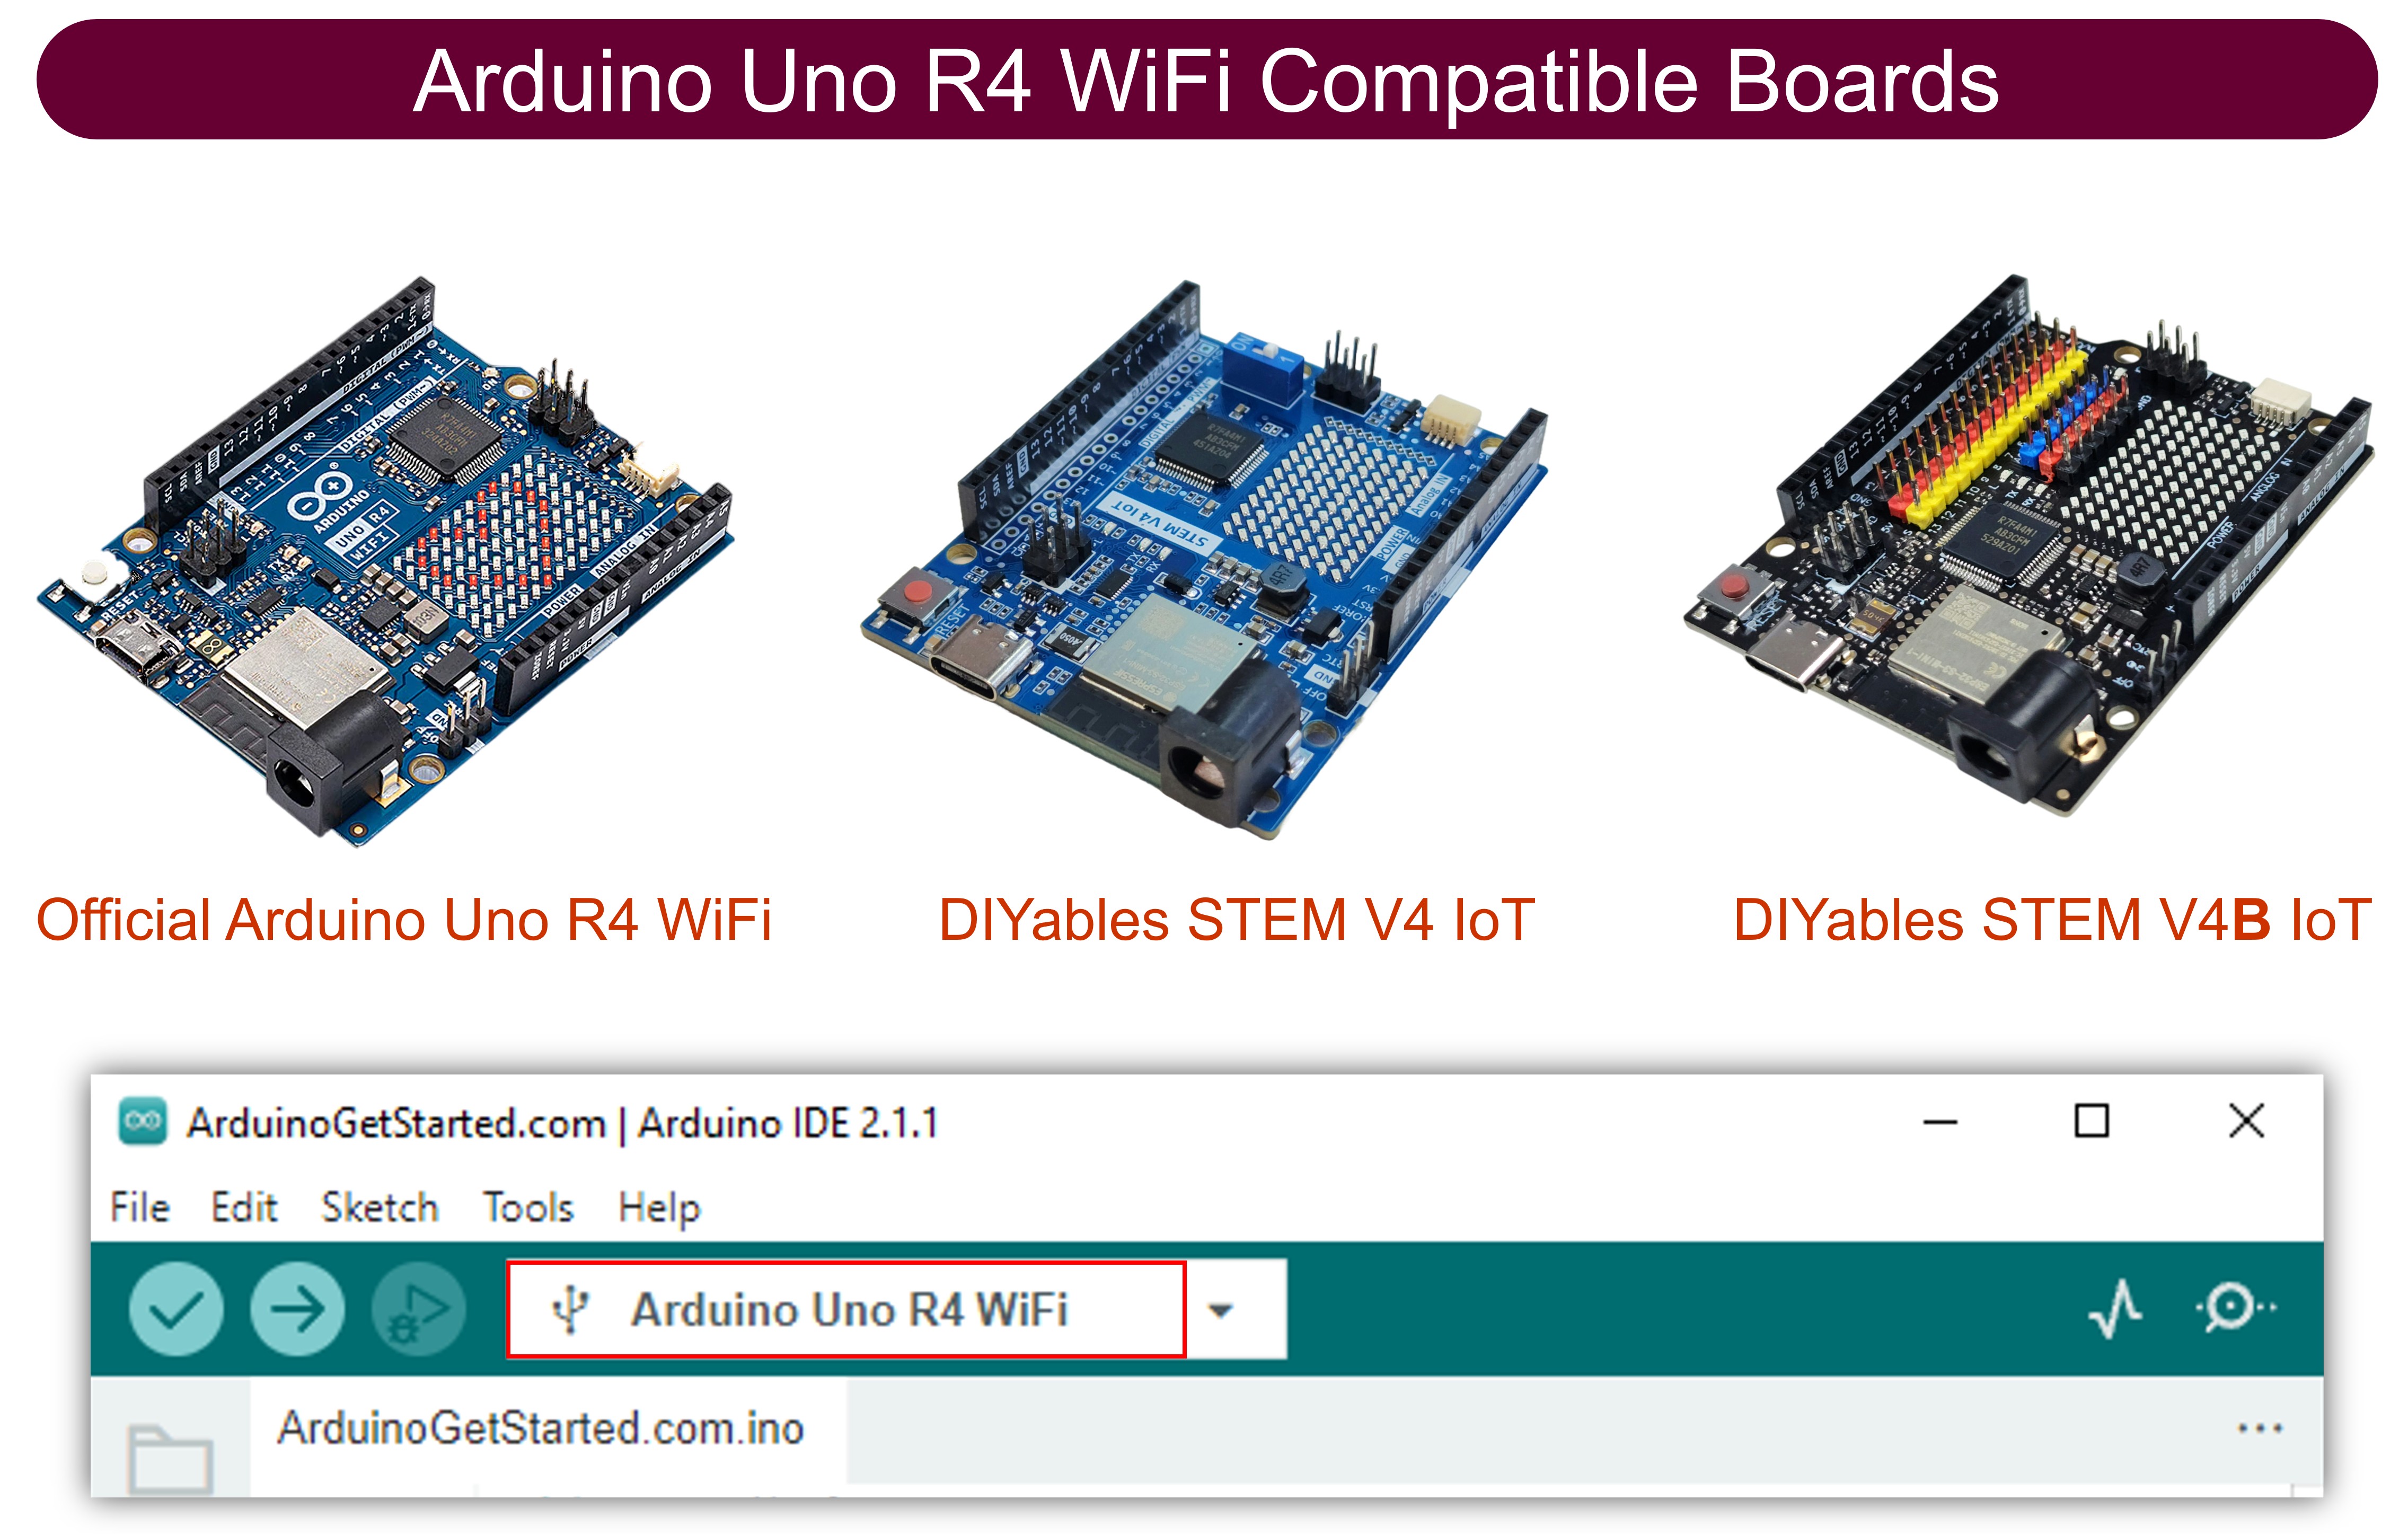
Overview of BTS7960 Motor Driver
The DIYables BTS7960 module is the same board that many shops sell as "IBT-2" or "HW-039". Its two power chips are Infineon BTS7960B half-bridges. Working as a pair, they form one full H-bridge, so the board controls one brushed DC motor in both directions, and PWM sets the speed. Small drivers such as the L298N or the DRV8833 are fine for toy motors. The BTS7960 is for the heavy ones: large gear motors, wiper motors, winches, scooters, wheelchair motors and big robots.
| BTS7960 Motor Driver Module | |
|---|---|
| Power chips | 2 x Infineon BTS7960B (half-bridge), together one H-bridge |
| Motors | 1 brushed DC motor, forward and reverse |
| Motor supply (B+ and B-) | 5.5V to 27V DC (for 6V, 12V and 24V motors) |
| Current | up to 43A (the current-limit level of the chip) |
| PWM on RPWM and LPWM | up to 25 kHz |
| Logic side | a 74HC14 buffer chip, powered from the VCC pin |
| Protection | current limiting, over-temperature protection |
Read the 43A number with care. It is the peak level where the chip starts to limit the current, not a value to run at all day. For a motor that runs for a long time, stay far below it. Over minutes or hours, the heat sink is what limits the current.
How does it work? Each BTS7960B chip can connect one motor terminal either to B+ or to B-. One chip sits at each end of the motor. When the right chip pulls its end up and the left chip holds its end down, current flows one way and the motor turns forward. Swap the roles, and the motor turns the other way. The 74HC14 chip just passes the signals from the Arduino UNO R4 on to the two power chips.
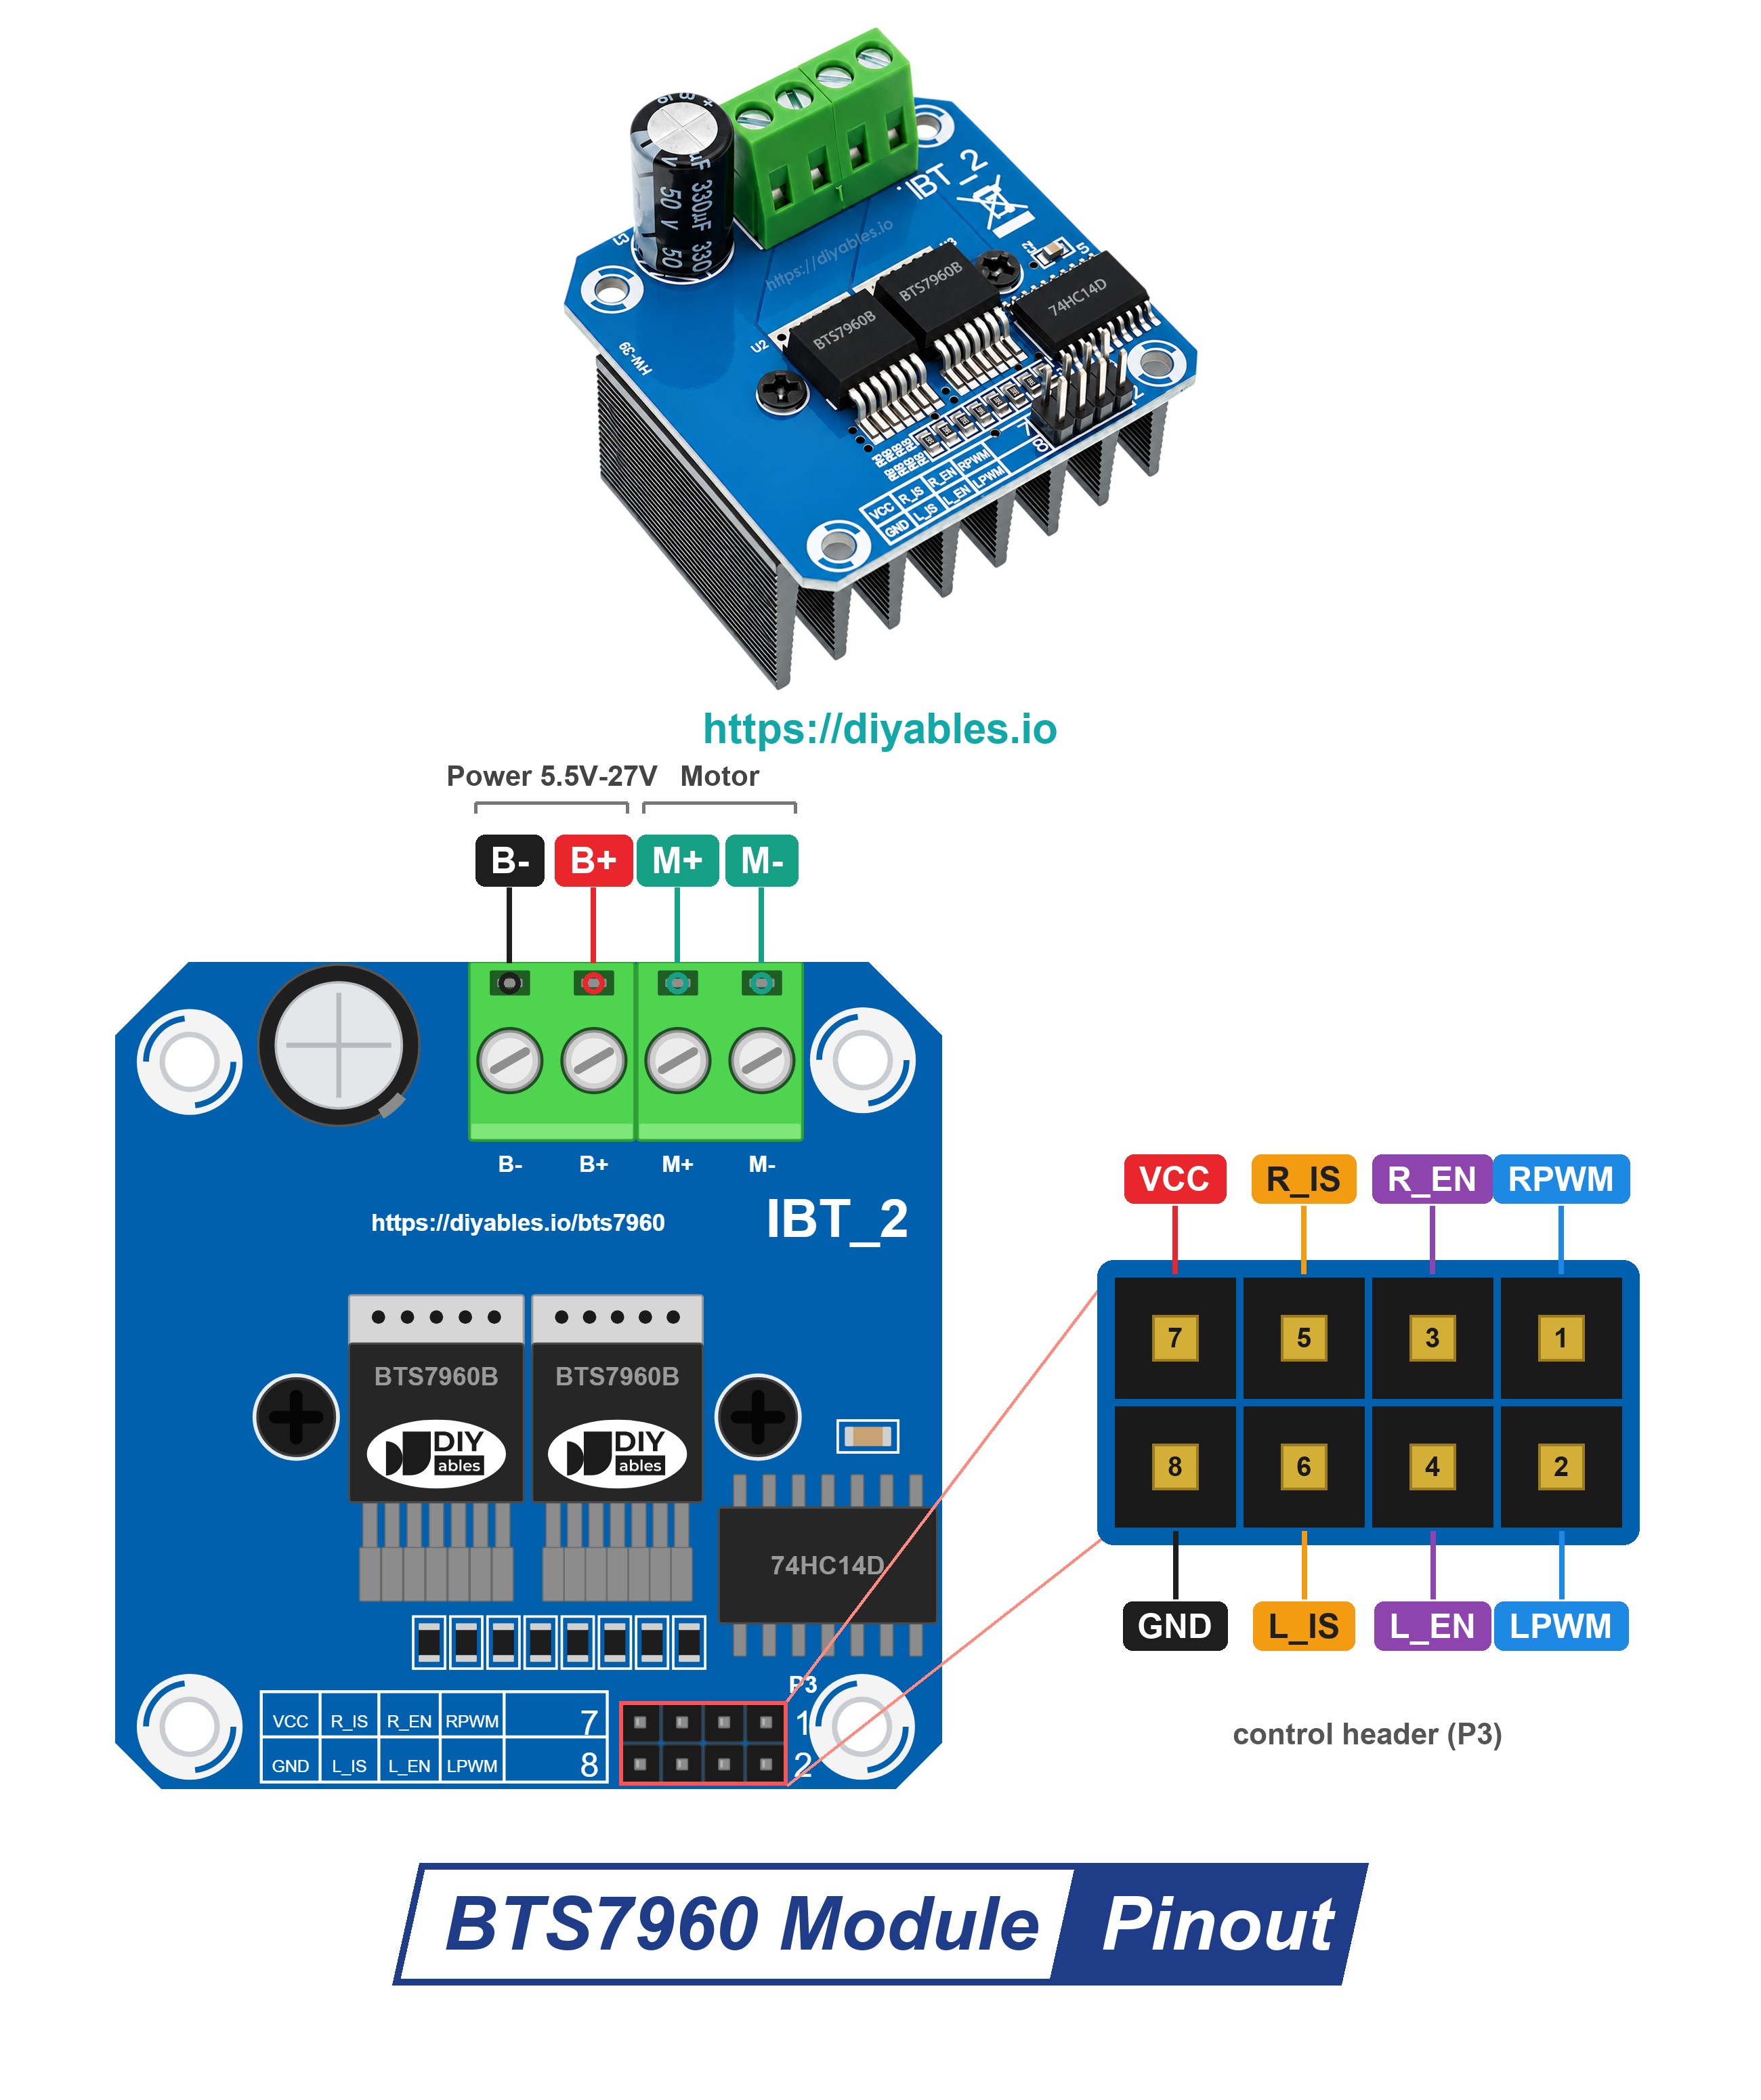
The control header has 8 male pins in two rows of four. The screw terminal block on the other side carries the high current. In this guide, use the pins like this:
- RPWM pin: PWM input of the right half-bridge, for the forward direction. Connect to PWM pin D9 of the Arduino UNO R4.
- LPWM pin: PWM input of the left half-bridge, for the reverse direction. Connect to PWM pin D10.
- R_EN pin: turns the right half-bridge on when HIGH. Connect to digital pin D12.
- L_EN pin: turns the left half-bridge on when HIGH. Connect to digital pin D11.
- R_IS and L_IS pins: current sense and fault outputs. They are not used here, so leave them unconnected.
- VCC pin: supply for the 74HC14 logic chip and the power LED. The motor takes nothing from it. Connect to the 5V pin of the Arduino UNO R4.
- GND pin: connect to GND of the Arduino UNO R4. On the module, this pin is already joined to B-.
- B+ and B- terminals: connect to the + and - of the motor power supply (a 12V adapter in this guide).
- M+ and M- terminals: connect to the two wires of the DC motor.
※ NOTE THAT:
On the board, R_IS and L_IS are printed as "R_S" and "L_S". They are the same pins.
Direction, Speed, Brake and Coast
Two PWM pins and two enable pins decide what the motor does:
| RPWM | LPWM | R_EN and L_EN | The motor |
|---|---|---|---|
| PWM (0 to 255) | 0 | HIGH | turns forward. A larger duty cycle means a higher speed. |
| 0 | PWM (0 to 255) | HIGH | turns in reverse. A larger duty cycle means a higher speed. |
| 0 | 0 | HIGH | brakes. The driver joins the two motor wires, so the motor stops fast. |
| 0 | 0 | LOW | coasts. Both half-bridges are off, and the motor rolls to a stop by itself. |
The golden rule: at any moment, at least one of RPWM and LPWM must be 0. Only one PWM pin may carry a signal at a time.
Motor Power and Common Ground
- The motor takes its power from the 12V adapter, never from the Arduino UNO R4. The adapter plugs into the DC power jack, and the jack's + and - screws go to B+ and B-.
- The adapter must be able to give more current than the mower motor asks for.
- Never connect B+ to any pin of the Arduino UNO R4.
- One wire from GND of the Arduino UNO R4 to GND of the module is enough for a common ground, because GND and B- are joined on the module.
- Check + and - before you plug in the adapter. If + and - are swapped, the module can be damaged.
Only have a small motor? These Arduino UNO R4 pages fit it better:
- A small 3V to 9V motor, or two of them: Arduino UNO R4 - DRV8833 DC Motor Driver.
- The basics of speed and direction, with one 5V motor and the DRV8833: Arduino UNO R4 - DC Motor.
In short, the DRV8833 controls two small motors at about 1.5A each, up to 10.8V. The BTS7960 controls only one motor, but it handles much more current, up to 27V, and loses very little voltage.
Wiring Diagram
Six jumper wires join the Arduino UNO R4 to the control header: four signals, plus 5V and GND. Watch the two enable wires: R_EN goes to D12 and L_EN goes to D11. The 12V adapter and the motor use only the screw terminals of the module.
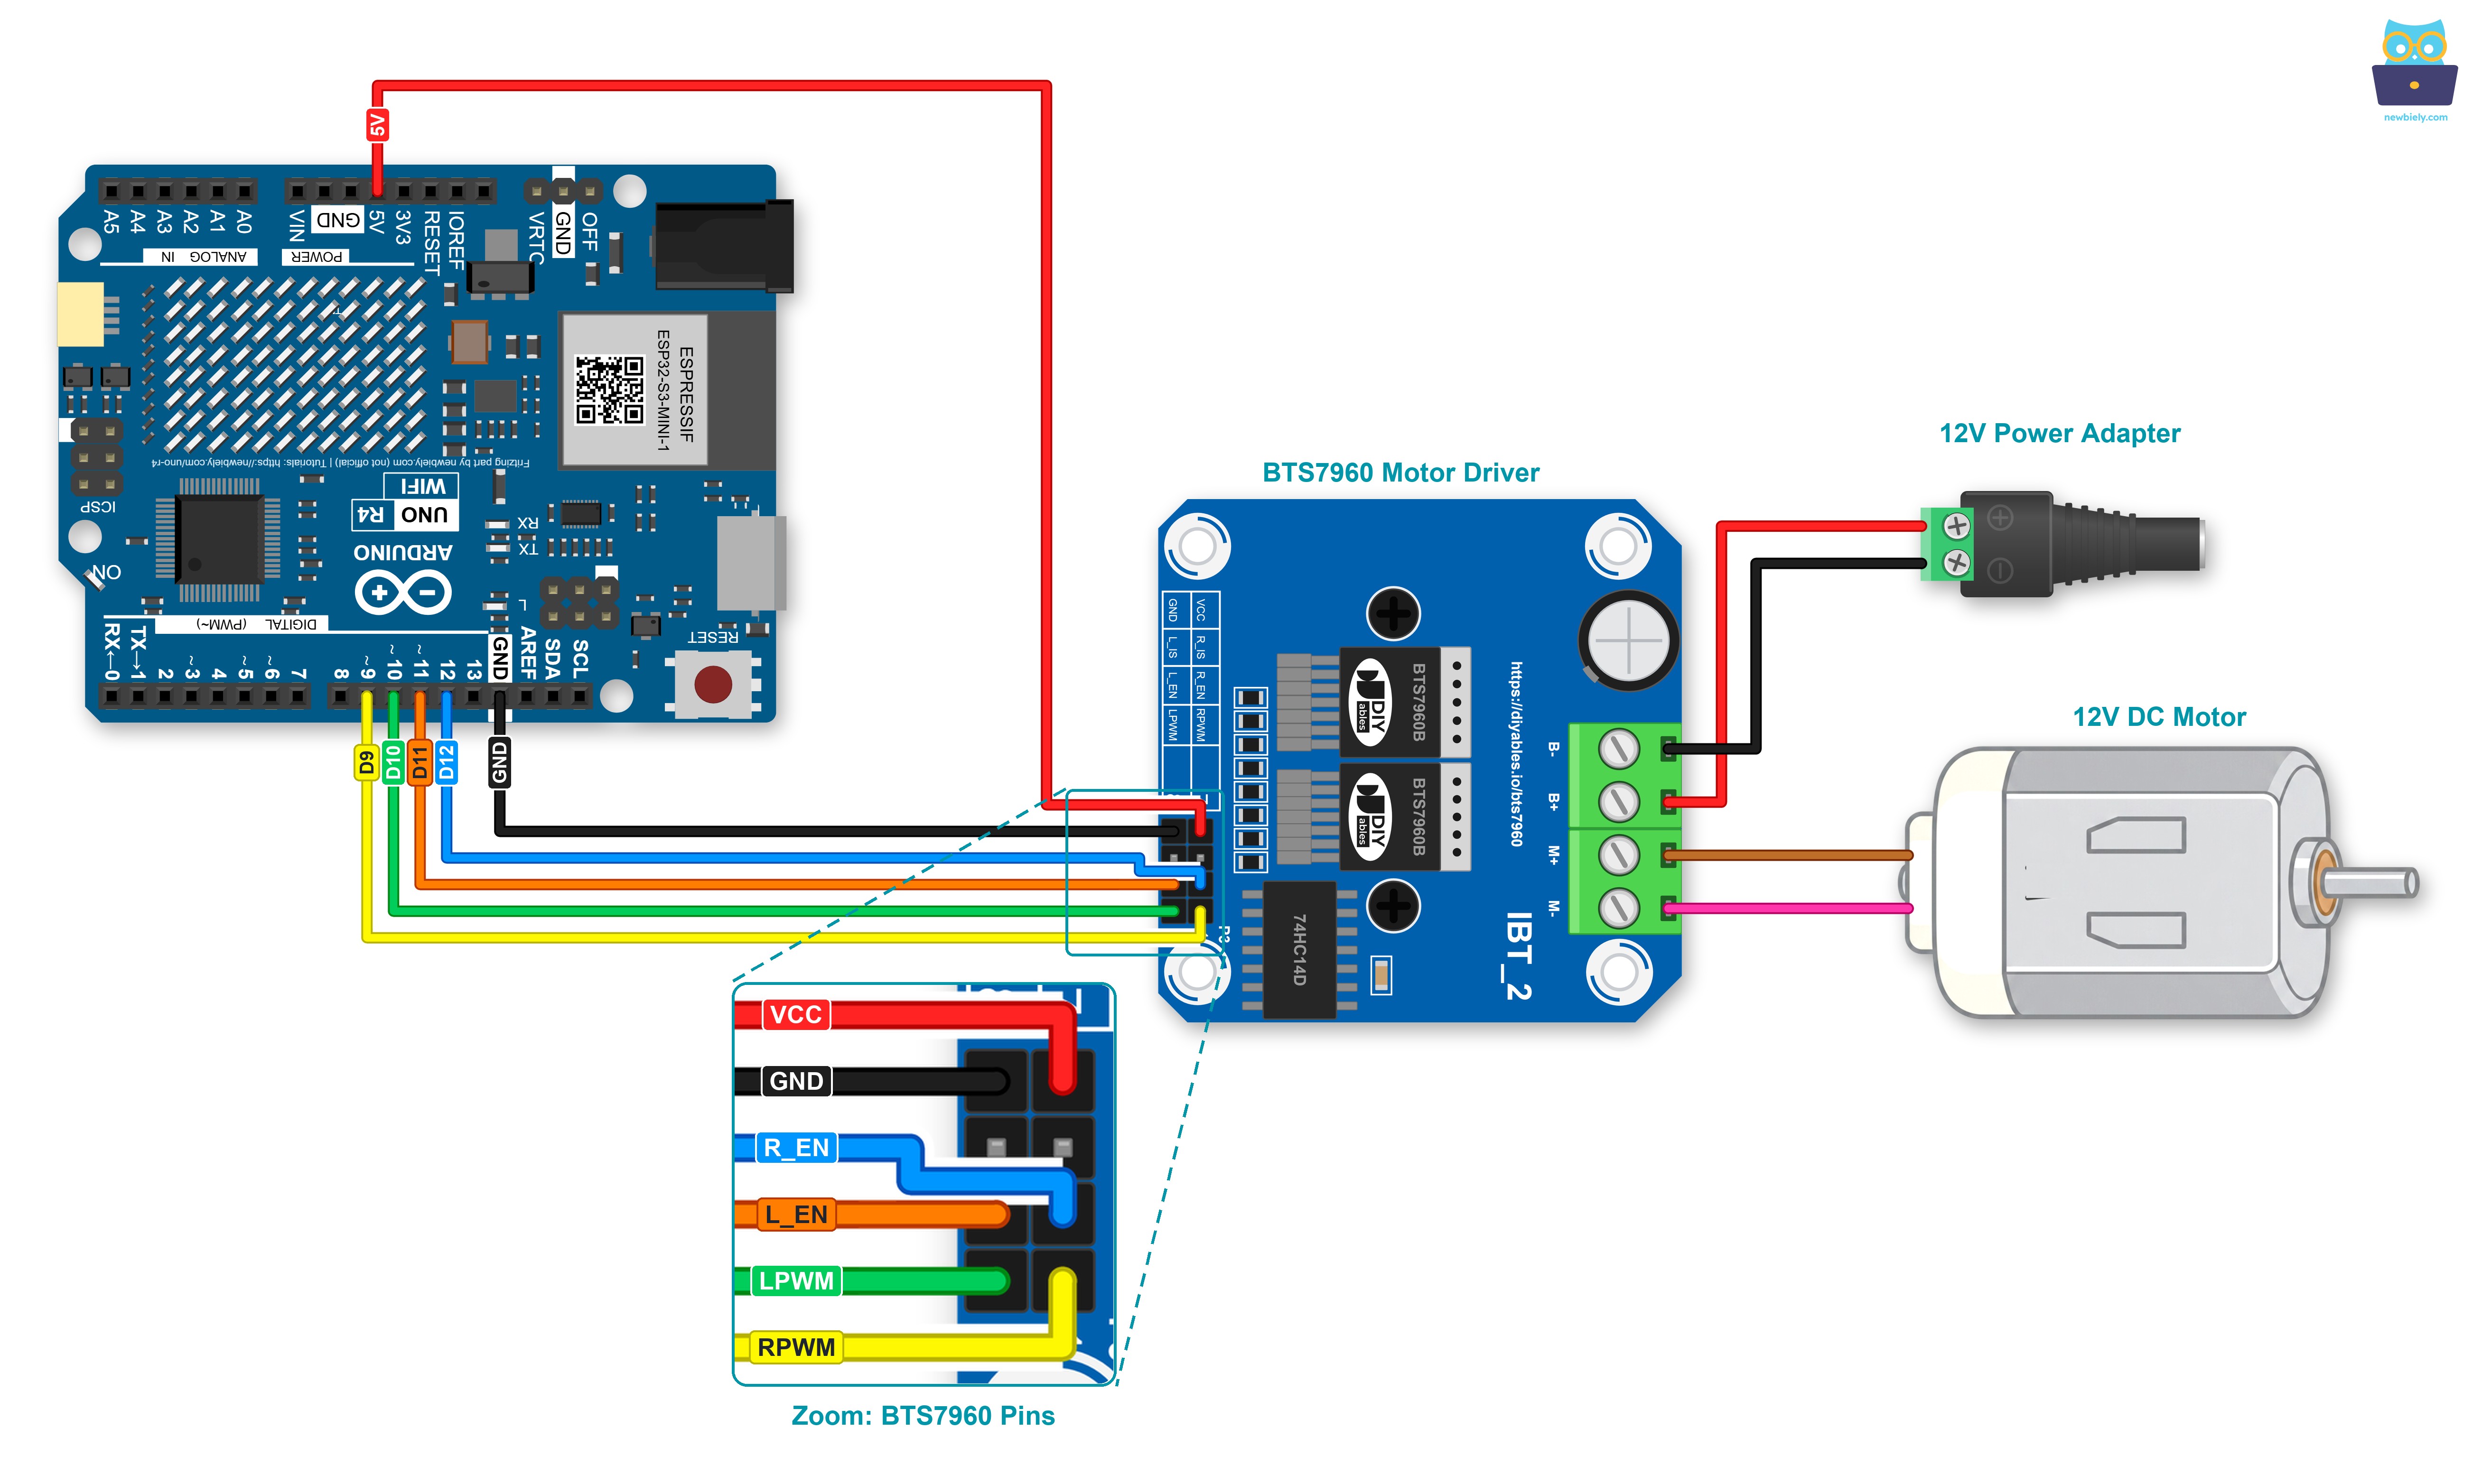
This image is created using Fritzing. Click to enlarge image
| BTS7960 Pin | Arduino UNO R4 Pin / Other Part |
|---|---|
| RPWM | D9 |
| LPWM | D10 |
| R_EN | D12 |
| L_EN | D11 |
| VCC | 5V |
| GND | GND |
| R_IS, L_IS | leave unconnected |
| B+ | + of the 12V power adapter (through the DC power jack) |
| B- | - of the 12V power adapter (through the DC power jack) |
| M+, M- | the two wires of the 12V DC motor |
Loose wires are a common cause of strange bugs. The Arduino UNO R4 works with both the Proto Screw Terminal Block Shield and the Screw Shield V2. Both turn the header pins into screw terminals. The diagram below shows the same wiring with the Screw Shield V2.
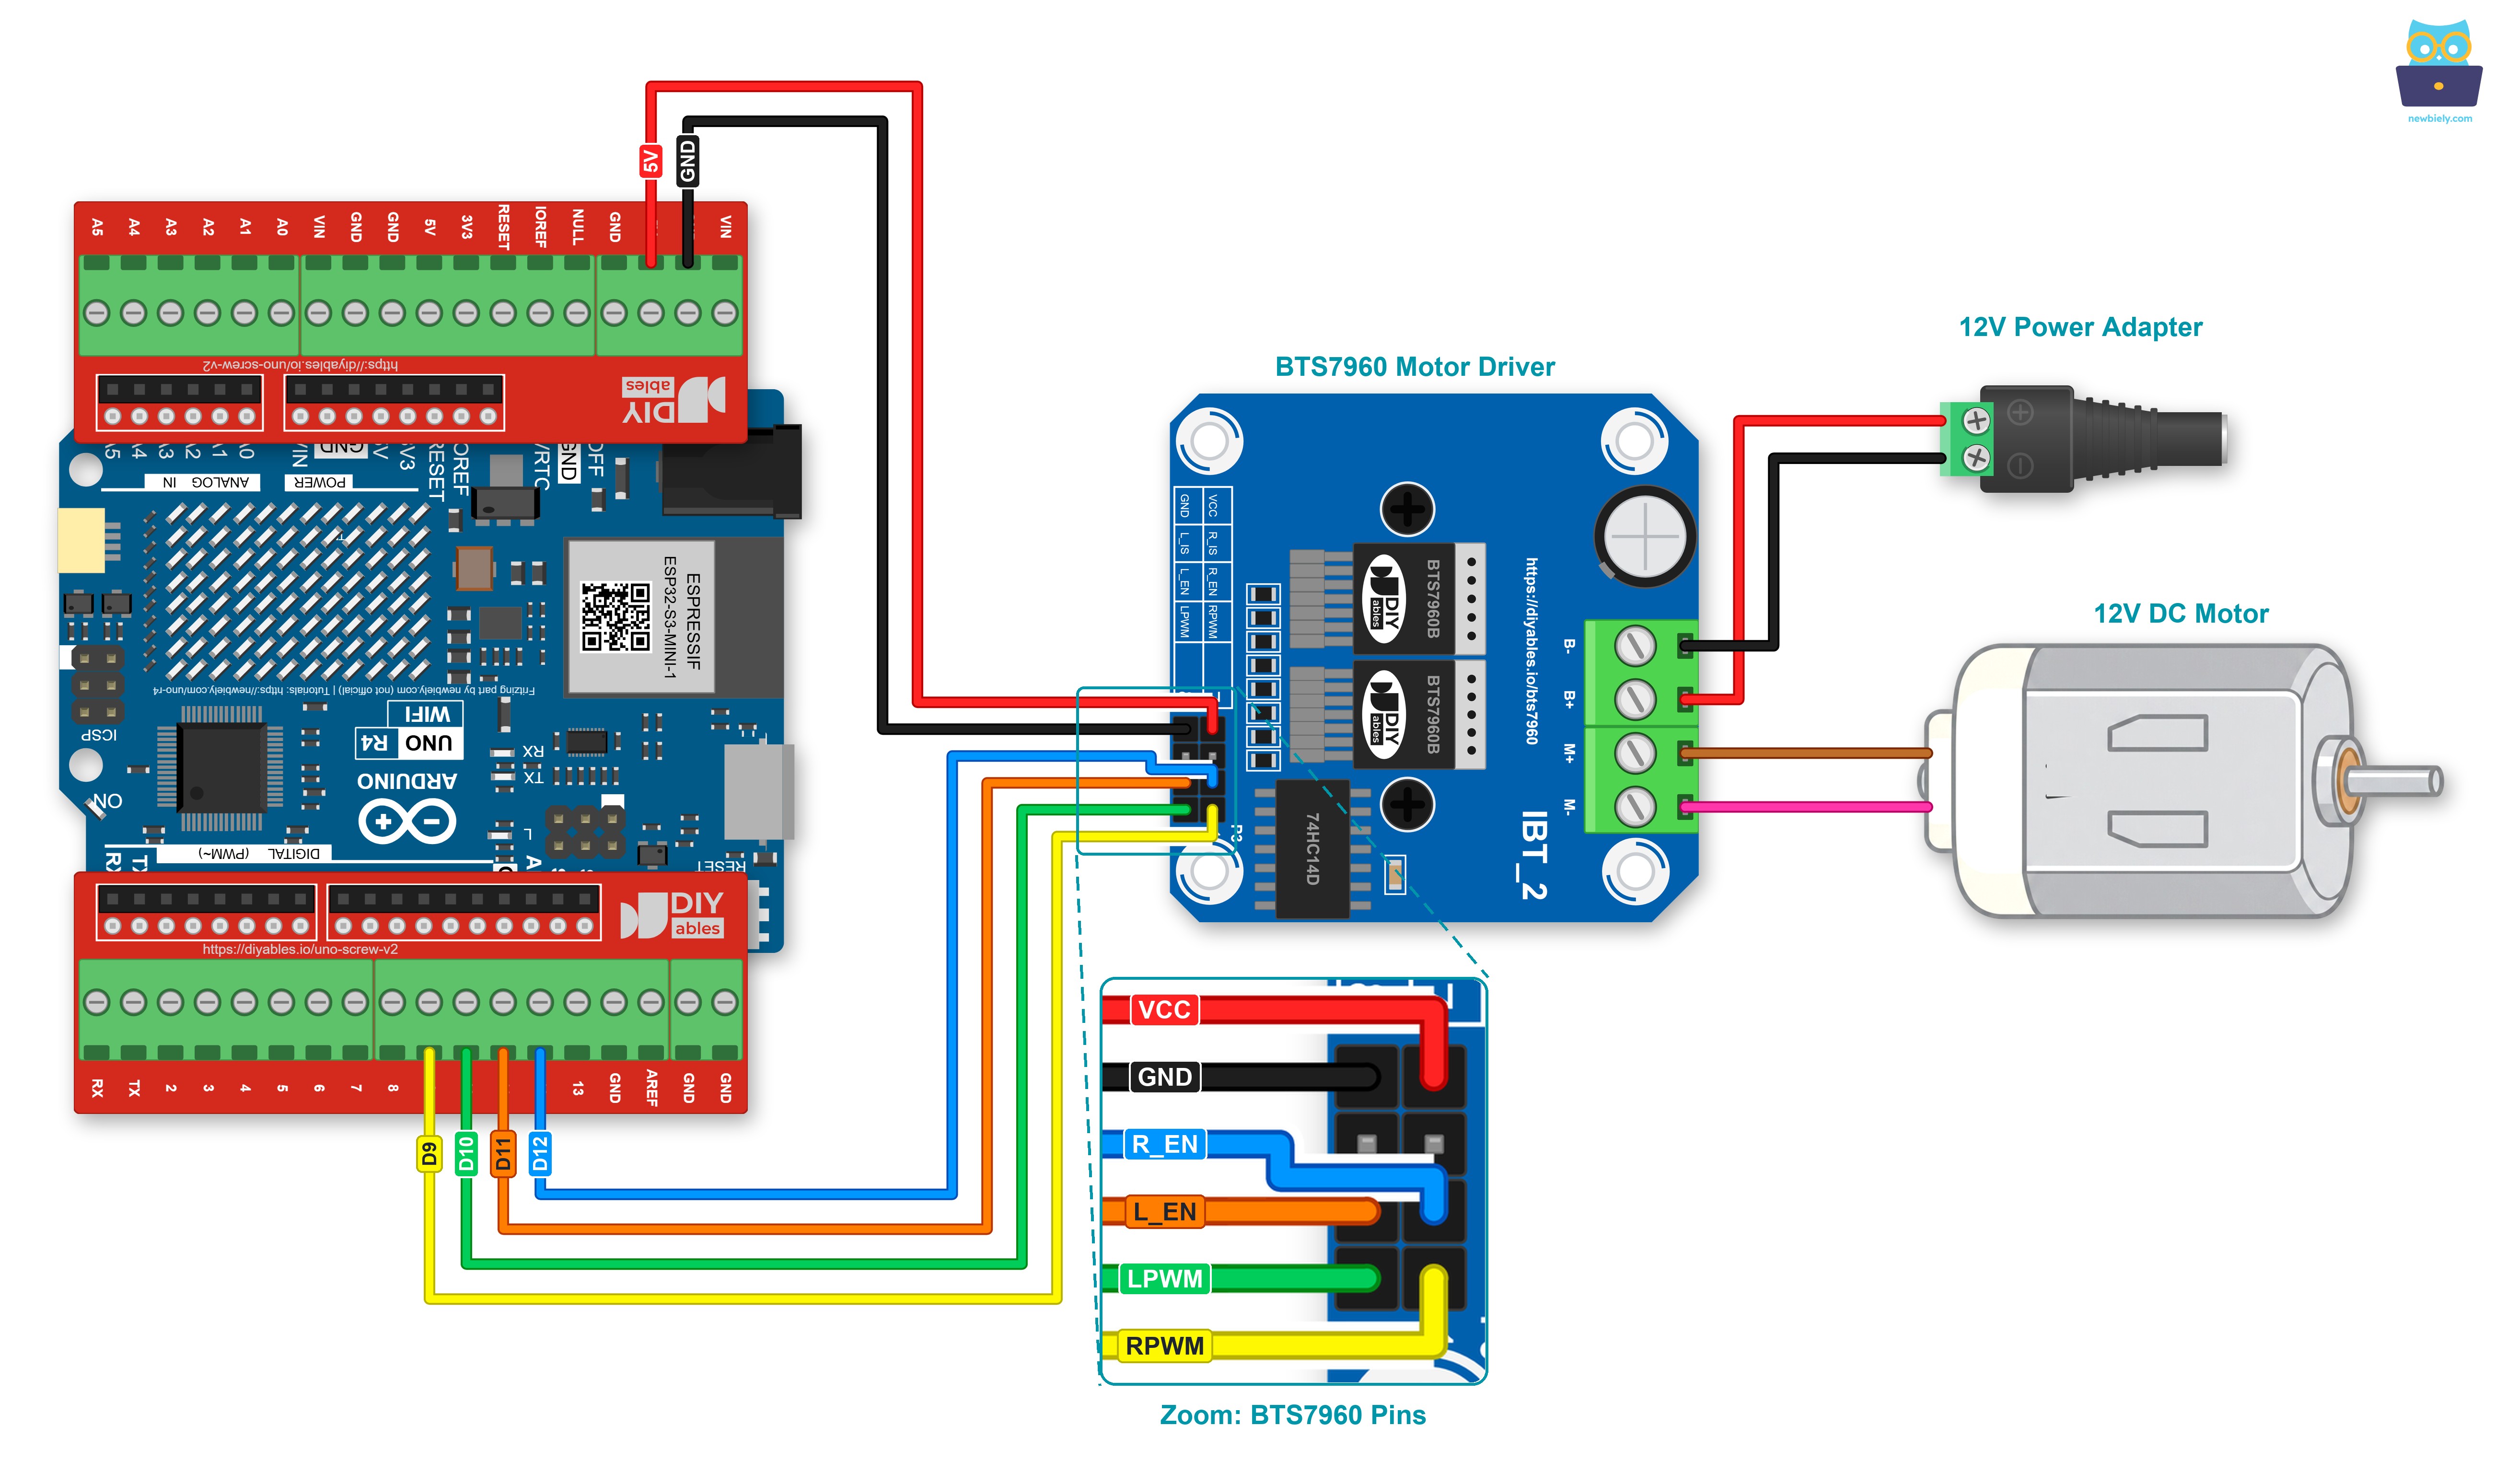
This image is created using Fritzing. Click to enlarge image
See The best way to supply power to the Arduino Uno R4 and other components.
※ NOTE THAT:
- D9 and D10 carry the PWM signals, so they must be PWM pins (marked with "~" on the Arduino UNO R4). The enable pins only need HIGH or LOW, so D11 and D12 work for them.
- VCC goes to 5V because the Arduino UNO R4 uses 5V logic.
- Plug in the 12V adapter last, when every other wire is already in place.
How To Program For BTS7960 Motor Driver
No library is needed. analogWrite() and digitalWrite() do all the work.
- Give names to the four control pins:
- In setup(), make them outputs and keep both PWM pins at 0. Then set both enable pins HIGH to turn the driver on:
- Turn forward with a duty cycle from 0 to 255:
- Turn in reverse:
- Brake: both PWM pins at 0, enable pins still HIGH:
- Coast: both PWM pins at 0, then both enable pins LOW:
In the full sketch, each of these actions has its own small function: runForward(), runReverse(), brakeMotor() and coastMotor(). runForward() and runReverse() always set the other PWM pin to 0 first, so the two PWM pins are never on together.
Arduino UNO R4 Code - BTS7960 Motor Driver
The sketch below is a small test drive for one wheel motor. It repeats these steps again and again:
- Raises the forward speed from 0 to full, step by step
- Stays at full speed for 2 seconds
- Lowers the speed back to 0
- Brakes for 1 second
- Runs in reverse at about half speed for 2 seconds
- Turns the driver off for 2 seconds so the motor coasts, then turns it on again
Detailed Instructions
Follow these instructions step by step:
- If this is your first time using the Arduino Uno R4 WiFi/Minima, refer to the tutorial on setting up the environment for Arduino Uno R4 WiFi/Minima in the Arduino IDE.
- Wire the BTS7960 module, the DC motor and the DC power jack as the wiring diagram shows. The 12V adapter stays out of the wall socket at this point.
- Fix the motor to the table with tape or a clamp. A big gear motor can jump when it starts.
- Connect the Arduino UNO R4 to your computer with a USB Type-C cable.
- Launch the Arduino IDE on your computer.
- Select the appropriate Arduino UNO R4 board (e.g., Arduino UNO R4 WiFi or Arduino UNO R4 Minima) and COM port.
- Copy the code above into the Arduino IDE and click the Upload button.
- Now plug in the 12V power adapter.
- Open the Serial Monitor at 9600 baud and watch the motor.
Watch the shaft at the end of each run. When the forward ramp reaches 0, the driver brakes, so the shaft stops right away. After the reverse run, the driver turns off, so the shaft keeps turning for a moment before it stops. Nothing holds it in the coast step.
If the motor turns backward when the Serial Monitor says "Forward", swap the M+ and M- wires at the screw terminals. No code change is needed.
At low speed, you may hear the motor hum or whine. This comes from the default PWM frequency of the Arduino UNO R4, and it is normal.
※ NOTE THAT:
The Serial Monitor prints the steps, but the motor does not move? Check that the 12V adapter is plugged in and that the + and - of the DC power jack go to B+ and B-. Then check the header wires: VCC on 5V, GND on GND, R_EN on D12 and L_EN on D11. The motor needs both half-bridges, so it cannot turn in either direction if one enable wire is loose.
Project Ideas
A few ideas for the BTS7960 and the Arduino UNO R4:
- Robot lawn mower: use one BTS7960 for each drive wheel, so two modules steer the left and right wheels.
- Speed knob: read a potentiometer on A0 and turn its value into the duty cycle of RPWM.
- Winch for a small boat trailer: pull in and let out the rope with forward and reverse.
- WiFi remote on the Arduino UNO R4 WiFi: a web page with Forward, Reverse and Stop buttons.