
Arduino Nano - SW-420 Vibration Sensor
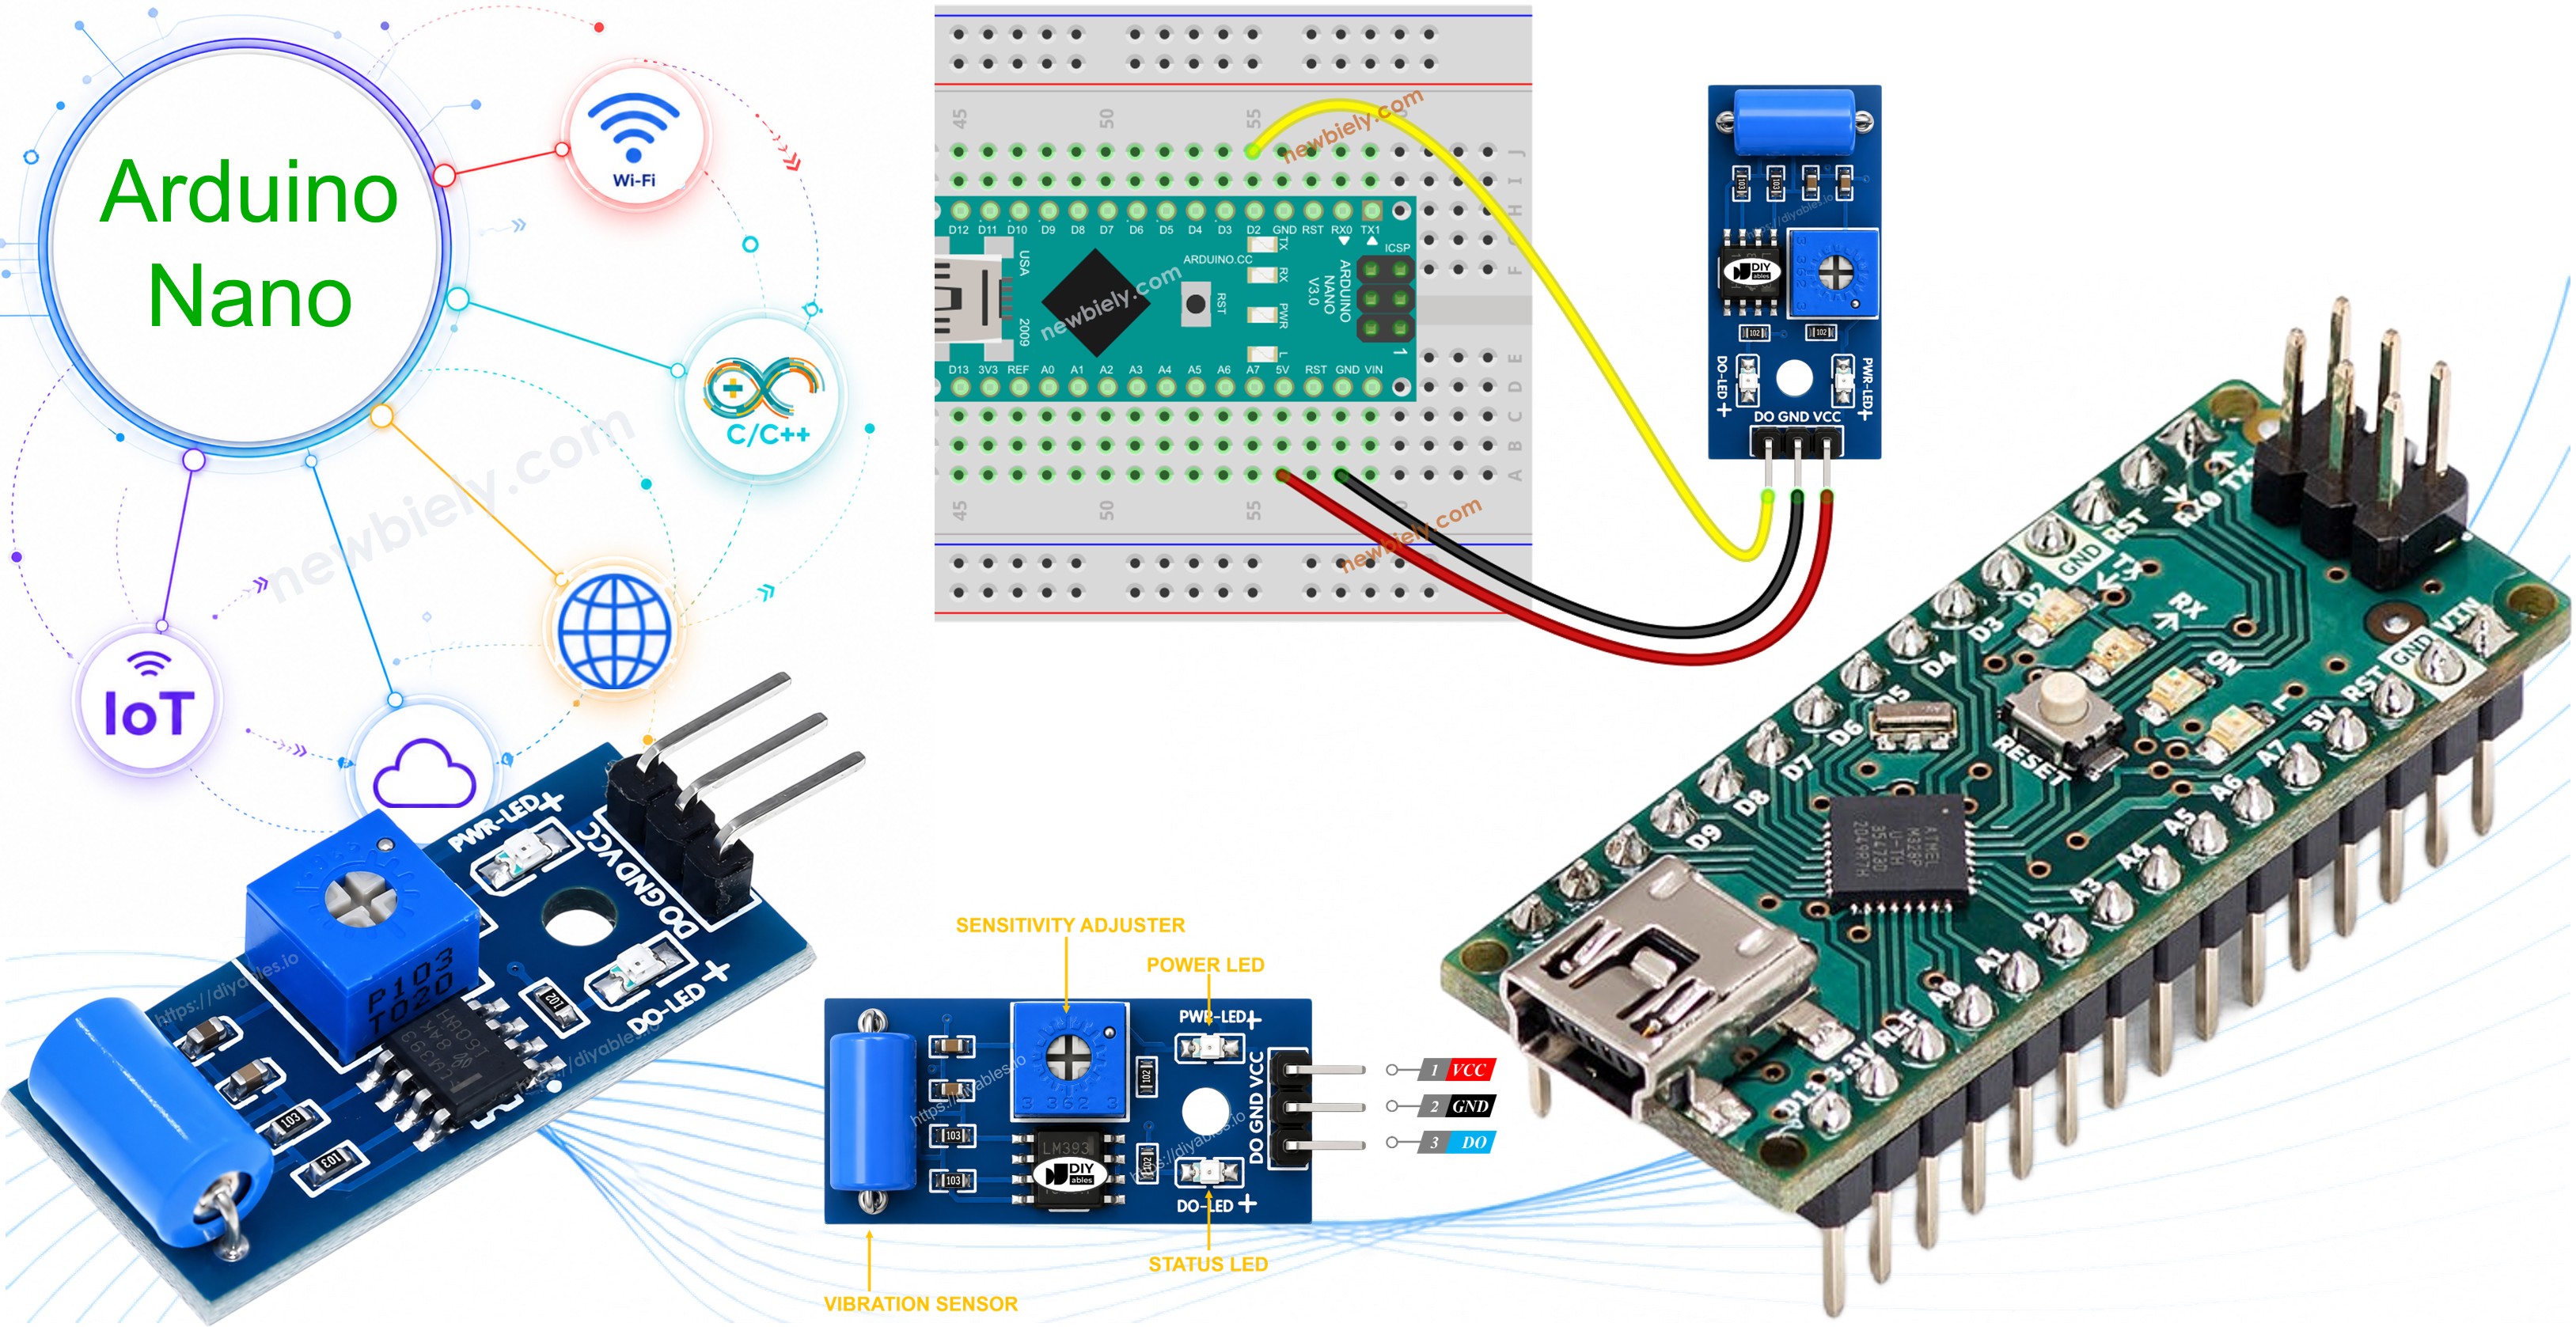
The SW-420 vibration sensor module has the capability to detect vibration or shock impacting its surroundings. It can be employed to create projects that respond to unwanted movement, like an alarm that activates when a door is knocked or a package that has been bumped in transit.
This tutorial instructs you how to use the Arduino Nano and a SW-420 vibration sensor to detect vibration. We will explore:
- How to connect the SW-420 vibration sensor to the Arduino Nano
- How to program the Arduino Nano to detect vibration using the SW-420 vibration sensor.
Once the basic sketch is running, you can extend the code to sound a buzzer, flash an LED, or send a notification whenever vibration is picked up.
Hardware Preparation
Or you can buy the following kits:
| 1 | × | DIYables Sensor Kit (18 sensors/displays) |
Additionally, some of these links are for products from our own brand, DIYables .
Overview of SW-420 Vibration Sensor
The SW-420 vibration sensor module can be used to detect vibration or shock in the surrounding environment. Inside the module, a small spring-based vibration switch sits near a metal contact; an onboard LM393 comparator watches that switch and outputs a clean digital signal whenever vibration or shock disturbs it. The module outputs a simple digital signal (ON/OFF), which makes it easy to interface with Arduino Nano.
The SW-420 Vibration Sensor Pinout
The SW-420 vibration sensor has three pins:
- VCC pin: needs to be connected to VCC (3.3V to 5V)
- GND pin: needs to be connected to GND (0V)
- DO pin: is an output pin: LOW when idle and HIGH when vibration or shock is detected. This pin needs to be connected to Arduino Nano's input pin.
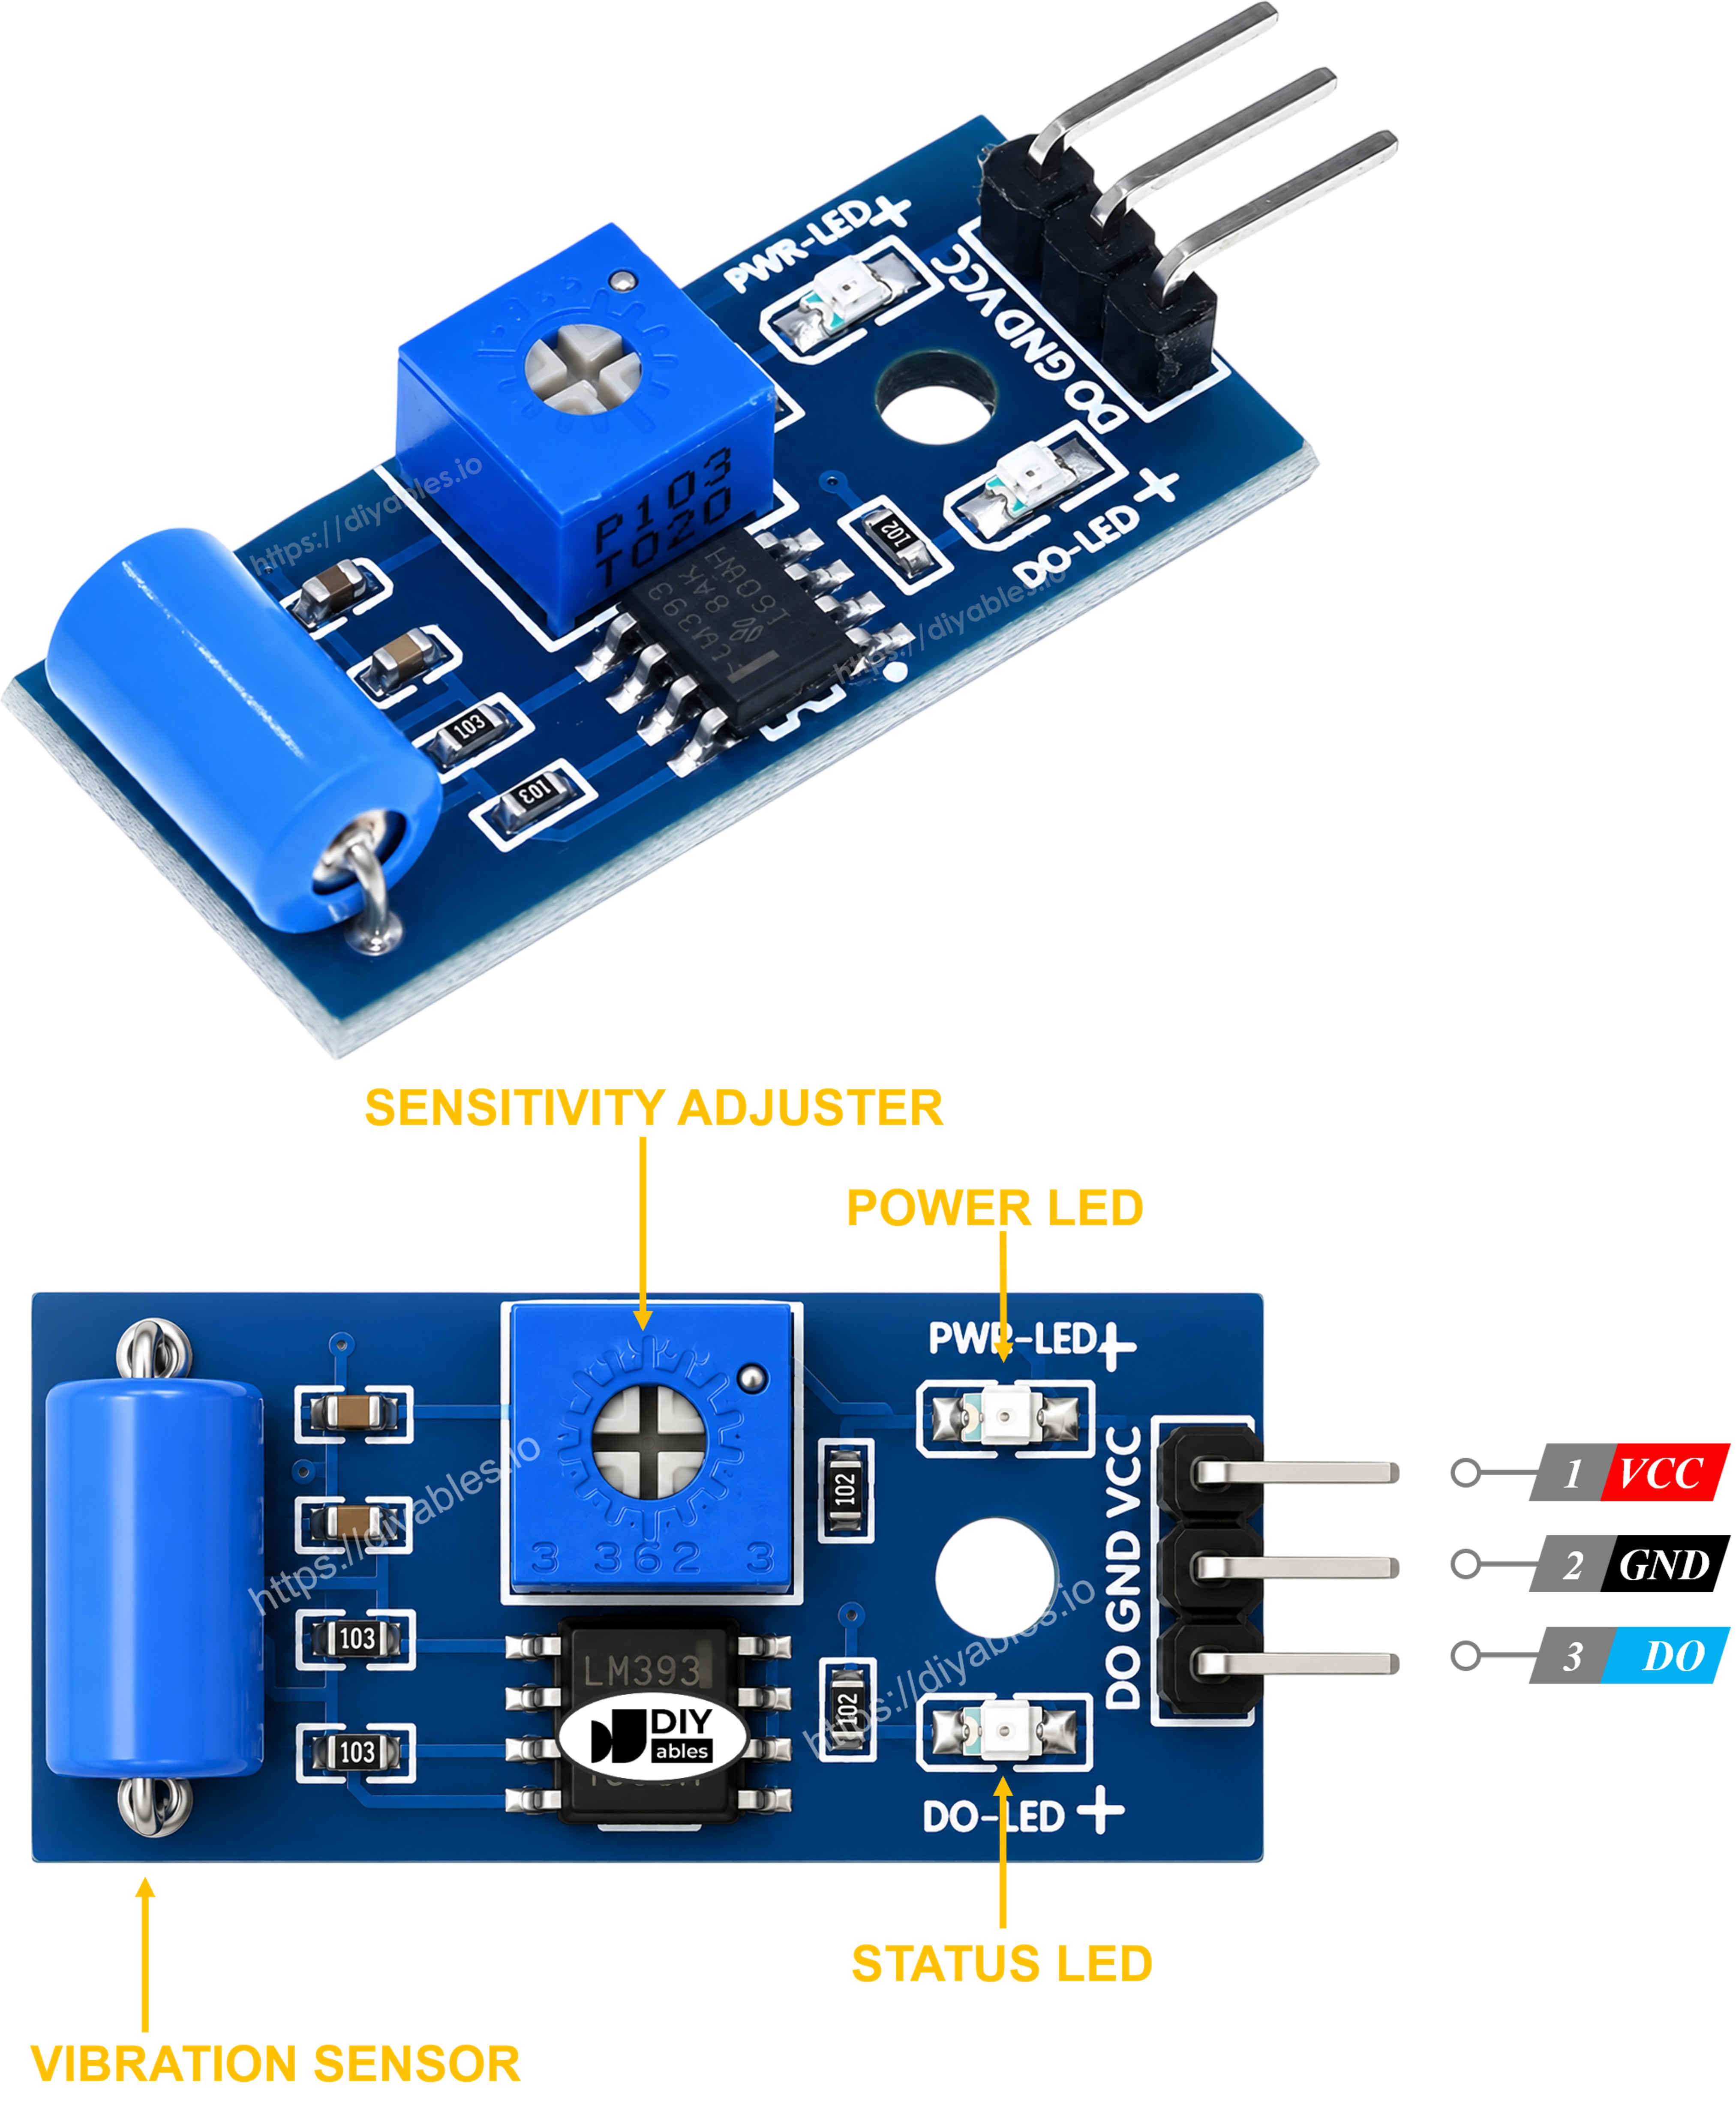
The SW-420 vibration sensor module also features two LED indicators:
- One LED indicates the power status.
- The other LED indicates the trigger state: it turns on when vibration is detected and off when the module is idle.
How It Works
The SW-420 vibration sensor module relies on a spring-based vibration switch paired with an onboard comparator. Here's how the output pin of the sensor behaves:
- When the module is undisturbed, the switch stays open and the output pin is set to LOW.
- When vibration or shock disturbs the switch, the contact closes momentarily and the output pin is set to HIGH.
- An onboard potentiometer lets you adjust how much shaking is needed before the output pin switches to HIGH.
Wiring Diagram
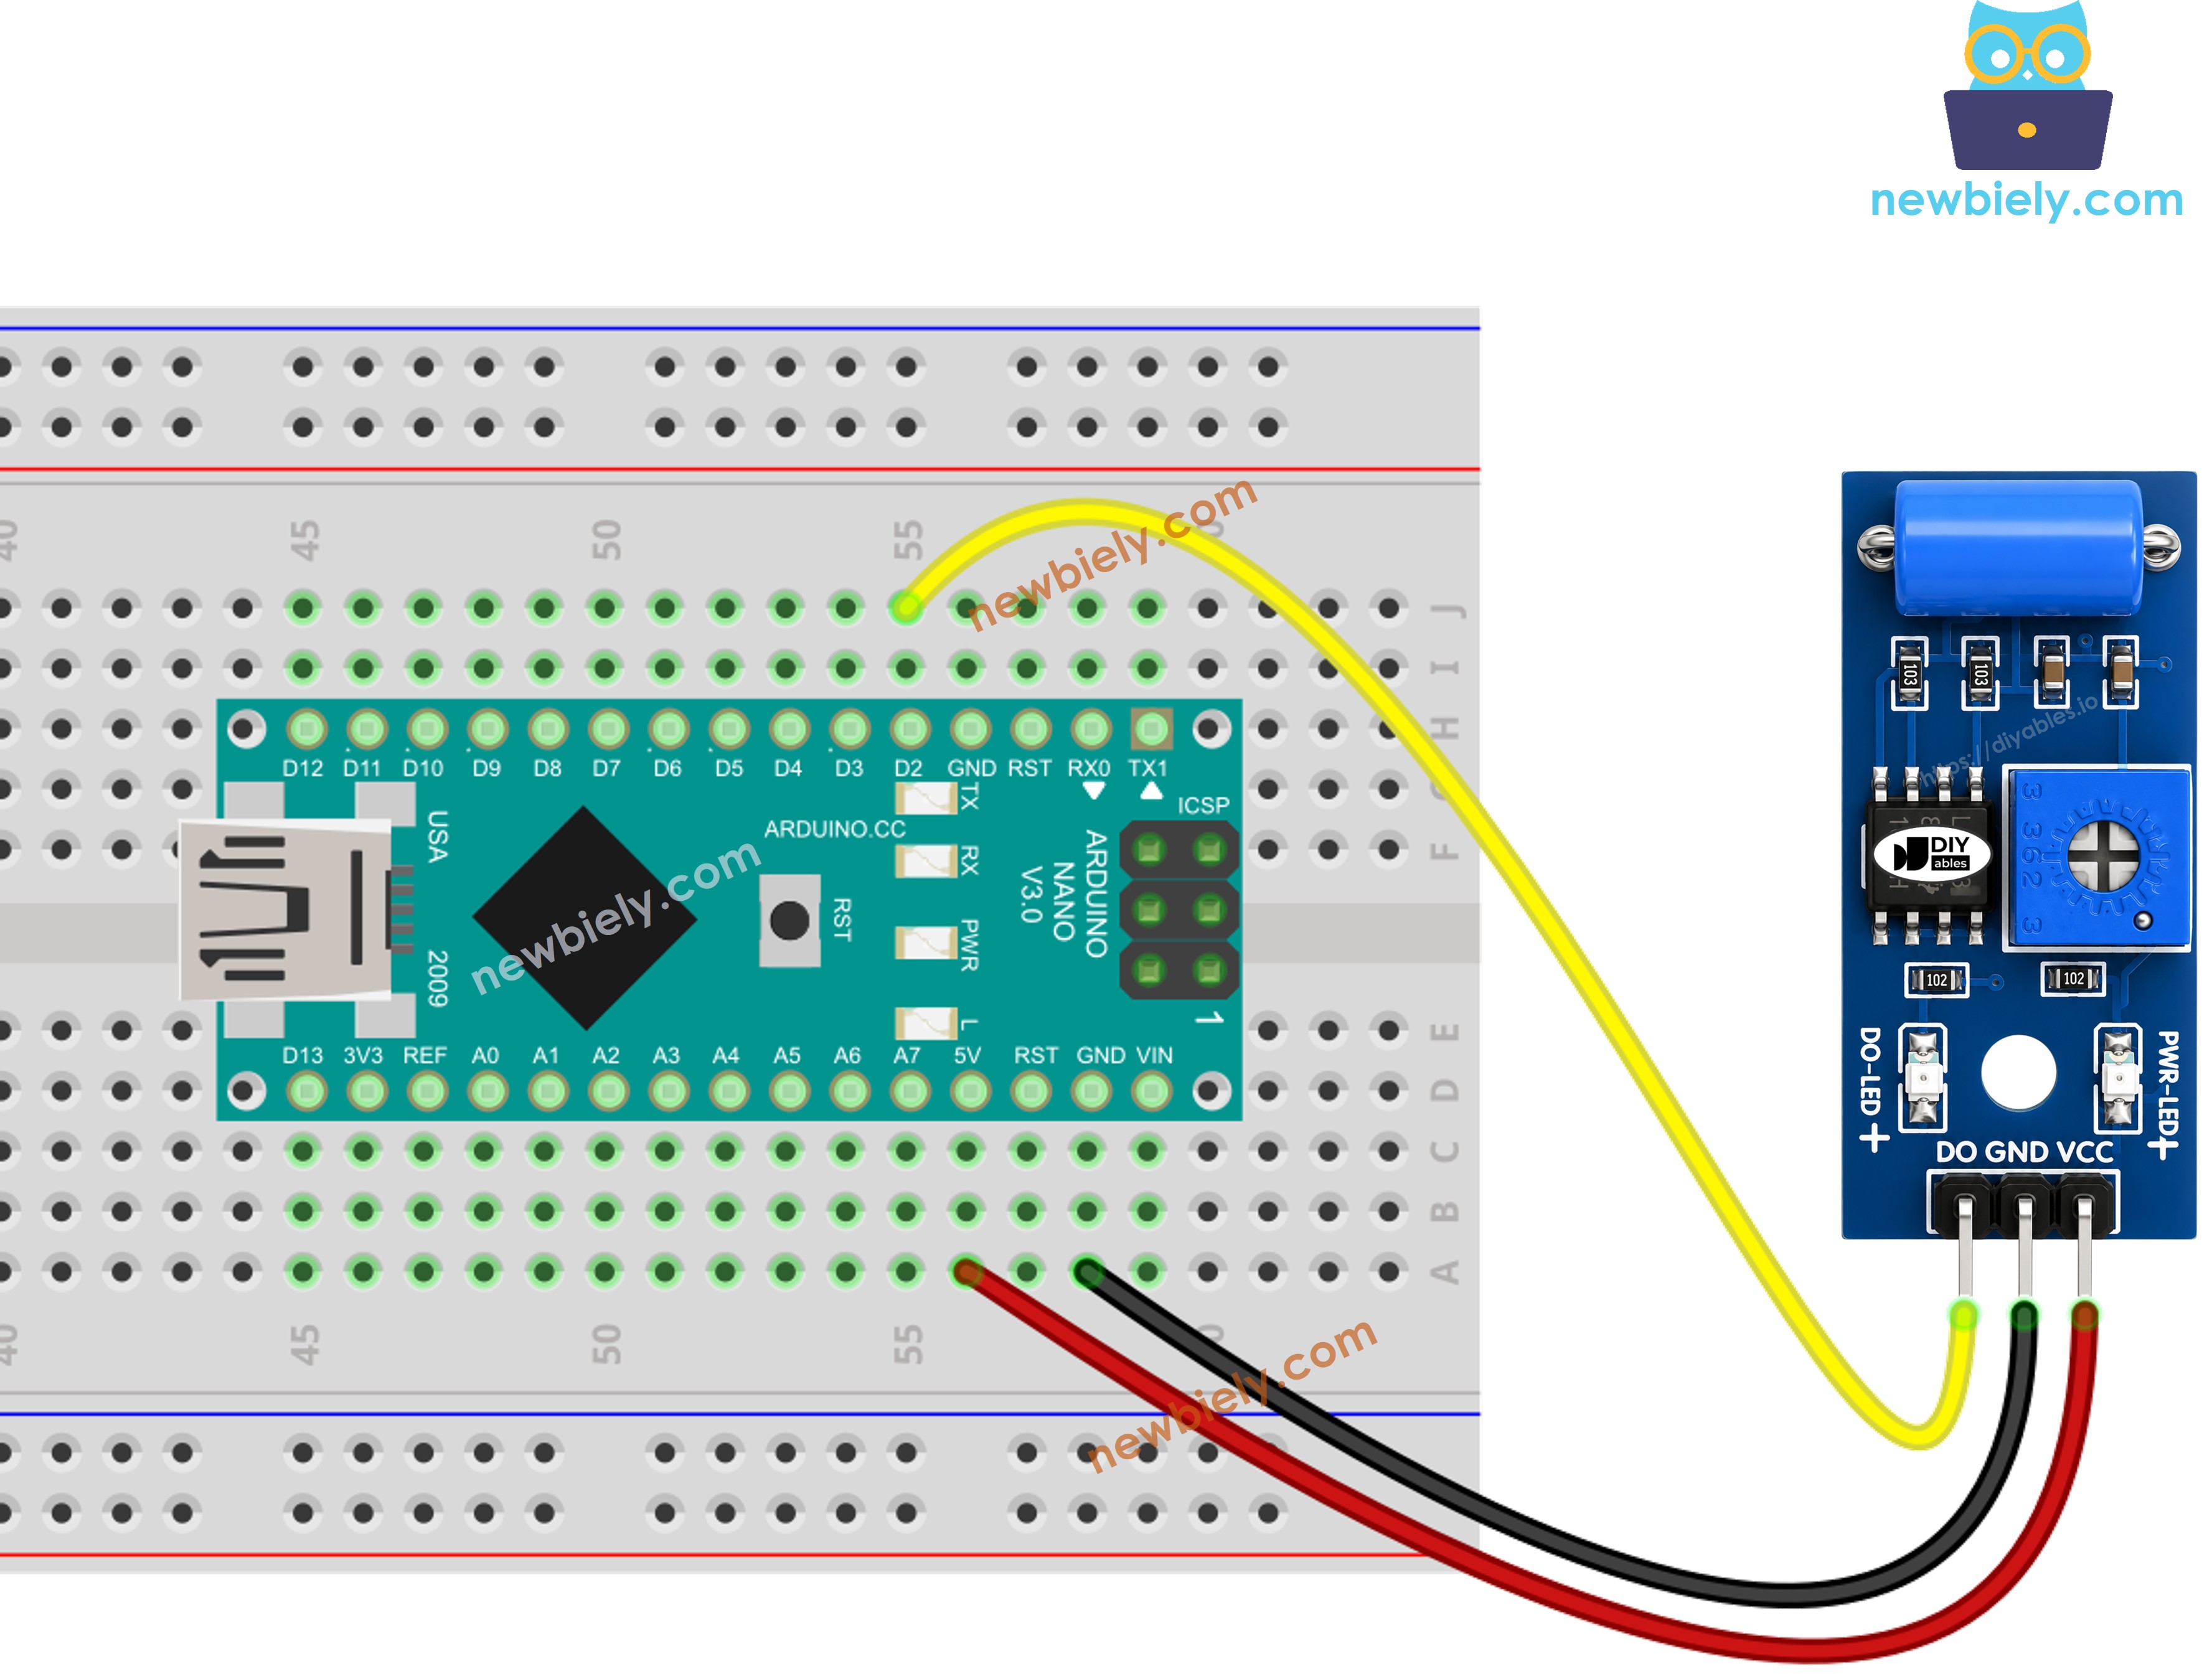
This image is created using Fritzing. Click to enlarge image
See The best way to supply power to the Arduino Nano and other components.
How To Program For SW-420 Vibration Sensor
- Initializes the Arduino Nano pin to the digital input mode by using pinMode() function. For example, pin D2
- Reads the state of the Arduino Nano pin by using digitalRead() function.
Arduino Nano Code - Detecting the vibration
Detailed Instructions
- Copy the above code and open with Arduino IDE
- Click Upload button on Arduino IDE to upload code to Arduino Nano
- Tap or gently shake the SW-420 sensor to trigger it
- Check out the result on the Serial Monitor.
From here, you can adapt the sketch to sound a buzzer, light up an LED, or push an alert to a connected app whenever vibration is detected. For more detailed information and step-by-step instructions, please refer to the tutorials provided at the end of this guide.
Troubleshooting
If you encounter issues with the SW-420 vibration sensor not functioning properly, you can follow these steps for troubleshooting:
- Adjust the sensitivity: Turn the onboard potentiometer to make the sensor more or less sensitive until it reliably triggers on the vibration level you care about.
- Isolate from ambient vibration: The sensor can pick up unrelated vibration from nearby motors, fans, or foot traffic. Mount it firmly on the target object to avoid false triggers.
- Check the wiring: Make sure the VCC, GND, and DO pins are connected correctly.
- Check the power supply: Ensure that the power supply is clean and stable, as noise can cause inconsistent readings.
By following these steps, you can address common issues and improve the performance of the SW-420 vibration sensor.