
ESP32 S3 Camera - Send Photo to Email When Motion Detected
This tutorial instructs you how to make an ESP32 S3 camera that sends you an email with a photo when somebody walks in front of it. A PIR motion sensor watches the room, the camera takes the picture, and the ESP32 S3 sends it straight to your mailbox. You do not need a Telegram account, a cloud service, or a public IP address.
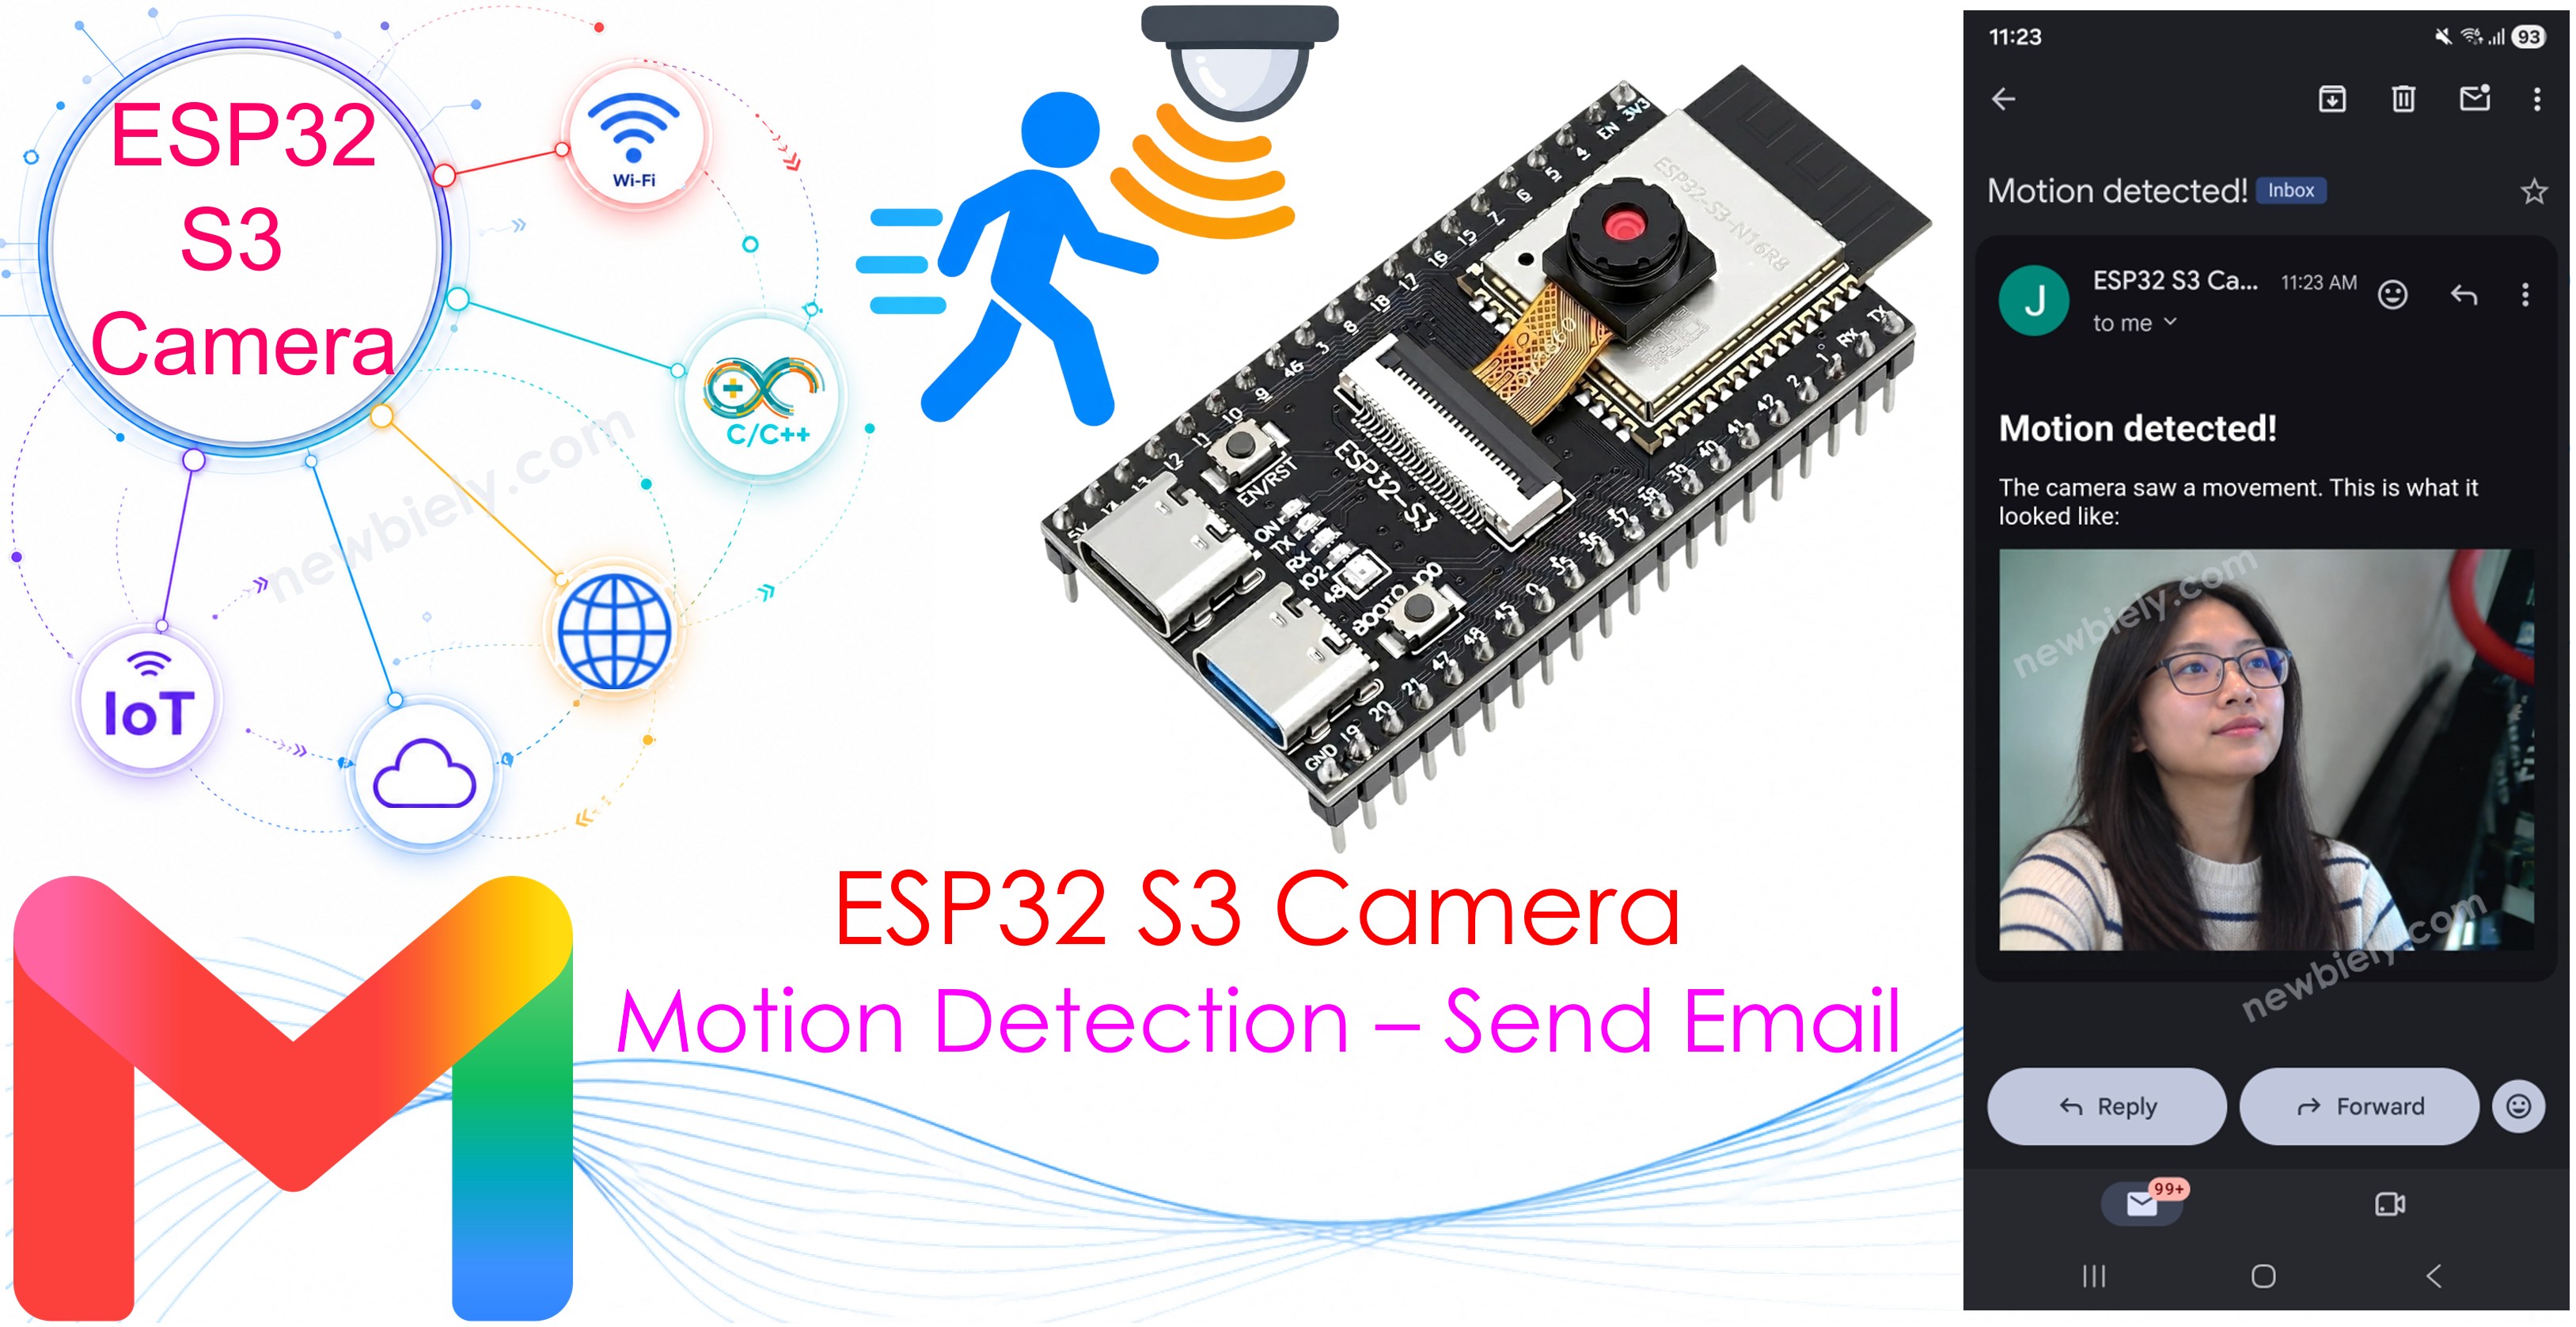
What you'll build:
- An ESP32 S3 camera with a PIR motion sensor
- An email with the photo inside the message, every time the sensor sees a movement
- A quiet time, so one visitor does not fill your mailbox
- A camera that anybody can read, because everybody has an email address
Hardware Preparation
Or you can buy the following kits:
| 1 | × | DIYables Sensor Kit (18 sensors/displays) |
Additionally, some of these links are for products from our own brand, DIYables .
※ NOTE THAT:
The ESP32 S3 camera board has 40 pins, but the screw terminal block and the breakout board have 44 pins. They still work together. Put the camera board in the center of the 44-pin board, so 2 pins stay free on the left side and 2 pins stay free on the right side.
The screw terminal block lets you connect wires with a screwdriver, with no soldering. The breakout board gives you easy pin headers for a breadboard.
Email or Telegram?
Both send the photo to your phone. They are good at different things:
| Telegram | ||
|---|---|---|
| Setup work | Make one app password | Make a bot and find a chat ID |
| Speed | 5 to 15 seconds | 2 to 4 seconds |
| Photo quality | Full size, shown inside the message | Telegram may make it smaller |
| Keeps old photos | Yes, your mailbox keeps everything | Yes, but the chat gets long |
| Works for anybody | Yes, everybody has an email | Only people who use Telegram |
| Code size | Bigger, it needs a library | Smaller |
Email is the better choice when you want the full size picture and a record you can search later. See also the ESP32 S3 Camera - Send Photo to Telegram When Motion Detected tutorial.
Overview of the App Password
Your normal Gmail password does not work here. Google blocks it for small devices. You must make a special 16-letter password, called an app password.
- Make a new Gmail account only for your projects. Do not use the account you read your real email with.
- Log into the new account.
- Go to your Google Account.
- Open the Security section.
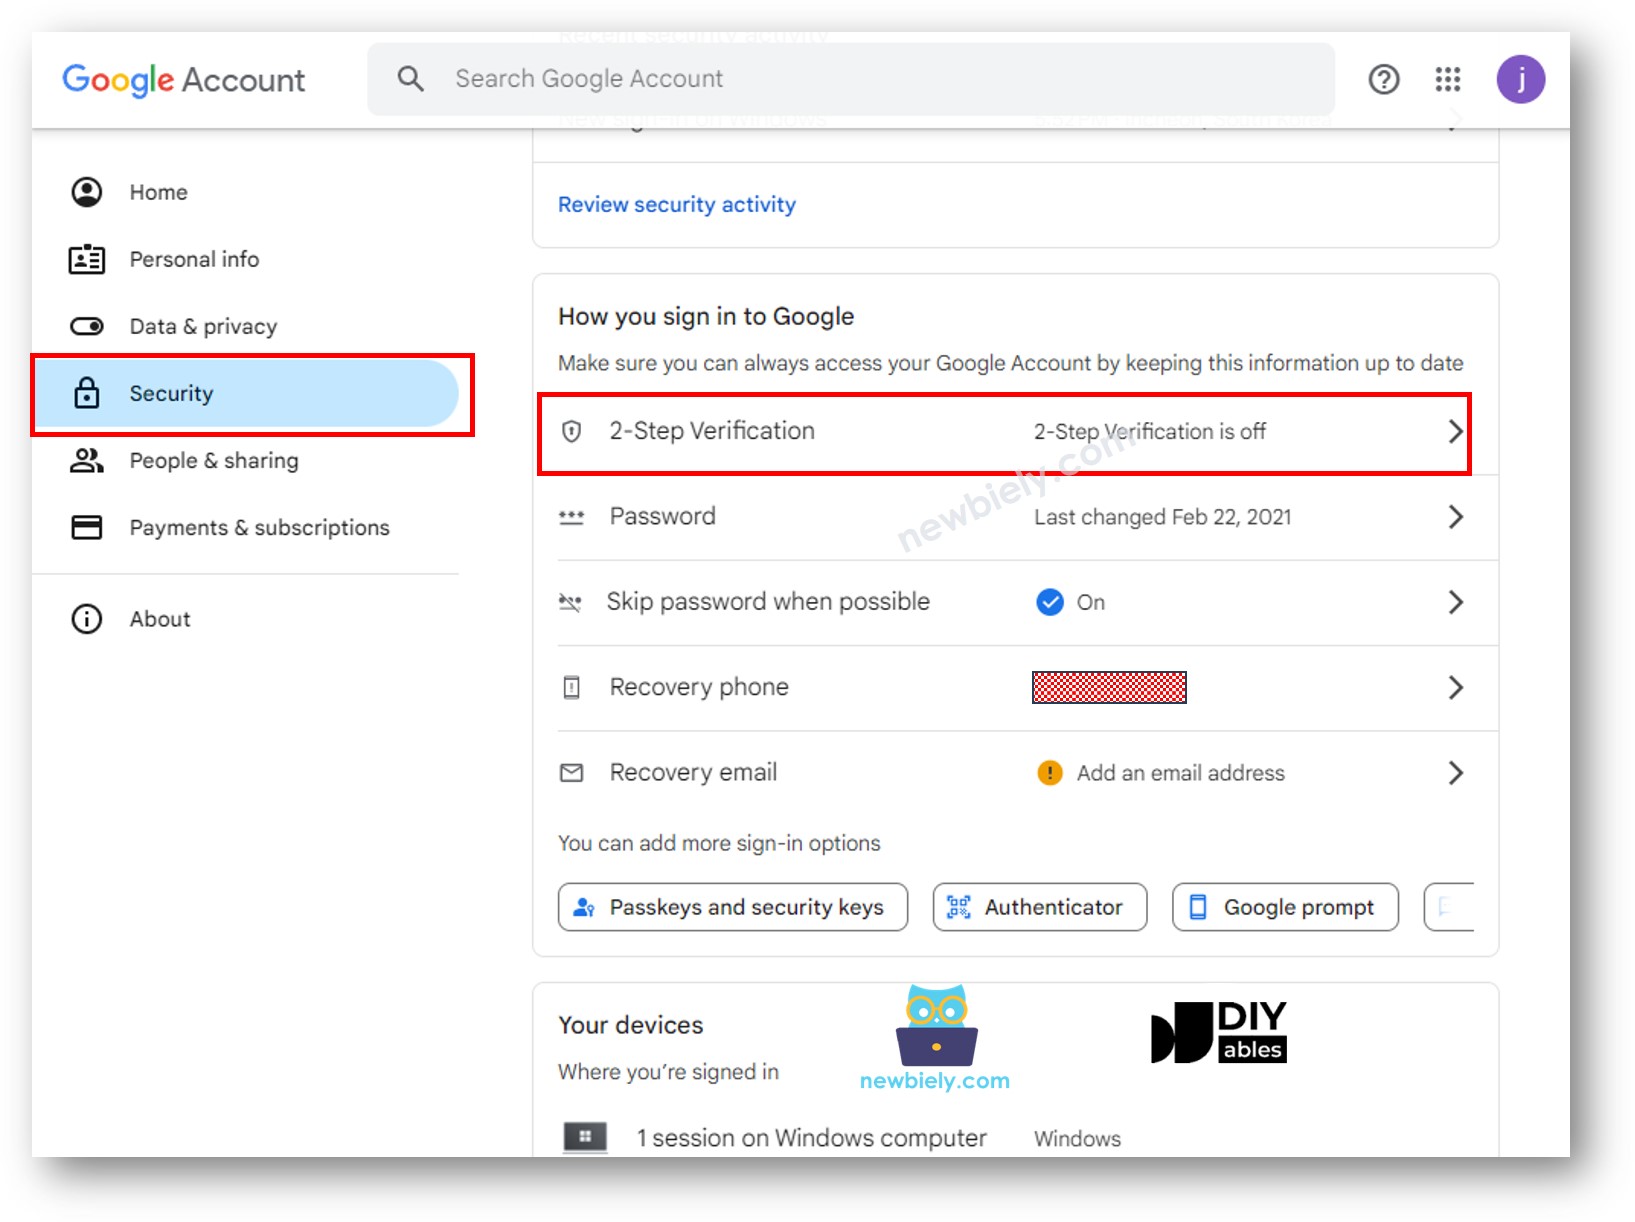
- Turn on 2-Step Verification. Without it, Google does not let you make an app password.
- Open the Google App Passwords page and make a new app password. You can give it any name, for example ESP32 S3 Camera.
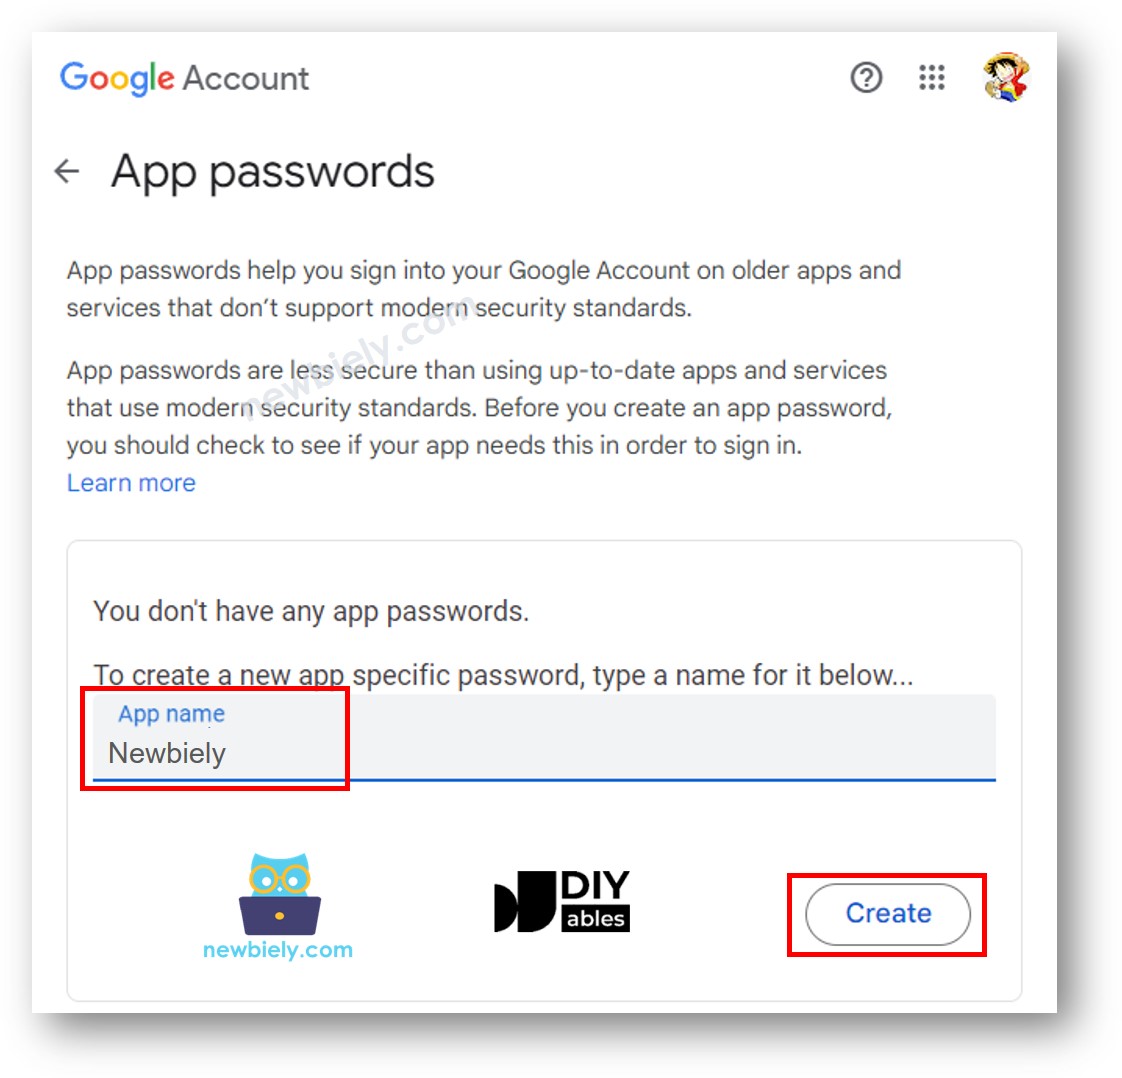
- Click the Create button. Google shows 16 letters in four groups:
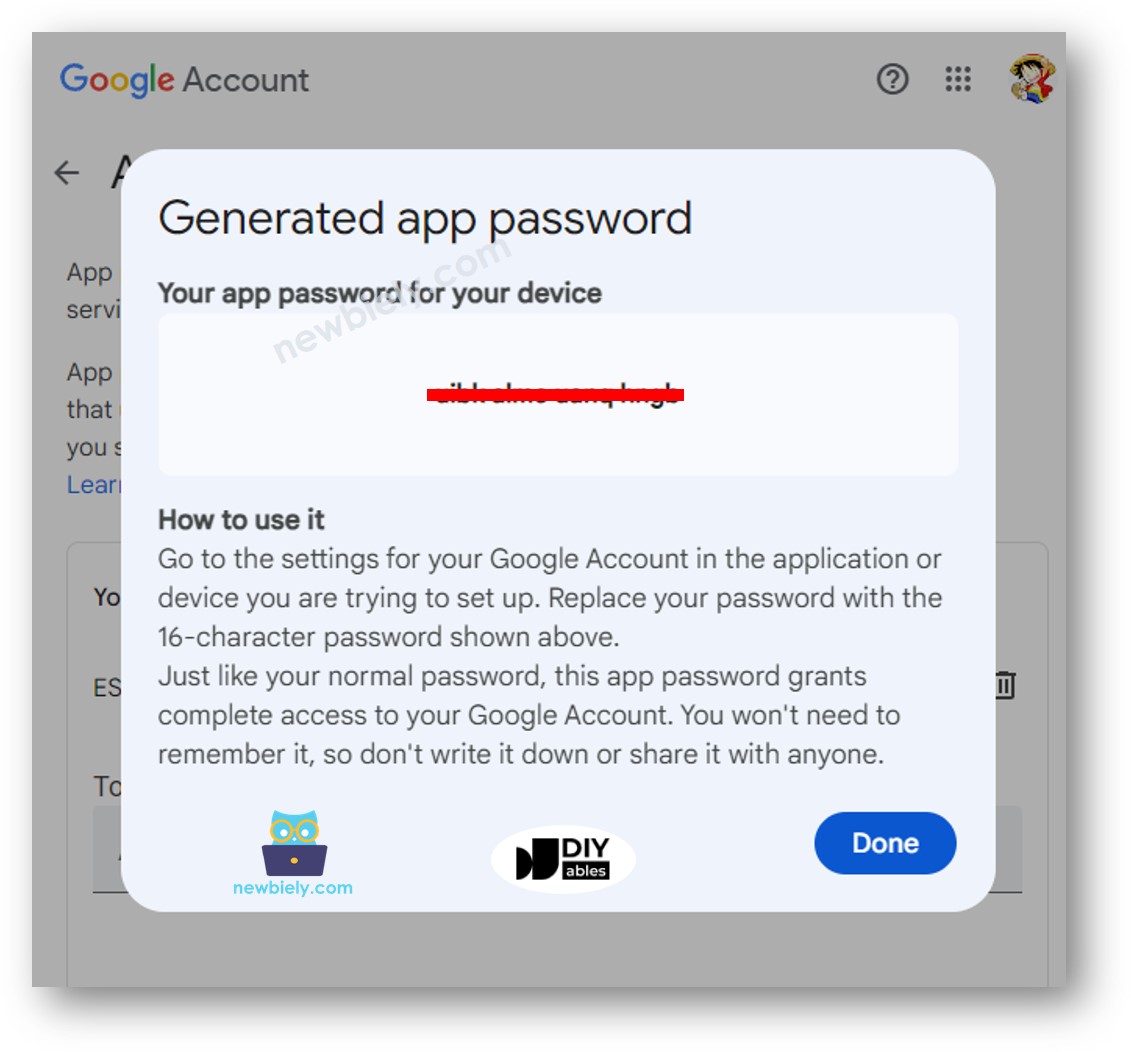
- Keep these 16 letters. You need them in the code in the next step.
※ NOTE THAT:
Write the 16 letters without spaces into the code: abcdefghijklmnop
※ NOTE THAT:
Google changes the look of these pages from time to time. If you cannot find "App Passwords" with the steps above, search the internet for "How to get Google App Passwords" to see the newest way.
※ NOTE THAT:
An app password gives access to the whole mailbox of that account. This is why we use a new account only for projects. Keep the password secret, and never put it on a website or on GitHub. You can delete it at any time on the same Google page, and the ESP32 S3 simply stops sending.
Do you use another email company? Then change only these two lines:
| Company | SMTP server | Port |
|---|---|---|
| Gmail | smtp.gmail.com | 465 |
| Outlook / Hotmail | smtp.office365.com | 587 |
| Yahoo | smtp.mail.yahoo.com | 465 |
Overview of PIR Motion Sensor
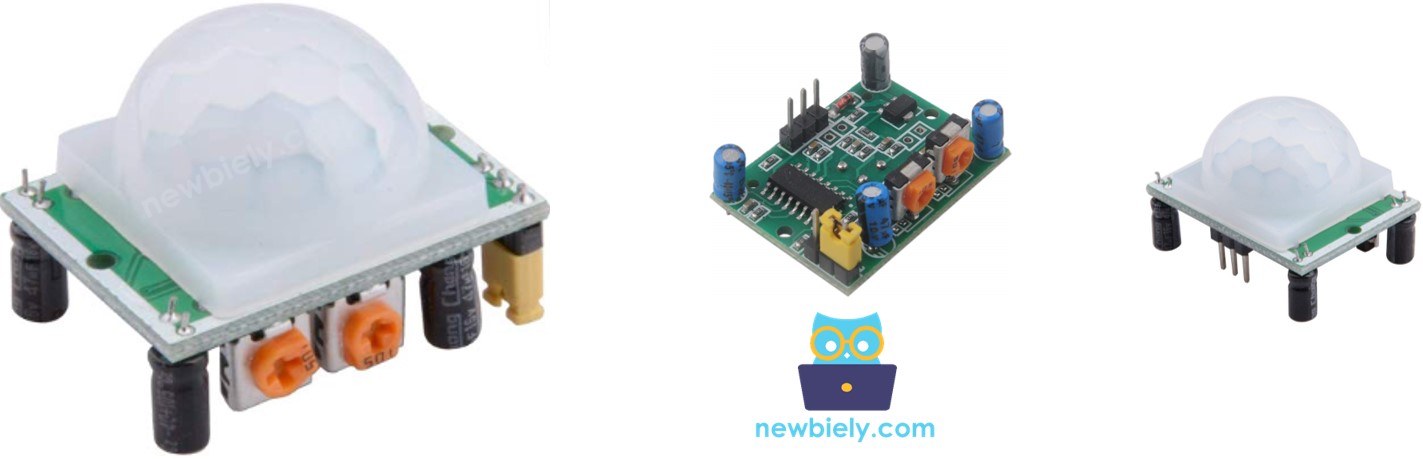
A PIR motion sensor sees the heat of a human body. PIR means "Passive InfraRed". When a warm body moves in front of it, the OUT pin goes HIGH.
Why This Project Uses a Sensor
The movement is found by the PIR sensor, not by the camera. This matters, because a PIR sensor answers only to the heat of a body. A person or an animal starts it. A lamp that goes on, a cloud that passes the sun, or a curtain that moves in the wind does not start it.
That is why a sensor sends you far fewer emails about nothing.
| Way to find movement | What starts it | Extra part | False alarms |
|---|---|---|---|
| PIR sensor (this tutorial) | The heat of a body | One sensor | Almost none |
| The camera looking at itself | Any change in the picture | None | Lamps, clouds, wind, unless you work against them |
Do you want to find movement with no sensor at all, using only the pictures of the camera? See the ESP32 S3 Camera - Detect Motion Without a Sensor tutorial. That way needs no extra part, and it also sees cold things such as a parcel or a car, which a PIR sensor never sees. The price is more code, and more work to ignore light and wind.
※ NOTE THAT:
Do you want the best of both? Use the sensor and the picture together, and send the email only when both agree. Then a warm body must be there and something must really have changed in the picture.
Key Specifications
| Item | Value |
|---|---|
| Power | 5V |
| Output | 3.3V HIGH when it sees a movement, LOW when it sees nothing |
| Distance | 3 to 7 meters (you can change it) |
| Angle | about 110° |
| Warm-up time | 30 to 60 seconds after power on |
The sensor has two small orange screws. Turn the time delay screw all the way to the left, so the output stays HIGH for only about 3 seconds.
For more detail about the motion sensor, see the ESP32 S3 - Motion Sensor tutorial.
Wiring Diagram between PIR Motion Sensor and ESP32 S3
Connect the PIR motion sensor to your ESP32 S3 with three jumper wires.
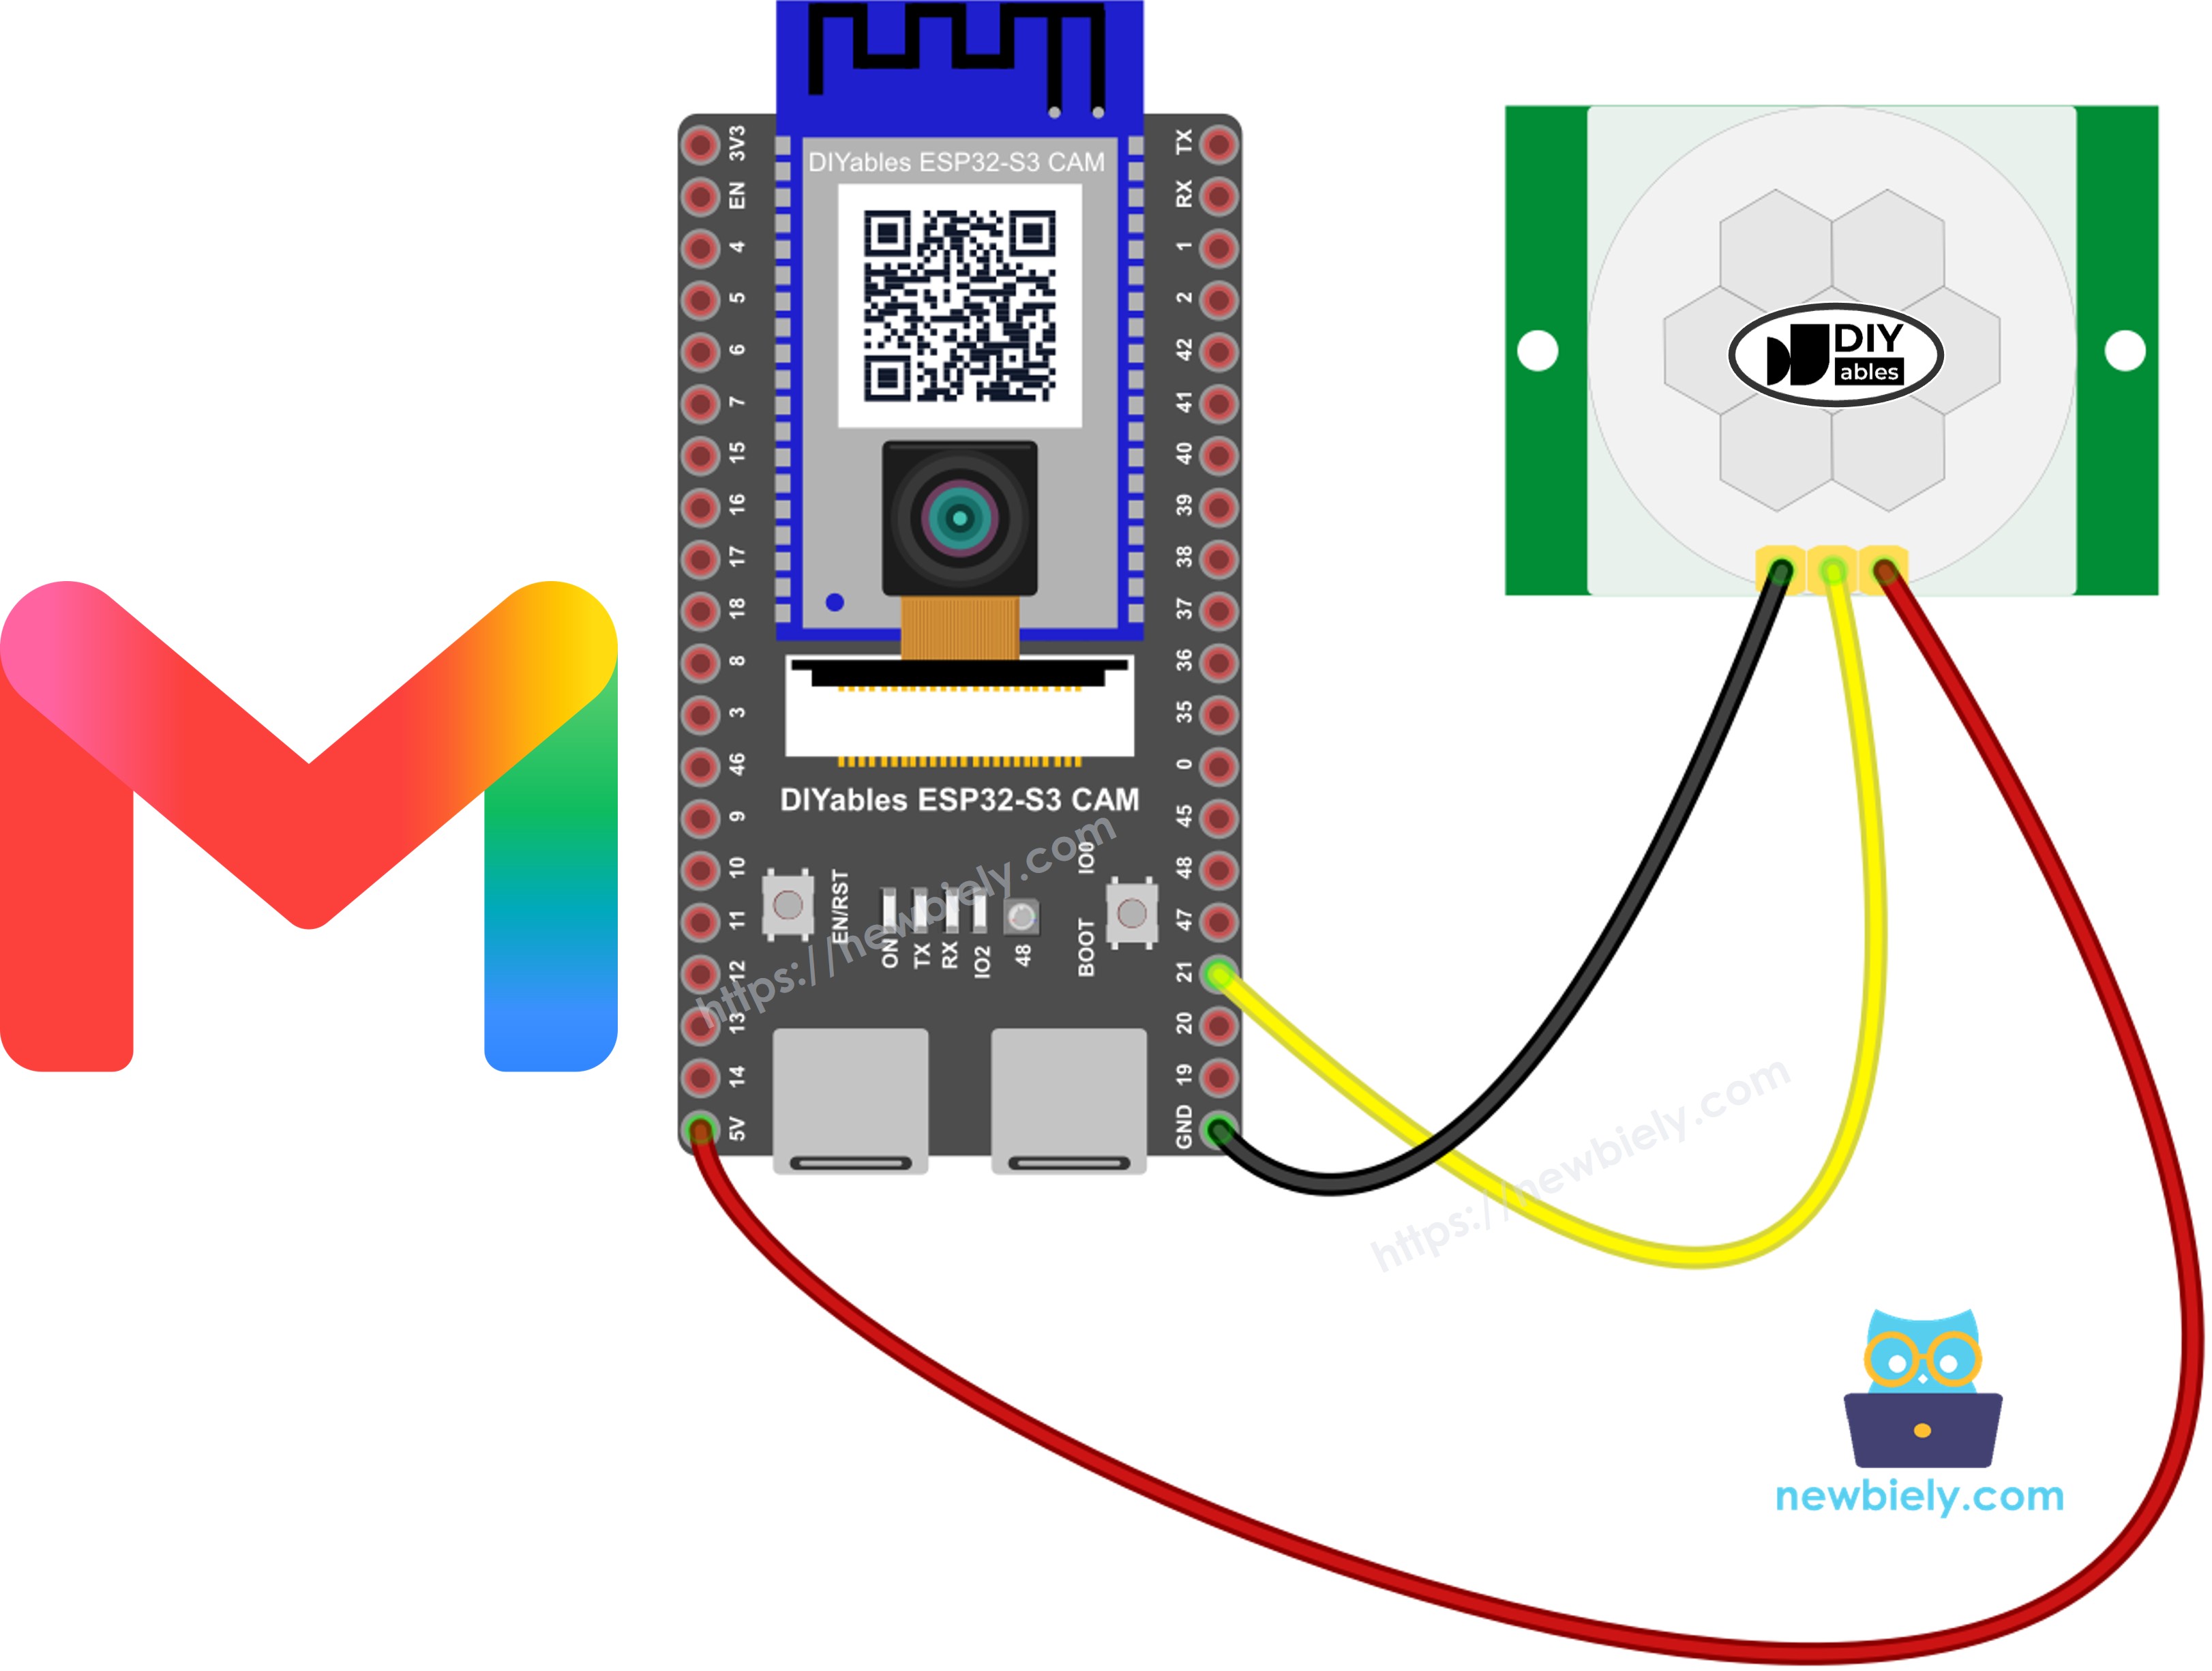
This image is created using Fritzing. Click to enlarge image
| PIR Sensor Pin | ESP32 S3 Pin |
|---|---|
| VCC | 5V |
| GND | GND |
| OUT | GPIO21 |
Safety Notes
The PIR sensor needs 5V on its VCC pin, not 3.3V. With 3.3V it looks like it works, but it gives wrong signals. Its OUT pin gives 3.3V, which is correct for the ESP32 S3.
The camera uses GPIO4, 5, 6, 7, 8, 9, 10, 11, 12, 13, 15, 16, 17 and 18. Do not use these pins for the sensor. GPIO21 is free, so we use it.
Install ESP Mail Client Library
The ESP Mail Client library talks to the email server for you.
- Open the Arduino IDE.
- Click the Libraries icon on the left bar.
- Type ESP Mail Client into the search box.
- Find the library by Mobizt and click INSTALL.
- Search for ESP Mail Client created by Mobizt and click the Install button.
Arduino IDE Settings for ESP32 S3 Camera
The camera does not work with the default settings of the Arduino IDE. You must change some items in the Tools menu before you upload the code.
| Tools Menu Item | Select This |
|---|---|
| Board | ESP32S3 Dev Module |
| Flash Size | 16MB (128Mb) |
| PSRAM | OPI PSRAM |
| Partition Scheme | Huge APP (3MB No OTA/1MB SPIFFS) |
| CPU Frequency | 240MHz (WiFi) |
| USB Mode | Hardware CDC and JTAG |
| Upload Mode | UART0 / Hardware CDC |
| Upload Speed | 921600 |
| USB CDC On Boot | Enabled |
※ NOTE THAT:
Partition Scheme must be Huge APP for this project. The email library is big, and the code does not fit in the normal partition.
How To Send a Photo by Email
- Include the library at the top of your code.
- Put your email account into a Session_Config.
※ NOTE THAT:
The email server also needs the correct time, or it refuses the message. The code asks an NTP time server for you with config.time.ntp_server.
- Write the message.
Inside the Email, Not Under It
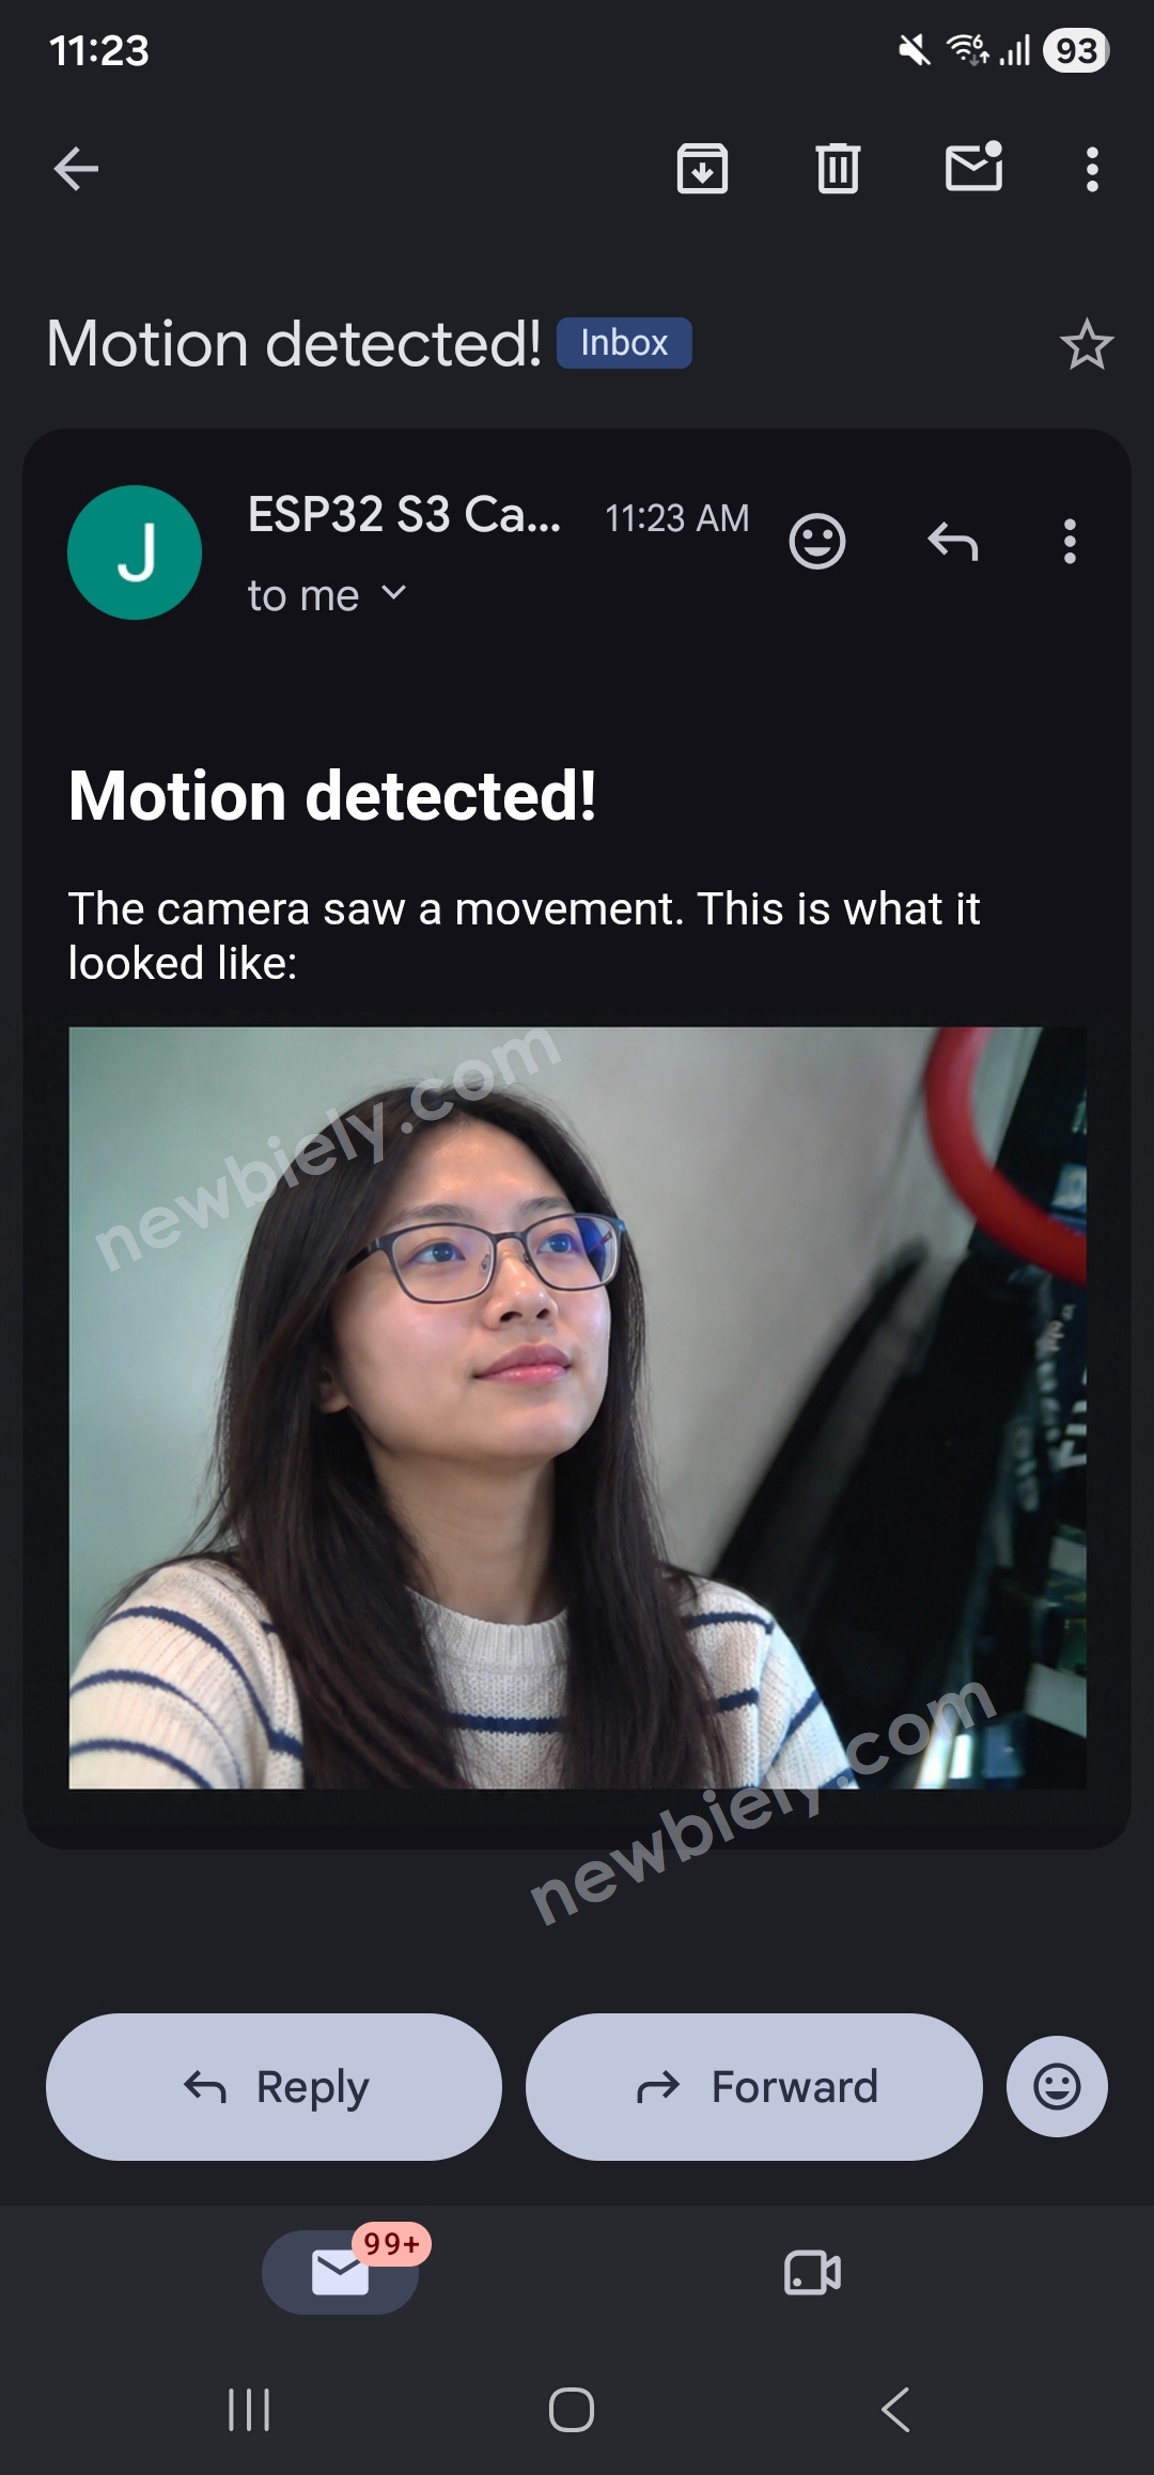
There are two ways to put a photo into an email, and they look very different when the message arrives:
| Way | Method in the code | How it looks |
|---|---|---|
| Attachment | message.addAttachment(att); | A small grey file box under the text. You must click it to see the photo. |
| Inside the email | message.addInlineImage(att); | The photo is big, in the message itself. You see it at once. |
For a security camera, inside the email is much better. You open the message on your phone and you see the visitor immediately, with no tapping.
Two things are needed for it:
- The body of the email must be HTML, not plain text
- The <img src="..."> name must match the file name of the picture
※ NOTE THAT:
Do you want both, so you can also save the file easily? Then add the same picture two times, once with addInlineImage() and once with addAttachment().
- Write the body of the email in HTML, and put an <img> in it.
- Put the photo inside the email with addInlineImage(). The photo goes straight from the memory, so it never has to be saved to a card first.
※ NOTE THAT:
The name in src="photo.jpg" must be exactly the same as att.descr.filename. That is how the email program knows which picture belongs in which place. Change one of them and you get an empty box instead of the photo.
※ NOTE THAT:
blob means "the data is already in the memory". The camera gives you fb->buf and fb->len, and the library sends exactly those bytes.
- Connect and send.
※ NOTE THAT:
Always call smtp.closeSession(). If you leave the connection open, the email server soon refuses new messages.
ESP32 S3 Code
Change your WiFi, your email address and your app password at the top of the code. The quiet time is 60 seconds, because an email takes longer than a chat message. To change it, change the line #define QUIET_TIME 60000.
Detailed Instructions
- New to ESP32 S3? Complete our Getting Started with ESP32 S3 guide first.
- Make your Google app password. See the steps above.
- Install the ESP Mail Client library.
- Unplug the USB cable, then wire the PIR sensor as in the table above.
- Turn the time delay screw of the sensor all the way to the left.
- Copy the above code and paste it into the Arduino IDE.
- Change WIFI_SSID, WIFI_PASSWORD, SENDER_EMAIL, SENDER_PASSWORD and RECEIVER_EMAIL.
※ NOTE THAT:
- SENDER_EMAIL must be a Gmail account, the new one you made for your projects.
- SENDER_PASSWORD is the 16-letter app password, not the password of the account.
- RECEIVER_EMAIL can be any kind of email address. It can also be the same address, so the camera writes to itself.
- Change the settings in the Tools menu. See the table above.
- Compile and upload the code to the ESP32 S3 board by clicking the Upload button in Arduino IDE.

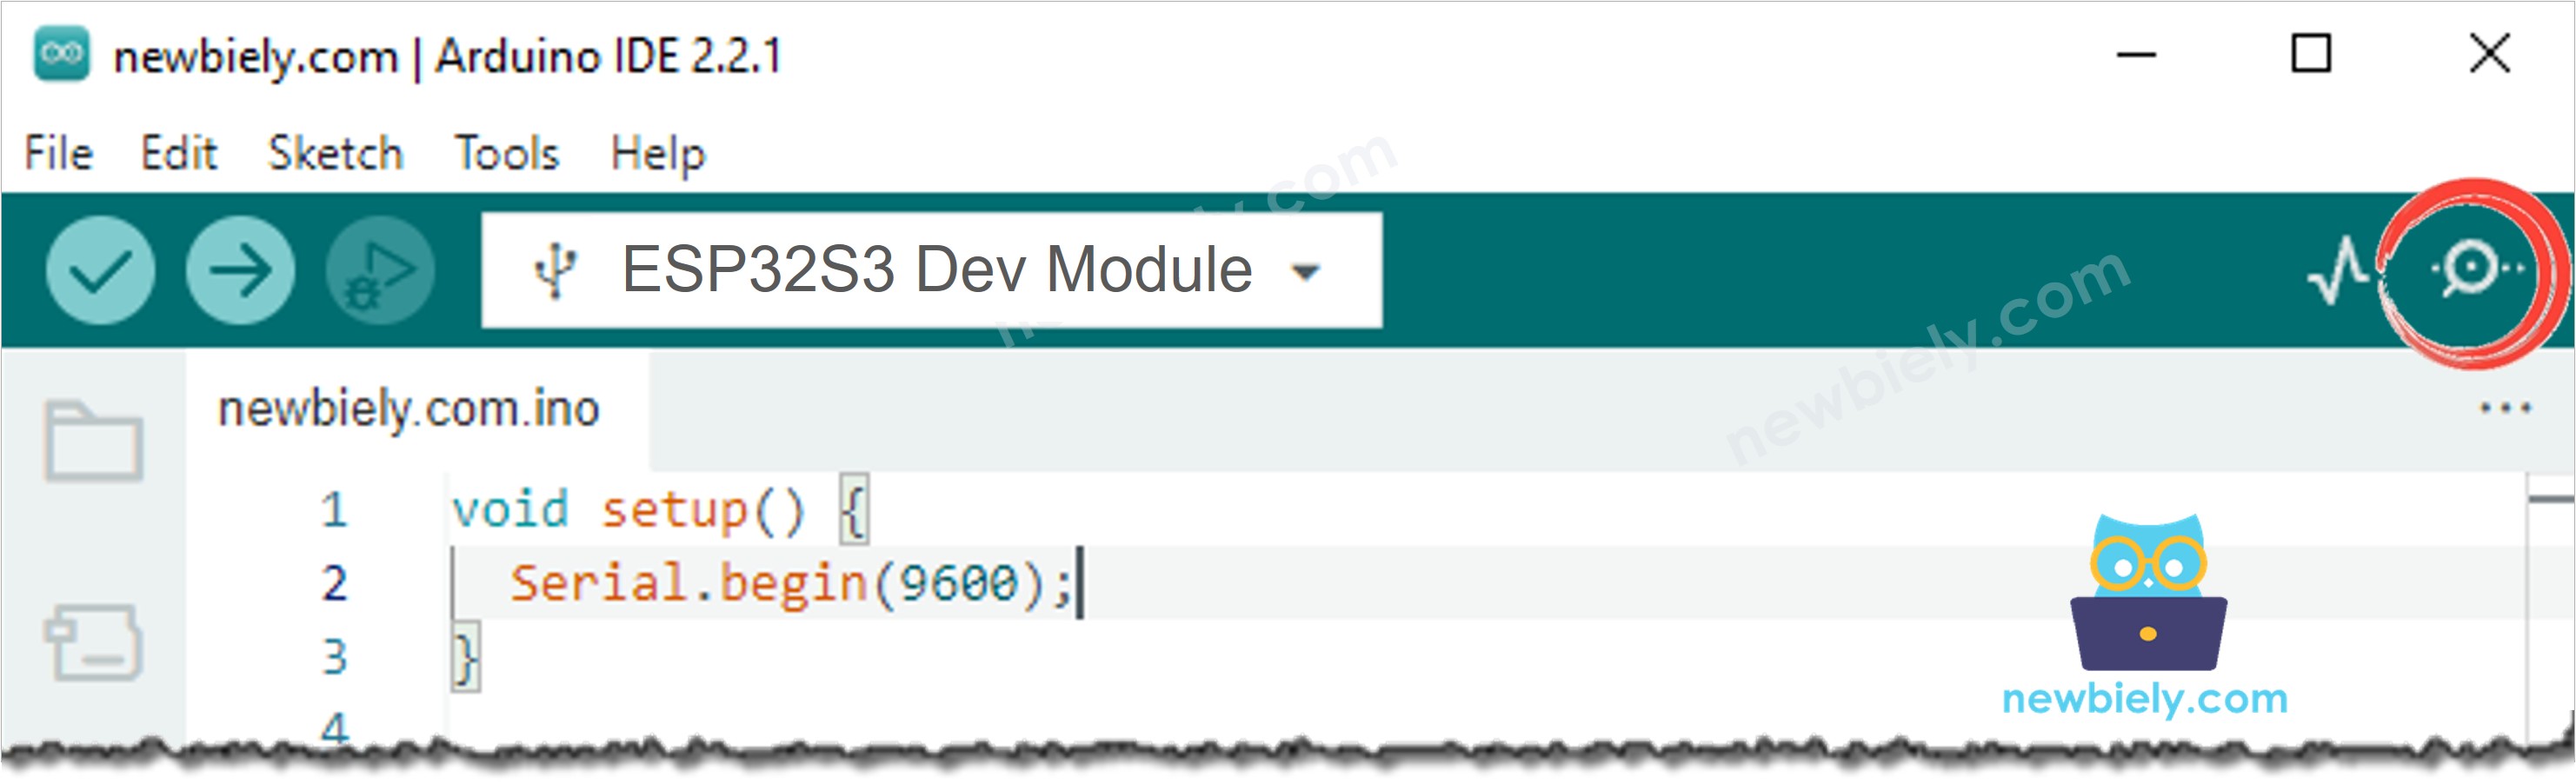
- Open the Serial Monitor in Arduino IDE.
- Press the RESET button one time, then leave the room for 30 seconds.
- Come back and walk in front of the camera. The email arrives in a few seconds.
Serial Monitor
The following readings were captured in 2026:
※ NOTE THAT:
Do you want to see every step that the email server does? Change smtp.debug(0) to smtp.debug(1). The Serial Monitor then shows the whole conversation, which helps a lot when something goes wrong.
Troubleshooting
The Serial Monitor shows Cannot connect with Username and Password not accepted.
You used your normal Gmail password. Make an app password and use that one, with no spaces.
The Serial Monitor shows a certificate or a time error.
The board has the wrong time, so it cannot check the server. Make sure the board reaches the internet, because the time comes from an NTP server.
The email arrives, but the photo is an empty box.
The name in src="photo.jpg" and the name in att.descr.filename are not the same. They must match exactly.
The photo is still a small file under the text.
You used addAttachment(). Change it to addInlineImage(), and make sure the body is message.html.content, not only message.text.content.
The email never arrives, but the Serial Monitor says it was sent.
Look in the Spam folder. The first message from a new sender often lands there. Mark it as "not spam" one time, and the next ones go to your inbox.
The Serial Monitor shows Connection error with Outlook.
Outlook uses port 587, not 465. Change SMTP_PORT to 587.
The upload fails with "text section exceeds available space".
Set Partition Scheme to Huge APP in the Tools menu. The email library is big.
The sensor sees a movement all the time.
Wait one full minute after start, turn the sensitivity screw a little to the left, and check that VCC is on 5V.
I get too many emails.
Increase QUIET_TIME from 60000 to 300000 (five minutes).
The Serial Monitor shows nothing after the boot messages.
If your USB cable is in the port named UART, set USB CDC On Boot to Disabled. If it is in the port named USB, set it to Enabled.
Applications
Email needs no special application, so anybody can receive the photos, on any phone and on any computer. Here are practical projects you can build with this code:
- Home security camera with email alerts: Get a full size photo in your mailbox when somebody enters.
- Package delivery record: Keep a dated email for every delivery at your door.
- Office after hours: Send the photos to a shared company mailbox that several people can read.
- Holiday house watcher: Watch an empty house, and keep every photo as a record.
- Wildlife camera with reports: Get an email when animals come into your garden at night.
- Farm gate and barn: Watch a place far from your house, and keep the emails as proof.
- Shop alarm record: Every photo has a date and a time, so it works as a simple log book.
- Baby room watcher: Get a photo when your child gets out of bed.
- Tutorial and machine room: Know who entered the room while the machines were running.
- Insurance proof: A mailbox full of dated photos is easy to search and easy to show later.
Video Tutorial
Watch the step-by-step video walkthrough for this ESP32 S3 project below.
Challenges
- Beginner: Change the subject and the text of the email to your own words.
- Intermediate: Send the email to two people at the same time with a second message.addRecipient().
- Advanced: Also save every photo to the microSD card, so you keep a copy even when the internet is down. See the ESP32 S3 Camera - Save Photo to SD Card When Motion Detected tutorial.