
ESP32 S3 - SCD40 CO2 Sensor
Stale room air is easy to miss until you feel tired, and the SCD40 turns that feeling into a real number: the CO2 level in parts per million (ppm). In this guide, the ESP32 S3 talks to the SCD40 over I2C, prints the CO2 level every few seconds, and labels the air as Good, Moderate or Poor.
What you'll build in this tutorial:
- What the SCD40 measures and why its CO2 value is a real measurement, not an estimate
- How to connect the SCD40 module to the I2C pins of the ESP32 S3
- A CO2 monitor sketch with a simple air-quality label
- A second sketch that adds the built-in temperature and humidity readings
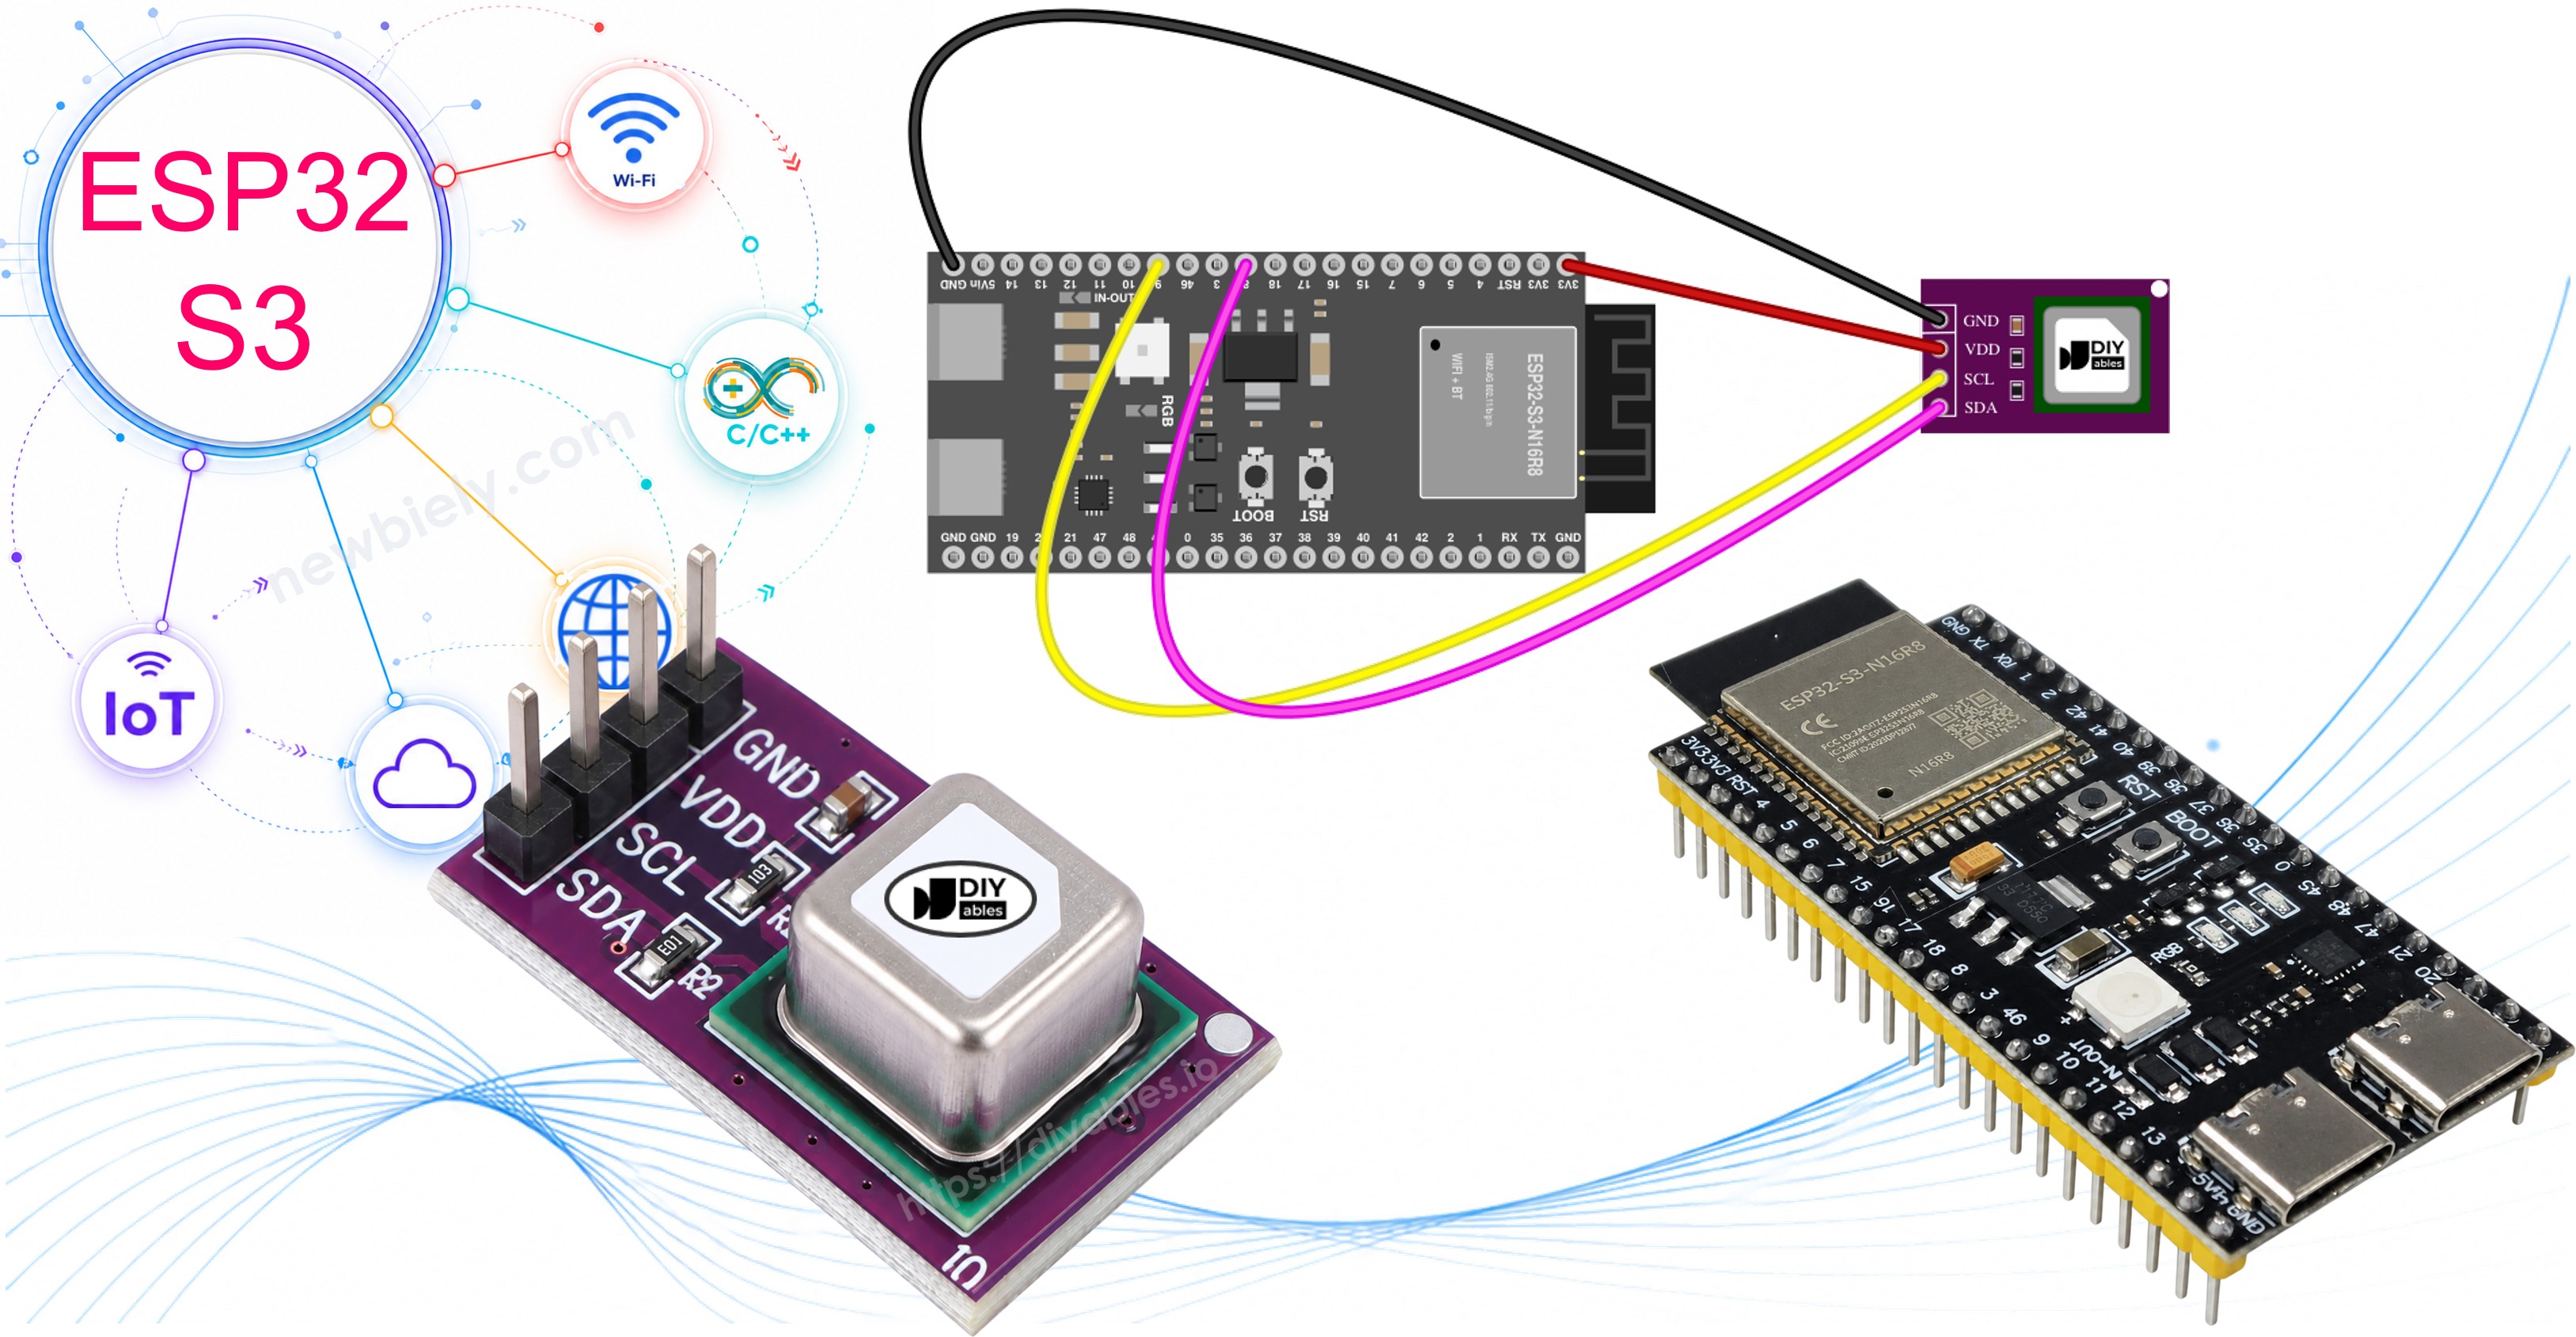
Hardware Preparation
Or you can buy the following kits:
| 1 | × | DIYables ESP32 S3 Starter Kit (ESP32 S3 included) | |
| 1 | × | DIYables Sensor Kit (18 sensors/displays) |
Additionally, some of these links are for products from our own brand, DIYables .
Overview of SCD40 CO2 Sensor
The SCD40 is a small CO2 sensor from Sensirion (part of the SCD4x family). Many cheap gas sensors, such as the MQ135 or CCS811, only guess an "equivalent CO2" from other gases. The SCD40 measures true CO2 with photoacoustic NDIR sensing: a tiny infrared light pulses inside its chamber, CO2 absorbs some of that light and makes a very small pressure "sound", and a microphone picks it up — more CO2 gives a stronger signal. It also has a temperature and humidity sensor on board, which it uses to correct the CO2 value and which you can read as well.
Key Specifications
The module runs from 2.4V to 5.5V, so the 3.3V pin of the ESP32 S3 powers it directly, and it talks over I2C at the fixed address 0x62. It can report 0 to 40,000 ppm, and inside the 400 to 2,000 ppm range its accuracy is ±(50 ppm + 5% of the reading). In normal periodic mode a fresh value is ready every 5 seconds (a low-power mode gives one every 30 seconds), and it draws about 15mA on average at 3.3V.
| Feature | Value | |
|---|---|---|
| Supply voltage | 2.4V to 5.5V | |
| Interface / address | I2C, 0x62 | |
| CO2 output range | 0 to 40,000 ppm | |
| CO2 accuracy (400 to 2,000 ppm) | ±(50 ppm + 5% of reading) | |
| Update rate | every 5 s (low-power mode | every 30 s) |
| Temperature accuracy | ±0.8°C (15 to 35°C) | |
| Humidity accuracy | ±6 %RH (15 to 35°C, 20 to 65 %RH) | |
| Average current | about 15mA at 3.3V |
Automatic self-calibration (ASC) is turned on by default. It assumes the sensor breathes fresh, outdoor-level air (about 400 ppm) at least once a week, ideally for an hour or more, so place it where a window gets opened now and then. Also, the first few readings after power-up can be less accurate while the sensor warms up.
Use this table to understand the numbers you will see:
| CO2 level | What it means |
|---|---|
| About 400 ppm | Fresh outdoor air |
| 400 to 1,000 ppm | Good indoor air |
| 1,000 to 2,000 ppm | Stuffy, open a window |
| Above 2,000 ppm | Poor air, headache or drowsiness possible |
SCD40 Pinout
The SCD40 breakout module has just four pins. Most modules already include the I2C pull-up resistors, so no extra parts are needed.
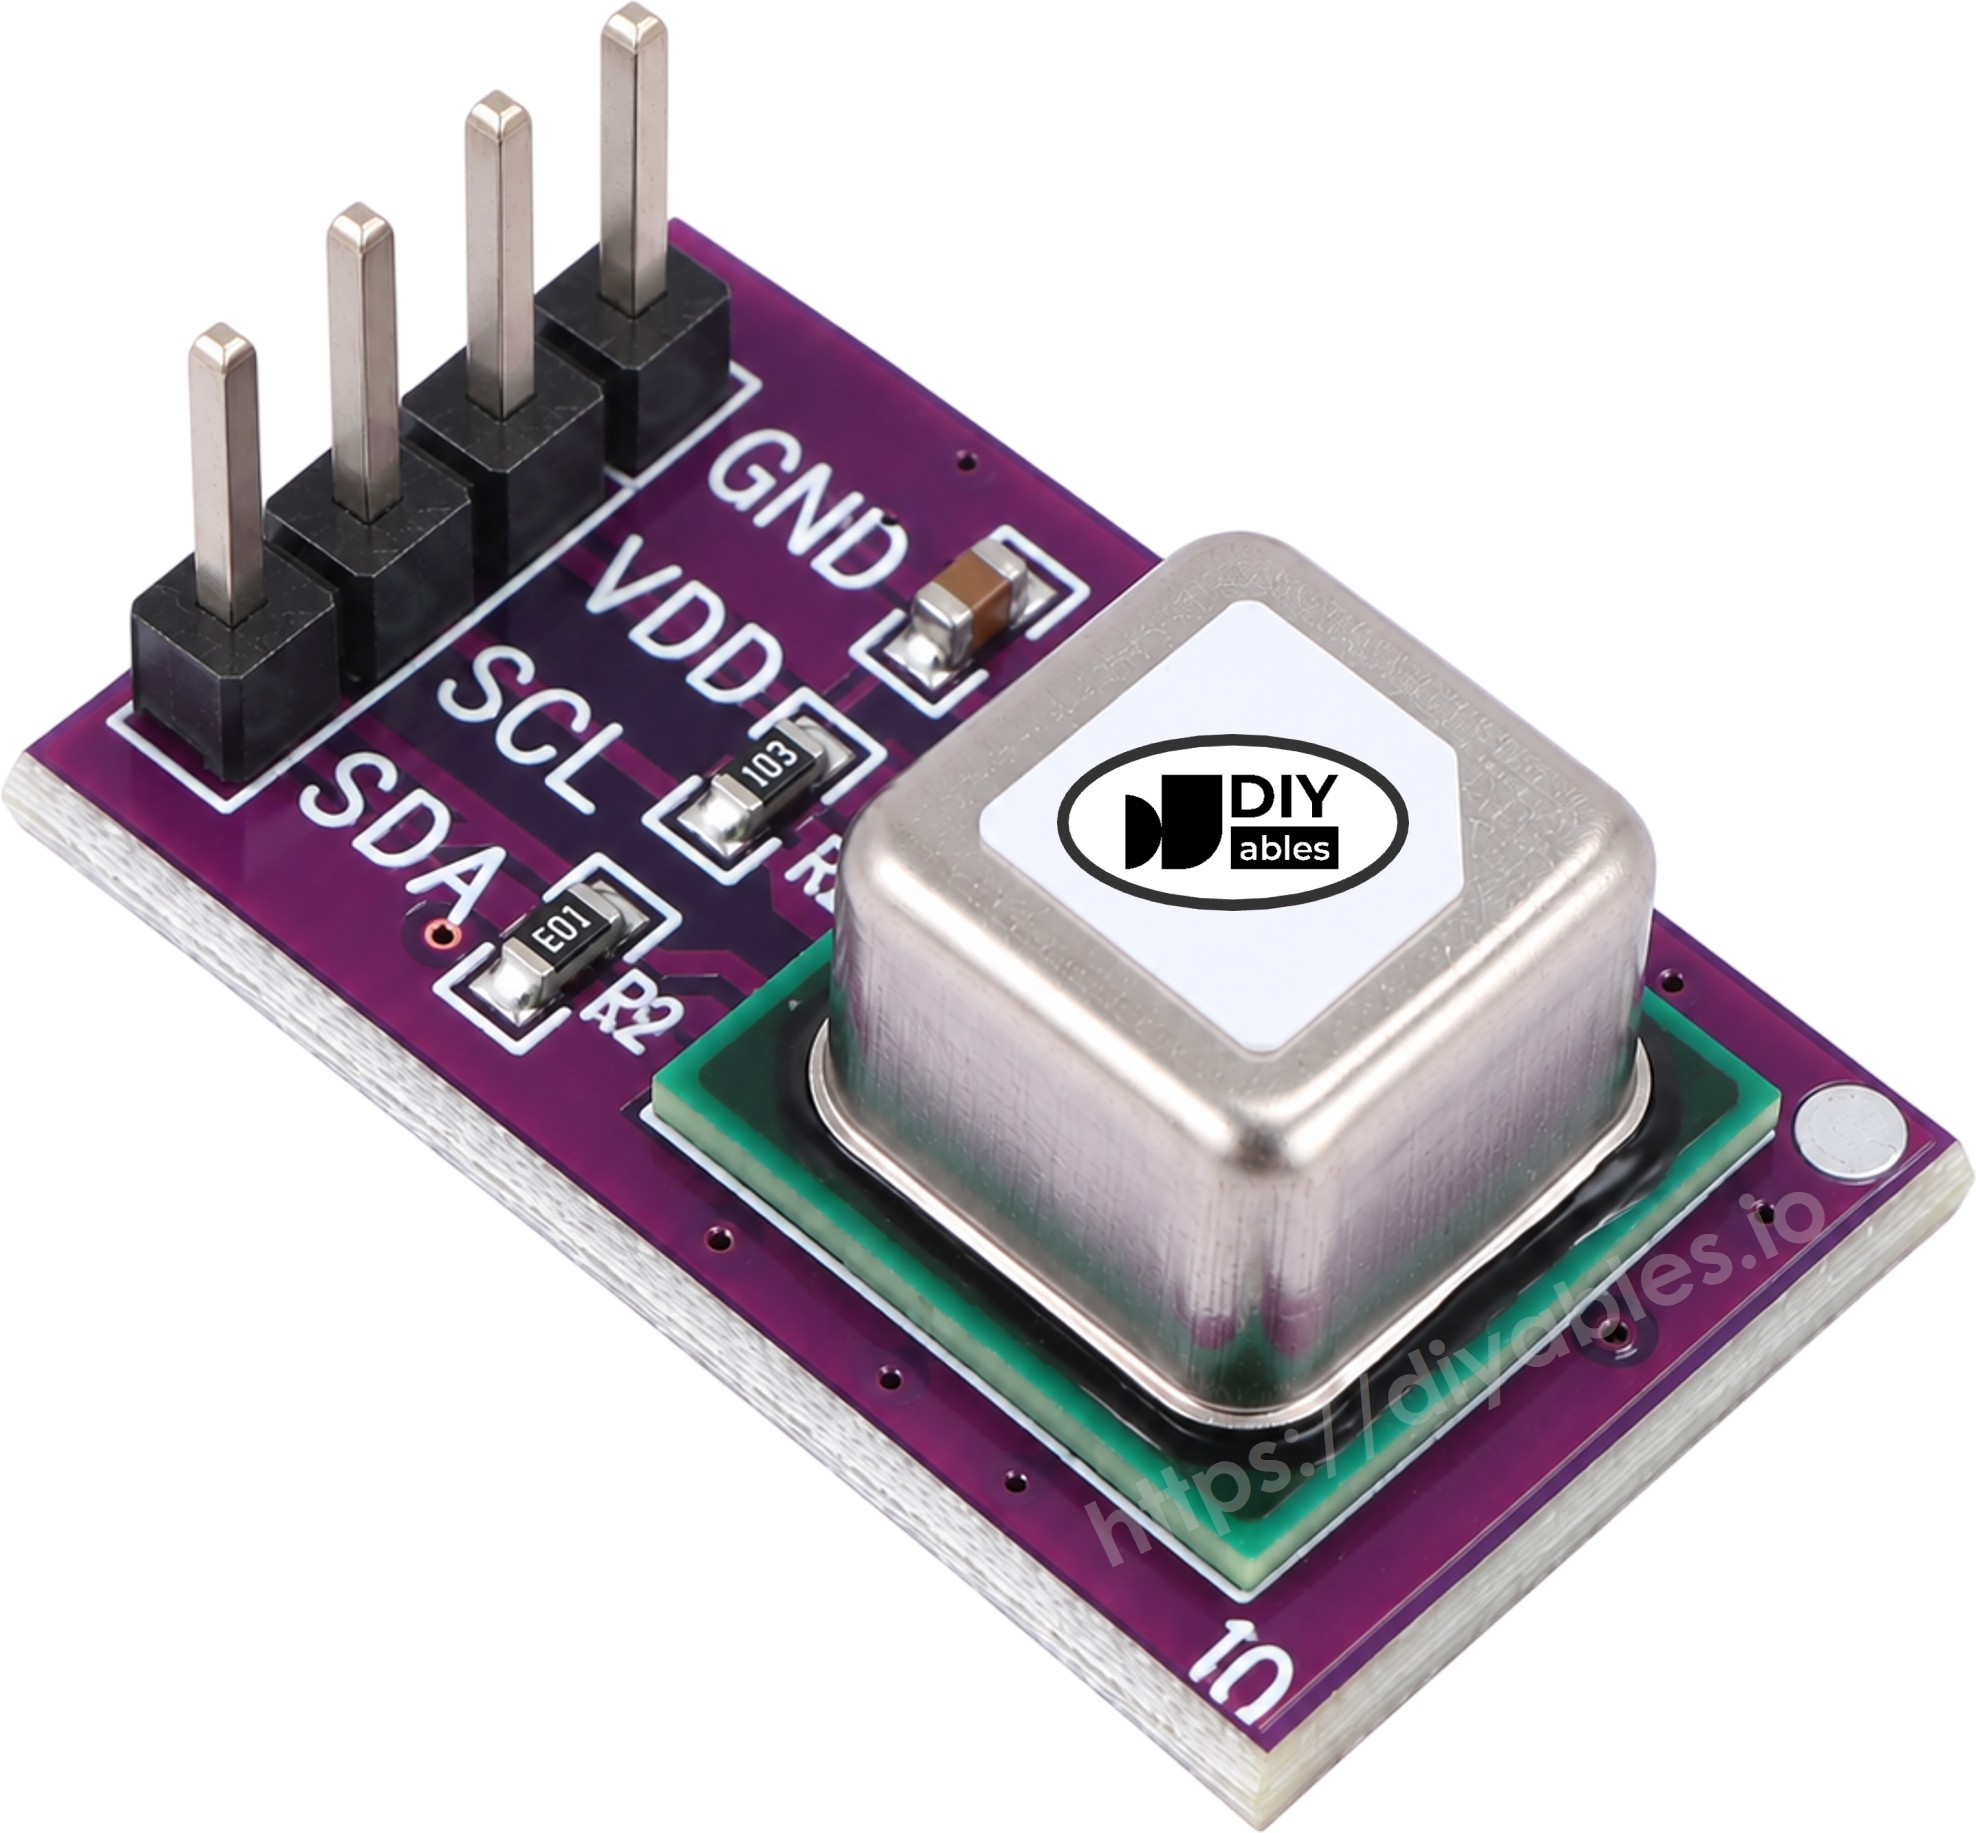
- VCC (VIN) — power input, 2.4V to 5.5V; use the 3.3V pin of the ESP32 S3
- GND — ground (0V)
- SCL — I2C clock line
- SDA — I2C data line
Wiring Diagram between SCD40 and ESP32 S3
The ESP32 S3 uses GPIO8 as its I2C data line (SDA) and GPIO9 as its clock line (SCL), the same pins used by the other I2C tutorials on this site. Wire the four pins of the SCD40 module straight to the board as shown below.
Safety Notes
Power the SCD40 from the 3.3V pin so its I2C signals match the 3.3V logic of the ESP32 S3. Double-check that SDA and SCL are not swapped, because swapped lines don't damage anything but the sensor will simply not answer. Don't block the opening on top of the sensor, and keep it away from your breath or a heater while testing, or the reading will jump.
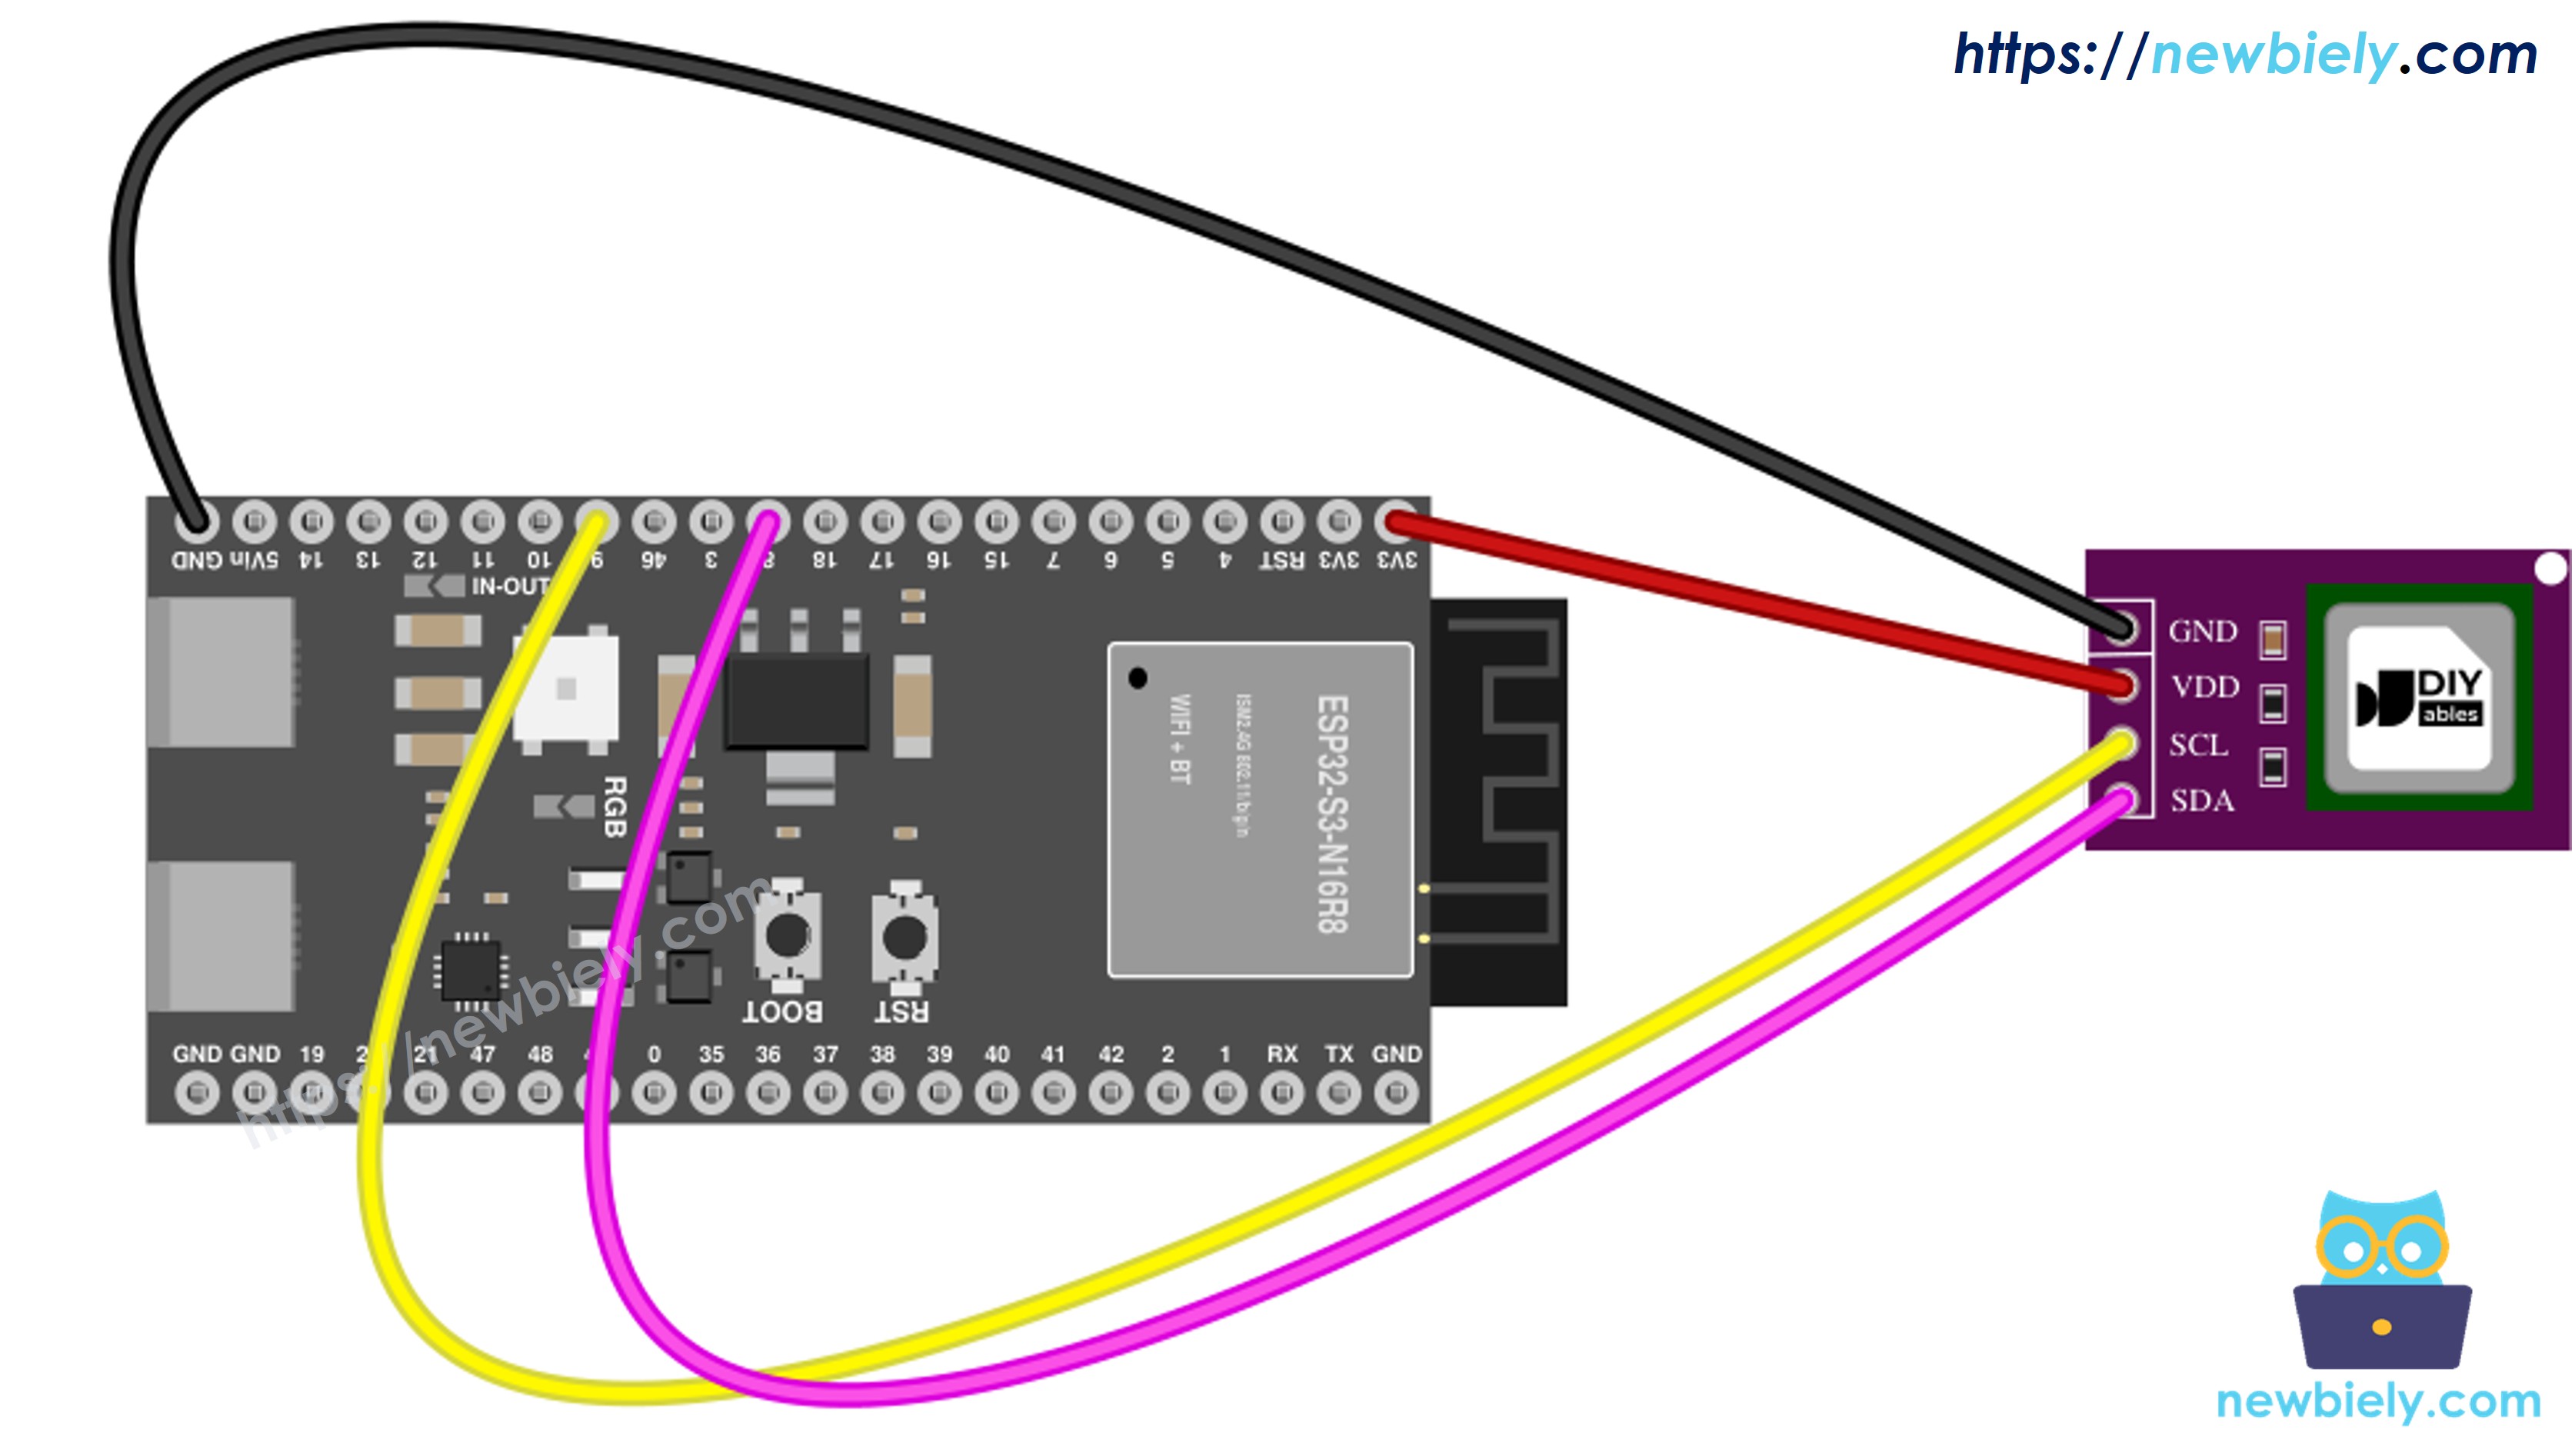
This image is created using Fritzing. Click to enlarge image
| SCD40 Module Pin | ESP32 S3 Pin |
|---|---|
| VCC | 3.3V |
| GND | GND |
| SDA | GPIO8 (I2C Data) |
| SCL | GPIO9 (I2C Clock) |
ESP32 S3 Code - SCD40 CO2 Sensor
The sketch starts I2C on GPIO8 and GPIO9, wakes the SCD40, stops any measurement left running from before, and then starts periodic measurement. Once per second it asks the sensor whether new data is ready, and when it is, it reads the result and prints the CO2 value with a word from the table above: Good below 1,000 ppm, Moderate up to 2,000 ppm, and Poor above that. If the sensor reports an error, the sketch prints a readable error message instead.
Detailed Instructions
- New to ESP32 S3? Complete our Getting Started with ESP32 S3 guide first.
- Wire the sensor: Connect the SCD40 module to the ESP32 S3 as shown in the wiring diagram.
- Connect the board: Plug the ESP32 S3 into your computer with the USB Type-C cable.
- Choose board and port: In Arduino IDE, select the ESP32 S3 board and the right COM port.
- Open Library Manager: Click the Library Manager icon on the left side of Arduino IDE.
- Find the library: Type SCD4x in the search box and find Sensirion I2C SCD4x by Sensirion.
- Search for Sensirion I2C SCD4x created by Sensirion and click the Install button.
- Install dependencies: When asked, click Install All so the Sensirion Core library is installed too.
- Upload the code: Paste the code above into Arduino IDE and click Upload.
- Open the Serial Monitor: Set it to 115200 baud and wait about 5 seconds for the first value.
- Test it: Breathe gently toward the sensor from a short distance and watch the CO2 value climb, then fall again.
- Pro Tip: Let the sensor run for a few minutes before you trust the numbers; the first readings after power-up are less accurate.
Serial Monitor Output
In the sample above, the jump to more than 1,100 ppm happened after breathing near the sensor; the value drops back slowly as fresh air reaches the chamber.
Reading Temperature and Humidity from the SCD40
Every SCD40 measurement already contains three values: CO2, temperature and relative humidity. The first sketch reads all three but only prints CO2. The sketch below prints all of them on one line, so your ESP32 S3 becomes a small three-in-one indoor climate monitor without any extra sensor. Keep in mind the accuracy from the specs: about ±0.8°C and ±6 %RH. The sensor also warms itself a little while running, so its temperature can read slightly higher than the room.
Detailed Instructions
- Keep the same wiring and library from the first sketch.
- Paste this second code into Arduino IDE and click Upload.
- Open the Serial Monitor at 115200 baud.
- Pro Tip: Compare the temperature with a DHT22 or a room thermometer; if it reads a bit high, mount the module where air can flow around it.
Applications and Project Ideas
Because the SCD40 gives a true CO2 value plus temperature and humidity, the ESP32 S3 can turn it into many practical air-quality tools.
- Classroom fresh-air alert: Light a red LED when CO2 passes 1,000 ppm so the teacher knows to open a window.
- Bedroom sleep monitor: Log CO2 overnight and check if the room needs better ventilation.
- Smart ventilation fan: Switch a fan through a relay when CO2 gets high and turn it off when the air is fresh.
- Home Assistant sensor: Send CO2, temperature and humidity to a dashboard over WiFi with MQTT.
- Mushroom or plant grow box: Keep an eye on CO2 and humidity inside a closed growing tent.
- Office meeting room display: Show the live CO2 value on an OLED or LCD on the meeting room door.
Video Tutorial
Watch the step-by-step video walkthrough for this ESP32 S3 project below.
Challenge Yourself
Once the readings look stable, try these tasks to build on the project.
- Beginner: Add a green, yellow and red LED that follow the Good, Moderate and Poor labels.
- Beginner: Add a buzzer that beeps once when CO2 rises above 2,000 ppm.
- Intermediate: Show CO2, temperature and humidity on an LCD I2C display that shares GPIO8 and GPIO9 with the SCD40.
- Intermediate: Print the average CO2 of the last 12 readings (one minute) to smooth out quick jumps.
- Advanced: Host a web page on the ESP32 S3 that draws a live CO2 chart in the browser.
- Advanced: Send a Telegram message from the ESP32 S3 when the room has been above 1,500 ppm for 10 minutes.