ESP32 S3 - HTTP Request

The ESP32 S3 has built-in Wi-Fi that makes it straightforward to act as an HTTP client — sending requests to web servers, REST APIs, and web services. This tutorial walks you through making HTTP GET and POST requests from the ESP32 S3, including how to attach sensor data to those requests and how to process the server's response.

What you'll build:

  1. An ESP32 S3 sketch that connects to Wi-Fi and sends an HTTP GET request to a remote server or API endpoint
  2. A sketch that includes live sensor data (temperature and humidity) in the HTTP query string of a GET request
  3. A sketch that sends sensor data in the body of an HTTP POST request using URL-encoded form data
  4. A complete working example that reads the HTTP response and prints the server reply to the Arduino IDE Serial Monitor
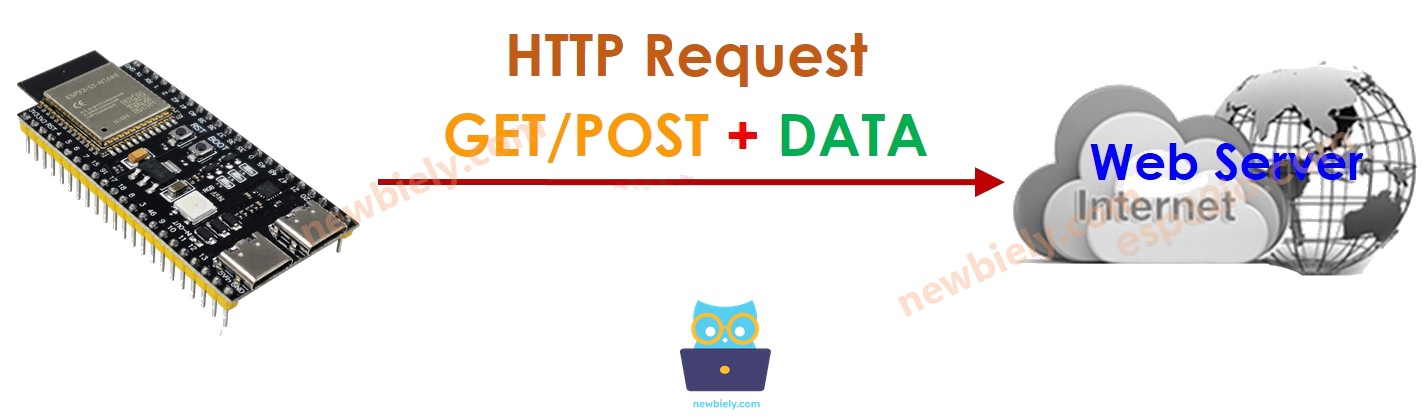
ESP32 S3 web client
ESP32 S3 HTTP request - send GET and POST data from the ESP32 S3 to a web server

Hardware Preparation

1×ESP32 S3 WROOM N16R8
1×Alternatively, ESP32 S3 SuperMini Dev Module
1×Alternatively, ESP32 S3 Uno-form Board
1×Alternatively, ESP32 S3 Camera Board
1×USB Cable Type-A to Type-C (for USB-A PC)
1×USB Cable Type-C to Type-C (for USB-C PC)
1×Optionally, DC Power Jack
1×Breadboard
1×Jumper Wires
1×Recommended: Screw Terminal Expansion Board for ESP32 S3
1×Recommended: Breakout Expansion Board for ESP32 S3
1×Recommended: Power Splitter for ESP32 S3

Or you can buy the following kits:

1×DIYables ESP32 S3 Starter Kit (ESP32 S3 included)
1×DIYables Sensor Kit (18 sensors/displays)
Disclosure: Some of the links provided in this section are Amazon affiliate links. We may receive a commission for any purchases made through these links at no additional cost to you.
Additionally, some of these links are for products from our own brand, DIYables .

Basic Concepts of Web Client and Web Server

Understanding a few core HTTP concepts makes it much easier to build reliable requests from the ESP32 S3. Key ideas include the URL structure (hostname and pathname), query strings for passing data, HTTP methods (GET vs POST), and how the server's response code tells you whether the request succeeded. You can learn more about these in the HTTP tutorial.

How to Make an HTTP Request

The following steps show the building blocks needed to send an HTTP request from the ESP32 S3 using the built-in WiFi and HTTPClient libraries.

  • Include libraries
#include <WiFi.h> #include <HTTPClient.h>
  • Declare WiFi SSID and password
const char WIFI_SSID[] = "YOUR_WIFI_SSID"; // CHANGE IT const char WIFI_PASSWORD[] = "YOUR_WIFI_PASSWORD"; // CHANGE IT
  • Declare hostname, pathname, query string
String HOST_NAME = "http://YOUR_DOMAIN.com"; // CHANGE IT String PATH_NAME = "/products/arduino"; // CHANGE IT //String PATH_NAME = "/products/arduino.php"; // CHANGE IT String queryString = "temperature=26&humidity=70"; // OPTIONAL
  • Declare a HTTP client object
HTTPClient http;
  • If connected to server, send an HTTP request. For example, HTTP GET:
http.begin(HOST_NAME + PATH_NAME); //HTTP int httpCode = http.GET();
  • Read the response data from the web server
// httpCode will be negative on error if (httpCode > 0) { // file found at server if (httpCode == HTTP_CODE_OK) { String payload = http.getString(); Serial.println(payload); } else { // HTTP header has been send and Server response header has been handled Serial.printf("[HTTP] GET... code: %d\n", httpCode); } } else { Serial.printf("[HTTP] GET... failed, error: %s\n", http.errorToString(httpCode).c_str()); } http.end();

How to Include Data in an HTTP Request

Sending sensor readings or other values to a web server requires encoding that data inside the HTTP request. The correct approach depends on whether you use GET or POST: GET requests carry data in the URL query string, while POST requests place data in the request body and can support formats beyond query strings such as JSON or XML.

The steps below show how to send data in query string format for both methods.

  • Create a query string
int temp = // from sensor int humi = // from sensor String queryString = String("temperature=") + String(temp) + String("&humidity=") + String(humi);
  • HTTP GET: add query string to pathname
http.begin(HOST_NAME + PATH_NAME + "?" + queryString); http.addHeader("Content-Type", "application/x-www-form-urlencoded"); int httpCode = http.GET();
  • HTTP POST: put query string in HTTP body
http.begin(HOST_NAME + PATH_NAME); http.addHeader("Content-Type", "application/x-www-form-urlencoded"); int httpCode = http.POST(queryString);
  • For both GET and POST, read the response data from the web server
// httpCode will be negative on error if (httpCode > 0) { // file found at server if (httpCode == HTTP_CODE_OK) { String payload = http.getString(); Serial.println(payload); } else { // HTTP header has been send and Server response header has been handled Serial.printf("[HTTP] GET/POST... code: %d\n", httpCode); } } else { Serial.printf("[HTTP] GET/POST... failed, error: %s\n", http.errorToString(httpCode).c_str()); } http.end();

ESP32 S3 Code

Complete ESP32 S3 Code for Making HTTP Request

The following sketch is the complete ESP32 S3 code for making an HTTP GET or POST request. It connects to your Wi-Fi network, opens an HTTP connection to the configured host and path, sends the request, reads the server response, and prints the result to the Serial Monitor. Replace the placeholder credentials and URL before uploading.

/* * This ESP32 S3 code was developed by newbiely.com * * This ESP32 S3 code is made available for public use without any restriction * * For comprehensive instructions and wiring diagrams, please visit: * https://newbiely.com/tutorials/esp32-s3/esp32-s3-http-request */ /* * This ESP32-S3 code is created by esp32io.com * * This ESP32-S3 code is released in the public domain * * For more detail (instruction and wiring diagram), visit https://esp32io.com/tutorials/esp32-s3-http-request */ #include <WiFi.h> #include <HTTPClient.h> const char WIFI_SSID[] = "YOUR_WIFI_SSID"; // CHANGE IT const char WIFI_PASSWORD[] = "YOUR_WIFI_PASSWORD"; // CHANGE IT String HOST_NAME = "http://YOUR_DOMAIN.com"; // CHANGE IT String PATH_NAME = "/products/arduino"; // CHANGE IT //String PATH_NAME = "/products/arduino.php"; // CHANGE IT void setup() { Serial.begin(115200); WiFi.begin(WIFI_SSID, WIFI_PASSWORD); Serial.println("Connecting"); while(WiFi.status() != WL_CONNECTED) { delay(500); Serial.print("."); } Serial.println(""); Serial.print("Connected to WiFi network with IP Address: "); Serial.println(WiFi.localIP()); HTTPClient http; http.begin(HOST_NAME + PATH_NAME); //HTTP int httpCode = http.GET(); // httpCode will be negative on error if(httpCode > 0) { // file found at server if(httpCode == HTTP_CODE_OK) { String payload = http.getString(); Serial.println(payload); } else { // HTTP header has been send and Server response header has been handled Serial.printf("[HTTP] GET... code: %d\n", httpCode); } } else { Serial.printf("[HTTP] GET... failed, error: %s\n", http.errorToString(httpCode).c_str()); } http.end(); } void loop() { }

Detailed Instructions

  1. New to ESP32 S3? Complete our Getting Started with ESP32 S3 guide first.
  2. Connect the ESP32 S3 board to your PC using a USB Type-C cable.
  3. Open the Arduino IDE on your PC.
  4. In the Arduino IDE, select the correct board (ESP32S3 Dev Module or equivalent) and COM port under Tools.
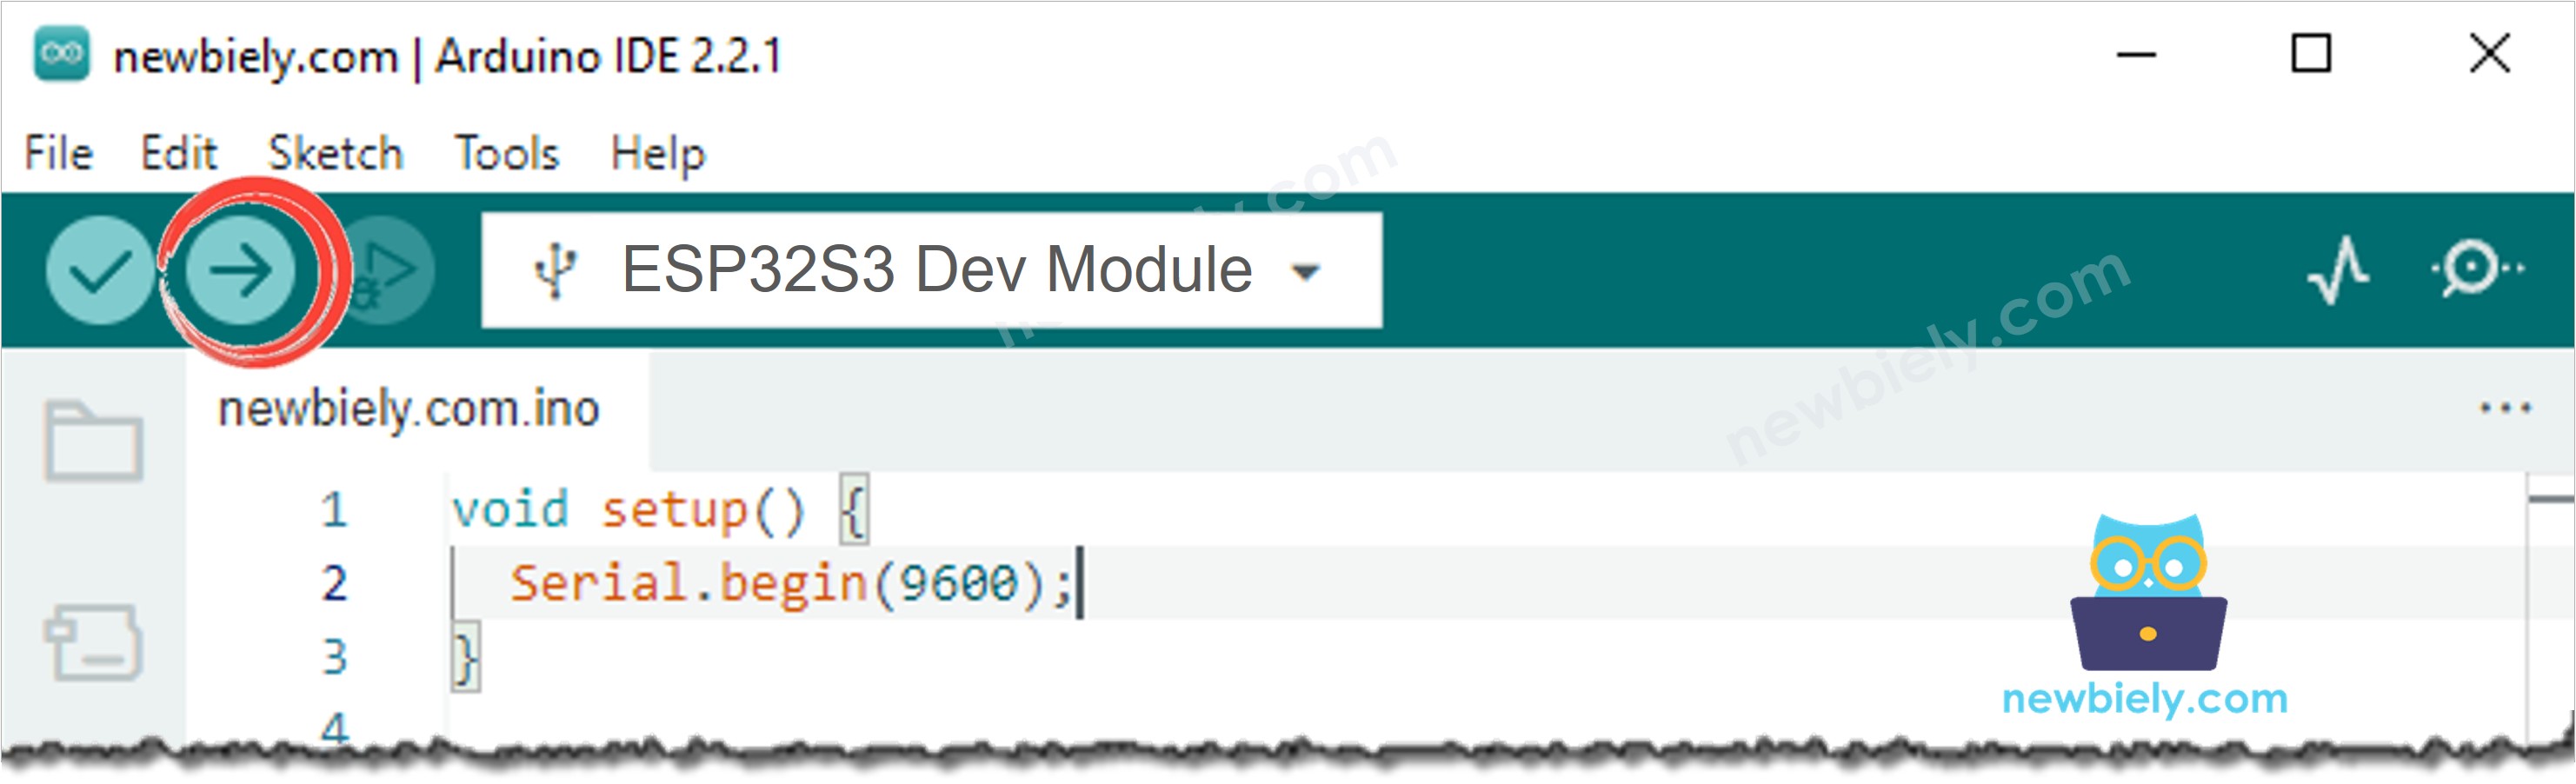
How to upload ESP32 S3 code on Arduino IDE
  1. Copy the sketch above and open it in the Arduino IDE.
  2. Update YOUR_WIFI_SSID and YOUR_WIFI_PASSWORD with your network credentials.
  3. Update HOST_NAME and PATH_NAME with the server address and endpoint you want to reach.
  4. Click the Upload button to compile and flash the sketch to the ESP32 S3.
  5. Once the upload is complete, open the Serial Monitor from the Tools menu or the monitor icon.
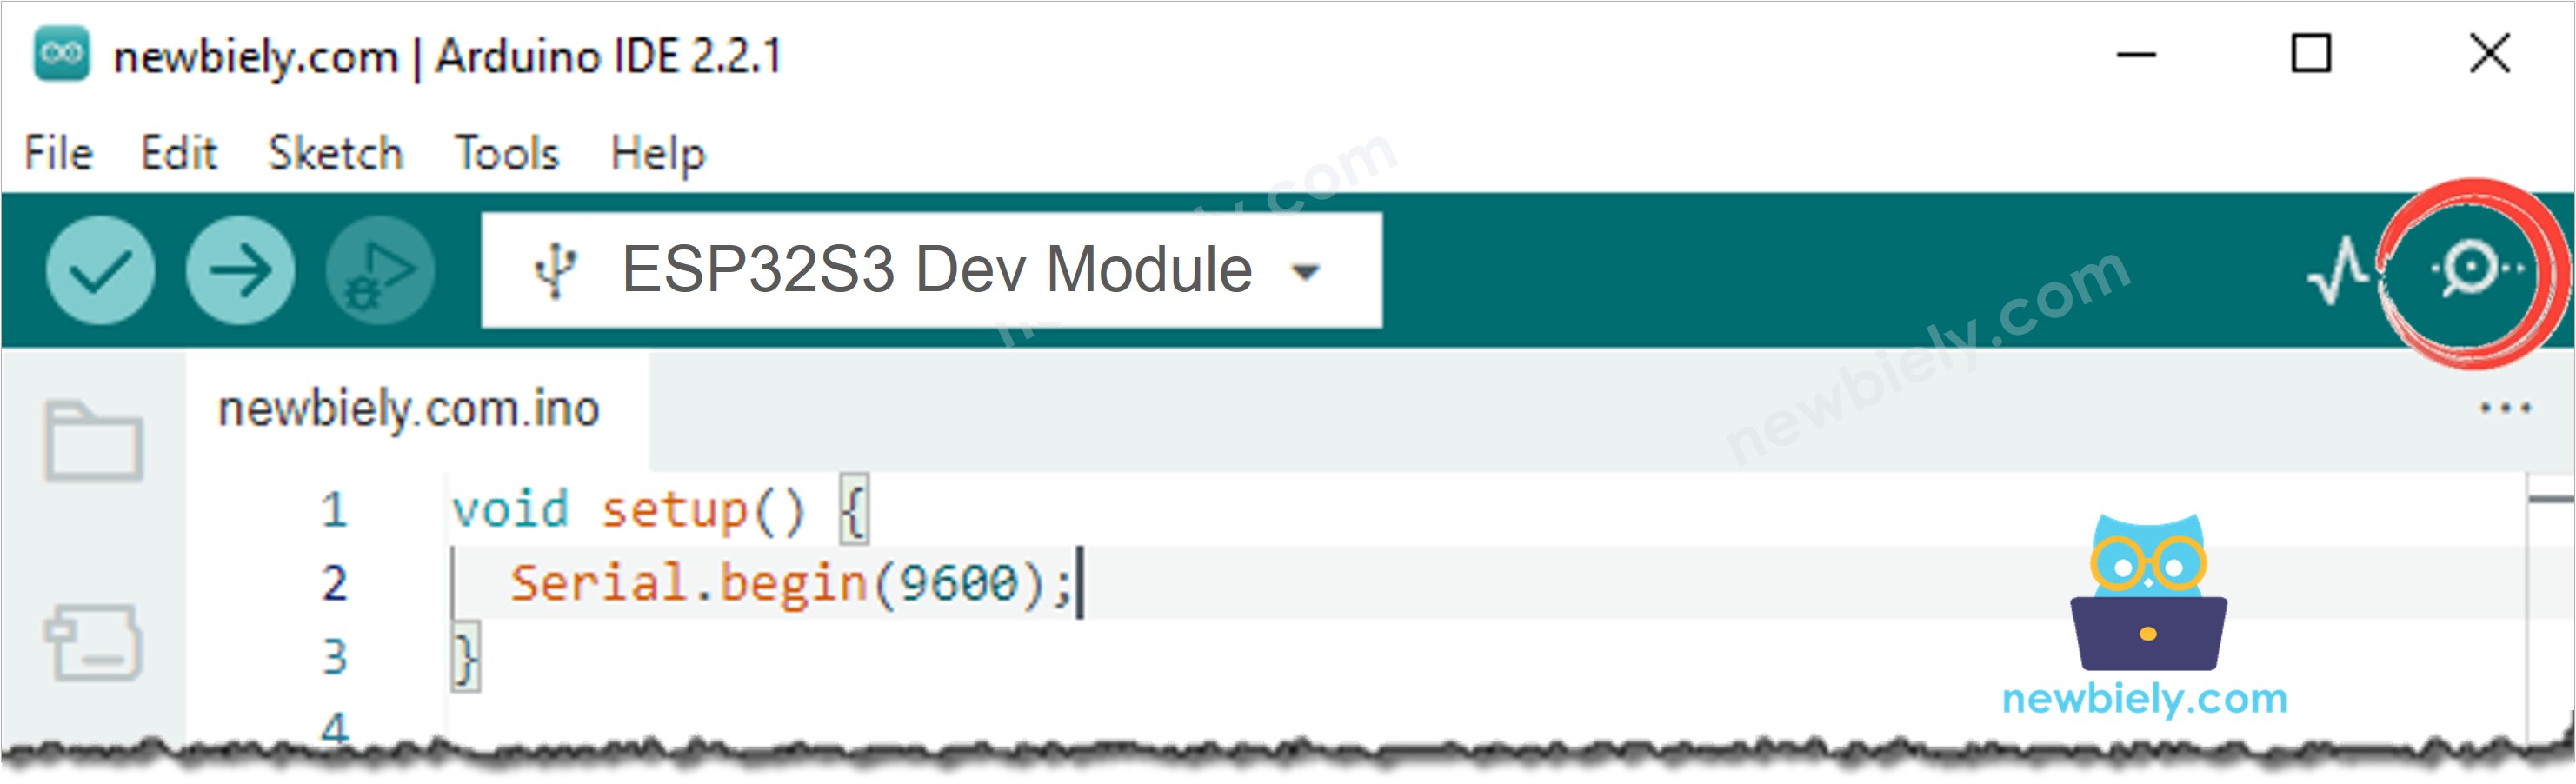
How to open serial monitor on Arduino IDE
  1. Set the baud rate to 115200 in the Serial Monitor dropdown.
  2. Watch the Serial Monitor for the Wi-Fi connection status and the HTTP response from the server.
  3. Pro Tip: If the request fails with a negative error code, check that your ESP32 S3 is within Wi-Fi range and that the target server is reachable from your network — firewalls and HTTPS-only endpoints are common causes of connection failures.

Line-by-line Code Explanation

The above ESP32 S3 code contains line-by-line explanation. Please read the comments in the code!

Serial Monitor Output

When the ESP32 S3 successfully connects to Wi-Fi and completes an HTTP request, the Serial Monitor will display output similar to the following:

∞
Newbiely | Arduino IDE 2.3.8
──
☐
✕
File
Edit
Sketch
Tools
Help
ESP32S3 Dev Module
Newbiely.ino
···
8 Serial.println("Hello World!");
Output
Serial Monitor
Message (Enter to send message to 'ESP32S3 Dev Module' on 'COM15')
New Line
9600 baud
[2026-06-16 10:22:01] Connecting to WiFi... [2026-06-16 10:22:04] WiFi connected. IP: 192.168.1.105 [2026-06-16 10:22:04] Sending HTTP GET request... [2026-06-16 10:22:05] HTTP Response Code: 200 [2026-06-16 10:22:05] Response: {"status":"ok","message":"Data received"} [2026-06-16 10:22:15] Sending HTTP GET request... [2026-06-16 10:22:16] HTTP Response Code: 200 [2026-06-16 10:22:16] Response: {"status":"ok","message":"Data received"}
Ln 11, Col 1
ESP32S3 Dev Module on COM15
2

ESP32 S3 Code

Complete ESP32 S3 Code for Making HTTP GET Request with Data

The following sketch extends the basic HTTP example by reading sensor values and appending them as a query string to the GET request URL. This is a common pattern for logging environmental data such as temperature and humidity to a remote server or IoT platform.

/* * This ESP32 S3 code was developed by newbiely.com * * This ESP32 S3 code is made available for public use without any restriction * * For comprehensive instructions and wiring diagrams, please visit: * https://newbiely.com/tutorials/esp32-s3/esp32-s3-http-request */ /* * This ESP32-S3 code is created by esp32io.com * * This ESP32-S3 code is released in the public domain * * For more detail (instruction and wiring diagram), visit https://esp32io.com/tutorials/esp32-s3-http-request */ #include <WiFi.h> #include <HTTPClient.h> const char WIFI_SSID[] = "YOUR_WIFI_SSID"; // CHANGE IT const char WIFI_PASSWORD[] = "YOUR_WIFI_PASSWORD"; // CHANGE IT String HOST_NAME = "http://YOUR_DOMAIN.com"; // CHANGE IT String PATH_NAME = "/products/arduino"; // CHANGE IT //String PATH_NAME = "/products/arduino.php"; // CHANGE IT String queryString = "temperature=26&humidity=70"; void setup() { Serial.begin(115200); WiFi.begin(WIFI_SSID, WIFI_PASSWORD); Serial.println("Connecting"); while (WiFi.status() != WL_CONNECTED) { delay(500); Serial.print("."); } Serial.println(""); Serial.print("Connected to WiFi network with IP Address: "); Serial.println(WiFi.localIP()); HTTPClient http; http.begin(HOST_NAME + PATH_NAME + "?" + queryString); http.addHeader("Content-Type", "application/x-www-form-urlencoded"); int httpCode = http.GET(); // httpCode will be negative on error if (httpCode > 0) { // file found at server if (httpCode == HTTP_CODE_OK) { String payload = http.getString(); Serial.println(payload); } else { // HTTP header has been send and Server response header has been handled Serial.printf("[HTTP] GET... code: %d\n", httpCode); } } else { Serial.printf("[HTTP] GET... failed, error: %s\n", http.errorToString(httpCode).c_str()); } http.end(); } void loop() { }

Detailed Instructions

  1. New to ESP32 S3? Complete our Getting Started with ESP32 S3 guide first.
  2. Connect the ESP32 S3 board to your PC using a USB Type-C cable.
  3. Open the Arduino IDE on your PC.
  4. Copy the sketch above and open it in the Arduino IDE.
  5. Update the Wi-Fi credentials and target URL with your values.
  6. Click the Upload button to flash the sketch to the ESP32 S3.
  7. Open the Serial Monitor at 115200 baud to see the request URL and server response.
  8. Pro Tip: Use a free service such as RequestBin or Webhook.site to capture and inspect the exact query string your ESP32 S3 sends — it is an easy way to verify data is formatted correctly before connecting to your real backend.

Line-by-line Code Explanation

The above ESP32 S3 code contains line-by-line explanation. Please read the comments in the code!

Serial Monitor Output

When the GET-with-data sketch runs on the ESP32 S3, the Serial Monitor will display output similar to the following, showing the query string appended to the request and the server's reply:

∞
Newbiely | Arduino IDE 2.3.8
──
☐
✕
File
Edit
Sketch
Tools
Help
ESP32S3 Dev Module
Newbiely.ino
···
8 Serial.println("Hello World!");
Output
Serial Monitor
Message (Enter to send message to 'ESP32S3 Dev Module' on 'COM15')
New Line
9600 baud
[2026-06-16 10:25:33] WiFi connected. IP: 192.168.1.105 [2026-06-16 10:25:33] GET /data?temperature=26&humidity=70 HTTP/1.1 [2026-06-16 10:25:34] HTTP Response Code: 200 [2026-06-16 10:25:34] Response: {"status":"ok","temp":26,"humi":70} [2026-06-16 10:25:44] GET /data?temperature=27&humidity=69 HTTP/1.1 [2026-06-16 10:25:45] HTTP Response Code: 200 [2026-06-16 10:25:45] Response: {"status":"ok","temp":27,"humi":69}
Ln 11, Col 1
ESP32S3 Dev Module on COM15
2

ESP32 S3 Code

Complete ESP32 S3 Code for Making HTTP POST Request with Data

The following sketch sends sensor data to a server using an HTTP POST request, placing the URL-encoded key-value pairs in the request body rather than the URL. POST is preferred when sending larger payloads or when you want to keep data out of server access logs.

/* * This ESP32 S3 code was developed by newbiely.com * * This ESP32 S3 code is made available for public use without any restriction * * For comprehensive instructions and wiring diagrams, please visit: * https://newbiely.com/tutorials/esp32-s3/esp32-s3-http-request */ /* * This ESP32-S3 code is created by esp32io.com * * This ESP32-S3 code is released in the public domain * * For more detail (instruction and wiring diagram), visit https://esp32io.com/tutorials/esp32-s3-http-request */ #include <WiFi.h> #include <HTTPClient.h> const char WIFI_SSID[] = "YOUR_WIFI_SSID"; // CHANGE IT const char WIFI_PASSWORD[] = "YOUR_WIFI_PASSWORD"; // CHANGE IT String HOST_NAME = "http://YOUR_DOMAIN.com"; // CHANGE IT String PATH_NAME = "/products/arduino"; // CHANGE IT //String PATH_NAME = "/products/arduino.php"; // CHANGE IT String queryString = "temperature=26&humidity=70"; void setup() { Serial.begin(115200); WiFi.begin(WIFI_SSID, WIFI_PASSWORD); Serial.println("Connecting"); while (WiFi.status() != WL_CONNECTED) { delay(500); Serial.print("."); } Serial.println(""); Serial.print("Connected to WiFi network with IP Address: "); Serial.println(WiFi.localIP()); HTTPClient http; http.begin(HOST_NAME + PATH_NAME); http.addHeader("Content-Type", "application/x-www-form-urlencoded"); int httpCode = http.POST(queryString); // httpCode will be negative on error if (httpCode > 0) { // file found at server if (httpCode == HTTP_CODE_OK) { String payload = http.getString(); Serial.println(payload); } else { // HTTP header has been send and Server response header has been handled Serial.printf("[HTTP] POST... code: %d\n", httpCode); } } else { Serial.printf("[HTTP] POST... failed, error: %s\n", http.errorToString(httpCode).c_str()); } http.end(); } void loop() { }

Detailed Instructions

  1. New to ESP32 S3? Complete our Getting Started with ESP32 S3 guide first.
  2. Connect the ESP32 S3 board to your PC using a USB Type-C cable.
  3. Open the Arduino IDE on your PC.
  4. Copy the sketch above and open it in the Arduino IDE.
  5. Update the Wi-Fi credentials and server URL with your values.
  6. Click the Upload button to flash the sketch to the ESP32 S3.
  7. Open the Serial Monitor at 115200 baud to confirm the POST was sent and view the server's response.
  8. Pro Tip: Set the Content-Type header to application/json and format the body as a JSON string if your server or API endpoint expects JSON instead of URL-encoded form data.

Line-by-line Code Explanation

The above ESP32 S3 code contains line-by-line explanation. Please read the comments in the code!

Serial Monitor Output

When the POST-with-data sketch is running on the ESP32 S3, the Serial Monitor will display output similar to the following:

∞
Newbiely | Arduino IDE 2.3.8
──
☐
✕
File
Edit
Sketch
Tools
Help
ESP32S3 Dev Module
Newbiely.ino
···
8 Serial.println("Hello World!");
Output
Serial Monitor
Message (Enter to send message to 'ESP32S3 Dev Module' on 'COM15')
New Line
9600 baud
[2026-06-16 10:30:11] WiFi connected. IP: 192.168.1.105 [2026-06-16 10:30:11] POST body: temperature=26&humidity=70 [2026-06-16 10:30:12] HTTP Response Code: 200 [2026-06-16 10:30:12] Response: {"status":"ok","saved":true} [2026-06-16 10:30:22] POST body: temperature=27&humidity=68 [2026-06-16 10:30:23] HTTP Response Code: 200 [2026-06-16 10:30:23] Response: {"status":"ok","saved":true}
Ln 11, Col 1
ESP32S3 Dev Module on COM15
2

Application and Project Ideas

The ESP32 S3's Wi-Fi capability and the HTTPClient library open up a wide range of real-world connectivity applications. Here are some directions worth exploring:

  1. IoT data logger: Periodically send temperature, humidity, or other sensor readings to a cloud database such as ThingSpeak or InfluxDB via HTTP POST.
  2. Home automation trigger: Send an HTTP GET request to a home automation hub (such as Home Assistant) to toggle lights, switches, or scenes from a physical button wired to the ESP32 S3.
  3. REST API consumer: Query a public weather, stock, or sports API over HTTP and display the parsed JSON response on an OLED or LCD screen.
  4. Sensor dashboard: POST live sensor data to a lightweight web server running on your local network and display readings on a browser-based dashboard.
  5. Alert system: Send an HTTP request to a messaging service (such as Pushover or IFTTT) when a sensor threshold is exceeded — for example, high temperature or a motion detection event.
  6. Firmware update notifier: Query a server endpoint to check whether a new firmware version is available and display a notice to the user before triggering an OTA update.

Video Tutorial

Watch the step-by-step video walkthrough for this ESP32 S3 project below.

Challenge Yourself

Once the basic HTTP request is working on your ESP32 S3, there are several ways to deepen your understanding and build more capable network-connected projects. Try the challenges below in order of difficulty:

  1. Beginner: Modify the sketch to print the full HTTP response headers to the Serial Monitor using http.collectHeaders().
  2. Beginner: Add a physical pushbutton to the ESP32 S3 so that pressing it triggers an HTTP GET request instead of sending on a timer.
  3. Intermediate: Parse a JSON response from the server using the ArduinoJson library and display a specific field value on the Serial Monitor.
  4. Intermediate: Implement a retry loop that resends the HTTP request up to three times if the server returns a non-200 status code or the connection times out.
  5. Advanced: Switch from HTTP to HTTPS by using WiFiClientSecure and a server certificate fingerprint, then confirm the ESP32 S3 can reach a TLS-secured API endpoint.
  6. Advanced: Build a multi-endpoint data router that reads from two different sensors and POSTs each sensor's data to a different server endpoint based on the sensor type.

※ OUR MESSAGES

  • As freelancers, We are AVAILABLE for HIRE. See how to outsource your project to us
  • Please feel free to share the link of this tutorial. However, Please do not use our content on any other websites. We invested a lot of effort and time to create the content, please respect our work!