
ESP32 S3 - Web Server on SD Card
In this tutorial, you will learn how to build a web server on the ESP32 S3 that serves web content directly from a MicroSD Card. Hosting your HTML, CSS, JavaScript, and image files on a MicroSD Card is a practical approach when your web pages are too large to store in the ESP32 S3's internal flash memory.
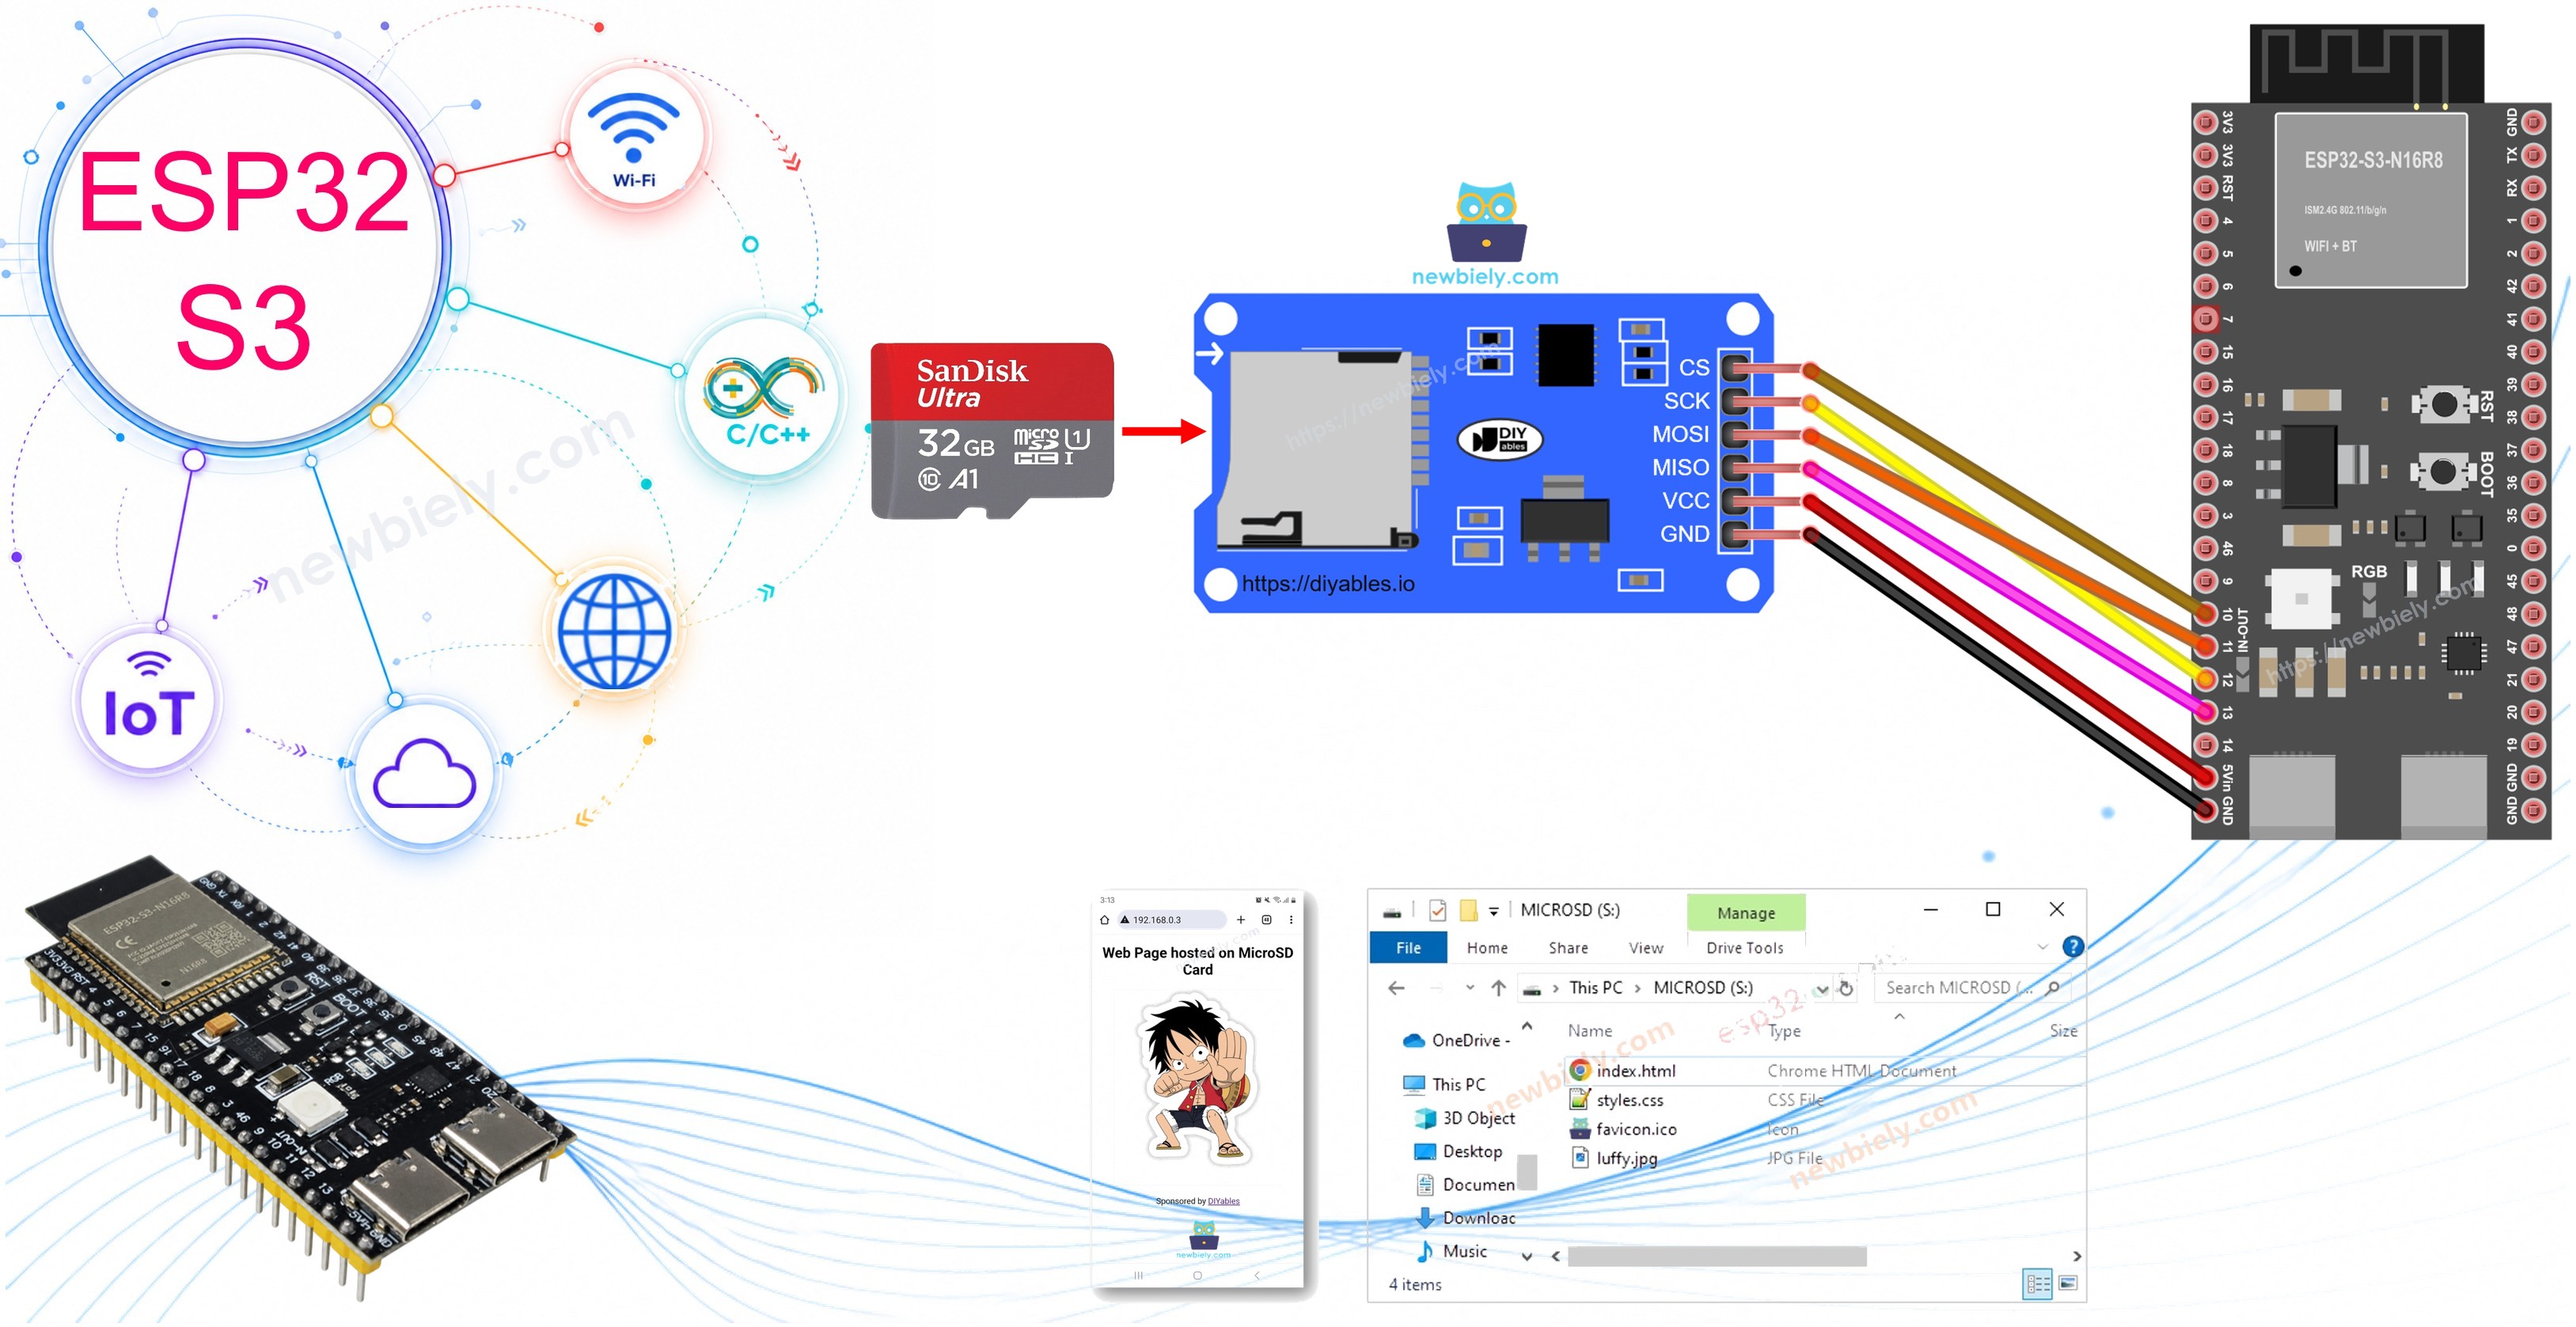
What you'll build:
- An ESP32 S3 web server that connects to your local WiFi network
- A MicroSD Card module wired to the ESP32 S3 via SPI
- An HTML page with CSS styling and an image served from the SD card
- A browser-accessible web page reachable by IP address on any device on the network
Hardware Preparation
Or you can buy the following kits:
| 1 | × | DIYables ESP32 S3 Starter Kit (ESP32 S3 included) | |
| 1 | × | DIYables Sensor Kit (18 sensors/displays) |
Additionally, some of these links are for products from our own brand, DIYables .
Overview of ESP32 S3 and Web Server
The ESP32 S3 is a powerful microcontroller with built-in WiFi and Bluetooth, making it well-suited for web server projects. When combined with a MicroSD Card module over SPI, you can serve rich web content — including styled pages and images — without consuming precious internal flash storage. If you're not yet familiar with the ESP32 S3's web server or MicroSD Card capabilities, the following tutorials provide the necessary background:
Key Specifications
- Microcontroller: Xtensa LX7 dual-core, up to 240 MHz
- Built-in WiFi: 802.11 b/g/n (2.4 GHz)
- Flash: 16 MB | PSRAM: 8 MB
- SPI interface for MicroSD Card module
- USB Type-C for programming and power
Wiring Diagram
Connect the MicroSD Card module to the ESP32 S3 using the SPI interface, ensuring all data and power lines are correctly mapped before powering the board.
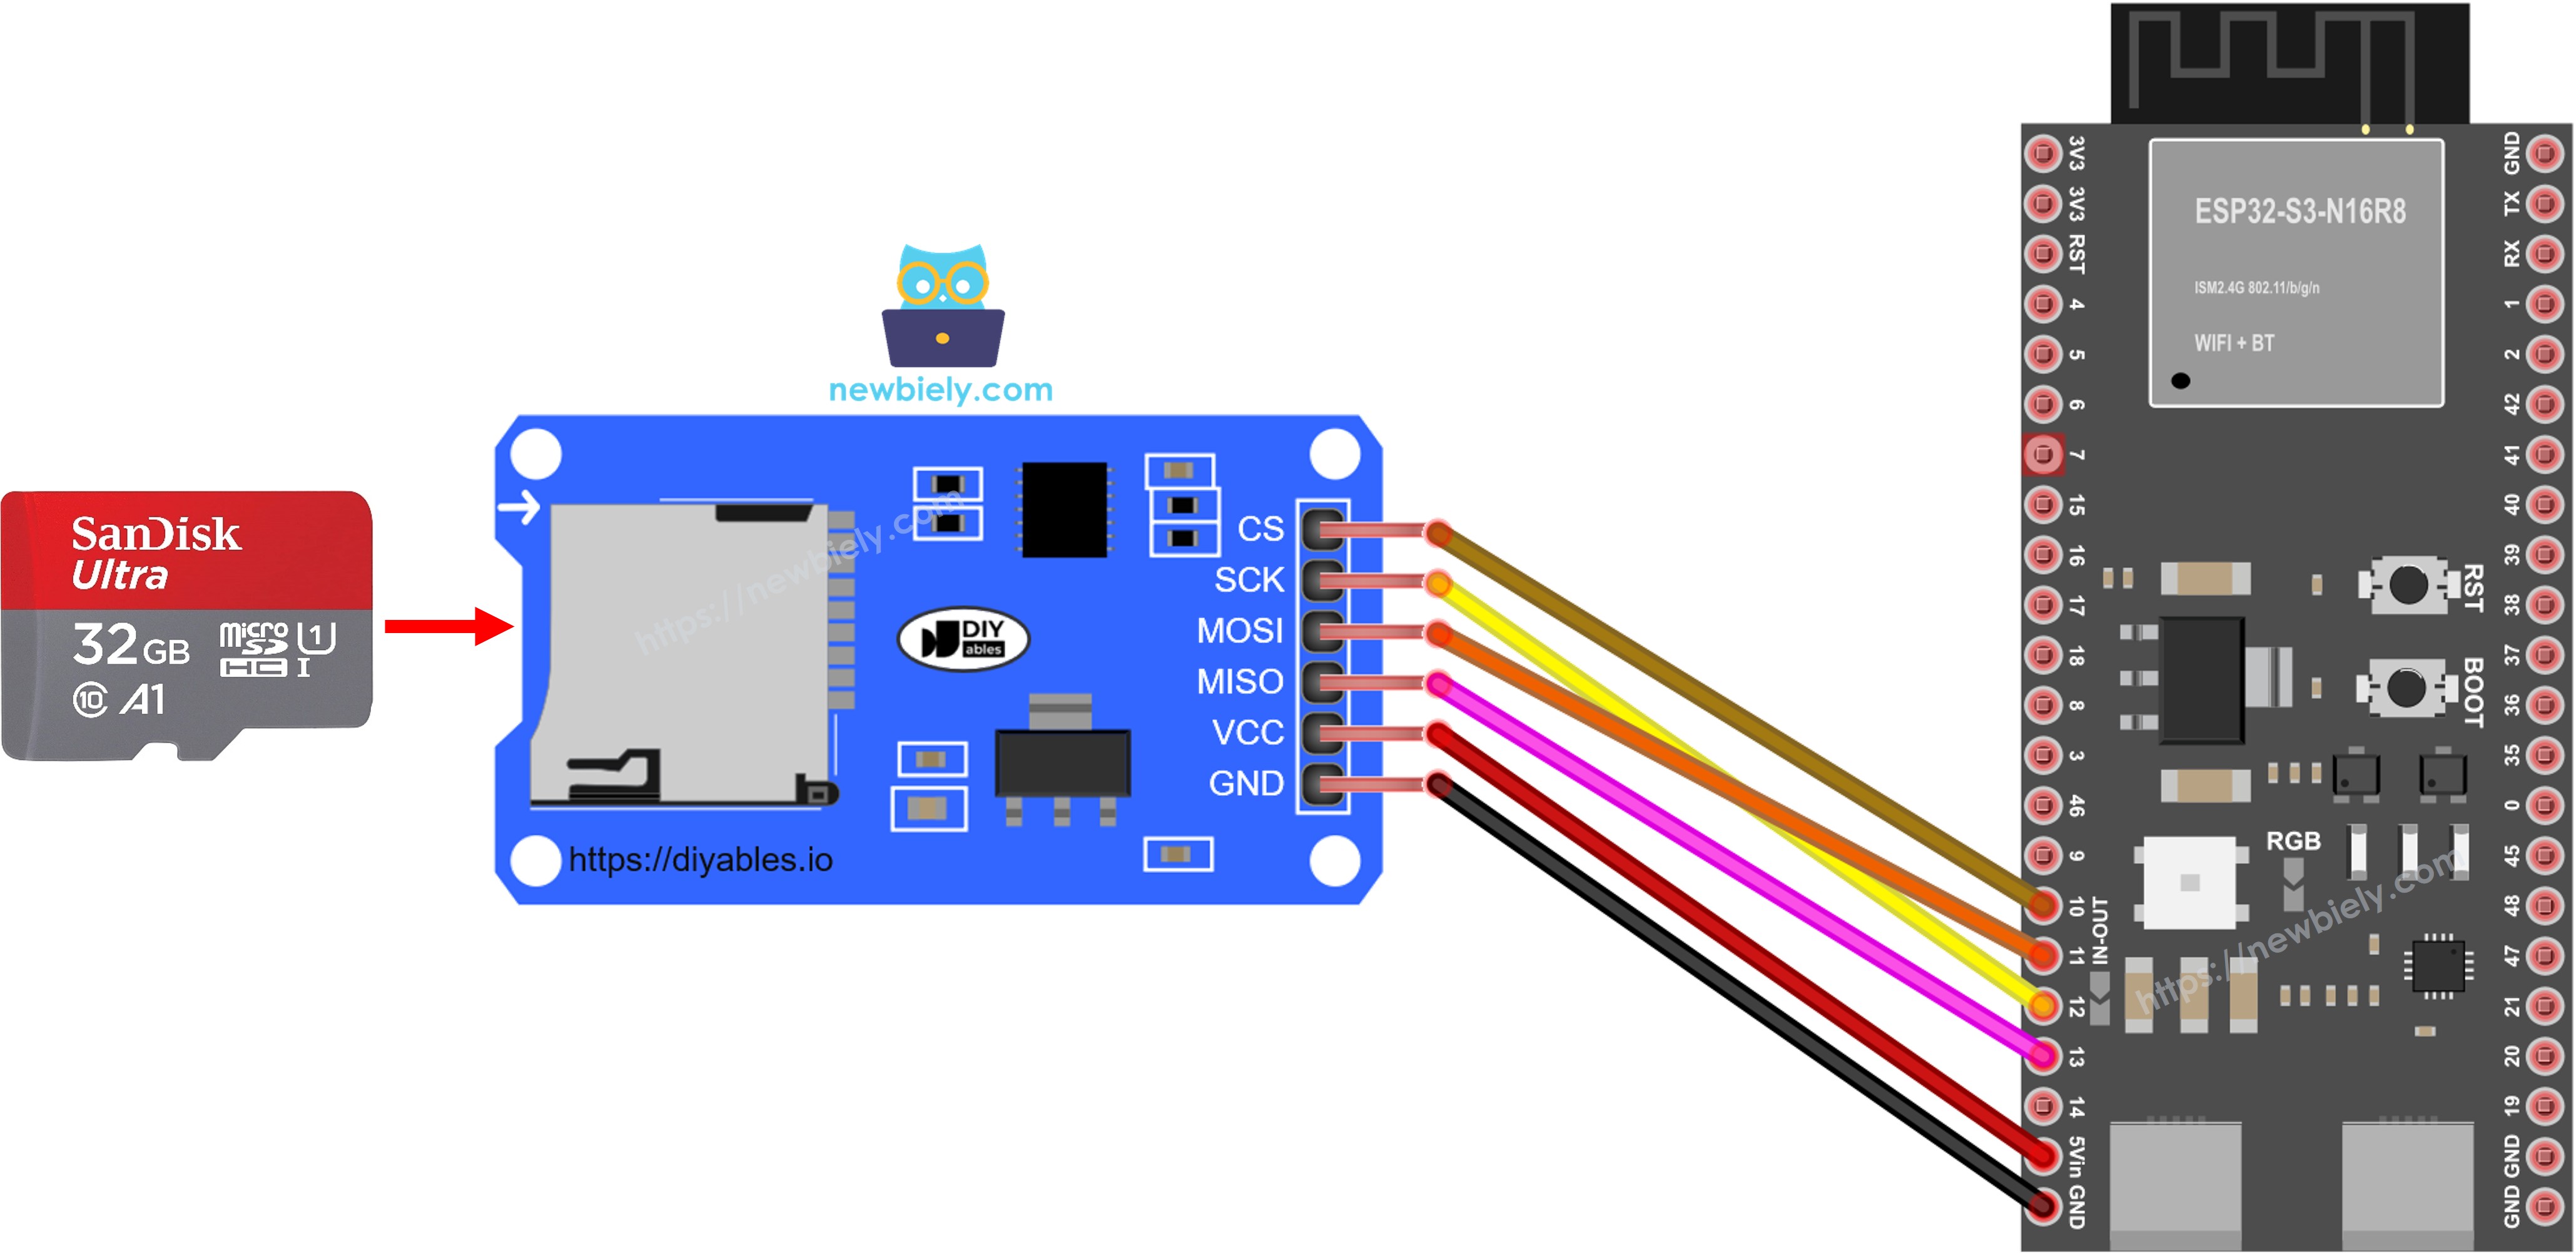
This image is created using Fritzing. Click to enlarge image
Safety Notes
Always power down the ESP32 S3 before connecting or disconnecting the MicroSD Card module to avoid corrupting the card or damaging the SPI bus. Use a logic level-compatible SD card module (3.3 V) since the ESP32 S3 GPIO pins operate at 3.3 V — connecting a 5 V module directly may damage the board.
| ESP32 S3 Pin | MicroSD Card Module Pin |
|---|---|
| 3.3V | VCC |
| GND | GND |
| GPIO10 | CS |
| GPIO11 | MOSI |
| GPIO12 | SCK |
| GPIO13 | MISO |
Copy HTML Contents to MicroSD Card
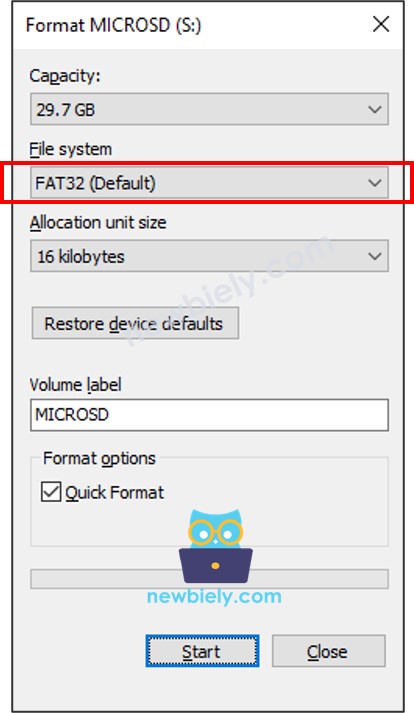
Before uploading code to the ESP32 S3, prepare your SD card with the web files it will serve. Format the MicroSD Card using FAT32 (on Windows: right-click the drive → Format → select FAT32), then create the following files in the root directory of the card.
- Please make sure that your Micro SD Card is formatted on FAT32 format as below (on Windows OS, right mouse click → format):
- Create a HTML file index.html and add the following code:
- Create a CSS file styles.css and add the following code:
- Prepare an image. This tutorial uses luffy.jpg, which is used in HTML code. You can download this image here:

- (Optional) Prepare favicon image. This tutorial uses this favicon.ico
- Put all files in the root directory of MicroSD Card, like below images:
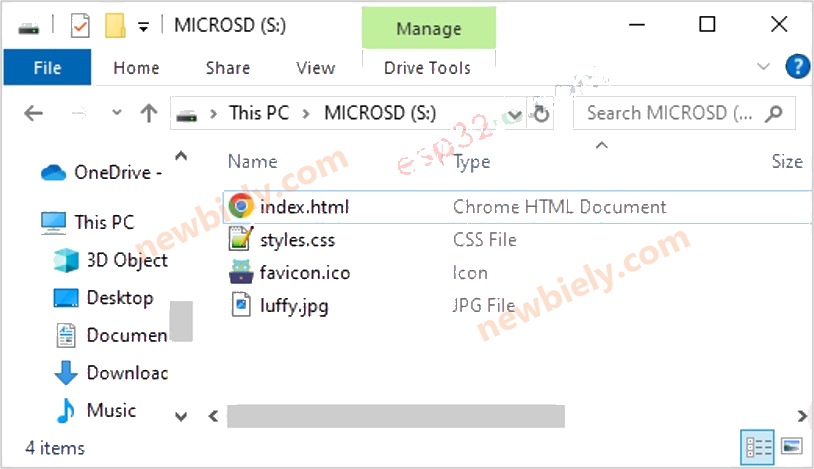
Please note that you can add other files such as JavaScript, txt, csv...
ESP32 S3 Code - Web Server on MicroSD Card
The following code configures the ESP32 S3 as a web server that reads and serves files directly from the MicroSD Card over the SPI interface. When a browser requests a file, the server opens it from the SD card and streams it to the client, including proper MIME type headers for HTML, CSS, JavaScript, and image files. Update the WiFi credentials in the code to match your network before uploading.
Detailed Instructions
- New to ESP32 S3? Complete our Getting Started with ESP32 S3 guide first.
- Connect the MicroSD Card module to the ESP32 S3 board following the wiring diagram above.
- Format your MicroSD Card as FAT32 and copy the HTML, CSS, and image files to its root directory.
- Connect the ESP32 S3 board to your PC via a USB Type-C cable.
- Open Arduino IDE on your PC.
- Select the right ESP32 S3 board (e.g. ESP32S3 Dev Module) and the correct COM port.
- Open the Library Manager by clicking on the Library Manager icon on the left navigation bar of Arduino IDE.
- Search "DIYables ESP32 WebServer", then find the Web Server library created by DIYables.
- Click Install button to install the Web Server library.
- Search for DIYables ESP32 WebServer created by DIYables.io and click the Install button.
- Copy the above code and open with Arduino IDE.
- Change the WiFi information (SSID and password) in the code to yours.
- Click Upload button on Arduino IDE to upload code to ESP32 S3.
- Open the Serial Monitor and set the baud rate to 115200.
- Check out the result on Serial Monitor.
- Pro Tip: You can update your web page content (HTML, CSS, images) by simply swapping or editing files on the MicroSD Card — no need to re-upload the ESP32 S3 firmware each time.
Serial Monitor
After the code uploads successfully, open the Serial Monitor to confirm the ESP32 S3 connects to WiFi and starts the web server. You should see output similar to the following readings:
- You will see an IP address on the Serial Monitor, for example: 192.168.0.3
- Type the IP address on the address bar of a web browser on your smartphone or PC.
- Please note that you need to change the 192.168.0.3 to the IP address you got on Serial Monitor.
- You will see a page loads HTML, CSS, images from SD Card.
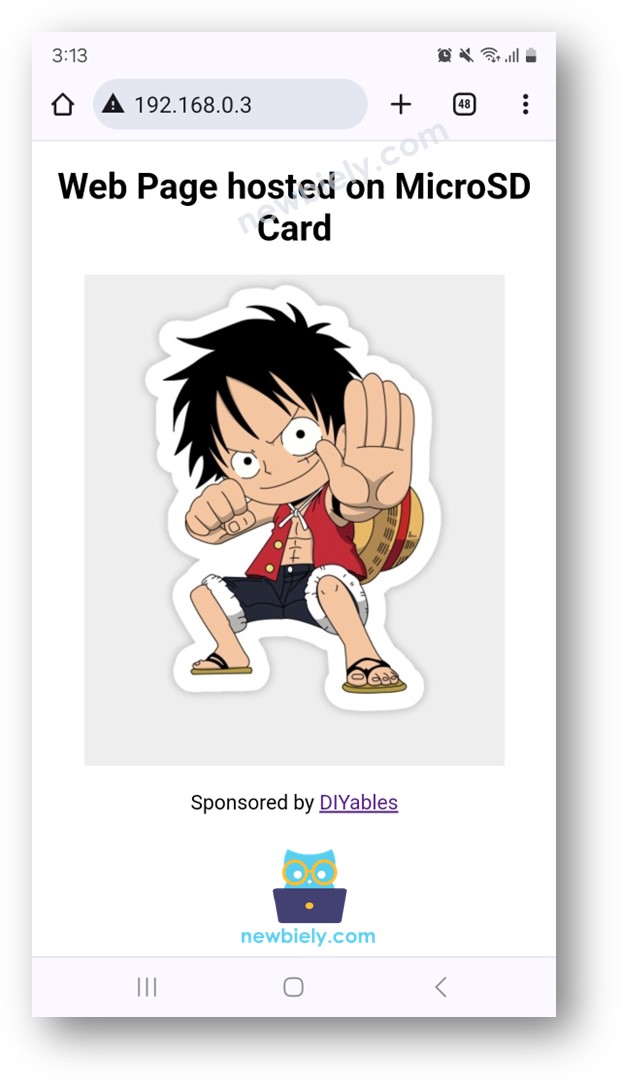
As you can see, the HTML, CSS, and images stored on the MicroSD Card were loaded by the web browser. You can now modify the HTML and CSS files on the SD card and refresh your browser to see changes immediately, without re-uploading the firmware.
Applications
Serving web content from a MicroSD Card opens up a wide range of practical use cases where the web interface is too large or too dynamic to fit in internal flash memory:
- Home Automation Dashboard: Host a full-featured control panel with multiple pages, icons, and scripts to monitor and control smart home devices.
- Data Logger Display: Serve a web page that reads and displays CSV log files stored on the same SD card, giving you a browser-based data viewer.
- Portable Information Kiosk: Deploy a self-contained informational display (e.g. at a museum or tutorial) that serves a multi-page website from a single ESP32 S3 device.
- OTA Web Interface: Host an update page on the SD card that allows users to configure WiFi credentials or device settings without reflashing the firmware.
- Media Gallery: Serve image galleries or small audio files from the SD card for lightweight multimedia projects.
Video Tutorial
Watch the step-by-step video walkthrough for this ESP32 S3 project below.
Challenges
Now that your ESP32 S3 web server is serving files from a MicroSD Card, try extending the project with these challenges to deepen your understanding:
- Beginner: Add a second HTML page (e.g. about.html) to the SD card and create a navigation link between index.html and the new page.
- Intermediate: Add a JavaScript file on the SD card that periodically fetches a sensor reading from a new /data endpoint on the ESP32 S3 and displays it on the web page without a page reload.
- Advanced: Implement a file upload endpoint on the ESP32 S3 web server so that users can upload new HTML or image files directly to the MicroSD Card from a browser, enabling fully remote content management.