ESP8266 - Motion Sensor - LED Strip
This tutorial instructs you on how to create a seamless lighting automation system using an ESP8266, an HC-SR501 motion sensor, and an LED strip. Tailored to trigger the LED strip upon detecting human presence, this versatile system is well-suited for a range of applications, including:
- Implementing the system on staircases to enable automatic lighting as individuals approach.
- Installing the system beneath your bed, activating the light as you step down from the bed to the floor.
- Establishing automatic illumination for a Christmas tree whenever humans are present.
Hardware Preparation
Or you can buy the following kits:
| 1 | × | DIYables Sensor Kit (18 sensors/displays) |
Additionally, some of these links are for products from our own brand, DIYables .
Overview of LED Strip and Motion Sensor
If you do not know about LED strip and motion sensor (pinout, how it works, how to program ...), learn about them in the following tutorials:
You have the flexibility to use either NeoPixel, WS2812B, or DotStar LED Strips. For the sake of simplicity in wiring, this tutorial specifically uses the DotStar LED Strip. Adapting the code for other LED strip types is straightforward, simply refer to the tutorials above for guidance.
Wiring Diagram
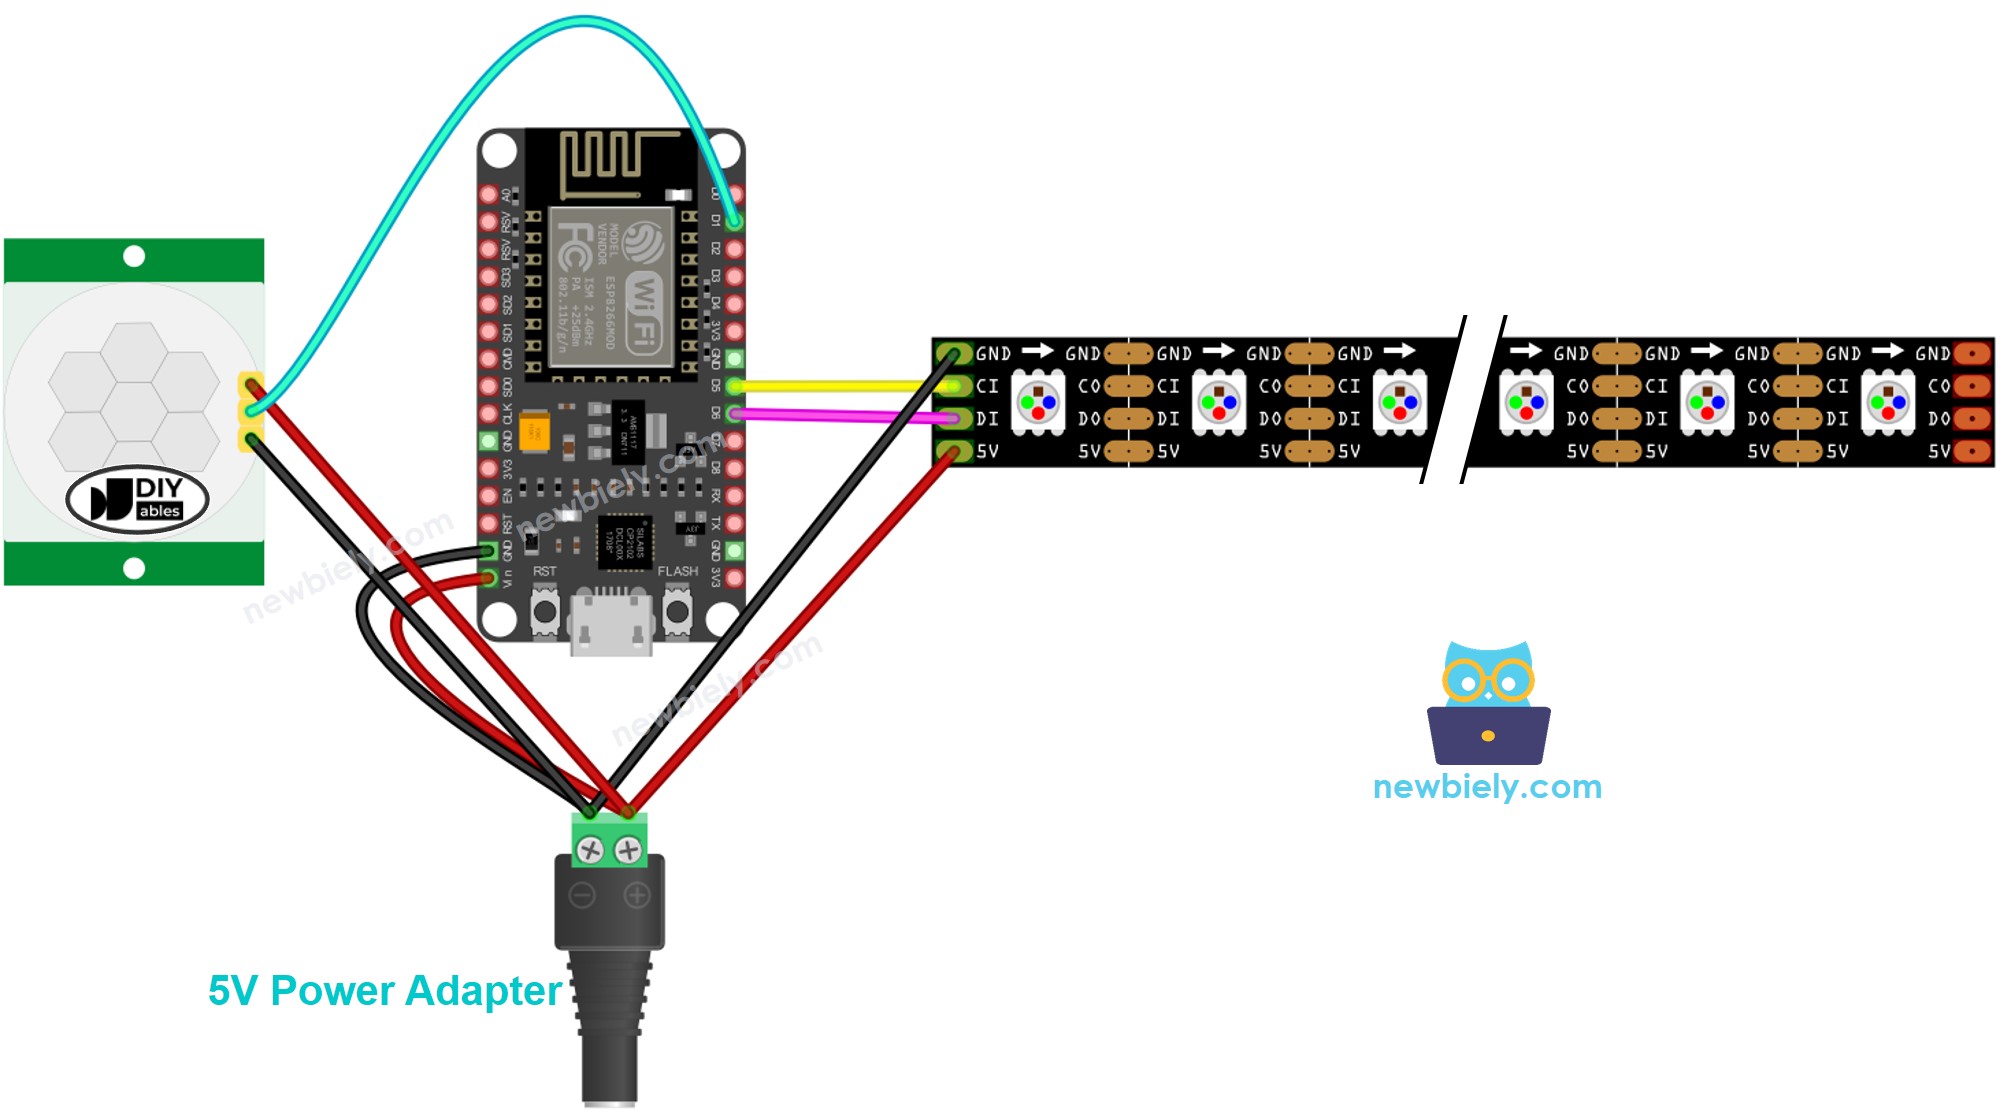
This image is created using Fritzing. Click to enlarge image
See more in ESP8266's pinout and how to supply power to the ESP8266 and other components.
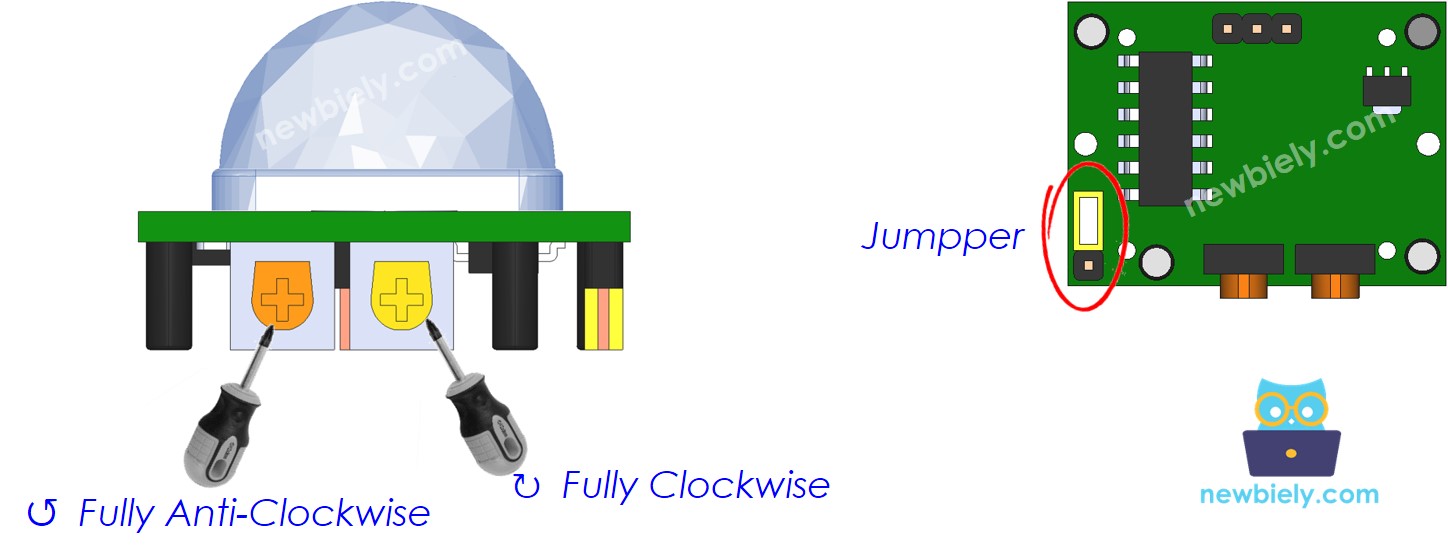
Initial Setting
| Time Delay Adjuster | Screw it in anti-clockwise direction fully. |
| Detection Range Adjuster | Screw it in clockwise direction fully. |
| Repeat Trigger Selector | Put jumper as shown on the image. |
ESP8266 Code - Motion Sensor Controls LED strip
Detailed Instructions
To get started with ESP8266 on Arduino IDE, follow these steps:
- Check out the how to setup environment for ESP8266 on Arduino IDE tutorial if this is your first time using ESP8266.
- Wire the components as shown in the diagram.
- Connect the ESP8266 board to your computer using a USB cable.
- Open Arduino IDE on your computer.
- Choose the correct ESP8266 board, such as (e.g. NodeMCU 1.0 (ESP-12E Module)), and its respective COM port.
- Connect ESP8266 to PC via USB cable
- Open Arduino IDE, select the right board and port
- Click to the Libraries icon on the left bar of the Arduino IDE.
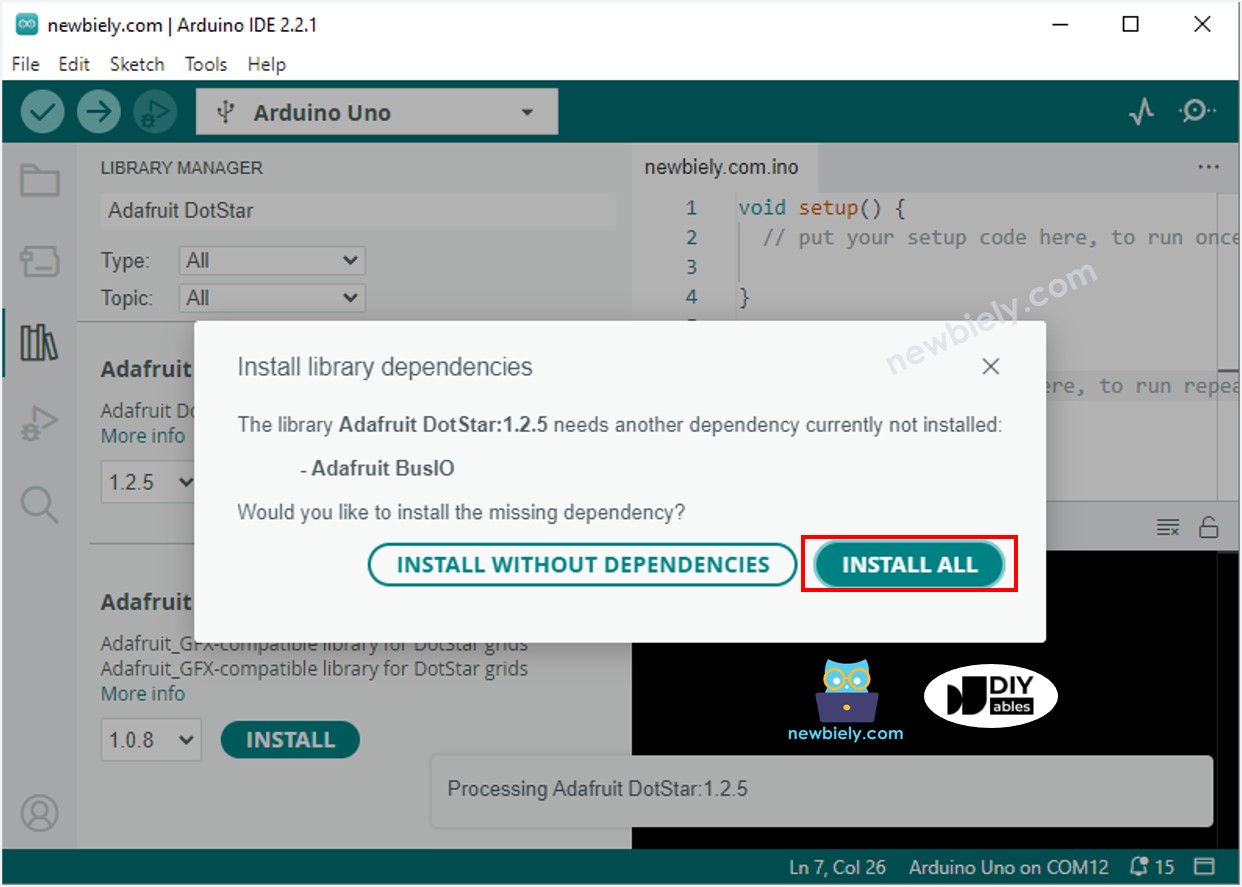
- Search “Adafruit DotStar”, then find the DotStar library by Adafruit
- Click Install button to install DotStar library.

- You will be asked to install the dependency. Click Install All button.
- Copy the above code and open with Arduino IDE
- Click Upload button on Arduino IDE to upload code to ESP8266
- Move your hand in front of sensor
- Check out the LED strip
You can modify the code to add a lighting effect.