ESP8266 Control Servo Motor via Bluetooth
This tutorial instructs you how to program an ESP8266 to manage a Servo Motor by using either Bluetooth (HC-05 module) or BLE (HM-10 module). Instructions for both modules are given.
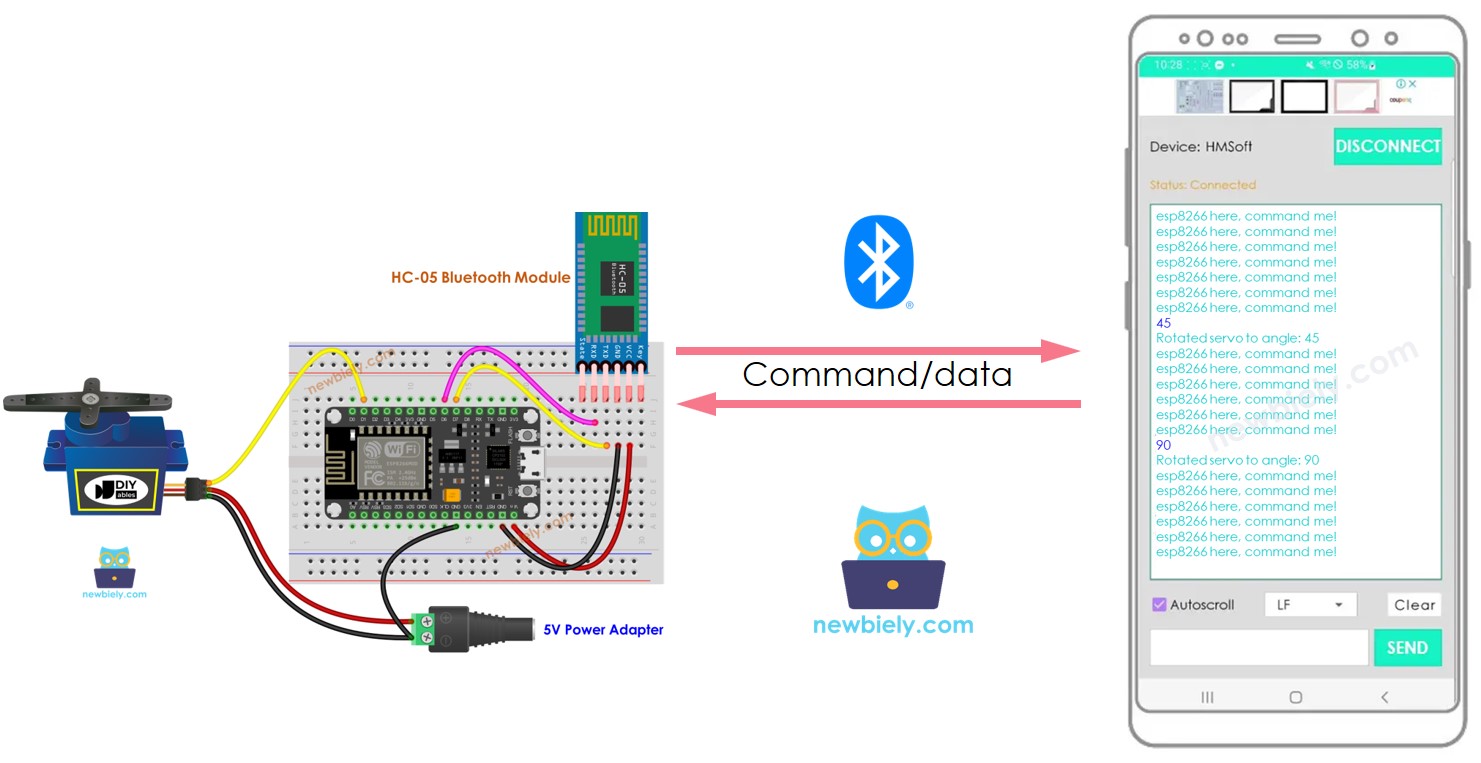
We will use the Bluetooth Serial Monitor App on a smartphone to transmit the angle value to ESP8266. ESP8266 will then adjust the servo motor in accordance with the received value.
Hardware Preparation
Or you can buy the following kits:
| 1 | × | DIYables Sensor Kit (18 sensors/displays) |
Additionally, some of these links are for products from our own brand, DIYables .
Buy Note: For controlling multiple servo motors, use the PCA9685 16 Channel PWM Servo Driver Module to save MCU pins and simplify wiring.
Overview of Servo Motor and Bluetooth Module
If you are not familiar with Servo Motors, Bluetooth Modules, their pinouts, how they work, and how to program them, please check out the following tutorials for more information:
Wiring Diagram
- To manage a Servo Motor with Classic Bluetooth, the HC-05 Bluetooth module should be used. A wiring diagram is supplied for reference.
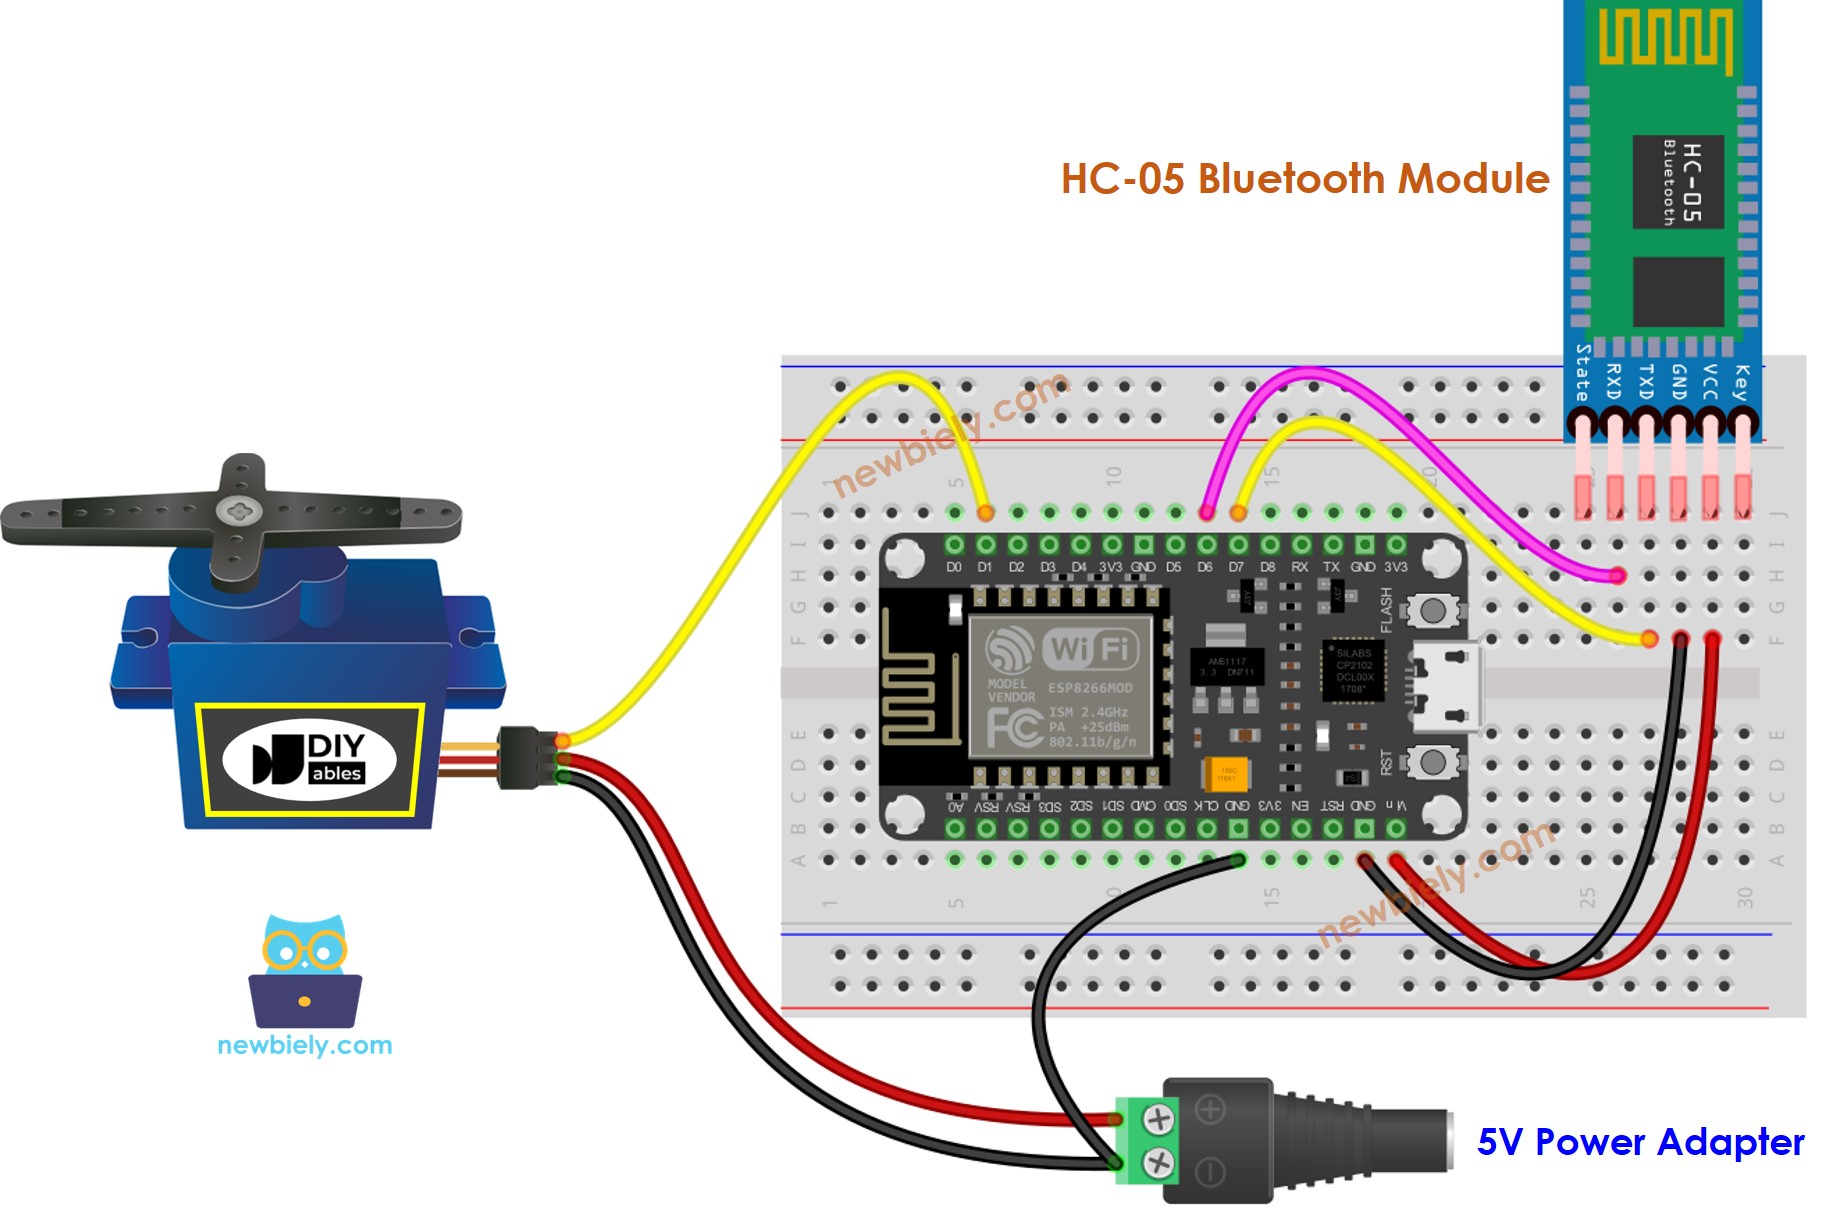
This image is created using Fritzing. Click to enlarge image
- To manage a Servo Motor with BLE, the HM-10 BLE module should be used. A wiring diagram is available for reference.
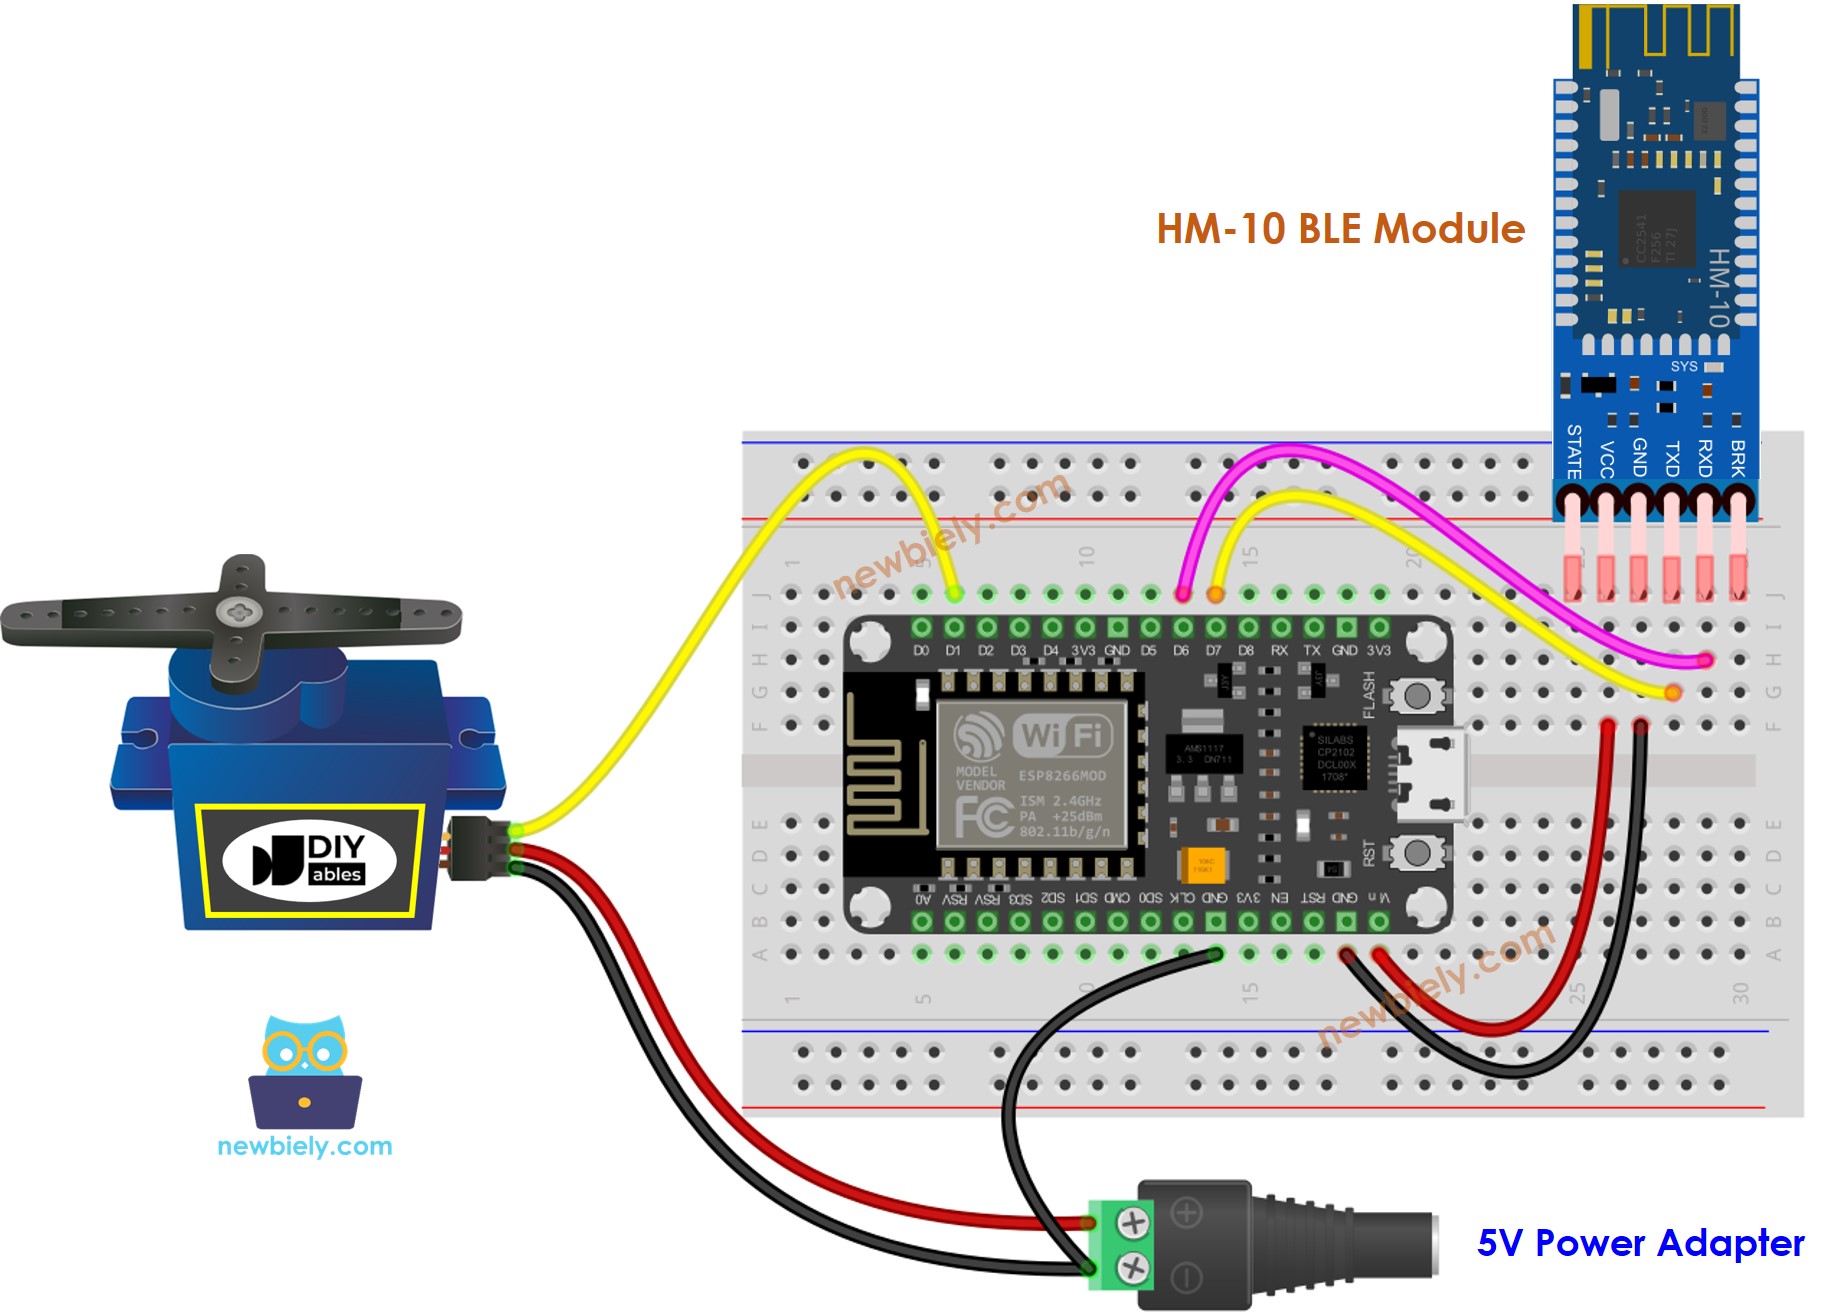
This image is created using Fritzing. Click to enlarge image
See more in ESP8266's pinout and how to supply power to the ESP8266 and other components.
ESP8266 Code - controls Servo Motor via Bluetooth/BLE
The following code is suitable for use with both the HC-10 Bluetooth module and the HM-10 BLE module. It is compatible with both.
Detailed Instructions
To get started with ESP8266 on Arduino IDE, follow these steps:
- Check out the how to setup environment for ESP8266 on Arduino IDE tutorial if this is your first time using ESP8266.
- Wire the components as shown in the diagram.
- Connect the ESP8266 board to your computer using a USB cable.
- Open Arduino IDE on your computer.
- Choose the correct ESP8266 board, such as (e.g. NodeMCU 1.0 (ESP-12E Module)), and its respective COM port.
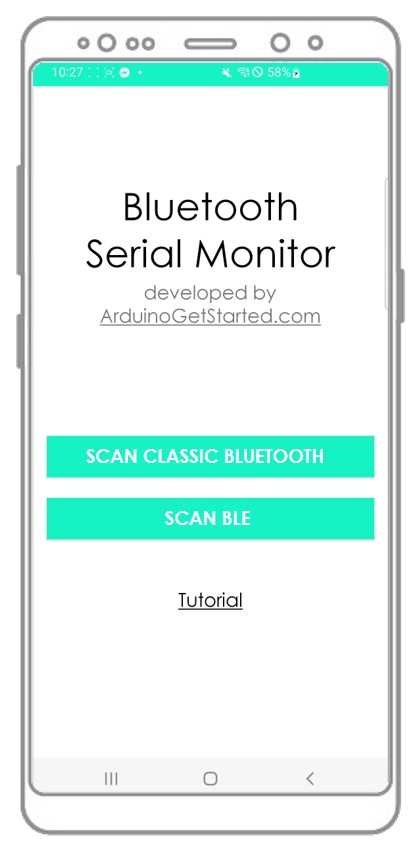
- Download the Bluetooth Serial Monitor App to your smartphone.
- Take the code provided and open it in the Arduino IDE, then upload it to your ESP8266 board.
- If you experience difficulty uploading the code, try detaching the TX and RX pins from the Bluetooth module, upload the code, and then reattach the RX/TX pins.
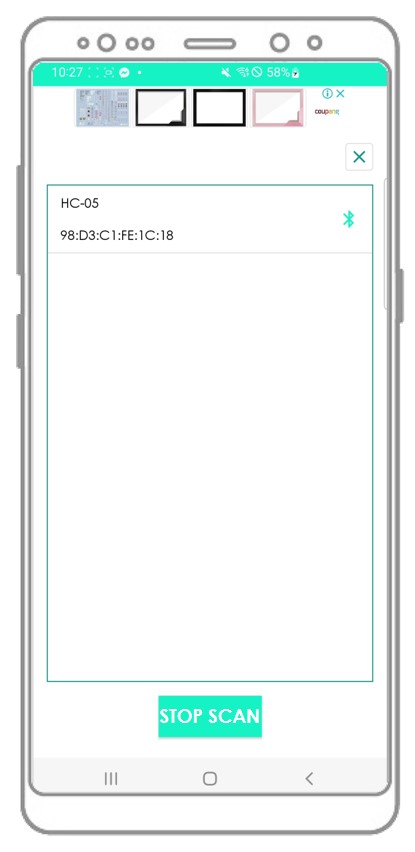
- Open the Bluetooth Serial Monitor App on your smartphone and select either the Classic Bluetooth or BLE option, depending on the module being used.
- Connect the app to the HC-05 Bluetooth module or HM-10 BLE module.
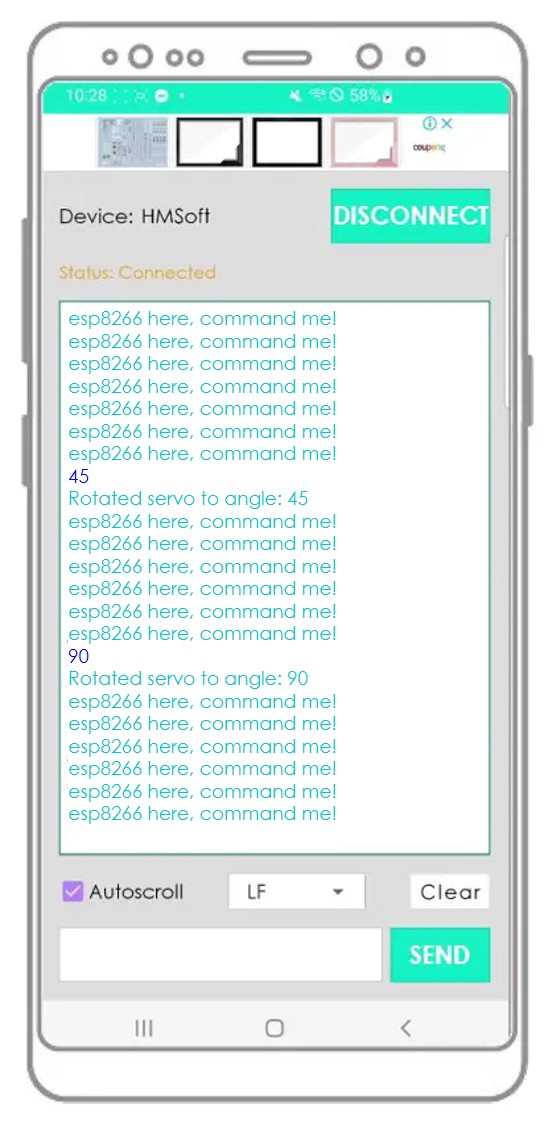
- Enter an angle such as 45 or 90 and press the Send button.
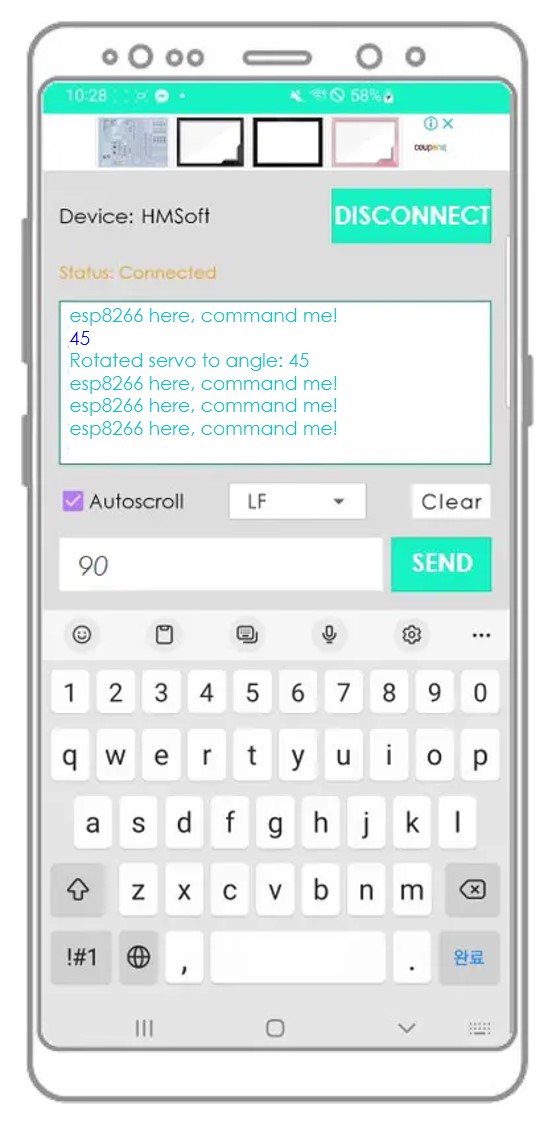
- Witness the Servo Motor's angle alteration.
- Examine the consequences on the Android App.
If you find the Bluetooth Serial Monitor app helpful, please rate it 5 stars on Play Store. Thank you for your support!