How to power ESP8266
This guide will walk you through safe and convenient ways to power the ESP8266 NodeMCU and its connected components (e.g., sensors, displays). We will cover:
- How to power the ESP8266 through the USB port
- How to power both the ESP8266 and sensors through the USB port
- How to power the ESP8266 through the Vin pin
- How to power both the ESP8266 and sensors through the Vin pin
- The most reliable and convenient method to power the ESP8266, sensors, and display
Hardware Preparation
Or you can buy the following kits:
| 1 | × | DIYables Sensor Kit (30 sensors/displays) | |
| 1 | × | DIYables Sensor Kit (18 sensors/displays) |
Additionally, some of these links are for products from our own brand, DIYables .
How to power ESP8266 via USB port
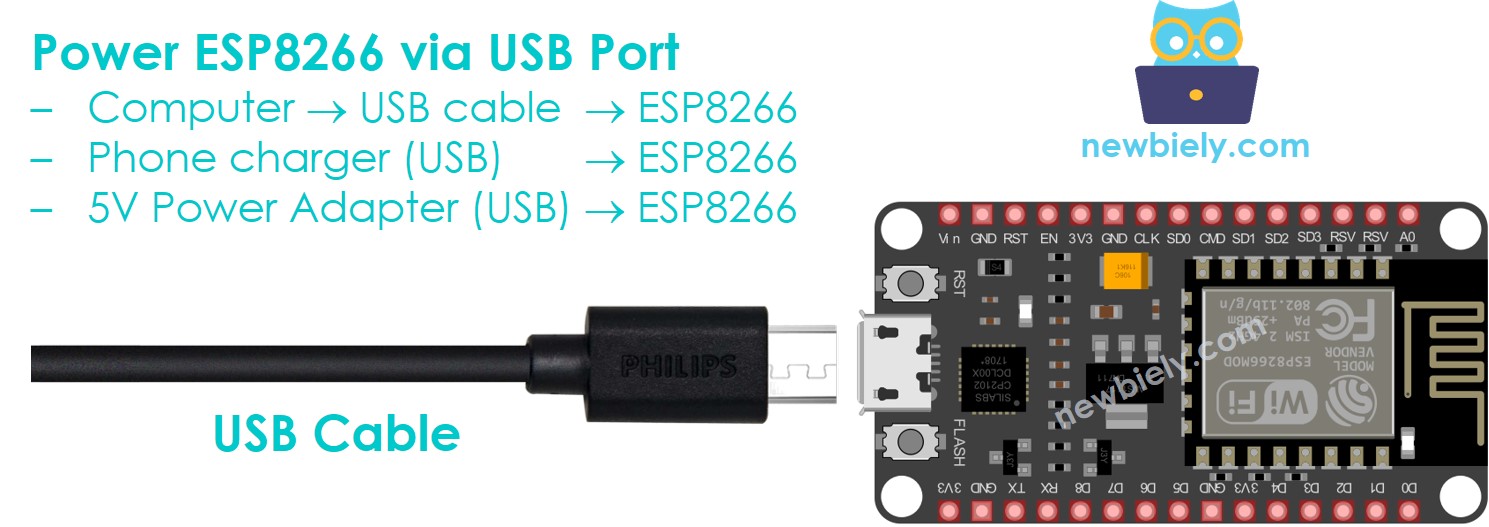
You can use the following power sources to power ESP8266 via USB port
- Computer and Micro USB Cable
- Phone charger (micro USB terminal)
- 5V Power Adapter (micro USB terminal)
How to power ESP8266 and sensors via USB port
The below diagram shows and example of powering ESP8266 (via USB port) and DHT22 sensor
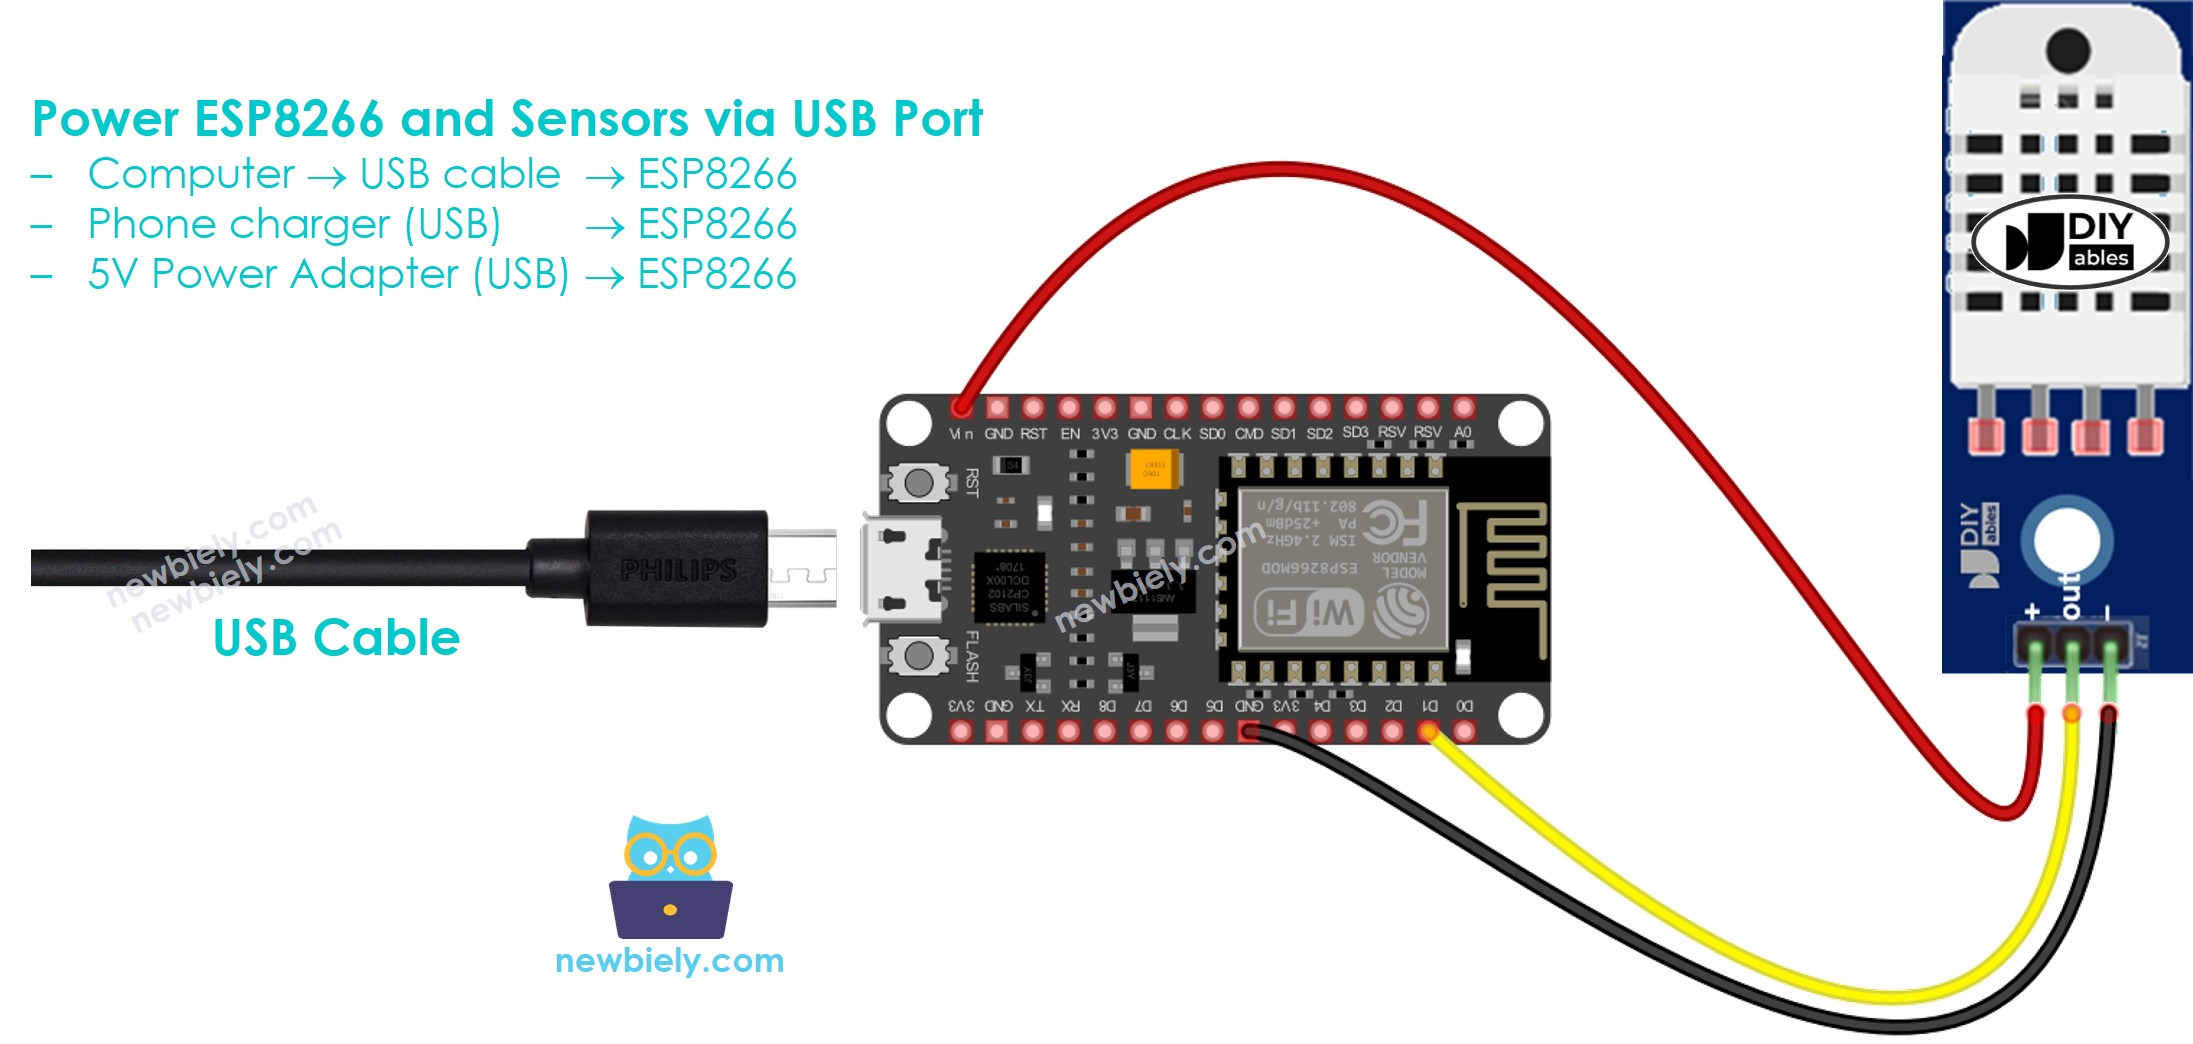
You can power the ESP8266 using the USB port as described above and then use the Vin pin to power the sensors.
Please note: This method is NOT recommended. It only works well for a few sensors that use little power. If a sensor uses a lot of power, it can damage the ESP8266 board. Instead, sensors and displays should be powered separately.
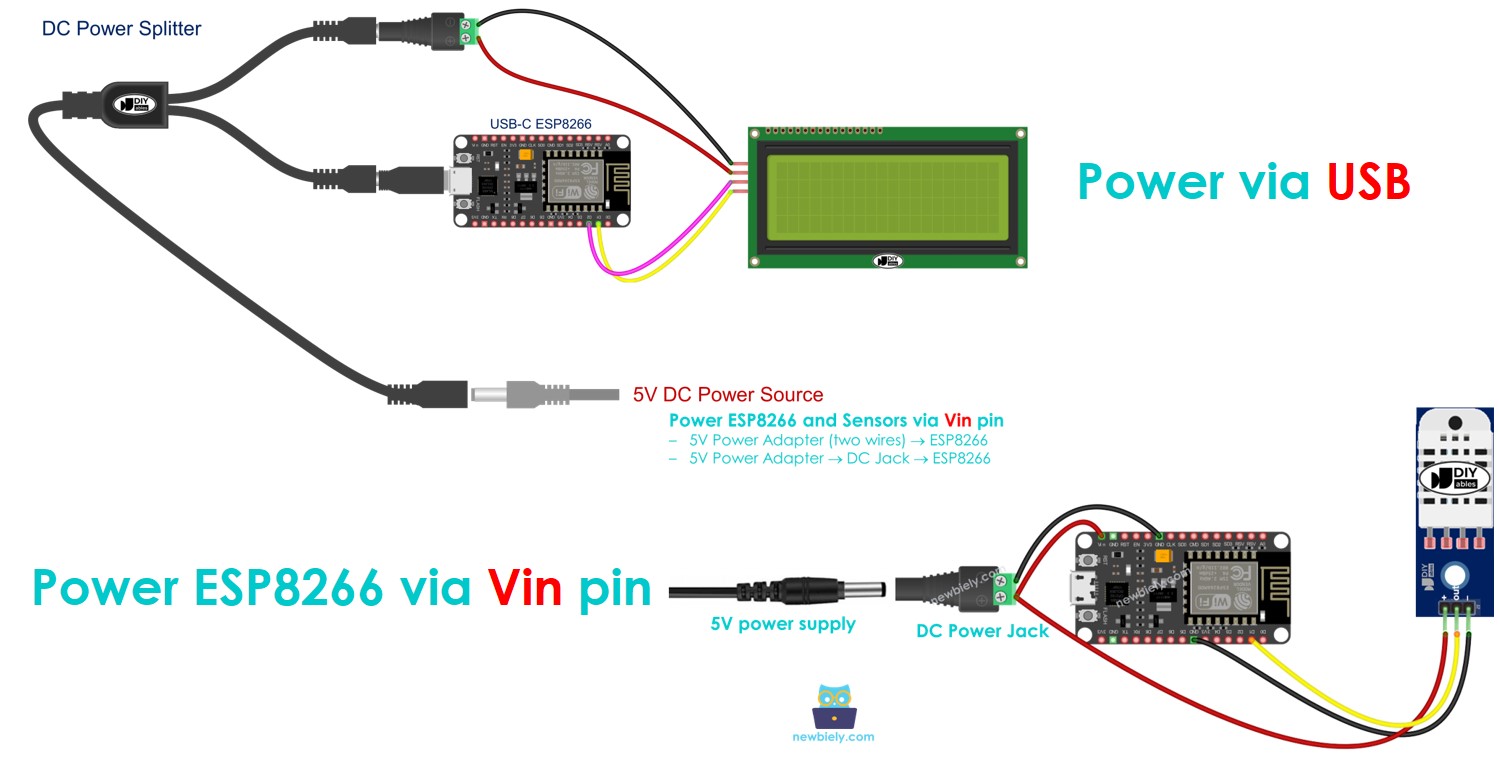
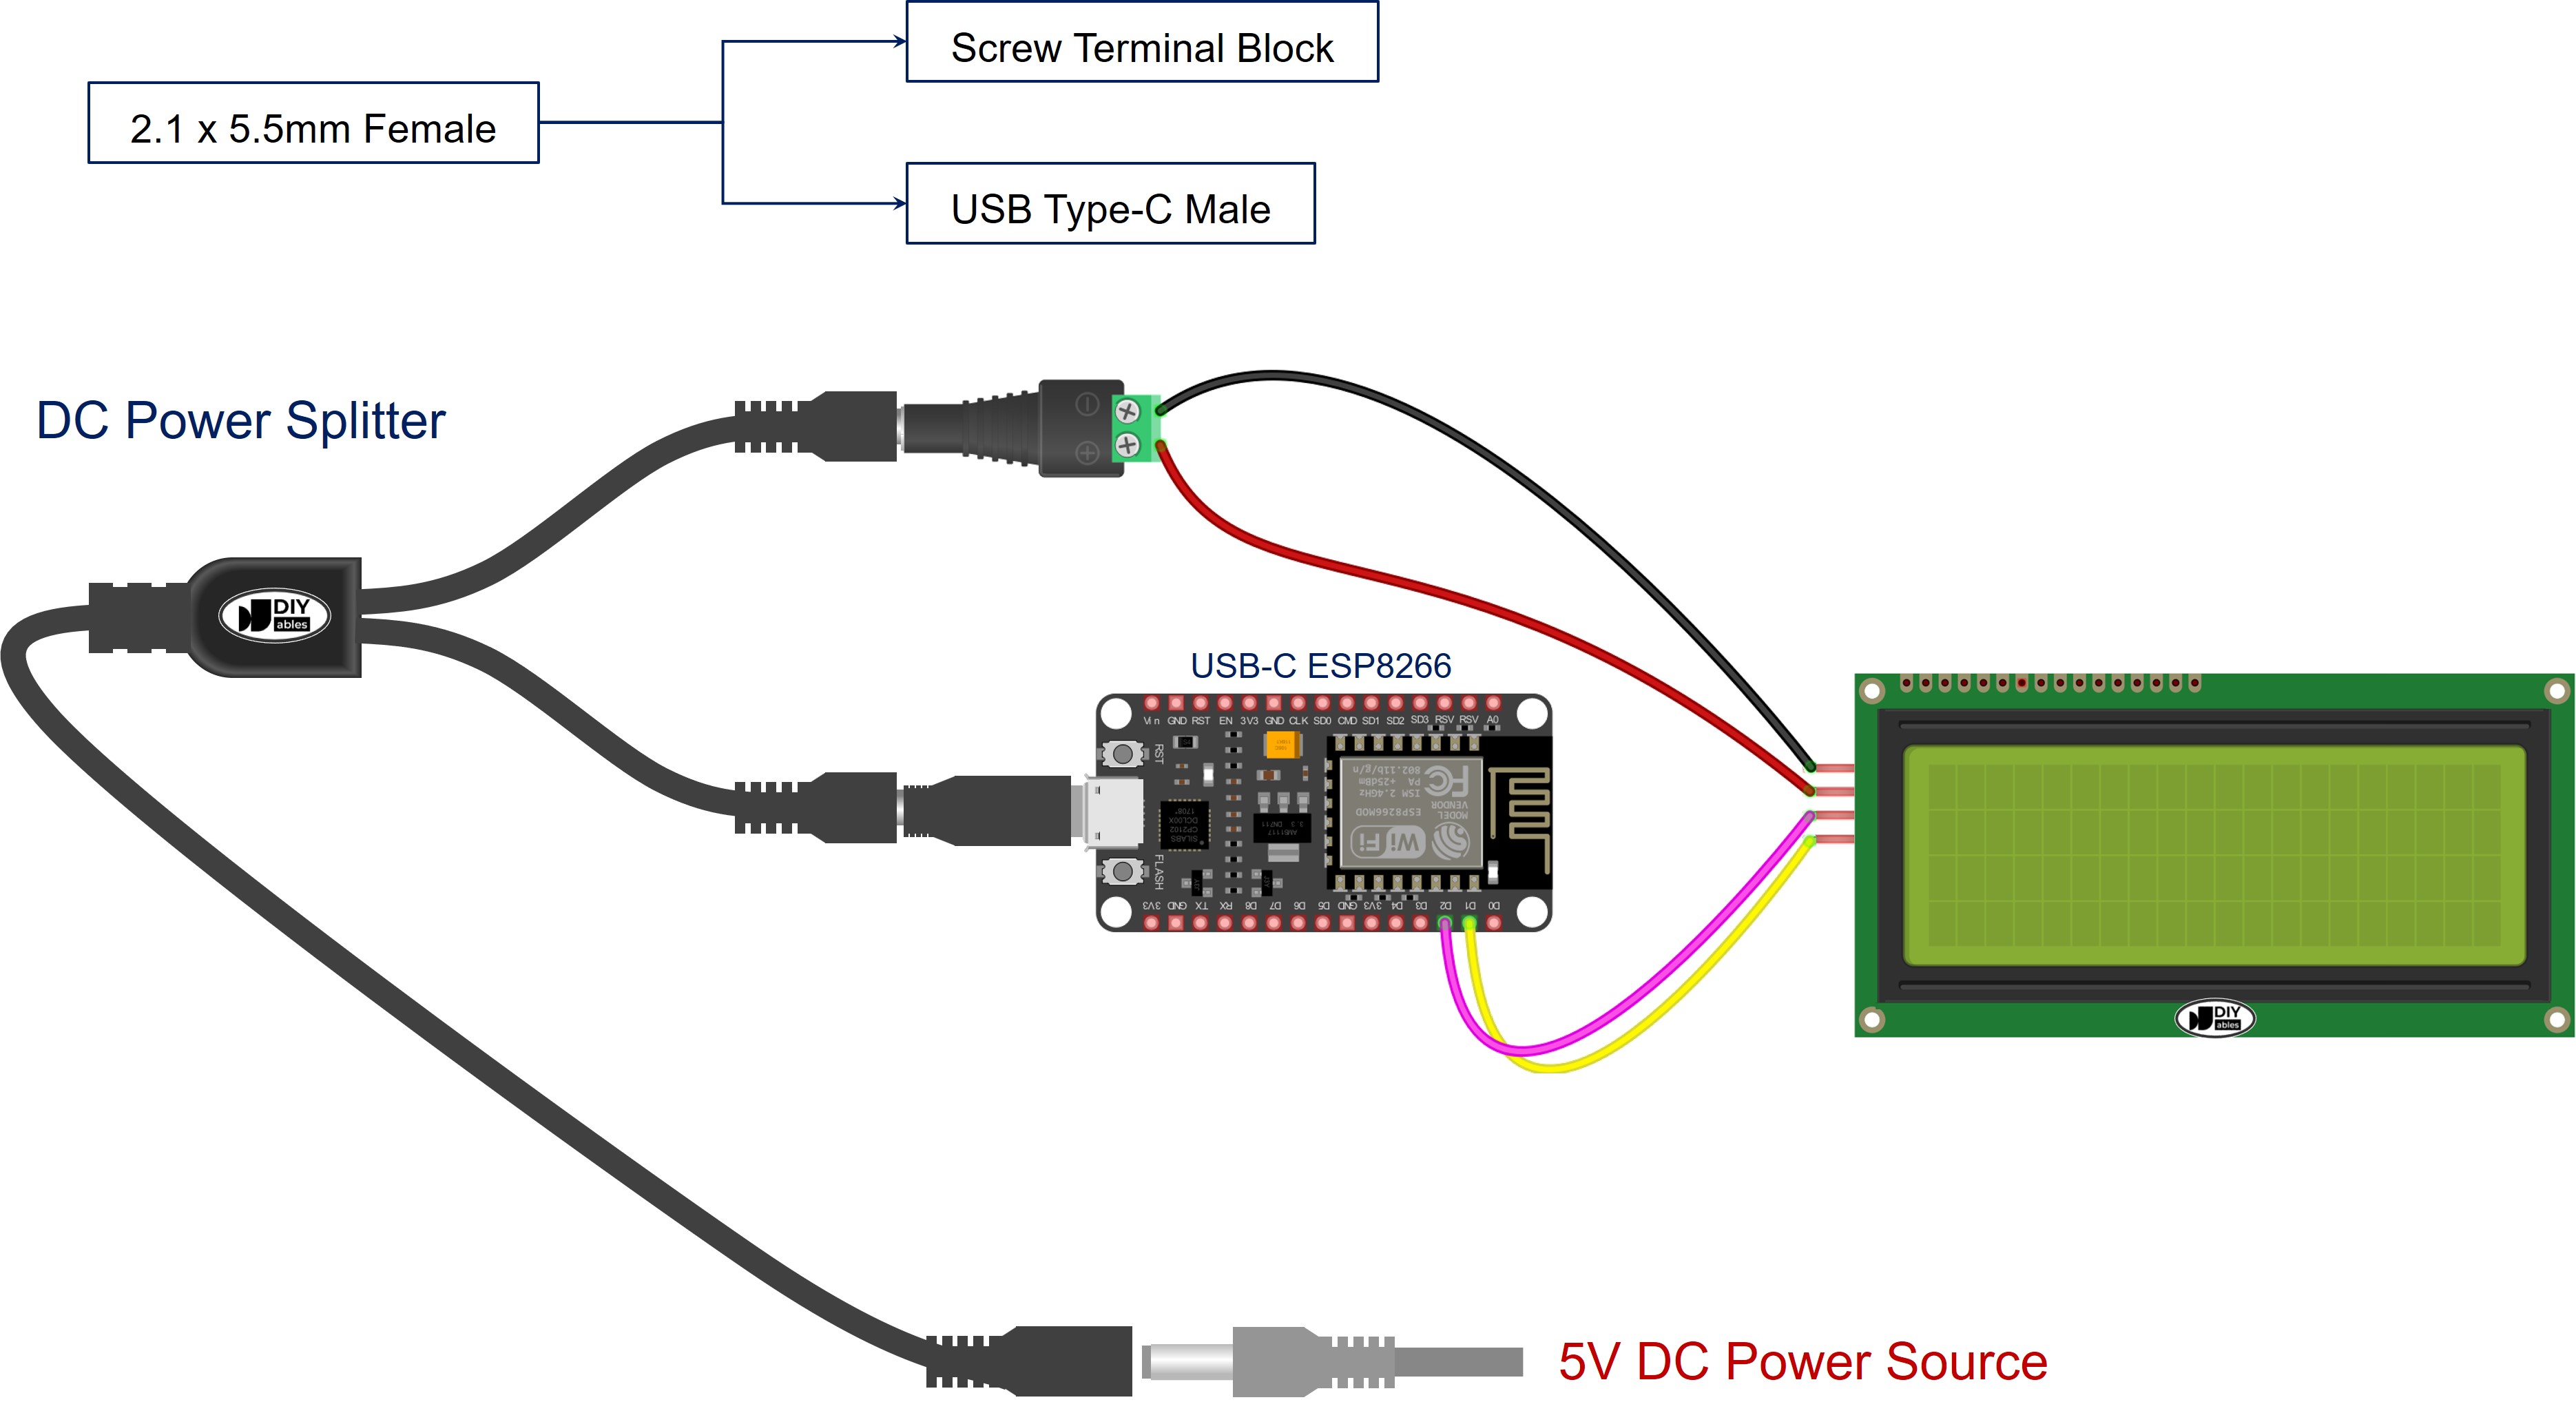
However, using two or more power sources is not very convenient. The best solution is to use a single power source with this power splitter set. The power splitter provides two connections:
- USB-C power line: Powers the ESP8266 board through the USB port.
- Screw terminal block line: Powers the connected sensors or displays.
The diagram below shows how to use a single power source with a power splitter to power both the ESP8266 and an LCD display separately.
How to power ESP8266 via Vin pin
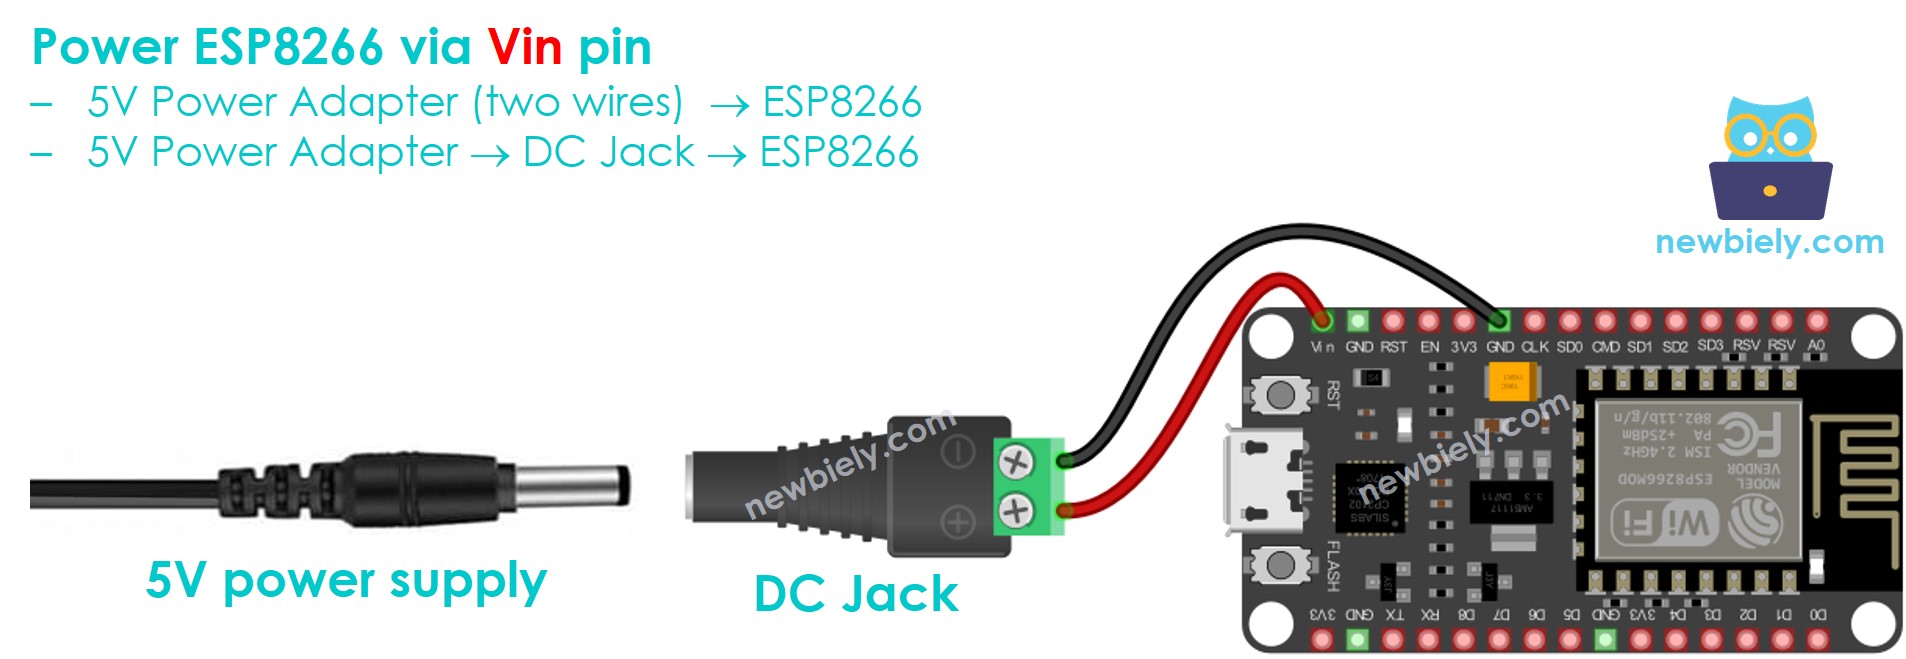
You can use the 5v power adapter with barrel jack to power ESP8266 via Vin pin. You can do so by two ways:
- Cut the wire and separate the positive and negative lines. Then connect the positive line to Vin pin and the negative line to a GND pin of ESP8266
- (Recommended) use a DC Jack connecter
How to power ESP8266 and sensors via Vin pin
The below diagram shows and example of powering ESP8266 (via Vin pin) and DHT22 sensor by a 5V power adapter
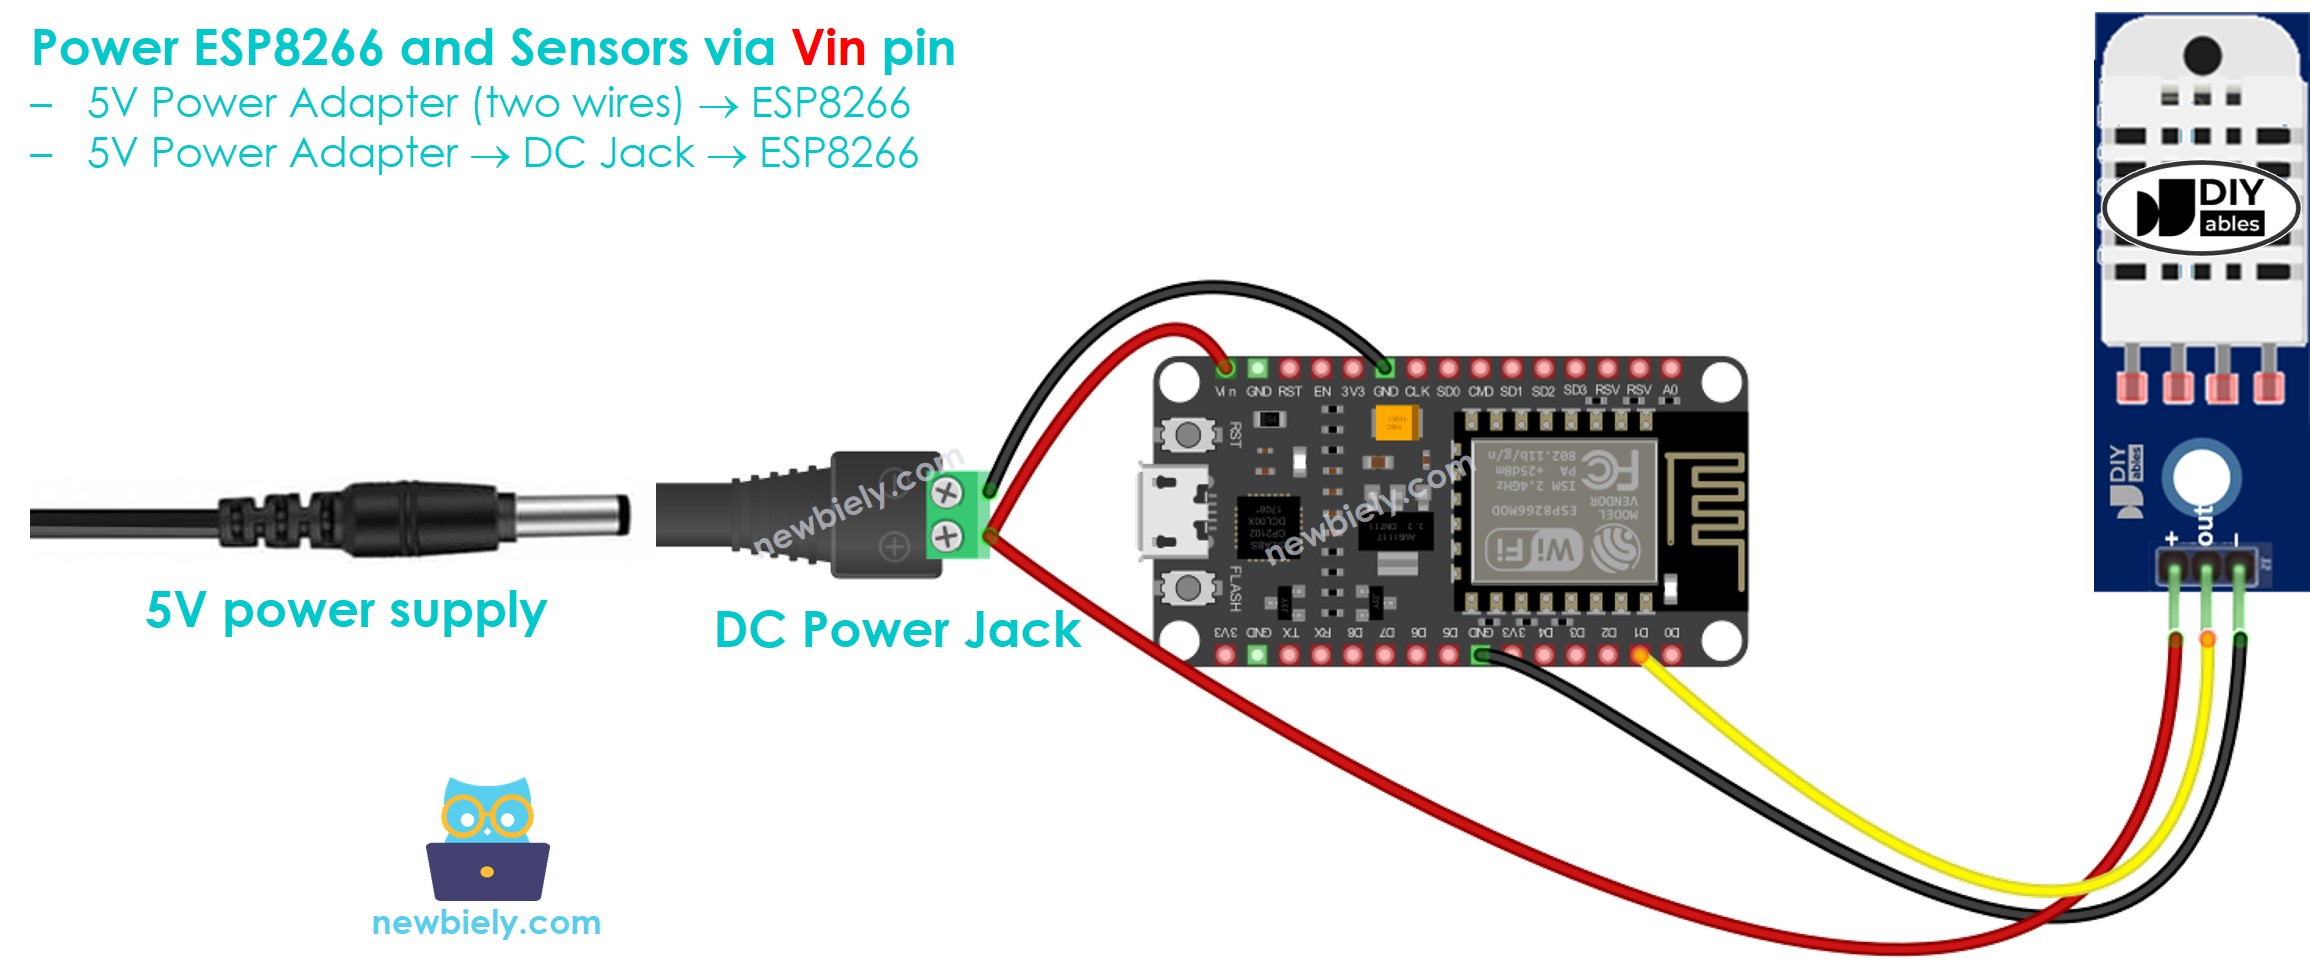
This method is strongly recommended as it ensures that the motors, sensors, displays, and other components are powered independently of the ESP8266 board, ensuring both safety and adequate power supply
The most reliable and convenient method to power the ESP8266, sensors, and display
In sumary, there are two best ways to power ESP8266 and connected components, as below examles:


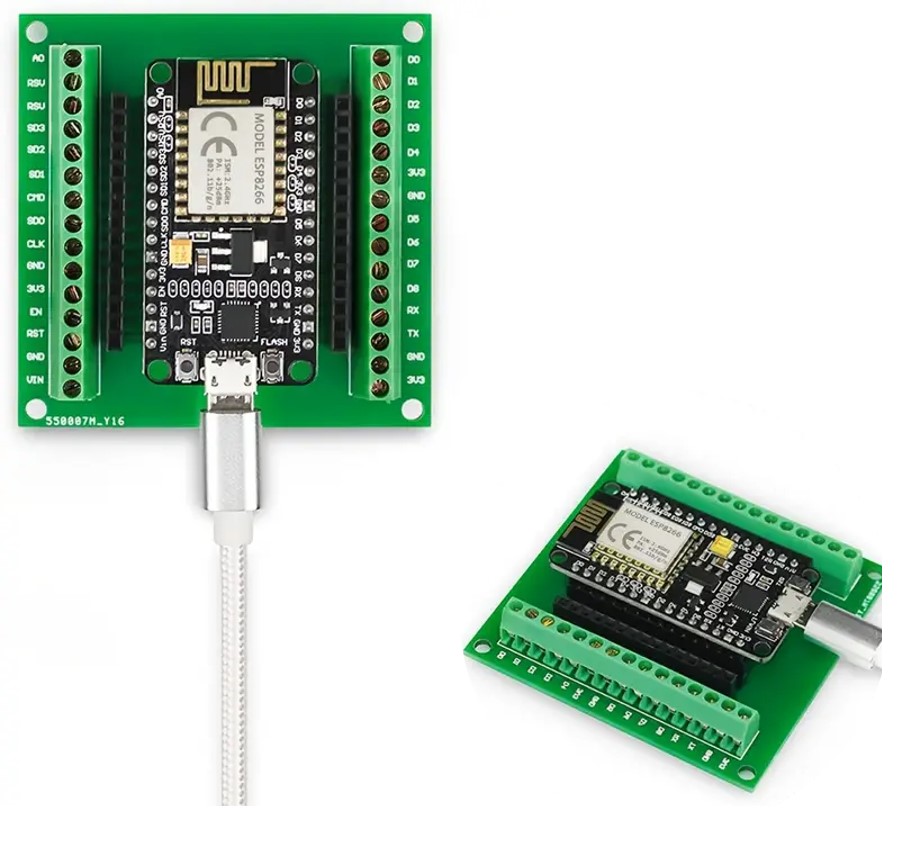
How to actually do wiring easily and conveniently
In practice, we require a method for secure, tidy, safe, and convenient wiring. The optimal solution is to utilize a screw terminal board.
