ESP8266 - Door Sensor - Piezo Buzzer
This tutorial instructs you how to use ESP8266 and door sensor to trigger piezo buzzer. In detail:
- ESP8266 produces a sound when detecting the door opened.
- ESP8266 stops the sound when detecting the door closed.
- ESP8266 plays a song when detecting the door opened.
Hardware Preparation
Or you can buy the following kits:
| 1 | × | DIYables Sensor Kit (30 sensors/displays) | |
| 1 | × | DIYables Sensor Kit (18 sensors/displays) |
Additionally, some of these links are for products from our own brand, DIYables .
Overview of Piezo Buzzer and Door Sensor
If you lack knowledge on piezo buzzer and door sensor (including pinout, functioning, programming, etc.), please refer to the following tutorials:
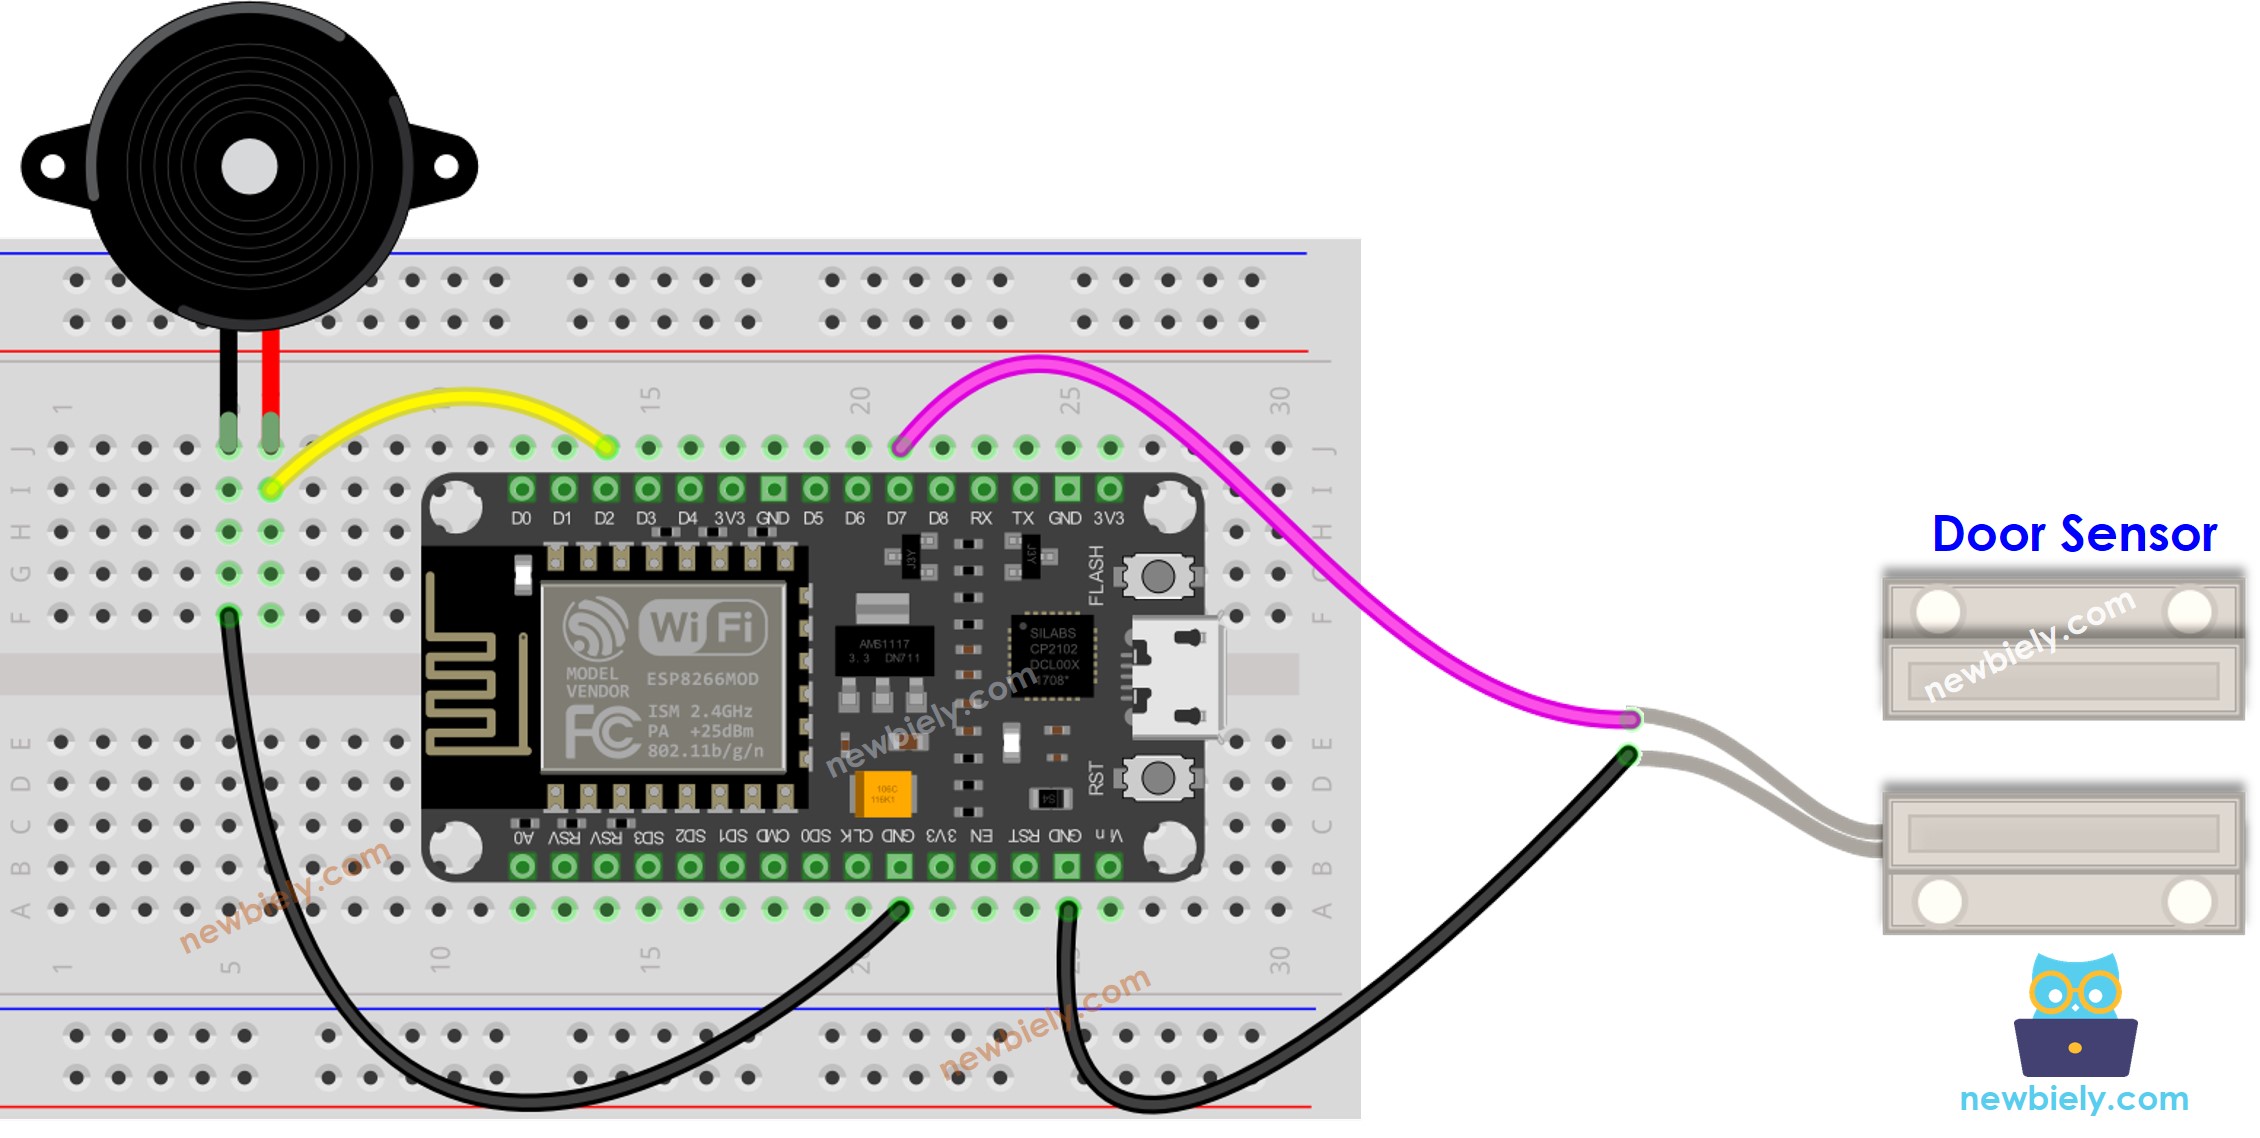
Wiring Diagram

This image is created using Fritzing. Click to enlarge image
See more in ESP8266's pinout and how to supply power to the ESP8266 and other components.
ESP8266 Code - Simple Sound
Detailed Instructions
To get started with ESP8266 on Arduino IDE, follow these steps:
- Check out the how to setup environment for ESP8266 on Arduino IDE tutorial if this is your first time using ESP8266.
- Wire the components as shown in the diagram.
- Connect the ESP8266 board to your computer using a USB cable.
- Open Arduino IDE on your computer.
- Choose the correct ESP8266 board, such as (e.g. NodeMCU 1.0 (ESP-12E Module)), and its respective COM port.
- Connect an ESP8266 to a PC by using a USB cable.
- Open the Arduino IDE, choose the correct board and port.
- Copy the code and open it in the Arduino IDE.
- Click the Upload button in the Arduino IDE to compile and upload the code to the ESP8266.
- Bring the magnet close to the reed switch and then move it away again.
- Hear the sound of the piezo buzzer.
Code Explanation
Check out the line-by-line explanation contained in the comments of the source code!
ESP8266 Code - Melody
Detailed Instructions
- Wire the components as shown in the diagram.
- Connect the ESP8266 board to your computer using a USB cable.
- Open Arduino IDE on your computer.
- Choose the correct ESP8266 board, such as (e.g. NodeMCU 1.0 (ESP-12E Module)), and its respective COM port.
- Copy the code and open it with the Arduino IDE.
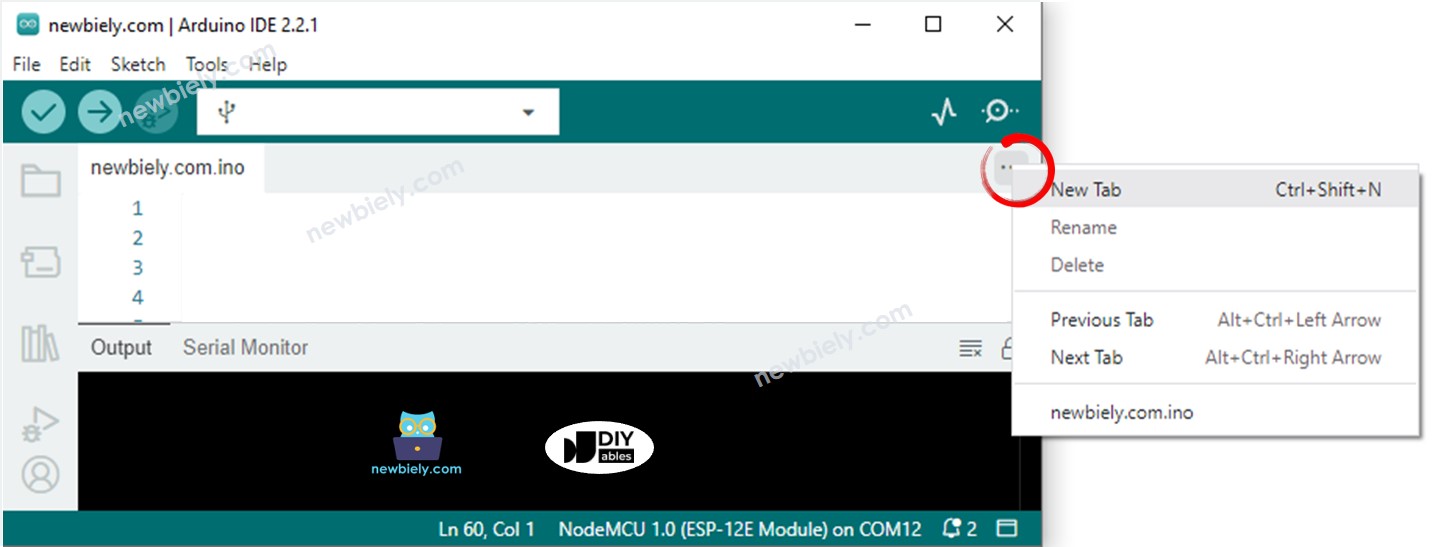
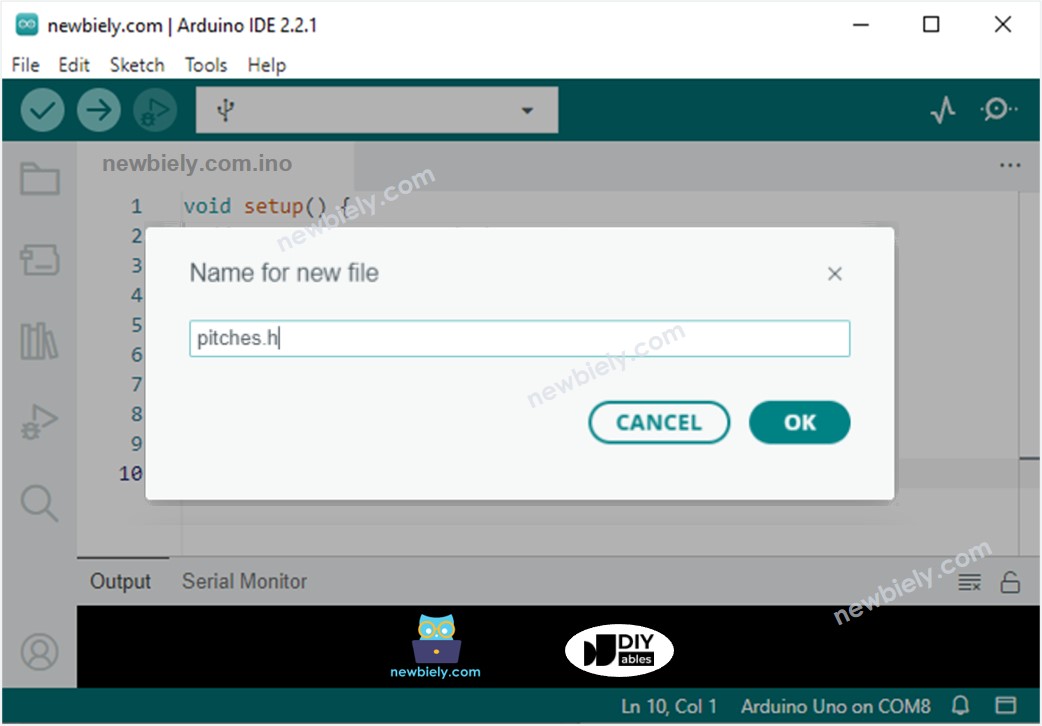
- Create the pitches.h file On Arduino IDE by:
- Either click on the button just below the serial monitor icon and choose New Tab, or use Ctrl+Shift+N keys.
- Give file's name pitches.h and click OK button
- Copy the below code and paste it to the created pitches.h file.
- Click the Upload button on the Arduino IDE to compile and upload the code to the ESP8266.
- Move the magnet far from the reed switch of door sensor to simulate the door open.
- Listen to the tune of the piezo buzzer.


Code Explanation
Read the line-by-line explanation in comment lines of the source code!. Examine the line-by-line description found in the comments of the source code!. Investigate the line-by-line commentary included in the source code!. Check out the line-by-line annotations present in the source code's comments!
