ESP8266 - Bluetooth LED Matrix
This tutorial instructs you how to use ESP8266 control an LED matrix display with a smartphone through Bluetooth or BLE.
We will have two different modules to choose from: HC-05 for Classic Bluetooth (Bluetooth 2.0) and HM-10 for Bluetooth Low Engery (BLE, Bluetooth 4.0). The tutorial will provide step-by-step instructions for both modules.
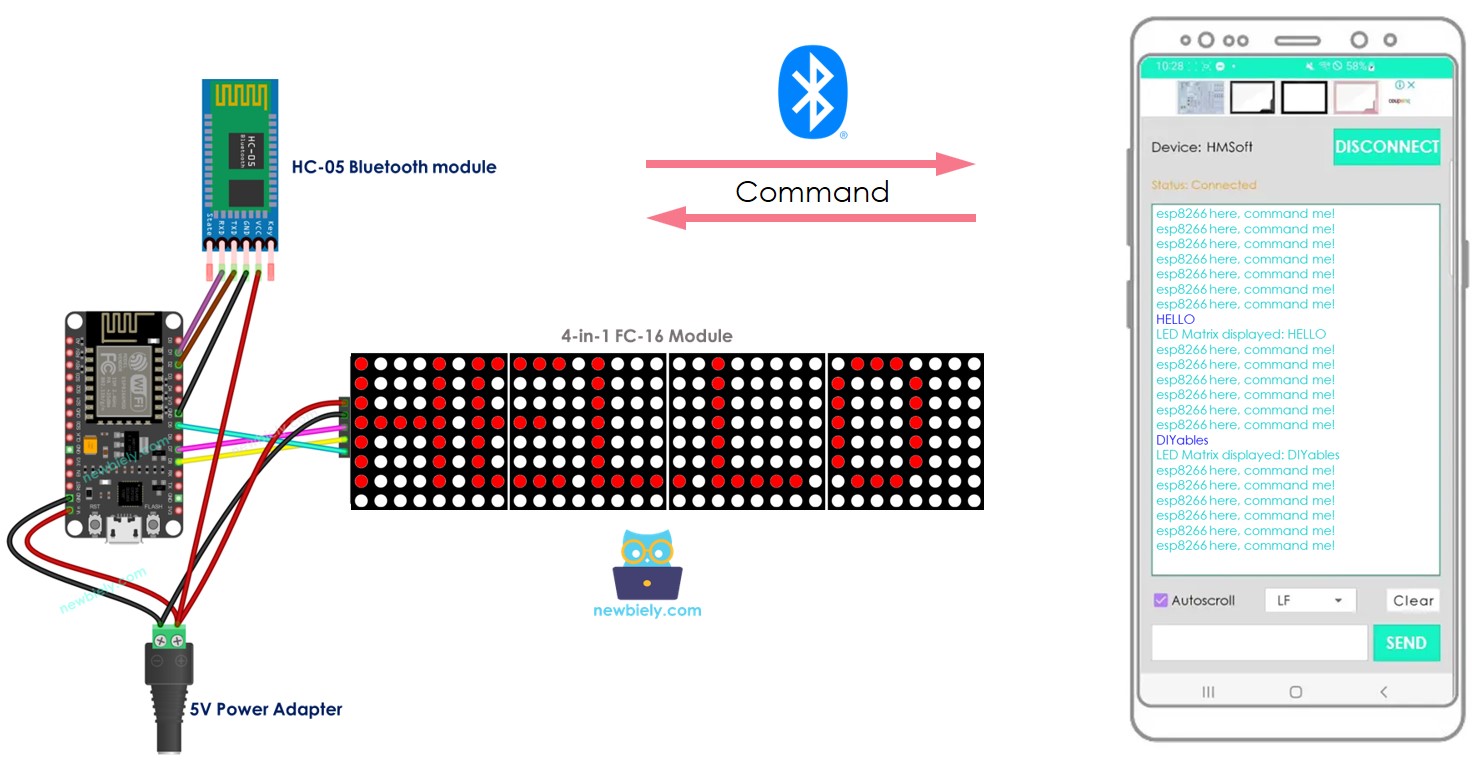
To send messages from the smartphone to the ESP8266, we will use the Bluetooth Serial Monitor App. Once the message is received by ESP8266, it will be displayed on the LED matrix display.
In detail, we will learn:
- How to connect the LED matrix display and HC-05 Classic Bluetooth module (Bluetooth 2.0) to ESP8266.
- How to connect the LED matrix display and HM-10 Bluetooth Low Engery module (BLE, Bluetooth 4.0) to ESP8266.
- How to program ESP8266 to receive the text from smartphone via Bluetooth or BLE and display it on LED Matrix.
Hardware Preparation
Or you can buy the following kits:
| 1 | × | DIYables Sensor Kit (18 sensors/displays) |
Additionally, some of these links are for products from our own brand, DIYables .
Overview of LED matrix display and Bluetooth Module
Prior to beginning this tutorial, it is suggested that you have a fundamental comprehension of LED matrix displays and Bluetooth modules, including their pinouts, how they operate, and how to code them. If you are not acquainted with these topics, please take a look at the following tutorials for more information:
- ESP8266 - LED Matrix Display tutorial
- ESP8266 - Bluetooth tutorial
- ESP8266 - BLE tutorial
Wiring Diagram
- To control the LED matrix display with Classic Bluetooth, the HC-05 Bluetooth module must be connected to ESP8266 as per the wiring diagram below:
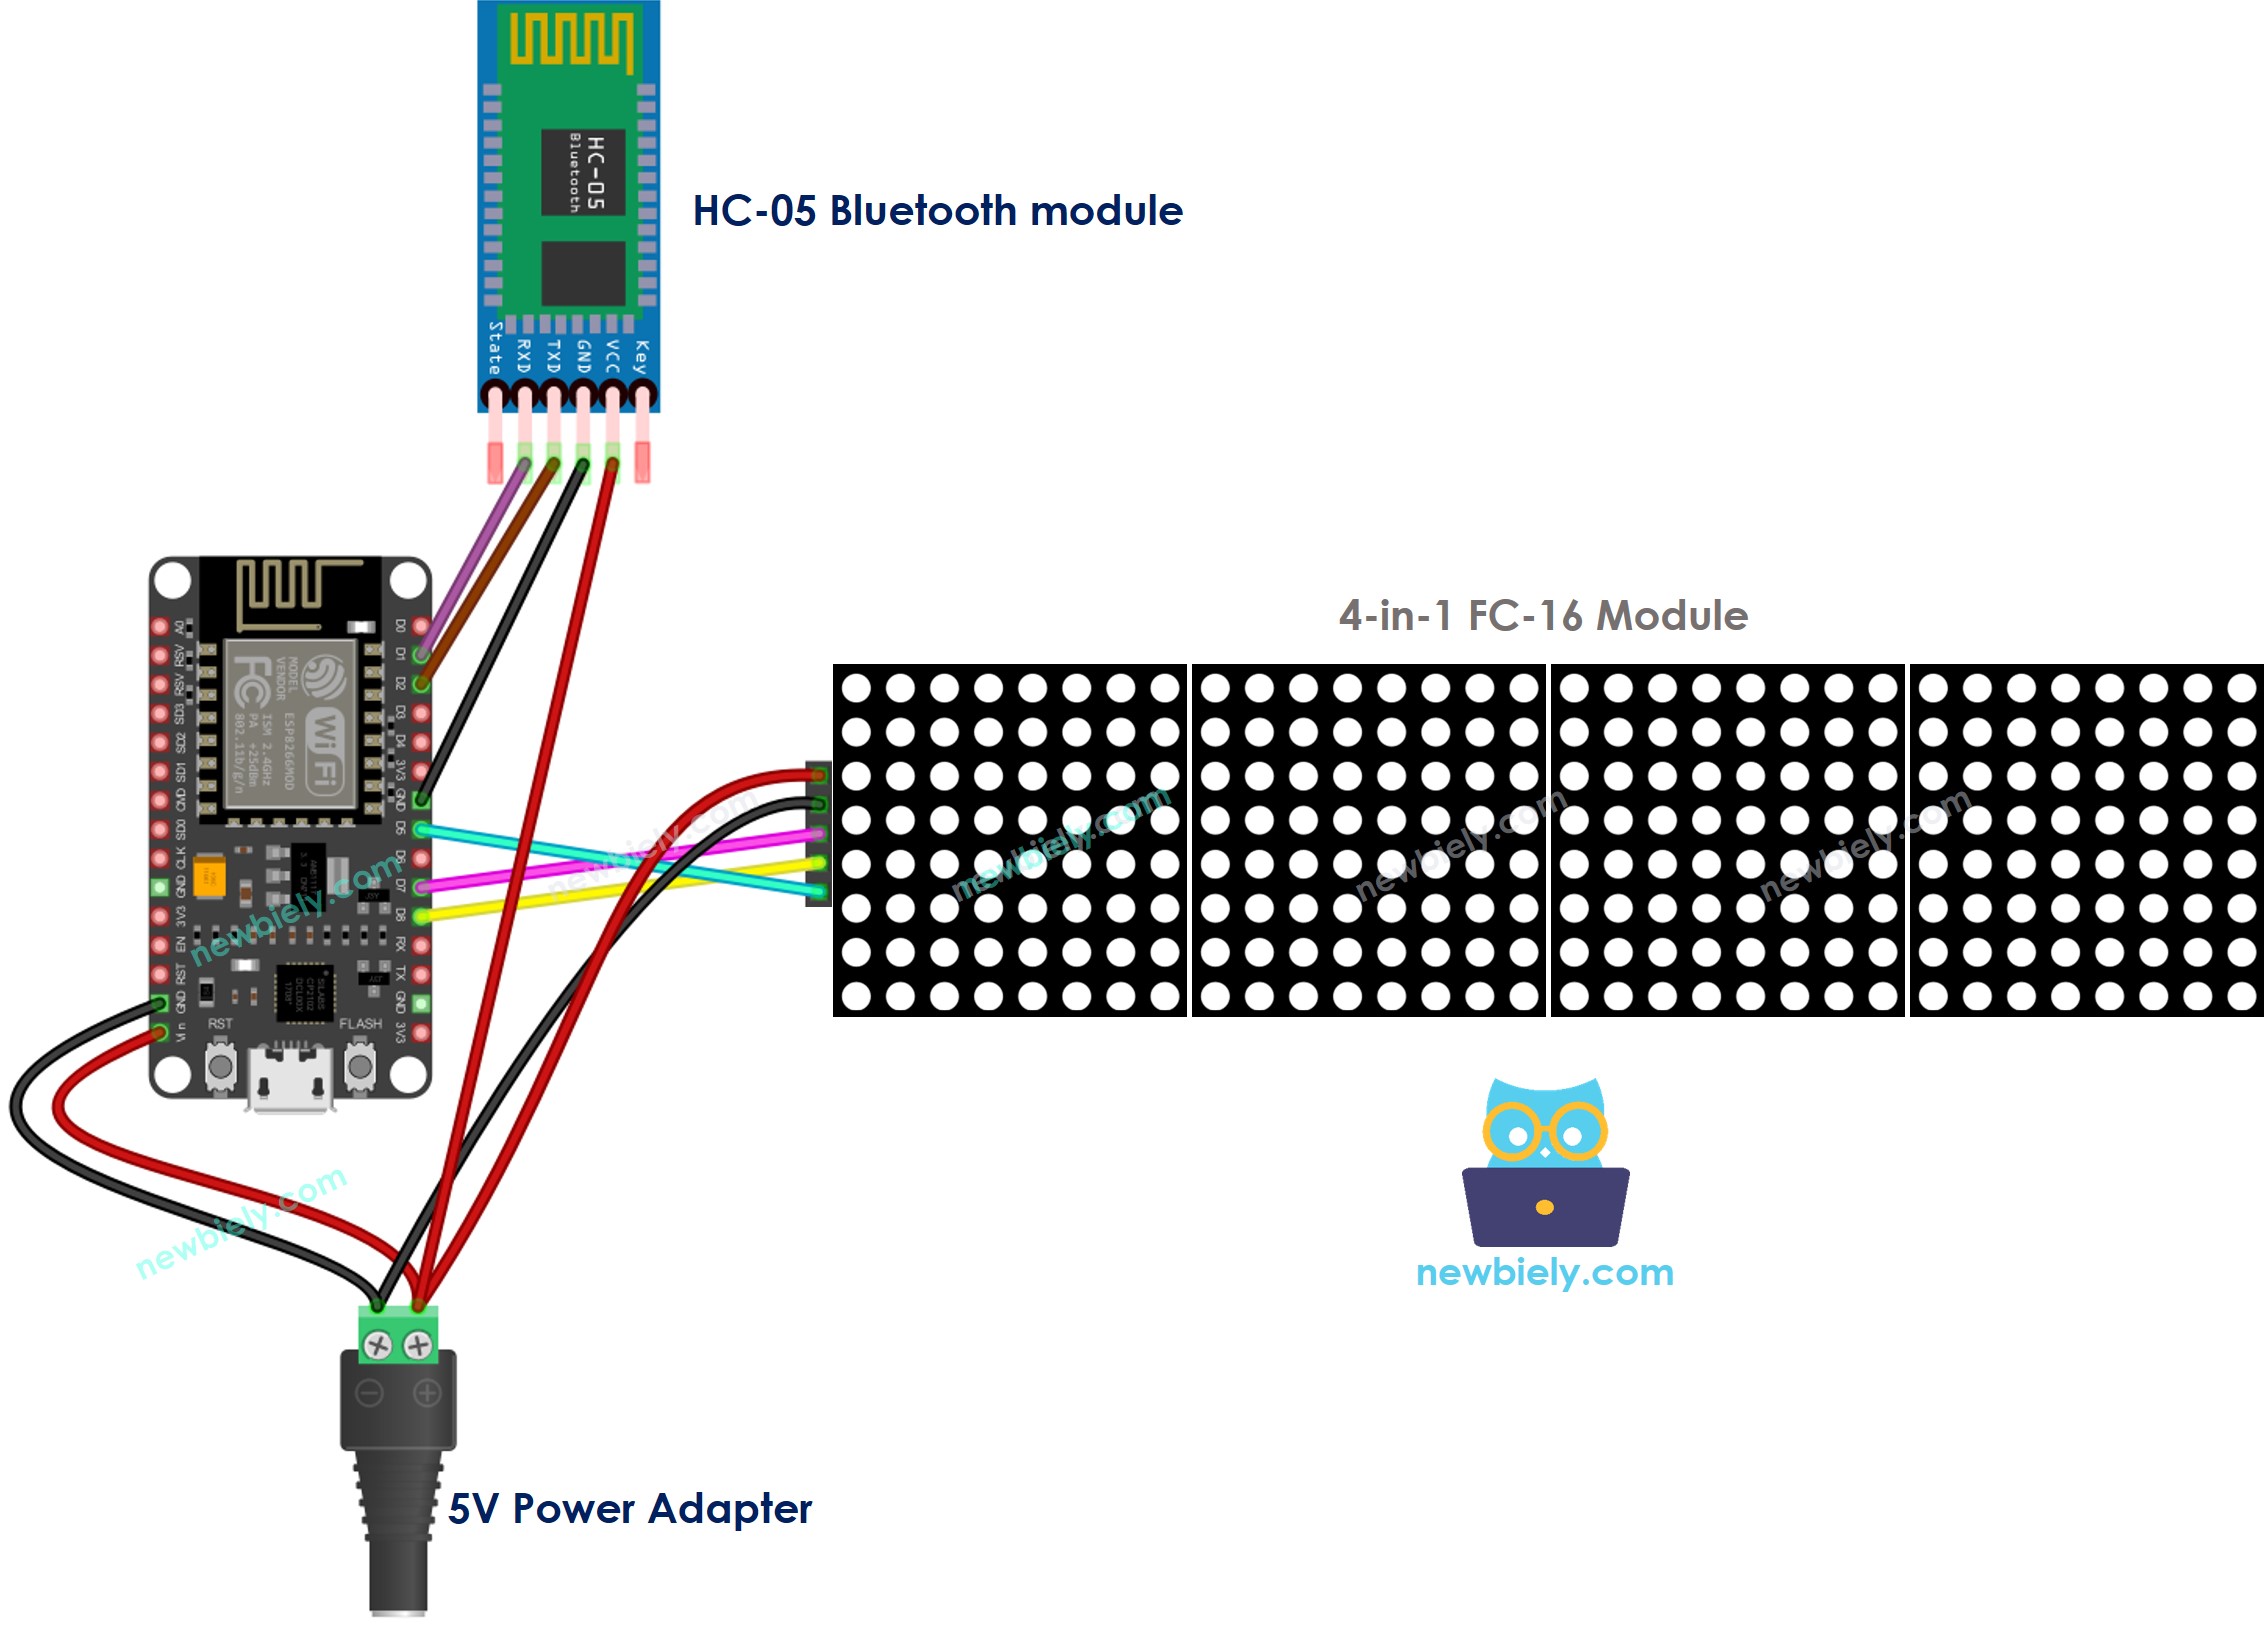
This image is created using Fritzing. Click to enlarge image
- To control the LED matrix display with BLE, you can utilize the HM-10 Bluetooth module and connect it to ESP8266 in accordance with the wiring diagram below:
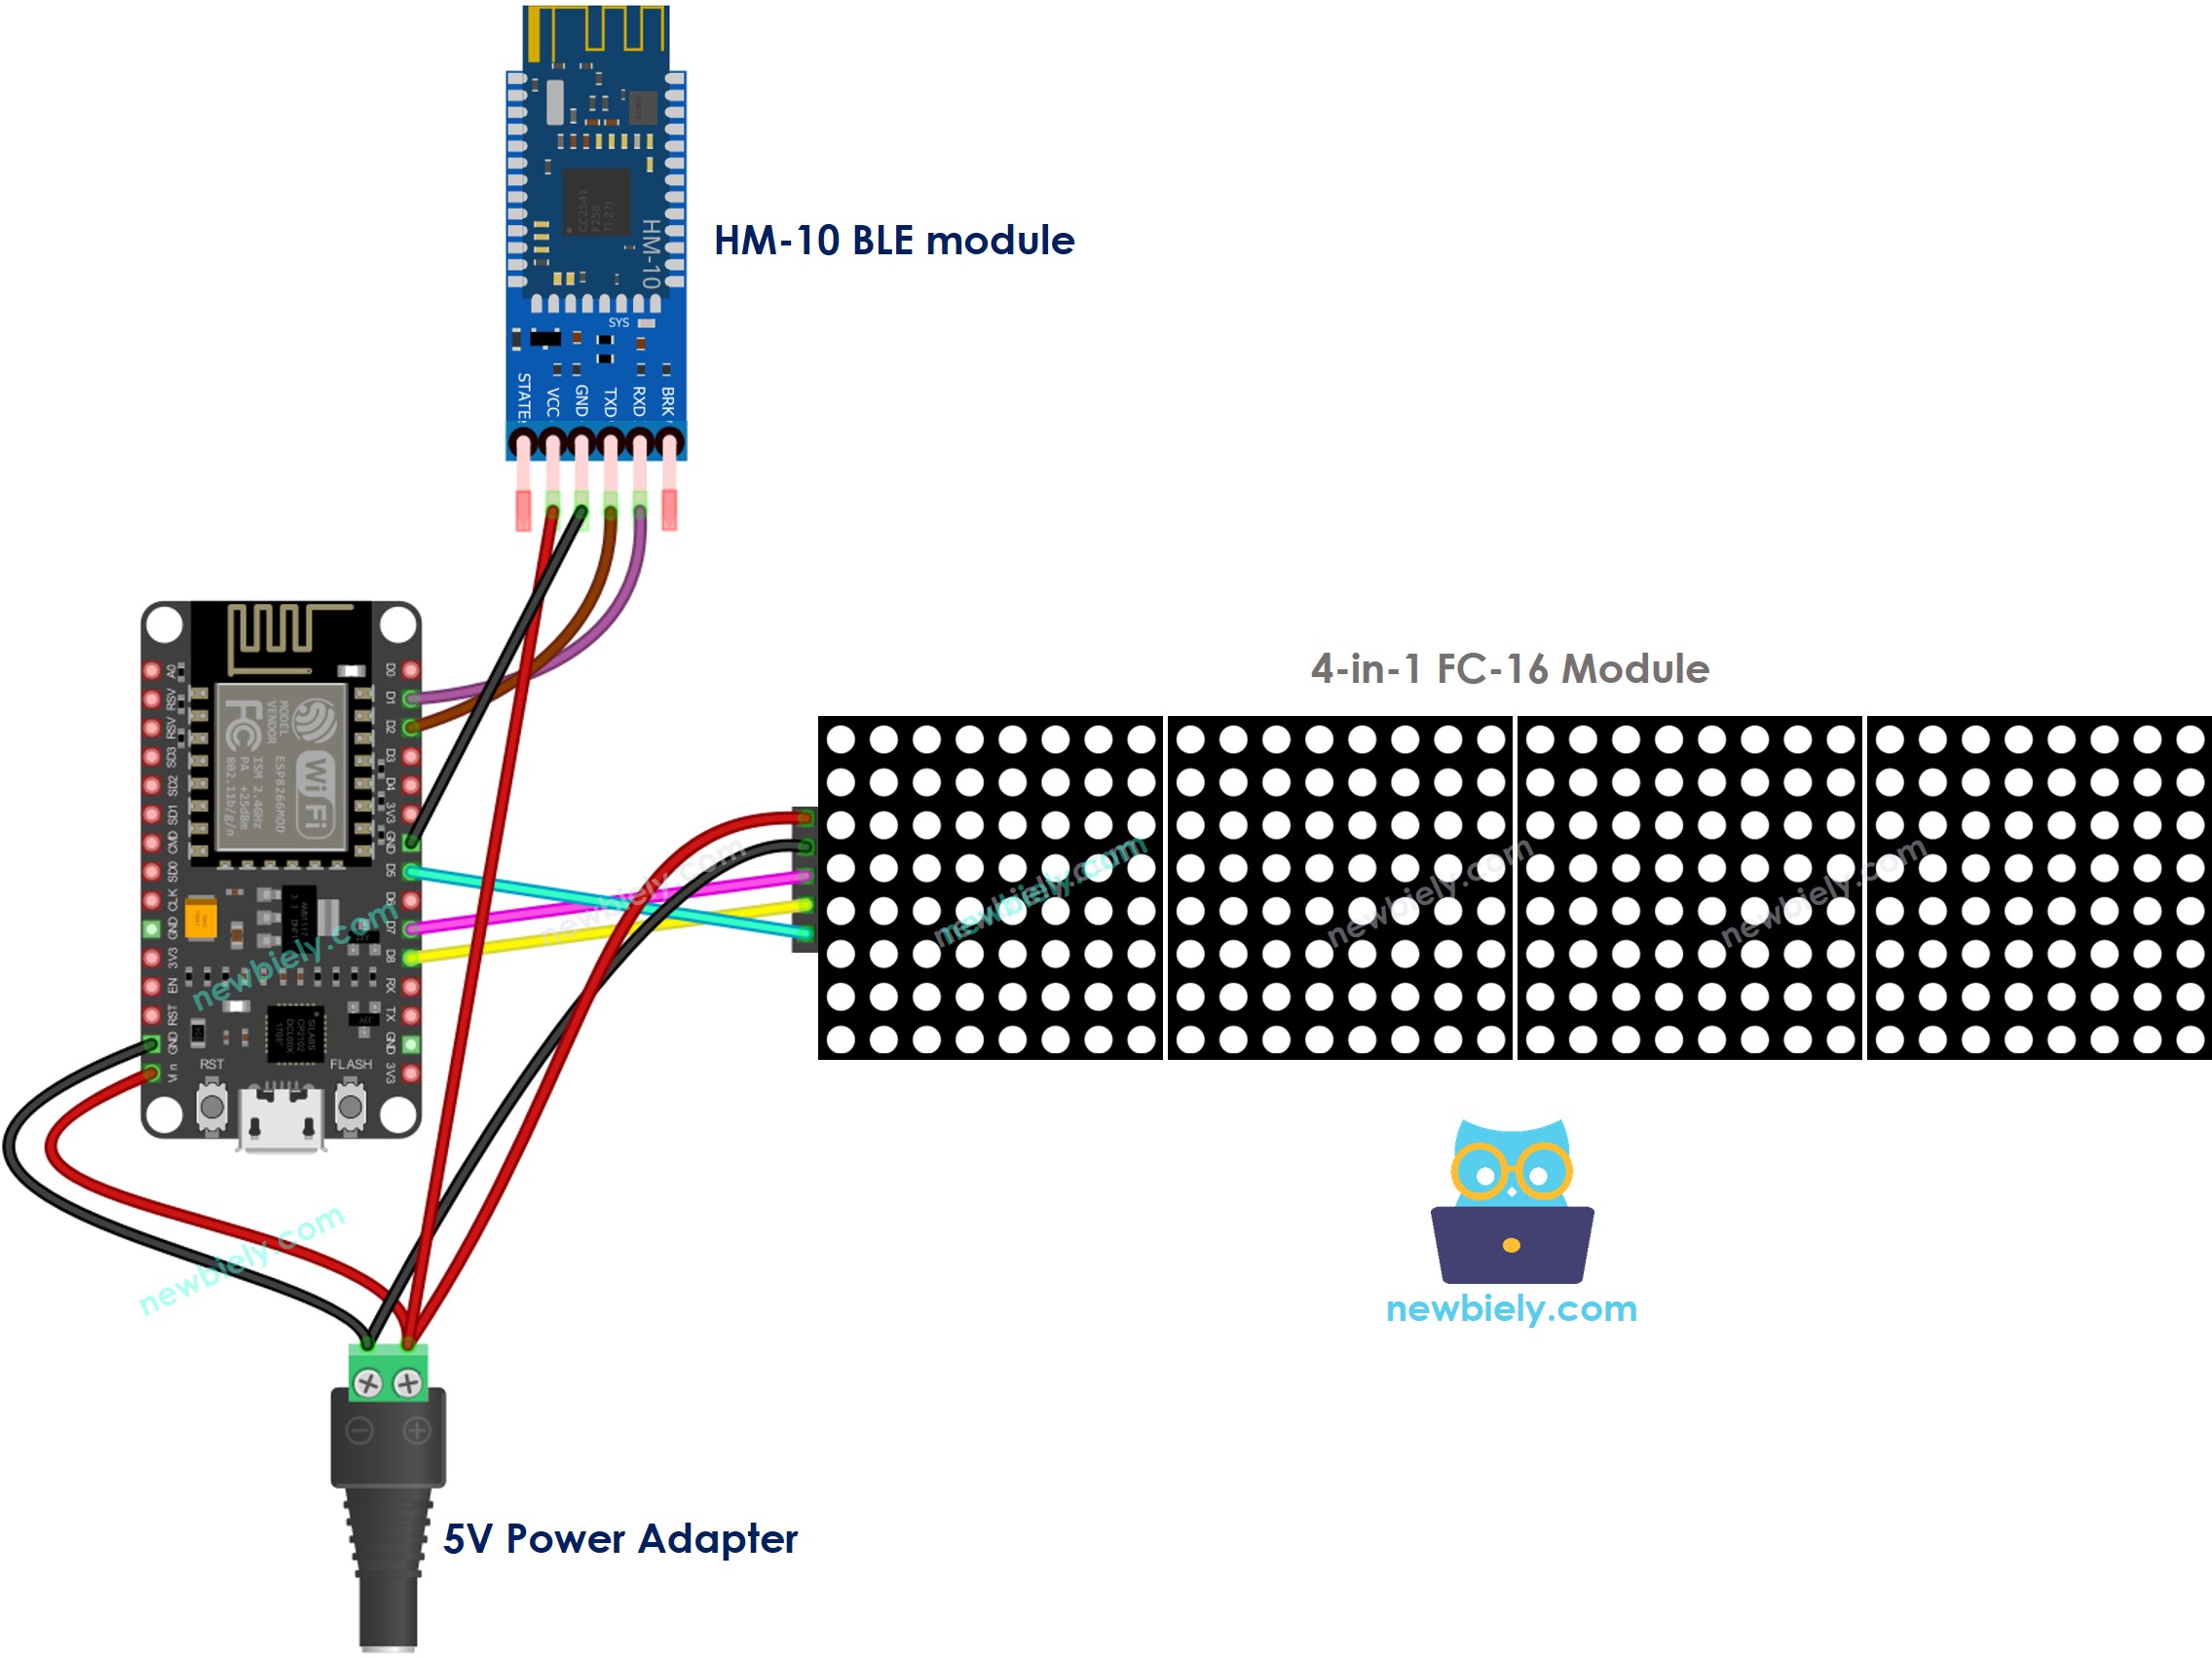
This image is created using Fritzing. Click to enlarge image
See more in ESP8266's pinout and how to supply power to the ESP8266 and other components.
ESP8266 Code - controls LED matrix display via Bluetooth/BLE
The following code is applicable for both the HC-10 Bluetooth module and the HM-10 BLE module. It will function correctly with either one.
Detailed Instructions
To get started with ESP8266 on Arduino IDE, follow these steps:
- Check out the how to setup environment for ESP8266 on Arduino IDE tutorial if this is your first time using ESP8266.
- Wire the components as shown in the diagram.
- Connect the ESP8266 board to your computer using a USB cable.
- Open Arduino IDE on your computer.
- Choose the correct ESP8266 board, such as (e.g. NodeMCU 1.0 (ESP-12E Module)), and its respective COM port.
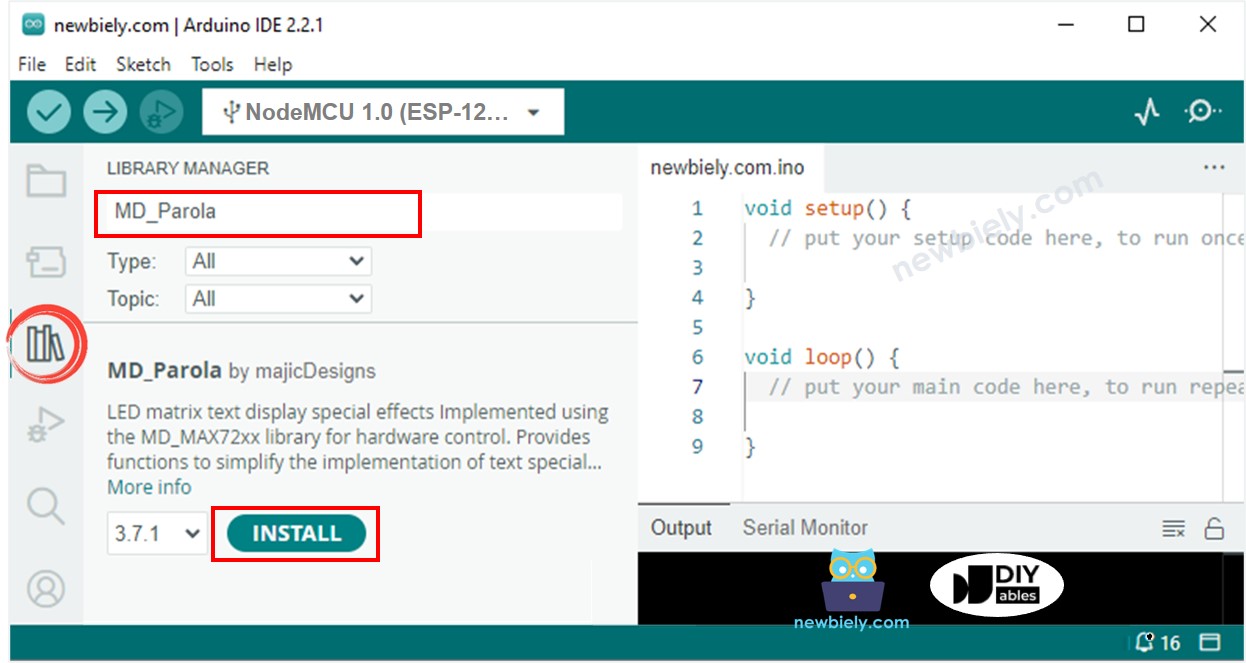
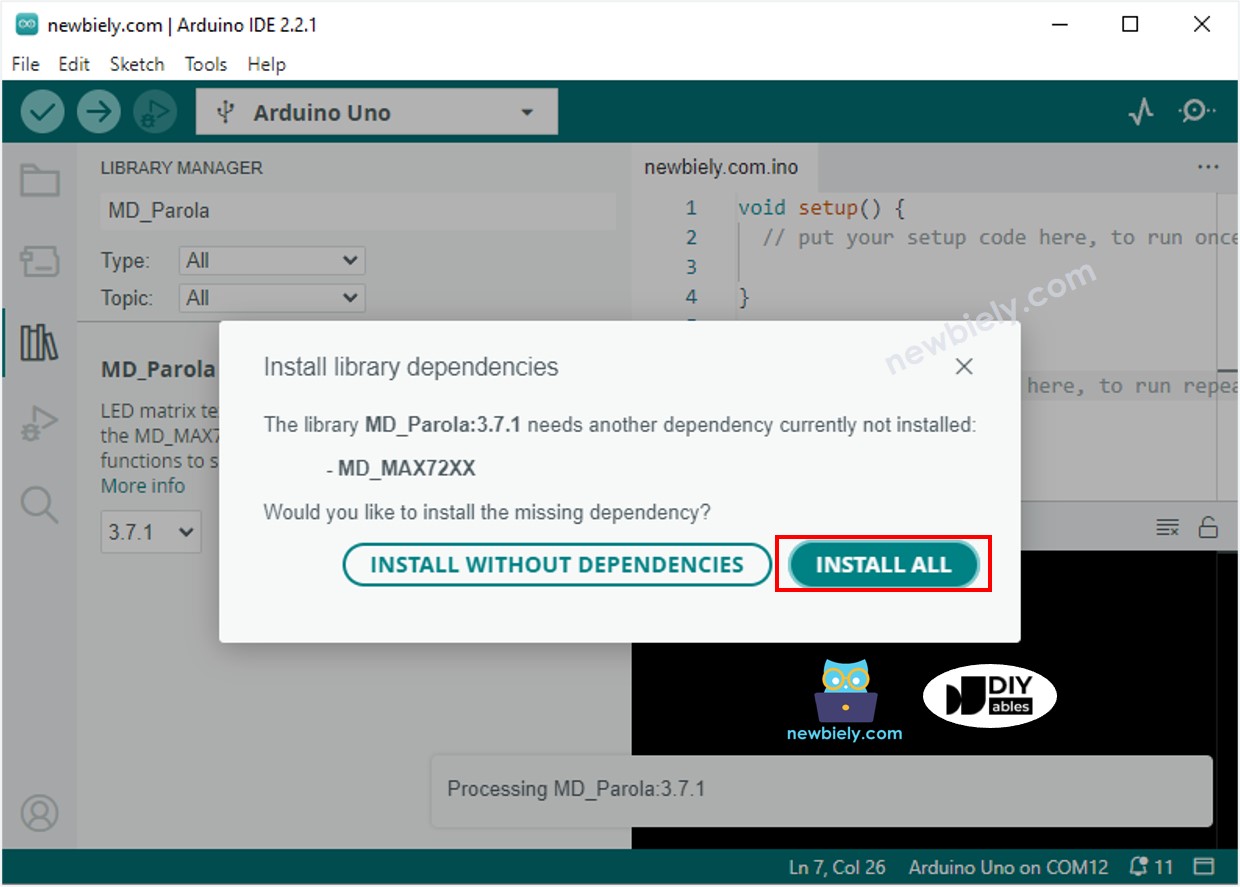
- Click to the Libraries icon on the left bar of the Arduino IDE.
- Search for “MD_Parola” and locate the MD_Parola library.
- Then, press the Install button.
- You will be asked to install the “MD_MAX72XX” library
- Click Install All button to install the dependency.
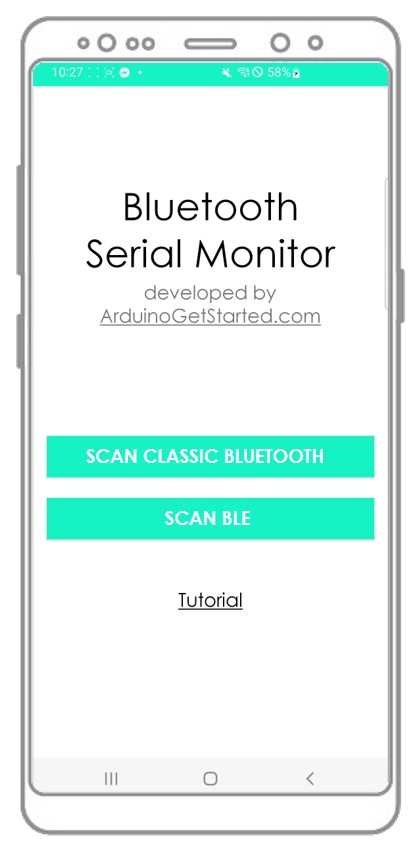
- Install the Bluetooth Serial Monitor App on your smartphone.
- Take the code given and open it in the Arduino IDE. Upload the code to your ESP8266. If you have trouble uploading, try disconnecting the TX and RX pins from the Bluetooth module, upload the code, and then reconnect the RX/TX pins.
- Open the Bluetooth Serial Monitor App on your smartphone.
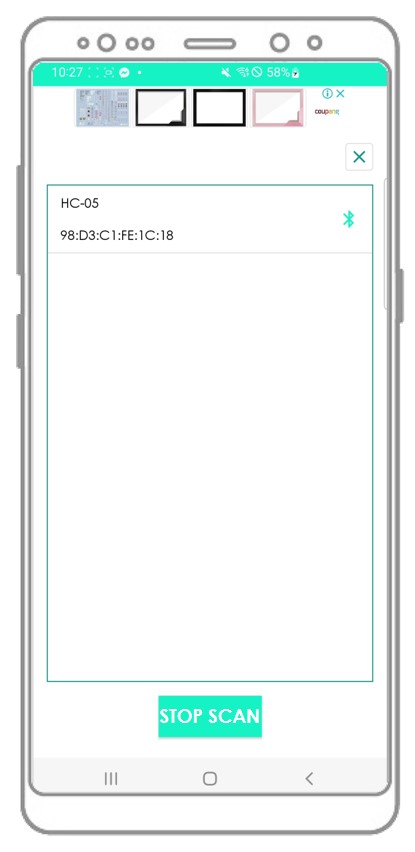
- Choose the Classic Bluetooth or BLE option, depending on the module you are using.
- Connect the Bluetooth App to the HC-05 Bluetooth module or the HM-10 BLE module.
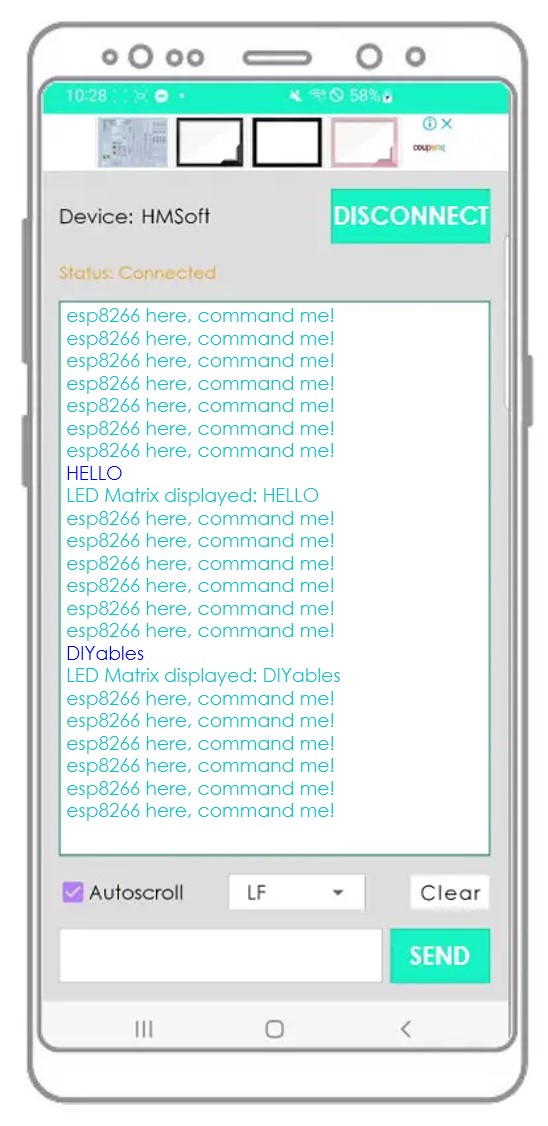
- Type a message, such as “HELLO”, and press the Send button to transmit it to the ESP8266.

- Examine the message that appears on the LED matrix display and the Bluetooth App.
- Confirm the outcome on the Android App.
If you found the Bluetooth Serial Monitor app to be useful, please consider giving it a 5-star rating on the Play Store. Your feedback would be much appreciated! Thank you!