ESP8266 - Multiple Button
This tutorial instructs you how to program an ESP8266 to work with several buttons at the same time, without relying on the delay() function. In detail, we will learn:
We will use three buttons as examples. You can easily modify it to adapt for two buttons, four buttons, or even more.
Or you can buy the following kits:
Disclosure: Some of the links provided in this section are Amazon affiliate links. We may receive a commission for any purchases made through these links at no additional cost to you.
Additionally, some of these links are for products from our own brand,
DIYables .
If you are unfamiliar with button (pinout, how it works, how to program ...), the following tutorials can provide you with more information:
When using multiple buttons, things can get complicated in certain scenarios:
Thankfully, the ezButton library streamlines this process by internally managing debounce and button events. This relieves users from the task of managing timestamps and variables when utilizing the library. Additionally, employing an array of buttons can enhance code clarity and brevity.
#include <ezButton.h>
#define BUTTON_PIN_1 D5
#define BUTTON_PIN_2 D6
#define BUTTON_PIN_3 D7
ezButton button1(BUTTON_PIN_1);
ezButton button2(BUTTON_PIN_2);
ezButton button3(BUTTON_PIN_3);
void setup() {
Serial.begin(9600);
button1.setDebounceTime(100);
button2.setDebounceTime(100);
button3.setDebounceTime(100);
}
void loop() {
button1.loop();
button2.loop();
button3.loop();
int button1_state = button1.getState();
int button2_state = button2.getState();
int button3_state = button3.getState();
if (button1.isPressed())
Serial.println("The button 1 is pressed");
if (button1.isReleased())
Serial.println("The button 1 is released");
if (button2.isPressed())
Serial.println("The button 2 is pressed");
if (button2.isReleased())
Serial.println("The button 2 is released");
if (button3.isPressed())
Serial.println("The button 3 is pressed");
if (button3.isReleased())
Serial.println("The button 3 is released");
}
To get started with ESP8266 on Arduino IDE, follow these steps:
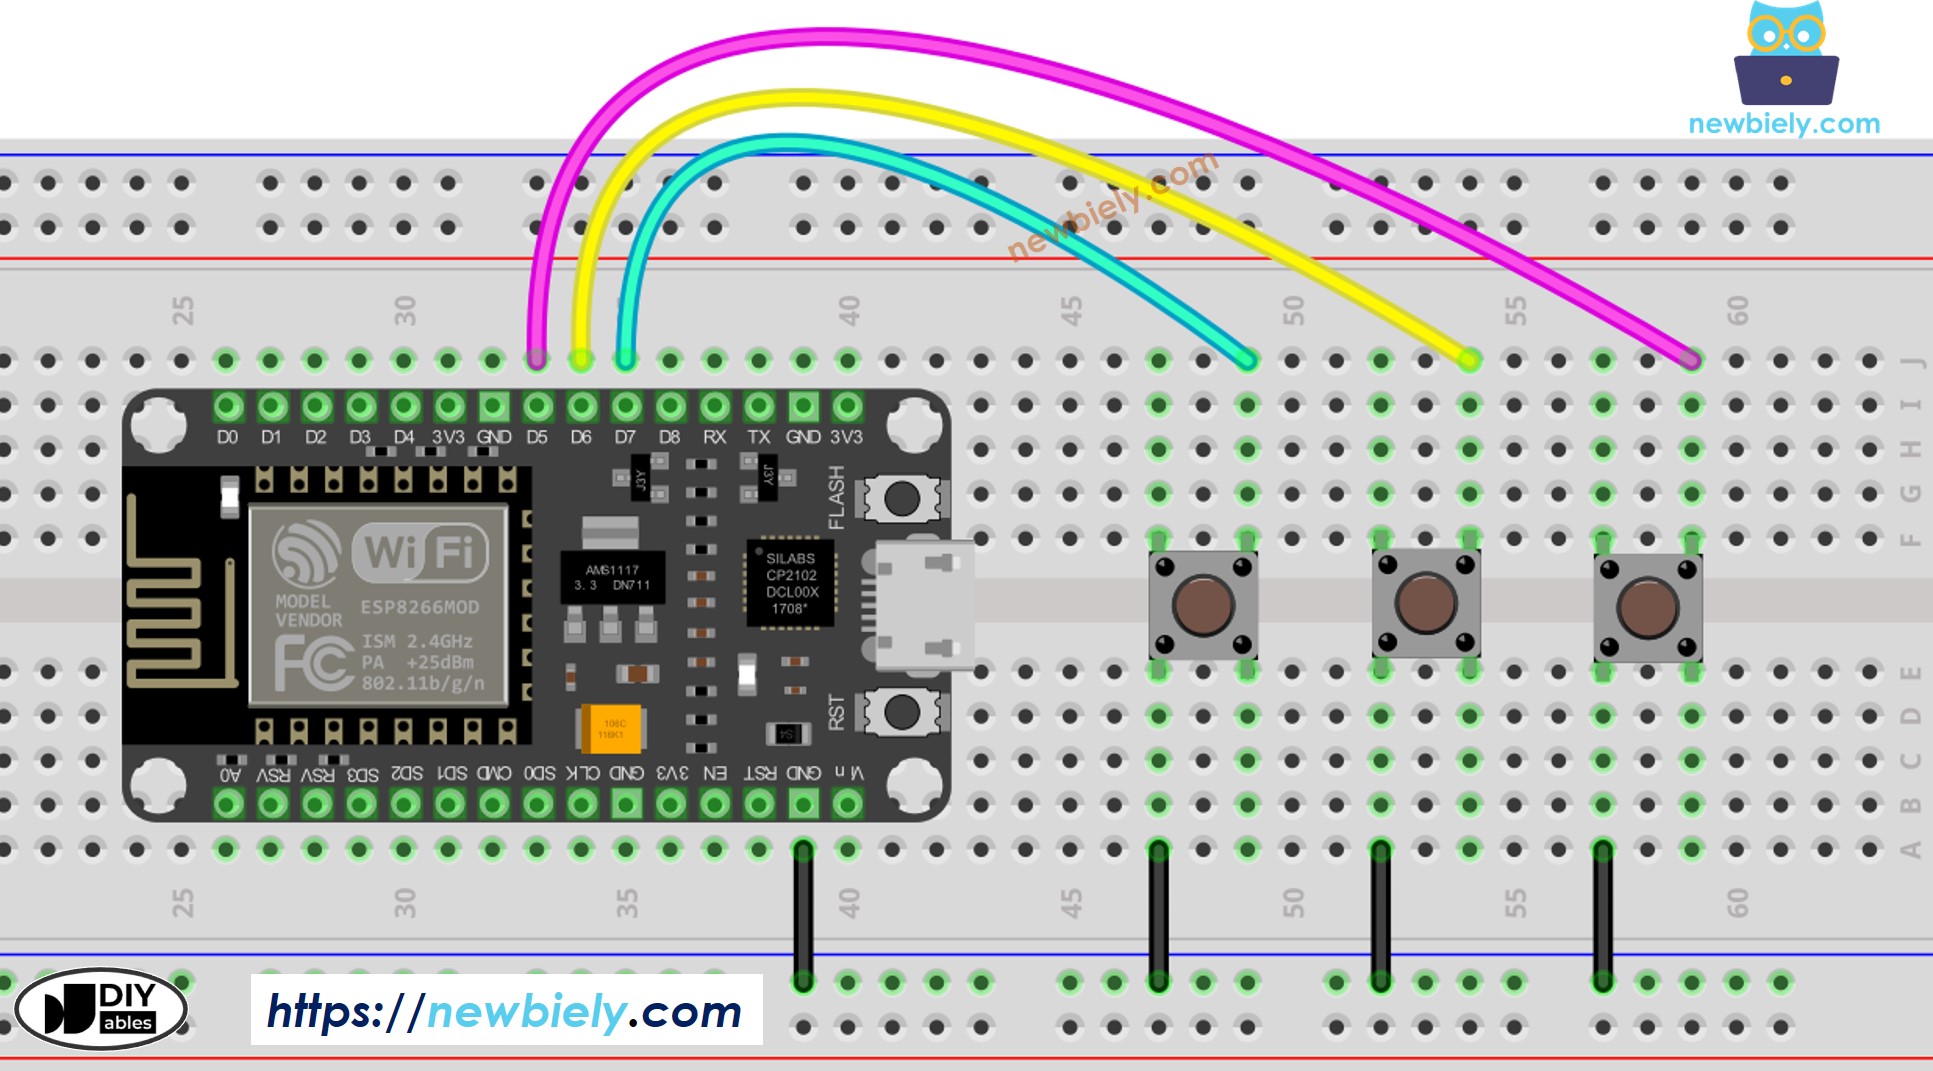
Wire the components as shown in the diagram.
Connect the ESP8266 board to your computer using a USB cable.
Open Arduino IDE on your computer.
Choose the correct ESP8266 board, such as (e.g. NodeMCU 1.0 (ESP-12E Module)), and its respective COM port.
Do the wiring as above image.
Connect the ESP8266 board to your PC via a USB cable
Open Arduino IDE on your PC.
Select the right ESP8266 board (e.g. ESP8266 Uno) and COM port.
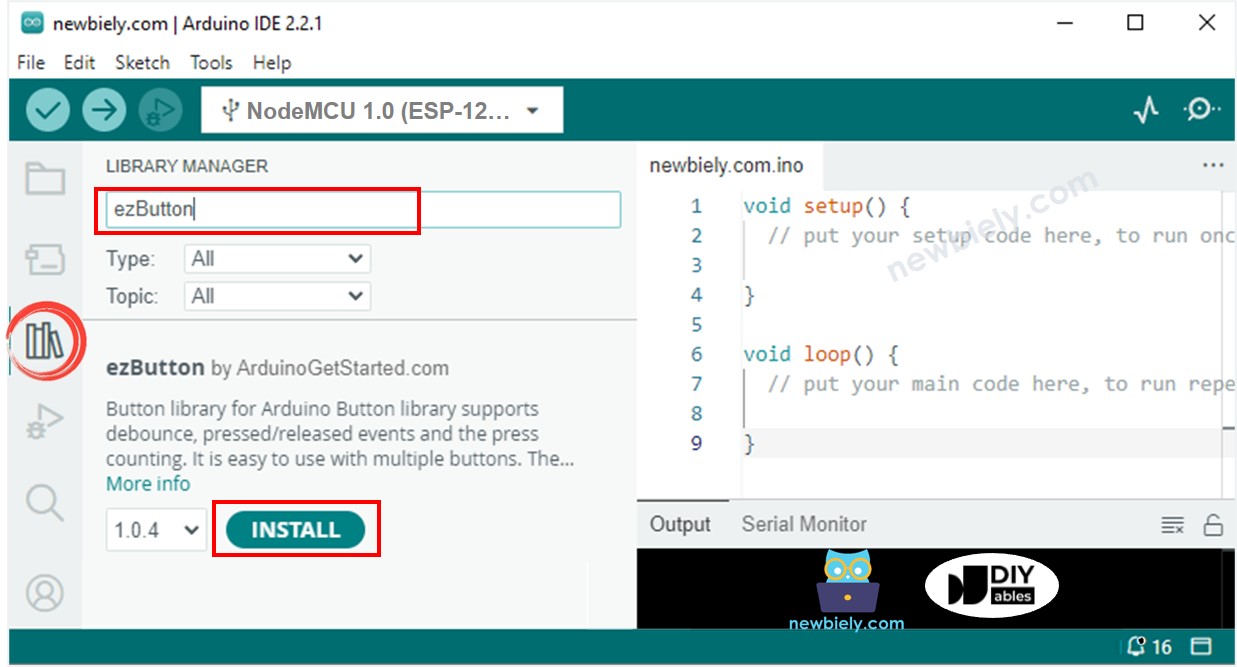
Click to the Libraries icon on the left bar of the Arduino IDE.
Search “ezButton”, then find the button library by ArduinoGetStarted
Click Install button to install ezButton library.
The button 1 is pressed
The button 1 is released
The button 2 is pressed
The button 2 is released
The button 3 is pressed
The button 3 is released
We can improve the code above by employing an array of buttons. The following code utilizes this array to handle button objects.
#include <ezButton.h>
#define BUTTON_NUM 3
#define BUTTON_PIN_1 D5
#define BUTTON_PIN_2 D6
#define BUTTON_PIN_3 D7
ezButton buttonArray[] = {
ezButton(BUTTON_PIN_1),
ezButton(BUTTON_PIN_2),
ezButton(BUTTON_PIN_3)
};
void setup() {
Serial.begin(9600);
for (byte i = 0; i < BUTTON_NUM; i++) {
buttonArray[i].setDebounceTime(100);
}
}
void loop() {
for (byte i = 0; i < BUTTON_NUM; i++)
buttonArray[i].loop();
for (byte i = 0; i < BUTTON_NUM; i++) {
int button_state = buttonArray[i].getState();
if (buttonArray[i].isPressed()) {
Serial.print("The button ");
Serial.print(i + 1);
Serial.println(" is pressed");
}
if (buttonArray[i].isReleased()) {
Serial.print("The button ");
Serial.print(i + 1);
Serial.println(" is released");
}
}
}


