ESP8266 - Cooling System using DS18B20 Temperature Sensor
This tutorial instructs you how to use ESP8266 to control the temperature with a fan and a DS18B20 temperature sensor.
- ESP8266 checks if the temperature is too high, the cooling fan will be turned on.
- ESP8266 checks if the temperature is cool, the cooling fan will be turned off.
If you would prefer to use a DHT11 or DHT22 sensor instead of the DS18B20, please refer to ESP8266 - Cooling System using DHT Sensor.
Hardware Preparation
Or you can buy the following kits:
| 1 | × | DIYables Sensor Kit (18 sensors/displays) |
Additionally, some of these links are for products from our own brand, DIYables .
Buy Note: Many DS18B20 sensors available in the market are unreliable. We strongly recommend buying the sensor from the DIYables brand using the link provided above. We tested it, and it worked reliably.
Overview of Cooling Fan and DS18B20 Temperature Sensor
The tutorial utilizes a cooling fan that is powered by a 12v supply. If power is provided, the fan will turn on and if it is removed, the fan will turn off. To control the fan with an ESP8266, a relay must be used as an intermediary.
If you are unfamiliar with temperature sensors and fans (including pinouts, how they work, and how to program them), the following tutorials can help:
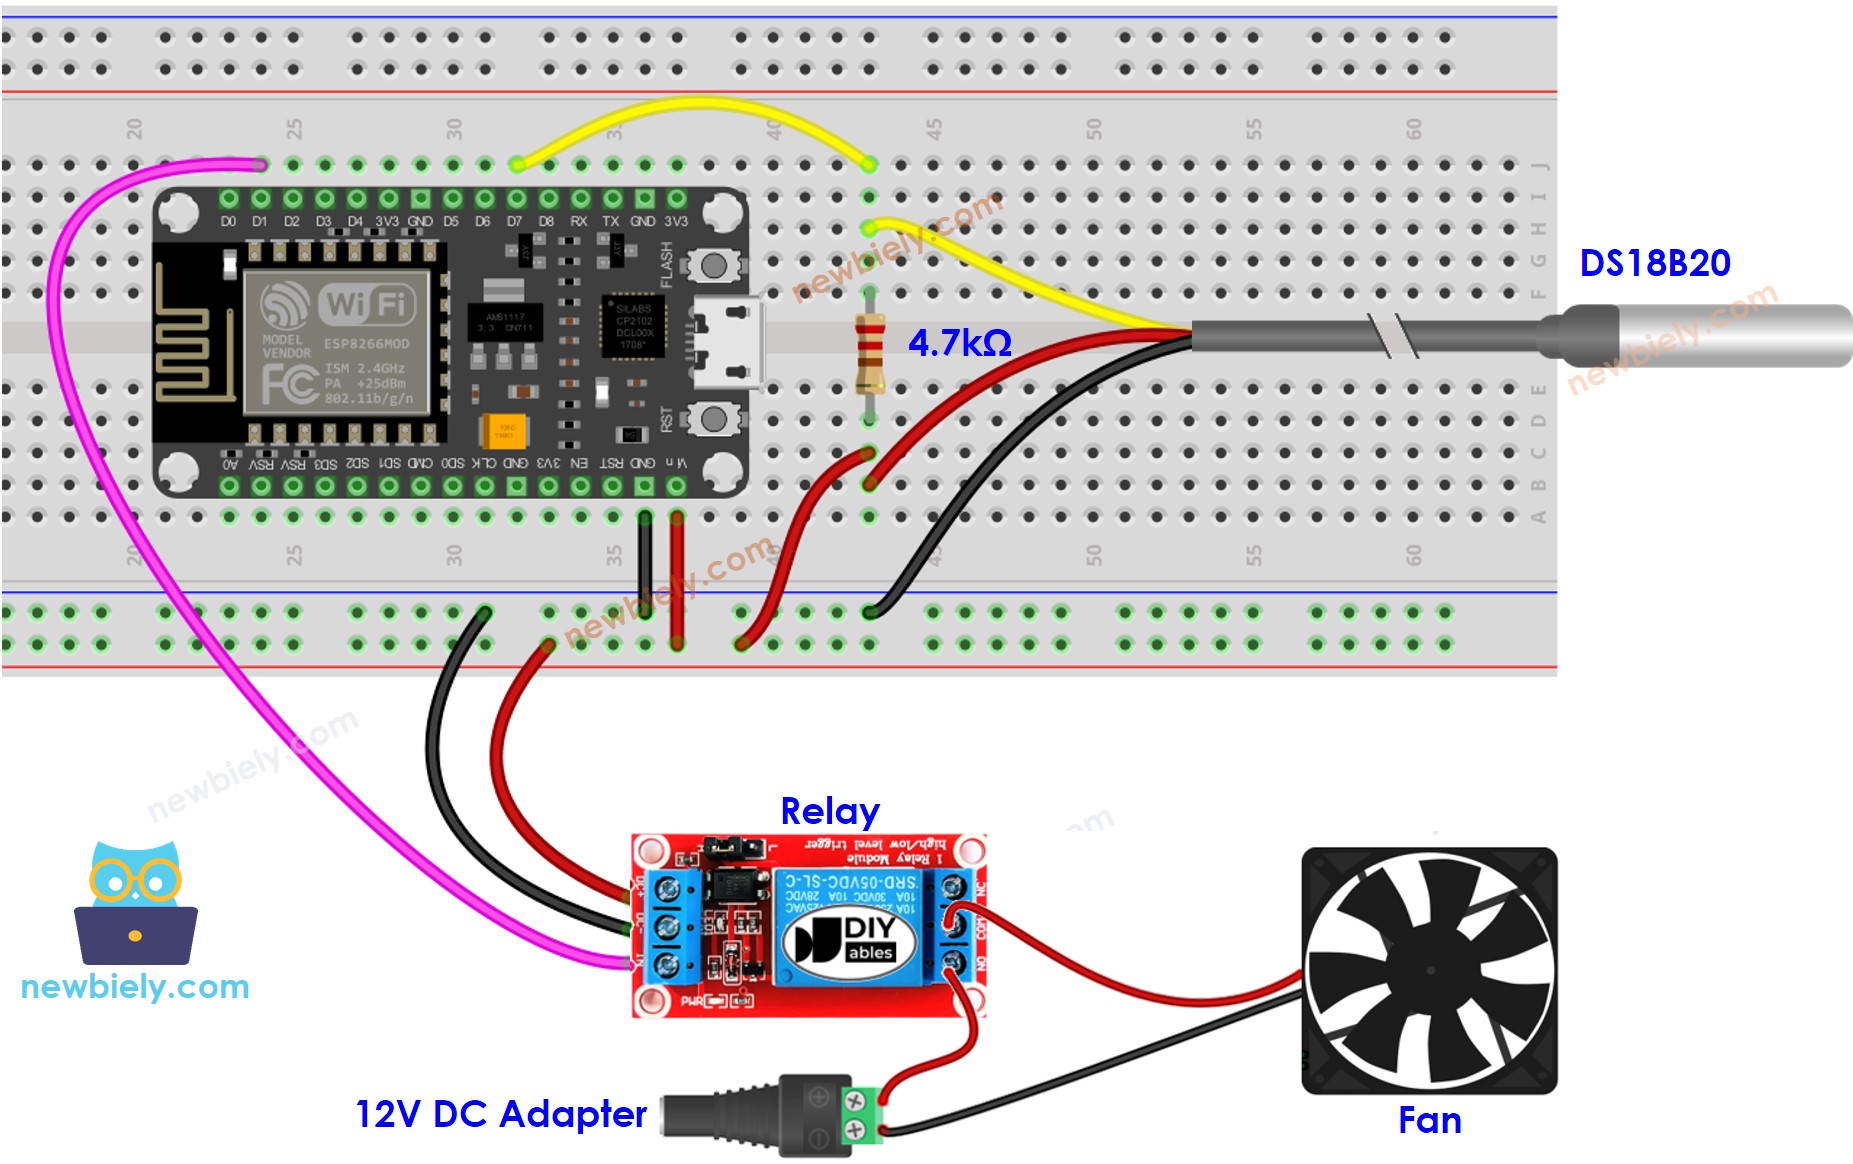
Wiring Diagram
- Wiring diagram using a breadboard.
This image is created using Fritzing. Click to enlarge image
- Wiring diagram using a terminal adapter (recommended).
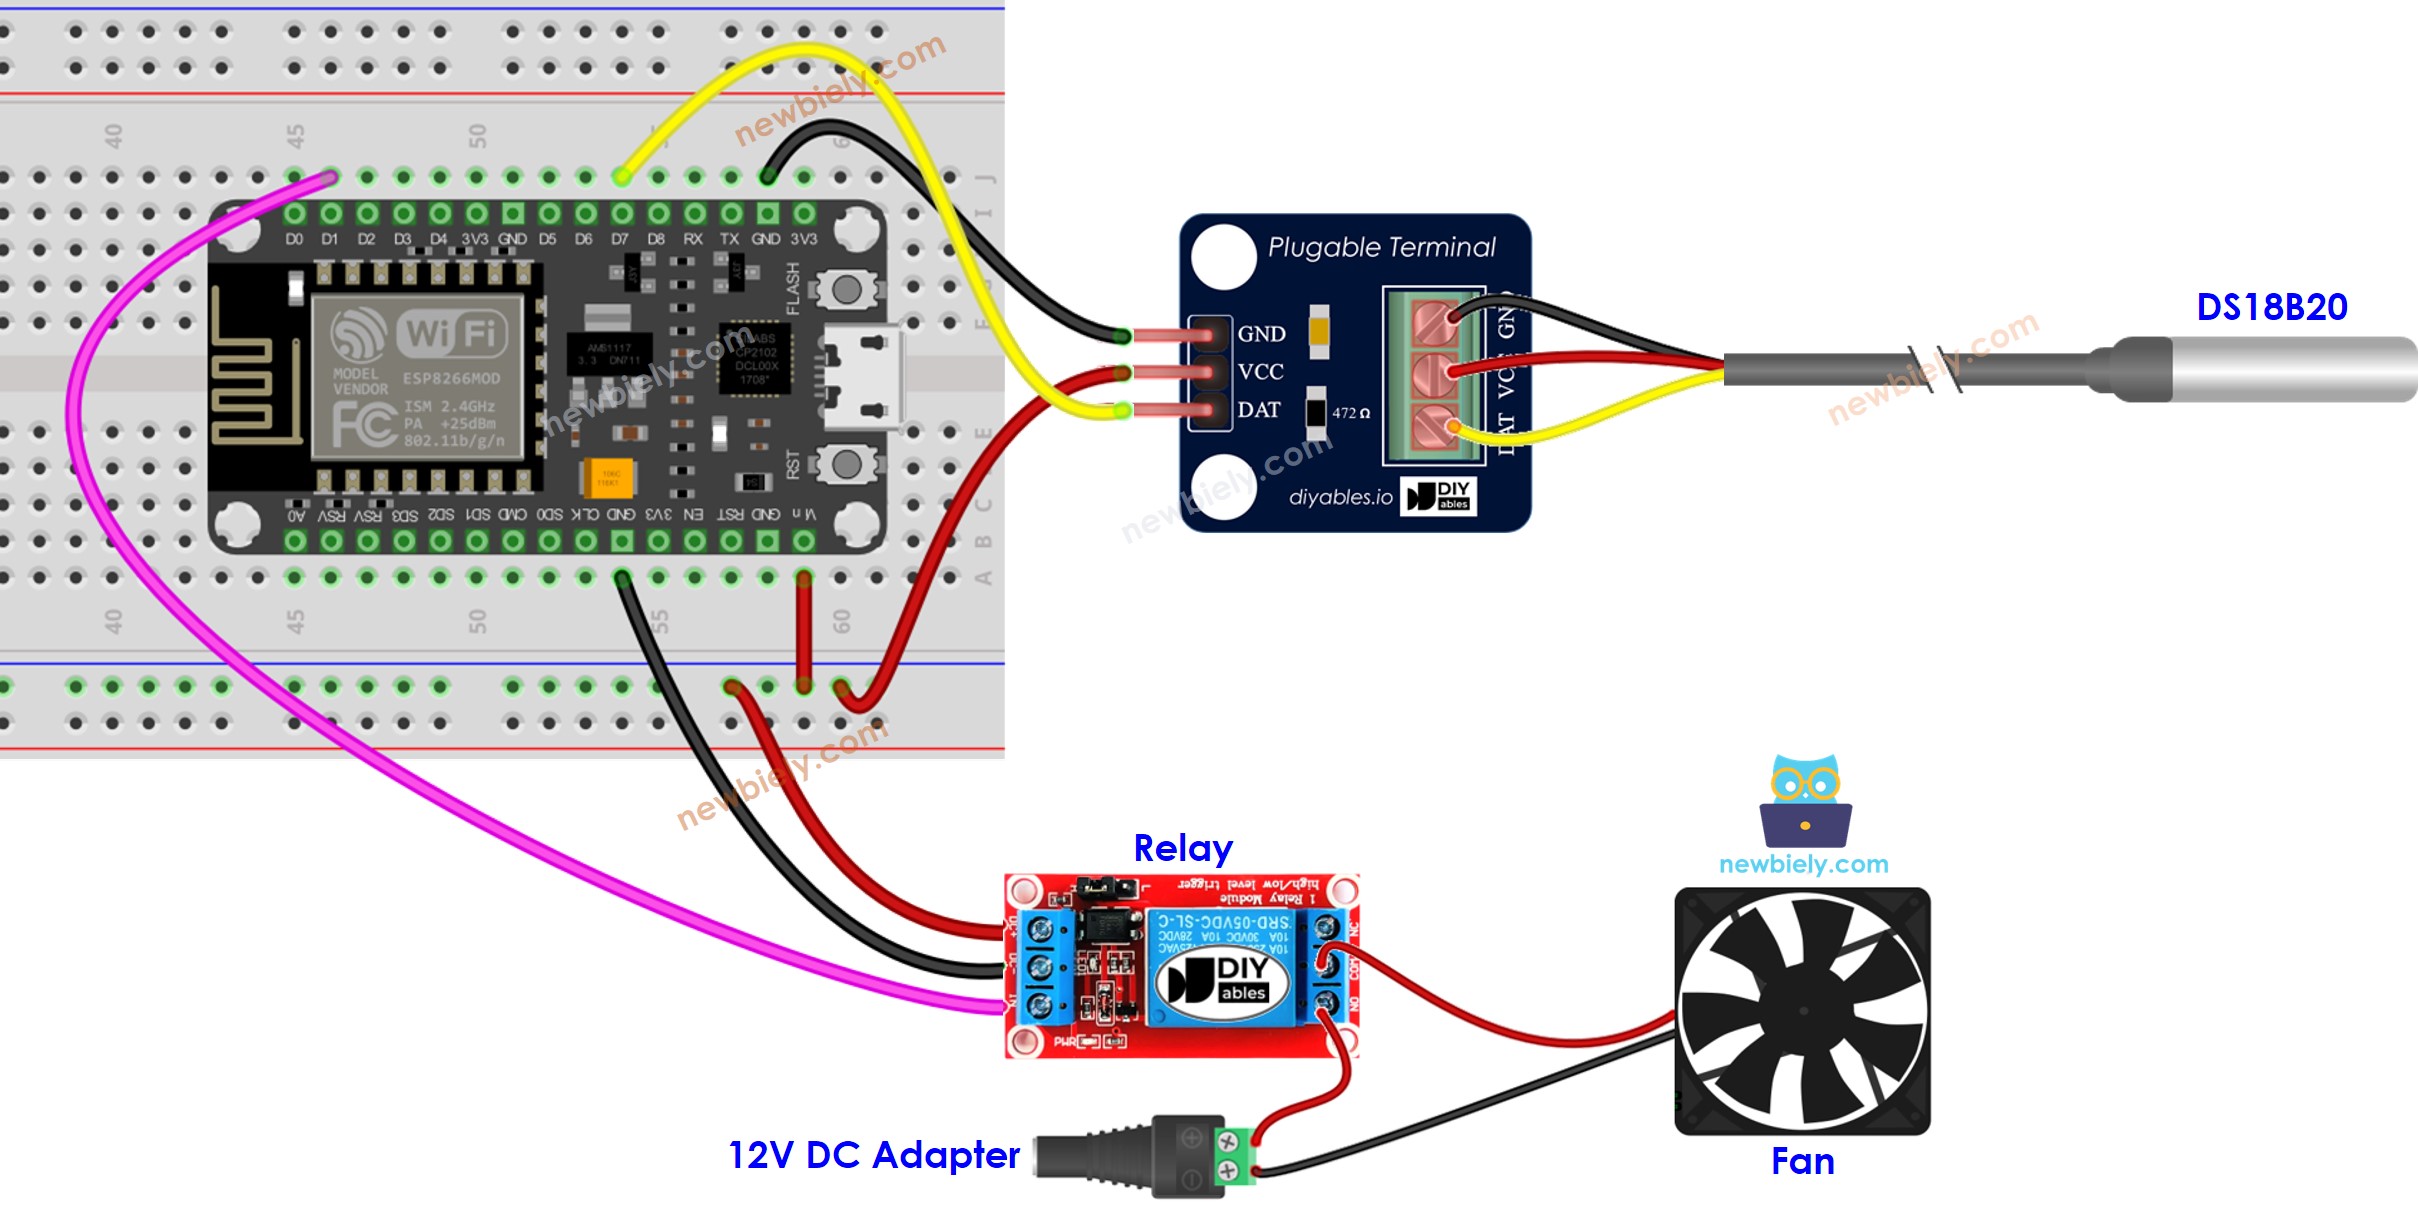
This image is created using Fritzing. Click to enlarge image
See more in ESP8266's pinout and how to supply power to the ESP8266 and other components.
We recommend buying a DS18B20 sensor along with its accompanying wiring adapter for a seamless setup. This adapter includes an integrated resistor, removing the need for an additional resistor in the wiring.
How System Works
- The ESP8266 checks the temperature using the temperature sensor.
- If the temperature is higher than the set upper limit, the fan is activated by the ESP8266.
- If the temperature is lower than the set lower limit, the ESP8266 shuts off the fan.
This procedure is repeated without end in a cycle.
If you wish to switch the fan on and off when the temperature is above or below a certain point, simply set the upper and lower thresholds to the same value.
ESP8266 Code for Cooling System with DS18B20 sensor
In the code above, when the temperature is greater than 25°C, the ESP8266 will activate the fan. The fan will remain on until the temperature drops below 20°C.
Detailed Instructions
To get started with ESP8266 on Arduino IDE, follow these steps:
- Check out the how to setup environment for ESP8266 on Arduino IDE tutorial if this is your first time using ESP8266.
- Wire the components as shown in the diagram.
- Connect the ESP8266 board to your computer using a USB cable.
- Open Arduino IDE on your computer.
- Choose the correct ESP8266 board, such as (e.g. NodeMCU 1.0 (ESP-12E Module)), and its respective COM port.
- Plug in the USB cable to connect ESP8266 to PC
- Launch Arduino IDE, choose the appropriate board and port
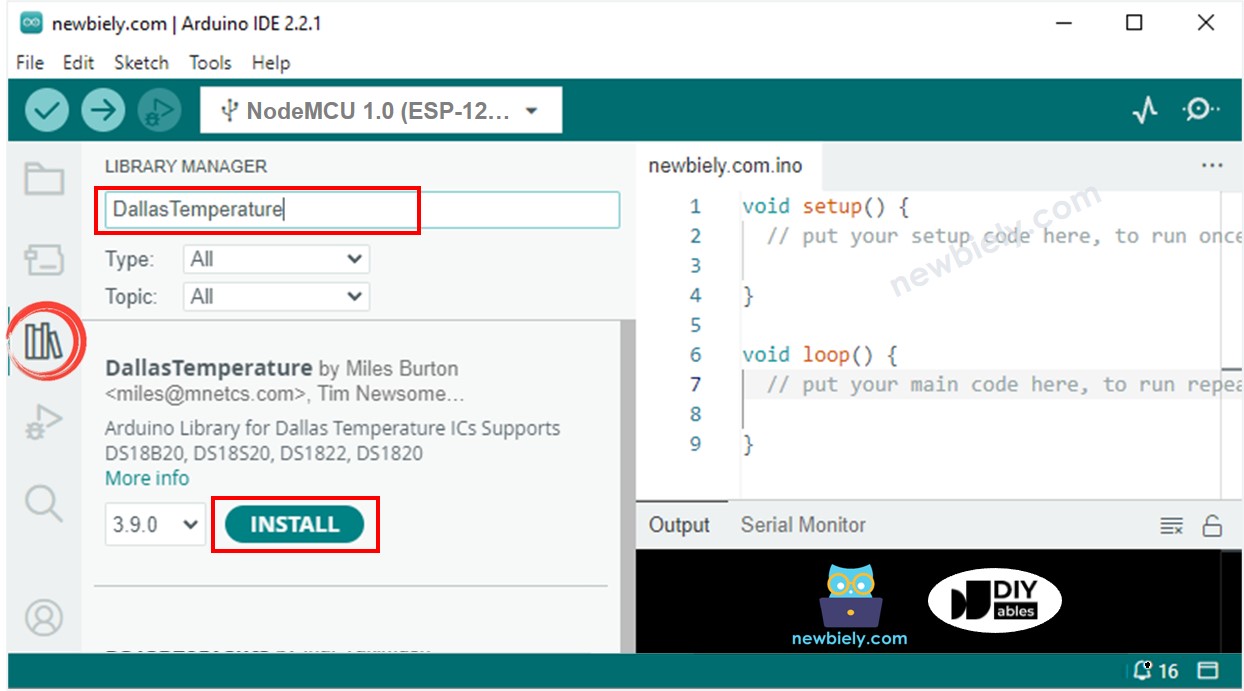
- Click to the Libraries icon on the left bar of the Arduino IDE.
- Search for “Dallas”, then locate the DallasTemperature library by Miles Burton.
- Press the Install button to install the DallasTemperature library.
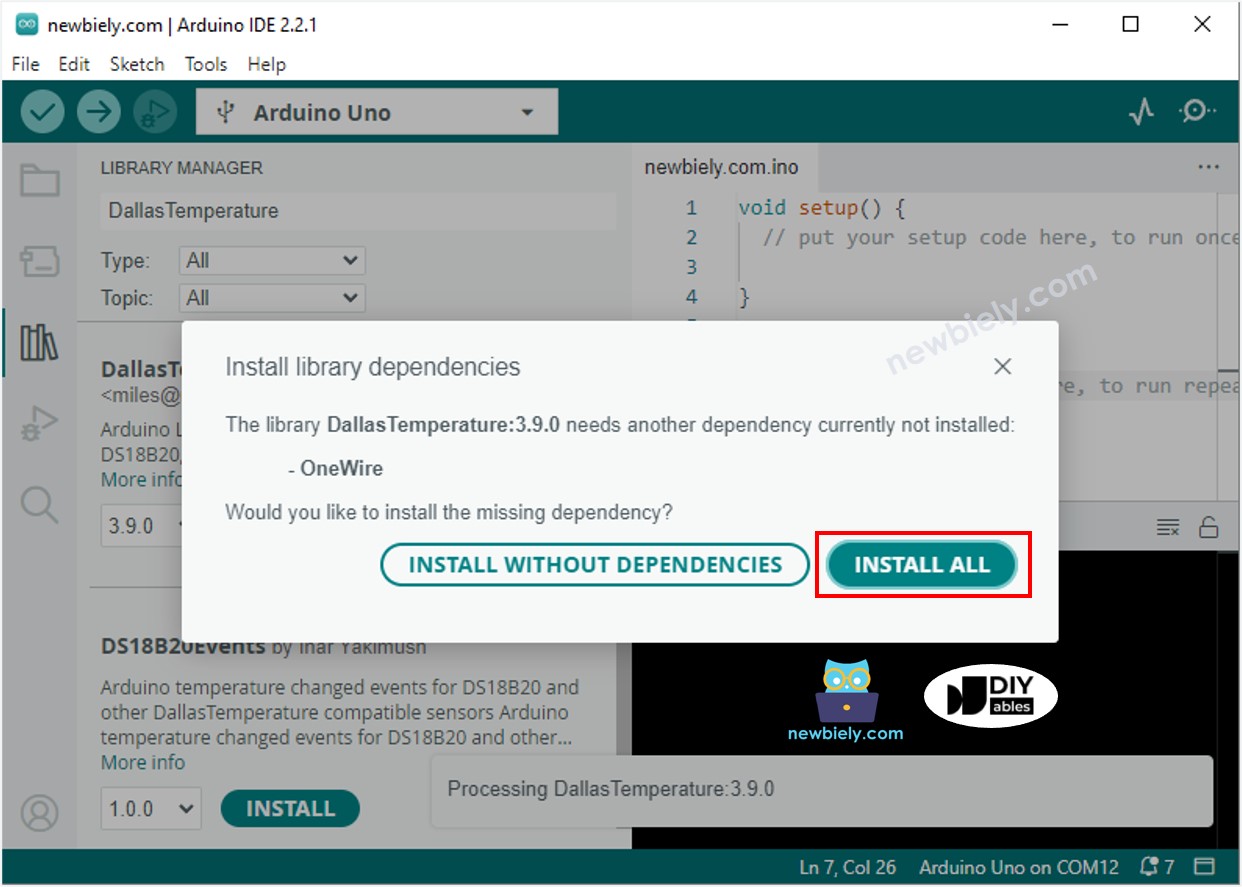
- You will be asked to install the dependency. Click Install All button to install OneWire library.
- Copy the code and open it in the Arduino IDE.
- Click the Upload button to transfer the code to the ESP8266.
- Change the temperature of the environment around the sensor.
- Check the status of the fan on the Serial Monitor.
Advanced Knowledge
The method of control described above is the on-off controller, which is also referred to as a signaller or "bang-bang" controller. This method is quite straightforward to put into practice.
An alternative approach known as the PID controller exists. This method makes it possible to achieve a more stable desired temperature, however, it is complicated to comprehend and implement. As a result, the PID controller is not commonly used for temperature control.