ESP8266 - Secure Your Belongings: Detect Theft and Send Email Alerts
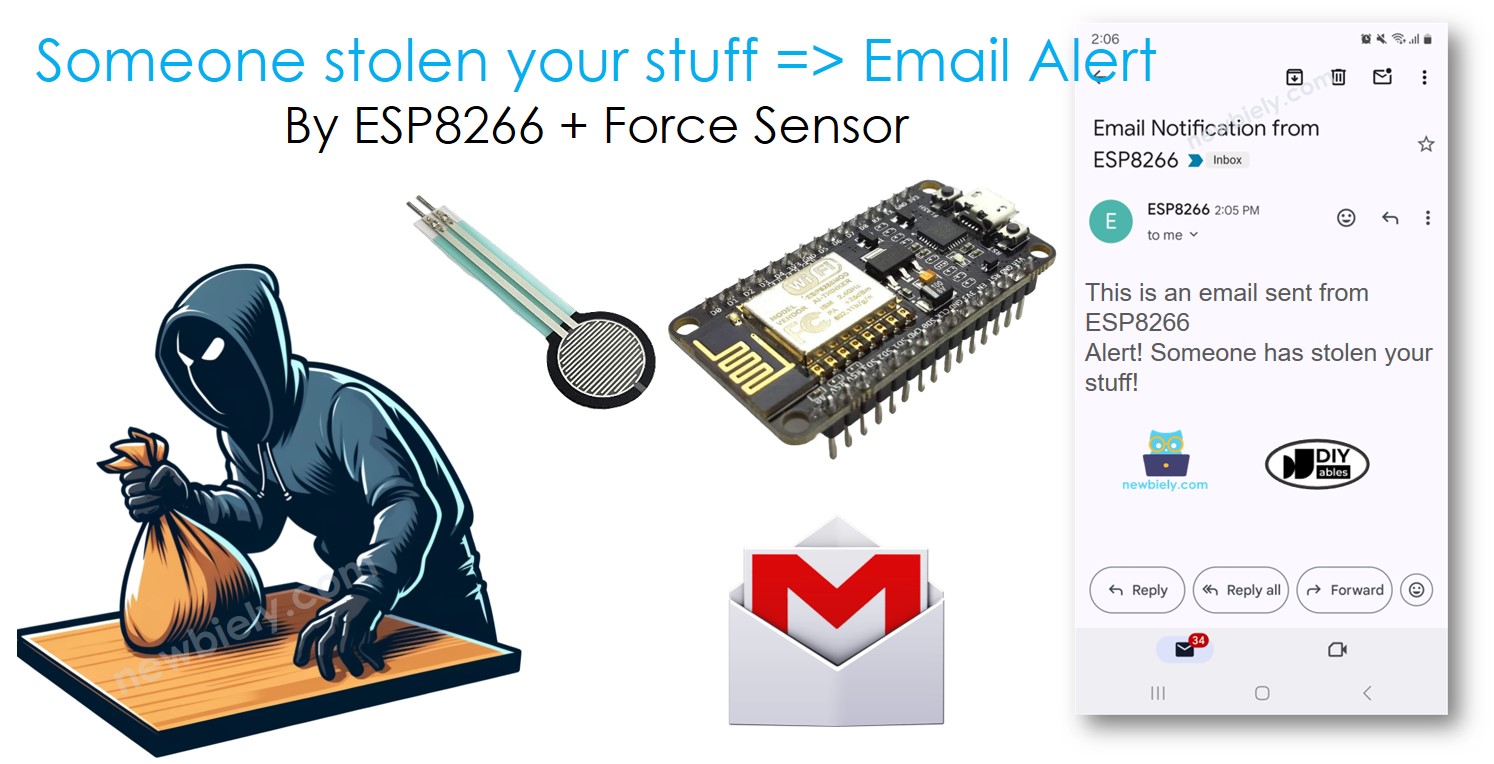
This guide will teach you how to use an ESP8266 and a force sensor to keep your items safe. We will show you how to create a system that sends you an email alert if someone tries to steal your possessions. You will learn how to prepare the ESP8266, connect the force sensor, and set it up to send emails through Gmail. We will provide step-by-step instructions and explain how this system can be useful in real-life scenarios.
Or you can buy the following kits:
Disclosure: Some of the links provided in this section are Amazon affiliate links. We may receive a commission for any purchases made through these links at no additional cost to you.
Additionally, some of these links are for products from our own brand,
DIYables .
We provide clear guides on Force Sensors and Gmail. Each tutorial includes complete instructions on setting up the hardware, how it functions, and connecting wires to ESP8266, with coding steps. For further details, follow these links.
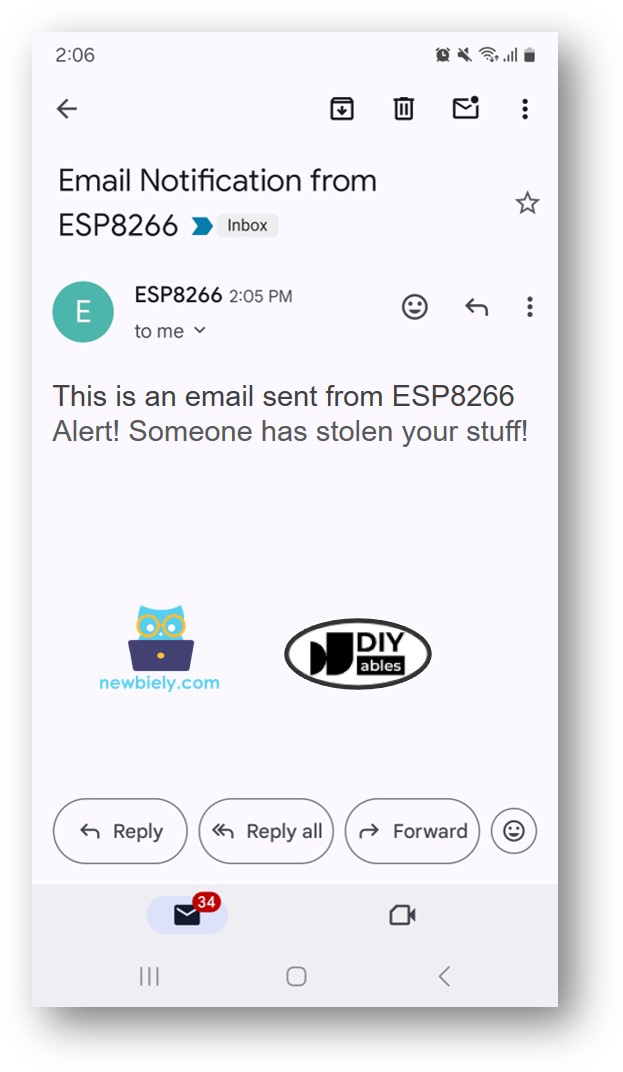
When you put an item on the force sensor, it measures the weight. The ESP8266 device records this weight. If the item is taken away, the weight is different. The ESP8266 detects this different weight and sends you an email to let you know that your item has been moved.
#include <ESP8266WiFi.h>
#include <ESP_Mail_Client.h>
#define WIFI_SSID "YOUR_WIFI_SSID"
#define WIFI_PASSWORD "YOUR_WIFI_PASSWORD"
#define SENDER_EMAIL "xxxxxx@gmail.com"
#define SENDER_PASSWORD "xxxx xxxx xxxx xxxx"
#define RECIPIENT_EMAIL "xxxxxx@gmail.com"
#define SMTP_HOST "smtp.gmail.com"
#define SMTP_PORT 587
#define FORCE_SENSOR_PIN A0
#define THRESHOLD 100
SMTPSession smtp;
void setup() {
Serial.begin(9600);
WiFi.begin(WIFI_SSID, WIFI_PASSWORD);
Serial.print("Connecting to Wi-Fi");
while (WiFi.status() != WL_CONNECTED) {
Serial.print(".");
delay(300);
}
Serial.println();
Serial.print("Connected with IP: ");
Serial.println(WiFi.localIP());
Serial.println();
pinMode(DOOR_SENSOR_PIN, INPUT_PULLUP);
door_state = digitalRead(DOOR_SENSOR_PIN);
}
void loop() {
int forceValue = analogRead(FORCE_SENSOR_PIN);
if (forceValue < THRESHOLD) {
Serial.println("Alert! Someone has stolen your stuff!");
String subject = "Email Notification from ESP8266";
String textMsg = "This is an email sent from ESP8266.\n";
textMsg += "Alert! Someone has stolen your stuff!";
gmail_send(subject, textMsg);
}
}
void gmail_send(String subject, String textMsg) {
MailClient.networkReconnect(true);
smtp.debug(1);
smtp.callback(smtpCallback);
Session_Config config;
config.server.host_name = SMTP_HOST;
config.server.port = SMTP_PORT;
config.login.email = SENDER_EMAIL;
config.login.password = SENDER_PASSWORD;
config.login.user_domain = F("127.0.0.1");
config.time.ntp_server = F("pool.ntp.org,time.nist.gov");
config.time.gmt_offset = 3;
config.time.day_light_offset = 0;
SMTP_Message message;
message.sender.name = F("ESP8266");
message.sender.email = SENDER_EMAIL;
message.subject = subject;
message.addRecipient(F("To Whom It May Concern"), RECIPIENT_EMAIL);
message.text.content = textMsg;
message.text.transfer_encoding = "base64";
message.text.charSet = F("utf-8");
message.priority = esp_mail_smtp_priority::esp_mail_smtp_priority_low;
message.addHeader(F("Message-ID: <abcde.fghij@gmail.com>"));
if (!smtp.connect(&config)) {
Serial.printf("Connection error, Status Code: %d, Error Code: %d, Reason: %s\n", smtp.statusCode(), smtp.errorCode(), smtp.errorReason().c_str());
return;
}
if (!smtp.isLoggedIn()) {
Serial.println("Not yet logged in.");
} else {
if (smtp.isAuthenticated())
Serial.println("Successfully logged in.");
else
Serial.println("Connected with no Auth.");
}
if (!MailClient.sendMail(&smtp, &message))
Serial.printf("Error, Status Code: %d, Error Code: %d, Reason: %s\n", smtp.statusCode(), smtp.errorCode(), smtp.errorReason().c_str());
}
void smtpCallback(SMTP_Status status) {
Serial.println(status.info());
if (status.success()) {
Serial.println("----------------");
Serial.printf("Email sent success: %d\n", status.completedCount());
Serial.printf("Email sent failed: %d\n", status.failedCount());
Serial.println("----------------\n");
for (size_t i = 0; i < smtp.sendingResult.size(); i++) {
SMTP_Result result = smtp.sendingResult.getItem(i);
Serial.printf("Message No: %d\n", i + 1);
Serial.printf("Status: %s\n", result.completed ? "success" : "failed");
Serial.printf("Date/Time: %s\n", MailClient.Time.getDateTimeString(result.timestamp, "%B %d, %Y %H:%M:%S").c_str());
Serial.printf("Recipient: %s\n", result.recipients.c_str());
Serial.printf("Subject: %s\n", result.subject.c_str());
}
Serial.println("----------------\n");
smtp.sendingResult.clear();
}
}
To get started with ESP8266 on Arduino IDE, follow these steps:
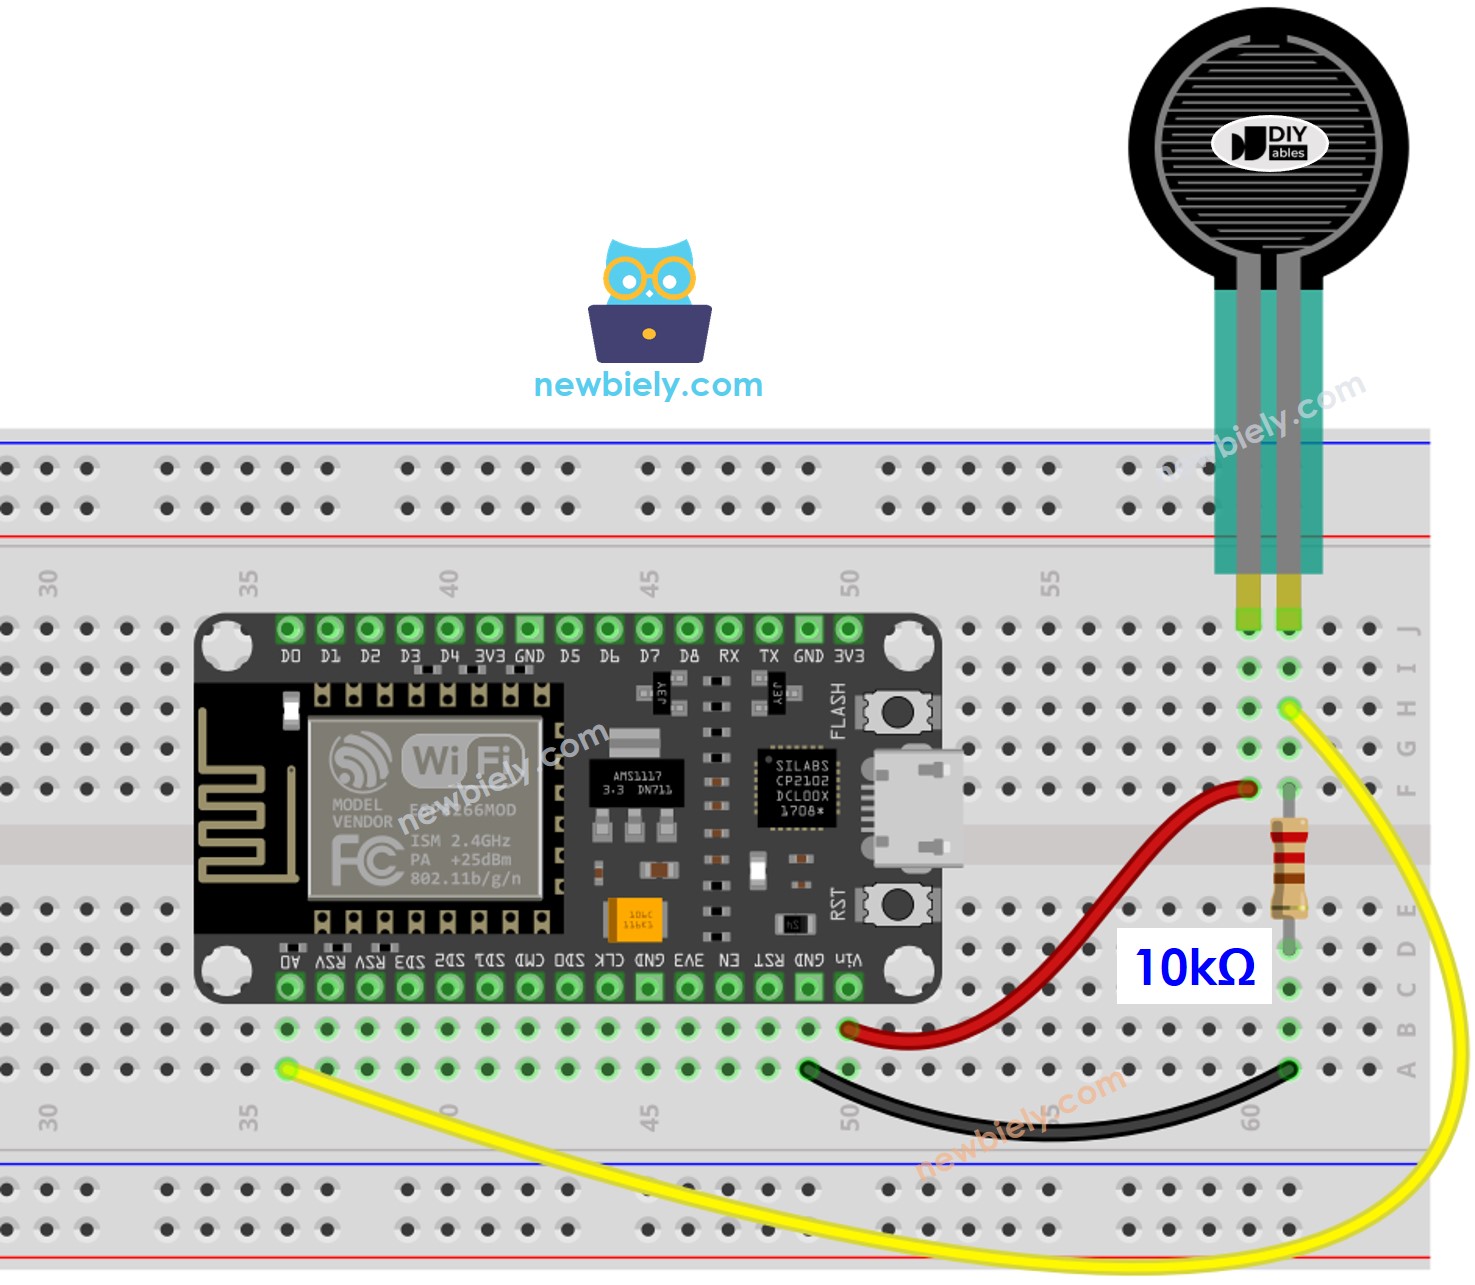
Connect your ESP8266 board to the force sensor as shown in the diagram.
Connect the ESP8266 board to your computer using a USB cable.
Place the items you want to secure on the force sensor.
Open Arduino IDE on your computer.
Choose the correct ESP8266 board, such as (e.g. NodeMCU 1.0 (ESP-12E Module)), and its respective COM port.
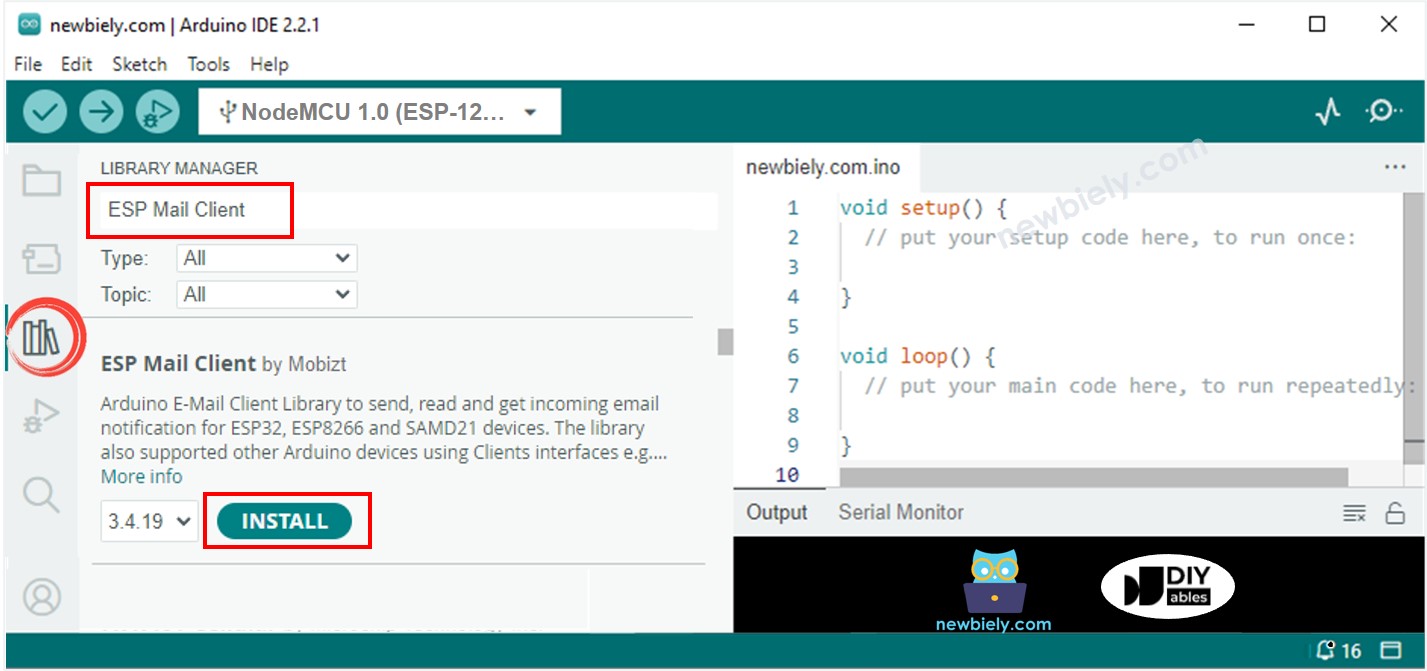
Click on the Library Manager icon on the left side of the Arduino IDE to open the Library Manager.
Search for ESP Mail Client and choose the library created by Mobizt.
Click the Install button to install the ESP Mail Client library.

Copy the code and open it in the Arduino IDE software.
Enter your WiFi name and password in the code by changing WIFI_SSID and WIFI_PASSWORD.
Enter the email and password of the sender in the code by changing SENDER_EMAIL and SENDER_PASSWORD.
Replace the recipient's email in the code by changing RECIPIENT_EMAIL. The recipient's email may be the same as the sender's email.
※ NOTE THAT:
The email address of the person sending the email should be from Gmail.
The password for the sender should be the App password you got before.
The email address of the person receiving the email can be from any email service.
Press the Upload button in the Arduino IDE to transfer code to the ESP8266.
Open the Serial Monitor.
Take off your item from the force sensor.
Check the results on the Serial Monitor.
Alert! Someone has stolen your stuff!
#### Email sent successfully
> C: Email sent successfully
----------------
Message sent success: 1
Message sent failed: 0
----------------
Message No: 1
Status: success
Date/Time: May 27, 2024 04:42:50
Recipient: xxxxxx@gmail.com
Subject: Email Notification from ESP8266
----------------


