ESP8266 - Ultrasonic Sensor - OLED
This tutorial instructs you how to acquire the distance from an ultrasonic sensor and display it on an OLED.
Hardware Preparation
Or you can buy the following kits:
| 1 | × | DIYables Sensor Kit (18 sensors/displays) |
Additionally, some of these links are for products from our own brand, DIYables .
Buy Note: If you want a bigger OLED display, use the 2.42 inch OLED Display 128x64 .
Overview of OLED and Ultrasonic Sensor
If you are not familiar with OLED and Ultrasonic Sensor (including pinout, functioning, programming, etc.), the following tutorials can help:
- ESP8266 - OLED tutorial
- ESP8266 - Ultrasonic Sensor tutorial
Wiring Diagram
- If powering ESP8266 via USB port:
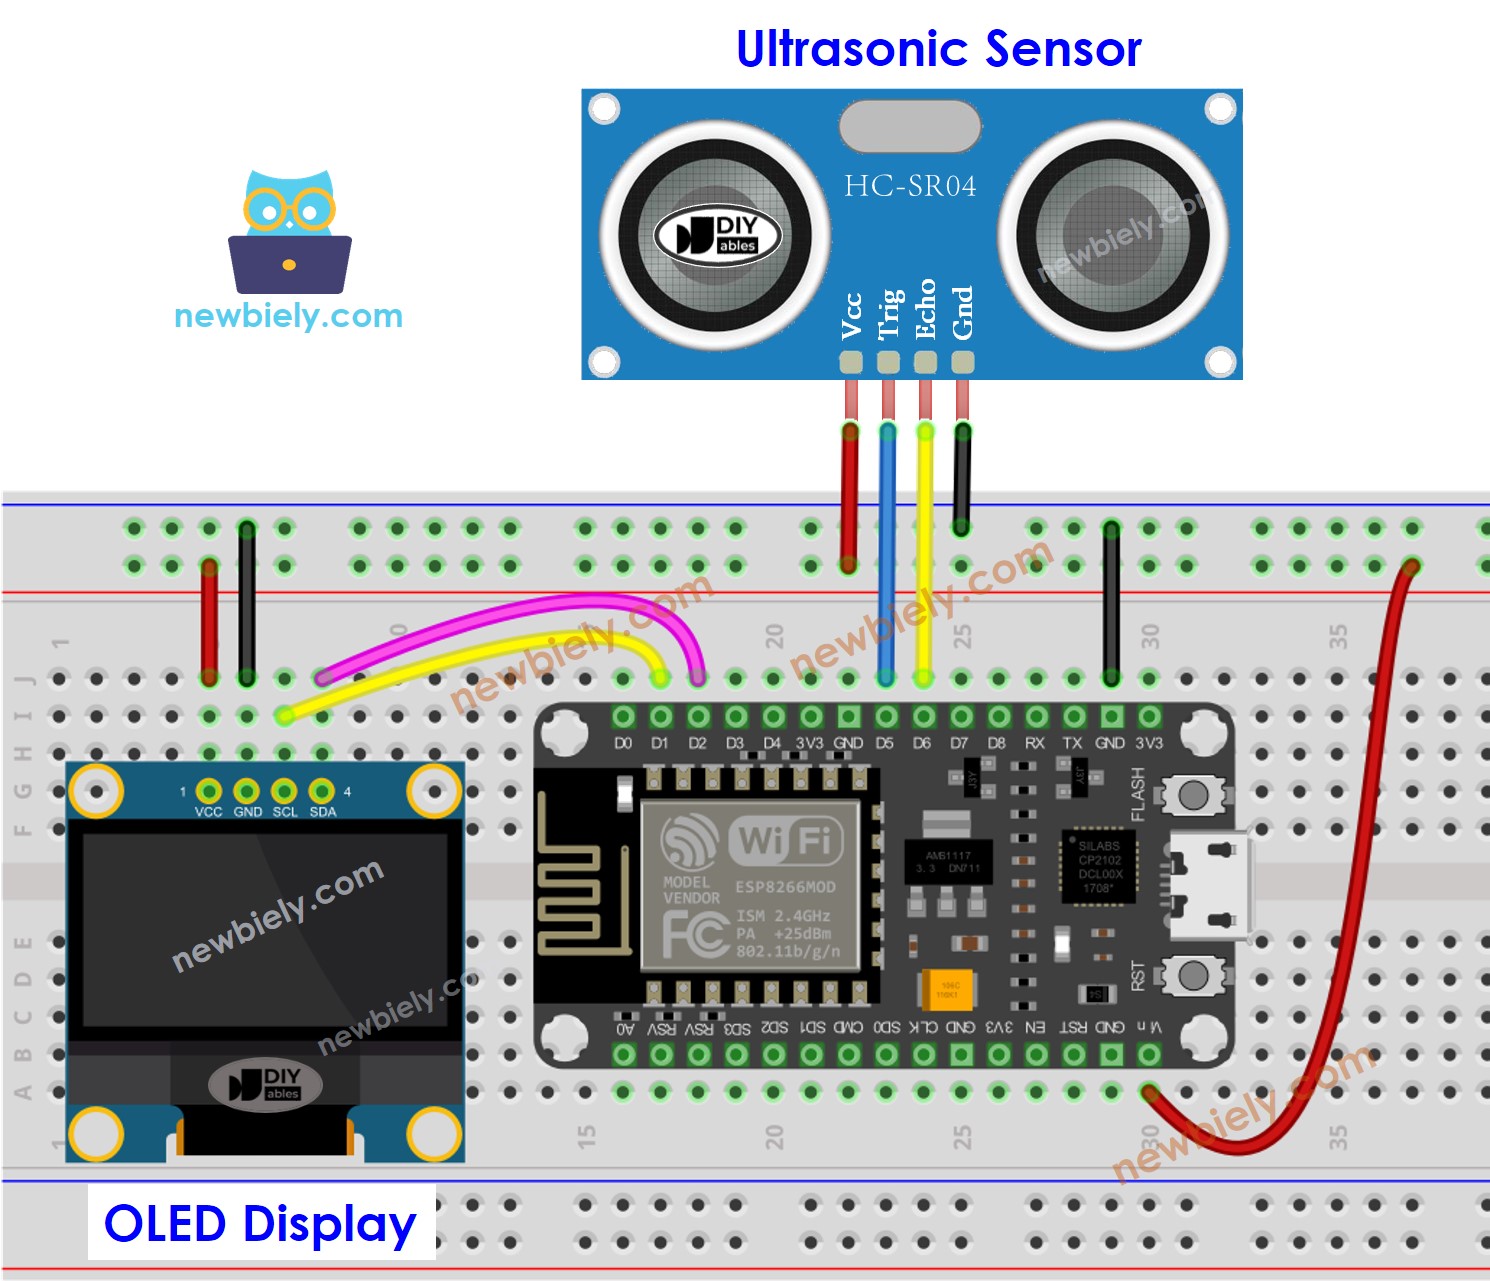
This image is created using Fritzing. Click to enlarge image
- If powering ESP8266 via USB port but power is not enough, use an external power source for OLED display and sensor
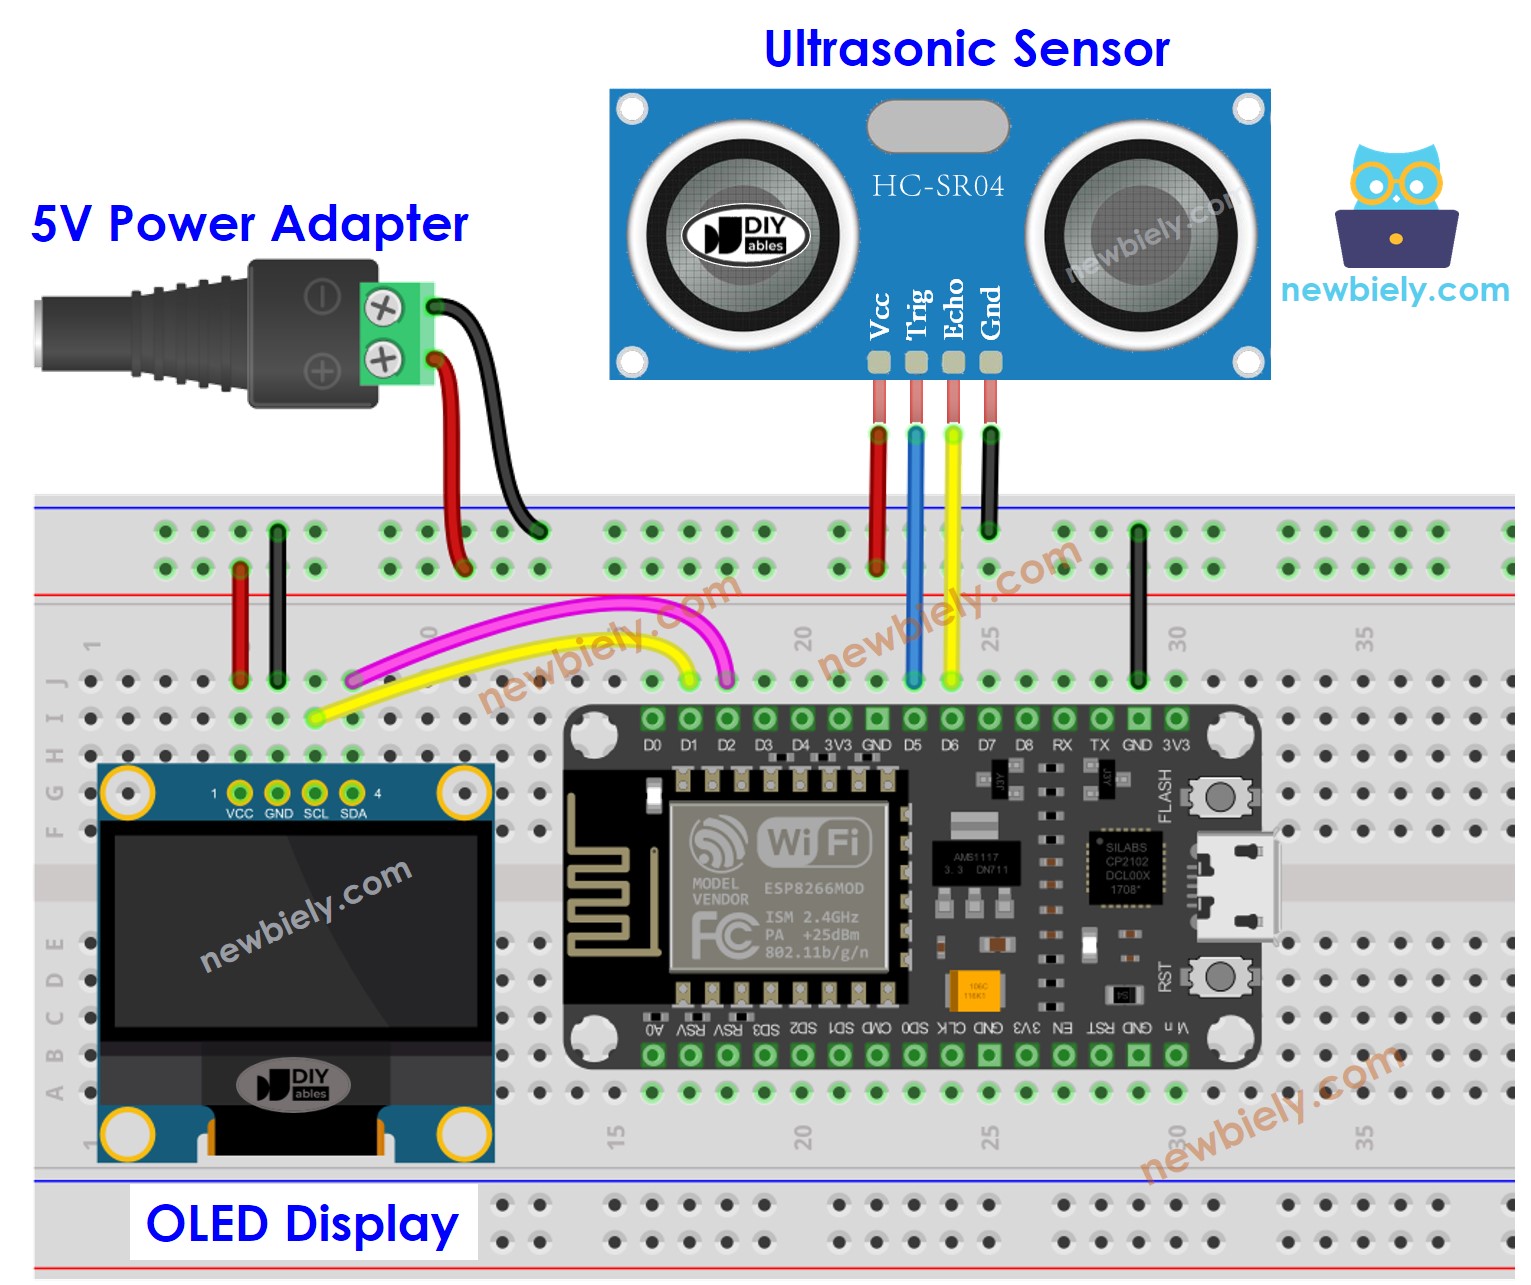
This image is created using Fritzing. Click to enlarge image
- If powering ESP8266 via Vin pin:
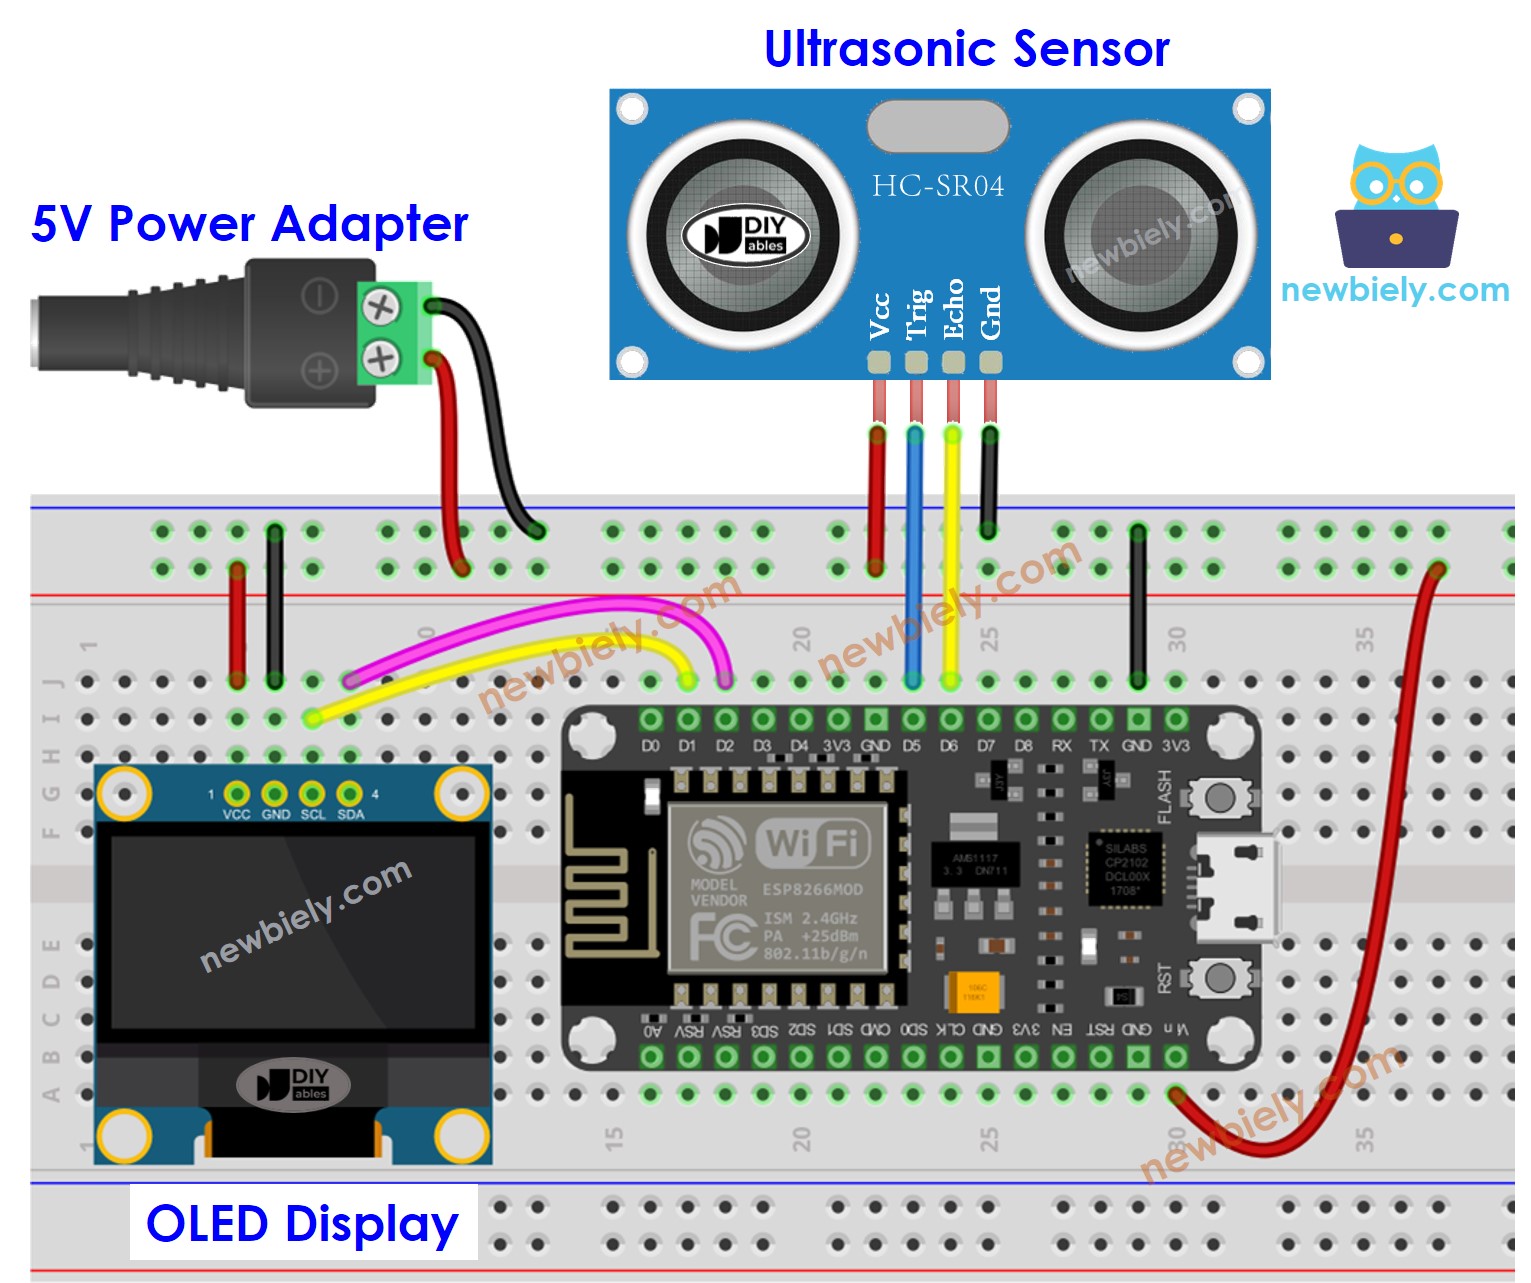
This image is created using Fritzing. Click to enlarge image
See more in ESP8266's pinout and how to supply power to the ESP8266 and other components.
ESP8266 Code - Ultrasonic Sensor - OLED
Detailed Instructions
To get started with ESP8266 on Arduino IDE, follow these steps:
- Check out the how to setup environment for ESP8266 on Arduino IDE tutorial if this is your first time using ESP8266.
- Wire the components as shown in the diagram.
- Connect the ESP8266 board to your computer using a USB cable.
- Open Arduino IDE on your computer.
- Choose the correct ESP8266 board, such as (e.g. NodeMCU 1.0 (ESP-12E Module)), and its respective COM port.
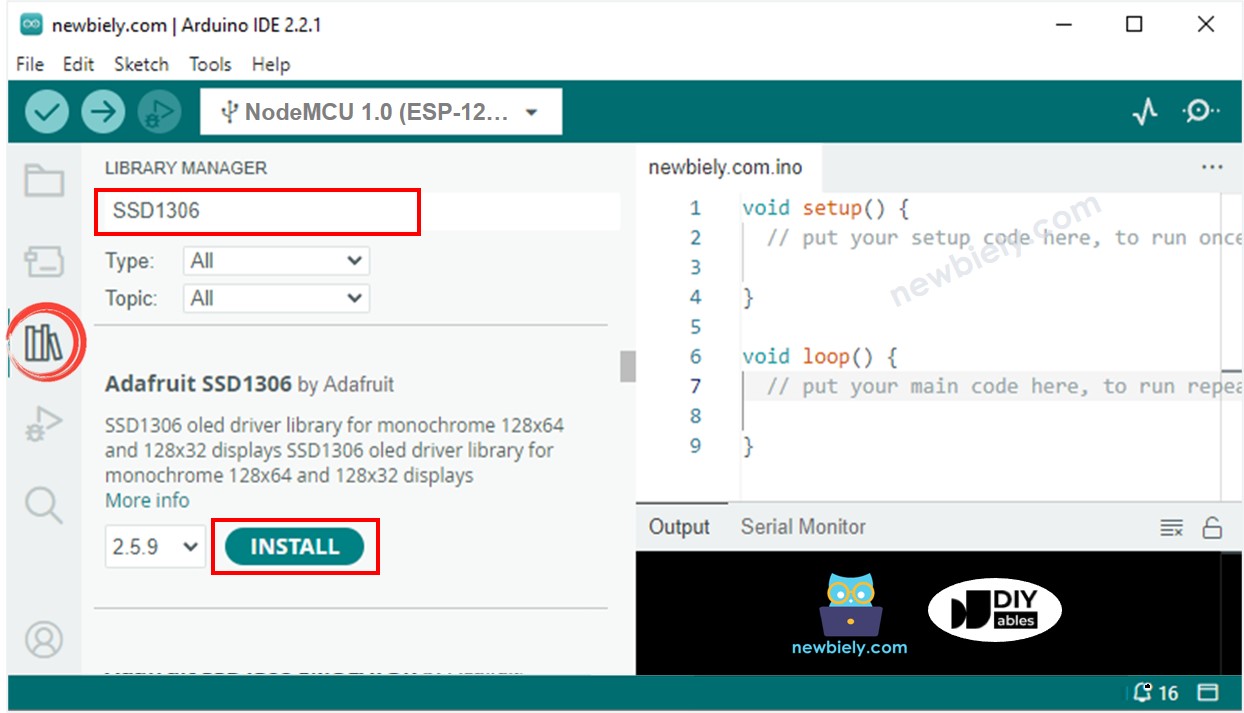
- Click to the Libraries icon on the left bar of the Arduino IDE.
- Search for “SSD1306” and locate the SSD1306 library by Adafruit.
- Then, press the Install button to install the library.
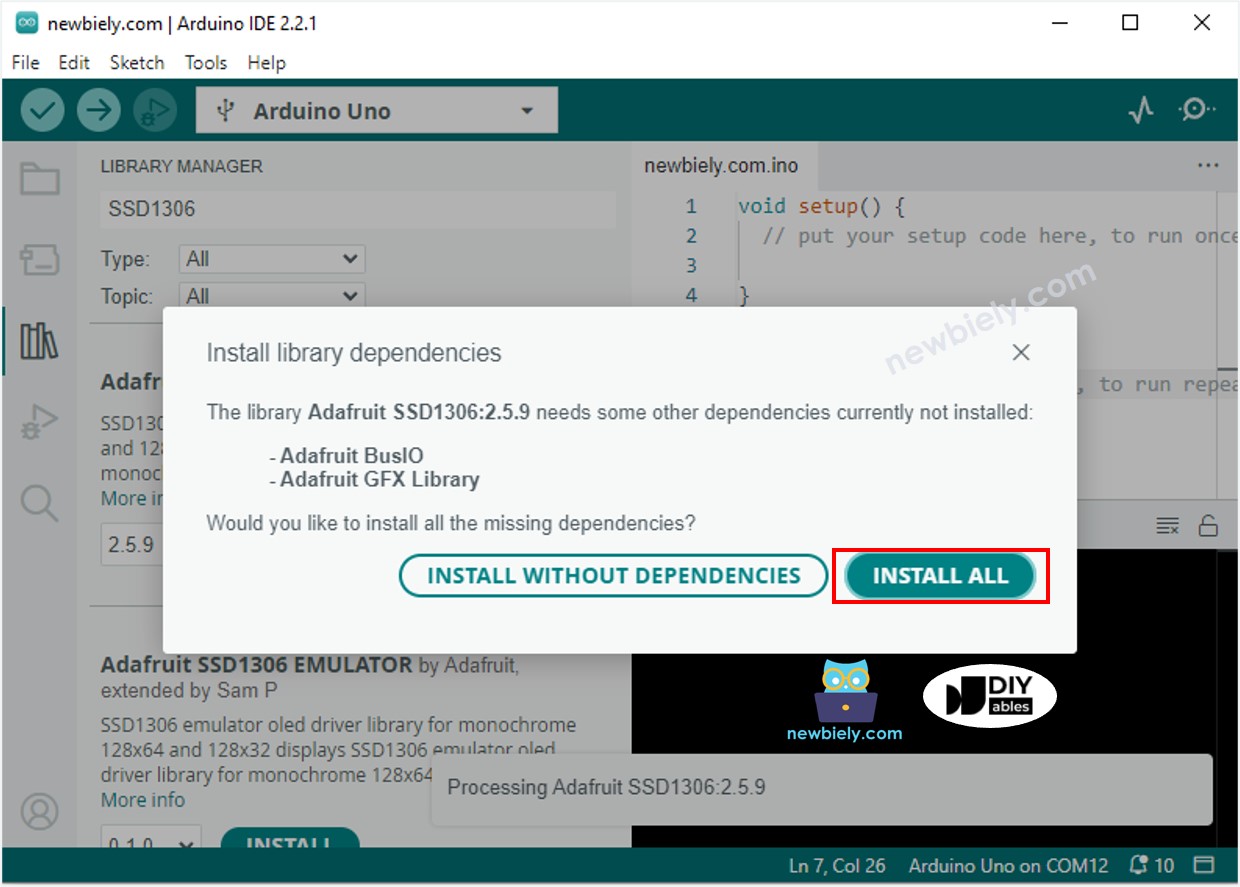
- You will be prompted to install additional library dependencies.
- To install all of them, click the Install All button.
- Copy the code and open it in the Arduino IDE.
- Click the Upload button in the IDE to transfer the code to the ESP8266.
- Move your hand in front of the sensor.
- Check out the outcome on the OLED display and in the Serial Monitor.
※ NOTE THAT:
The code below will enable automatic horizontal and vertical centering of text on an OLED display. To learn more, please see How to vertical/horizontal center on OLED.