ESP8266 - Water Leak Email Notification
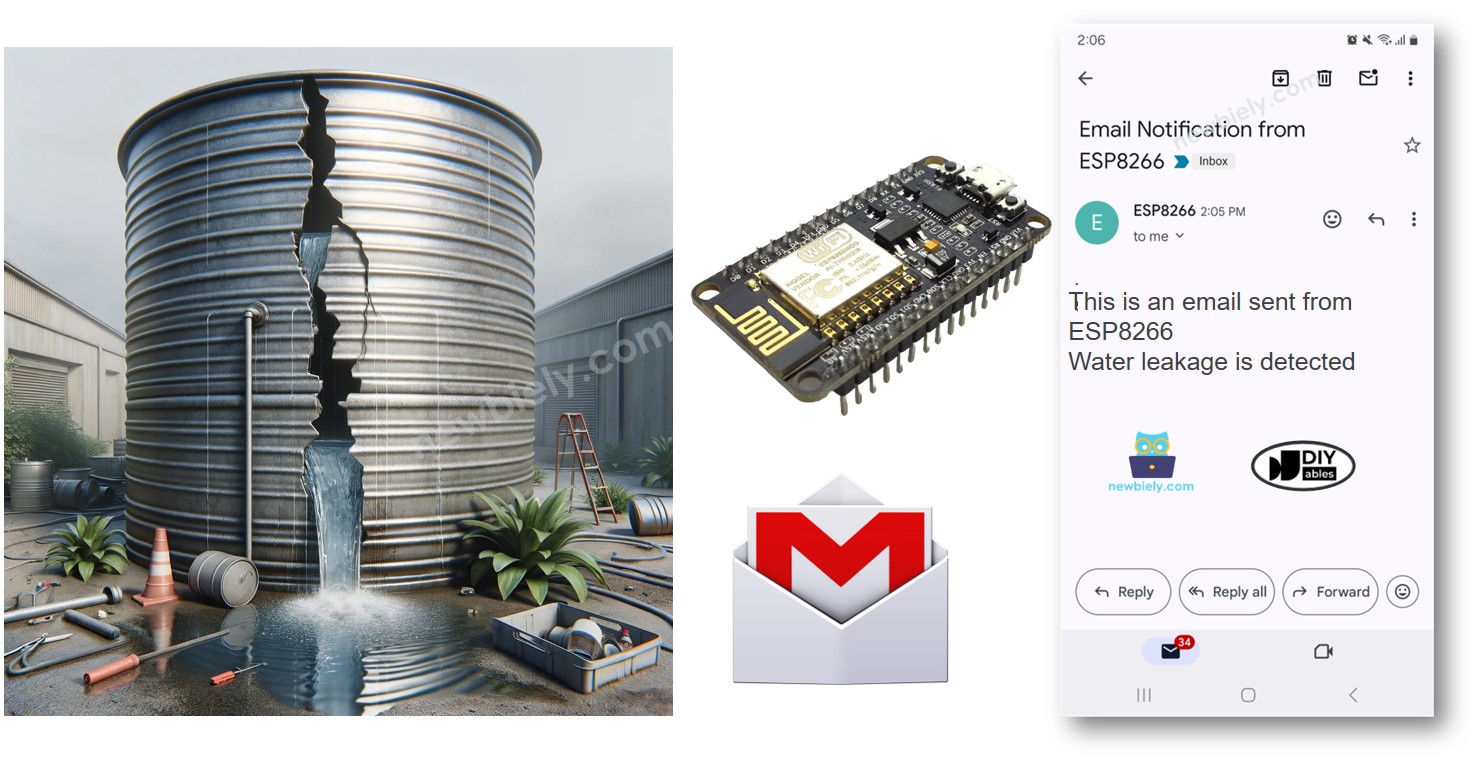
This guide will teach you how to use an ESP8266 to detect water leaks and send email alerts immediately. We'll cover setting up the sensor, provide code examples, and describe how to link with email services. This can protect your home or office from water damage. It's ideal for those who like DIY projects and want to enhance their water leak detection systems.
Or you can buy the following kits:
Disclosure: Some of the links provided in this section are Amazon affiliate links. We may receive a commission for any purchases made through these links at no additional cost to you.
Additionally, some of these links are for products from our own brand,
DIYables .
We provide detailed guides on using Water Sensors and Gmail. Each guide includes full instructions and simple steps for setting up the hardware, understanding how it works, and connecting and programming the ESP8266. For more information, please visit these links.
#include <ESP8266WiFi.h>
#include <ESP_Mail_Client.h>
#define WIFI_SSID "YOUR_WIFI_SSID"
#define WIFI_PASSWORD "YOUR_WIFI_PASSWORD"
#define SENDER_EMAIL "xxxxxx@gmail.com"
#define SENDER_PASSWORD "xxxx xxxx xxxx xxxx"
#define RECIPIENT_EMAIL "xxxxxx@gmail.com"
#define SMTP_HOST "smtp.gmail.com"
#define SMTP_PORT 587
#define WATER_SENSOR_PIN D7
int water_state;
int prev_water_state;
SMTPSession smtp;
void setup() {
Serial.begin(9600);
WiFi.begin(WIFI_SSID, WIFI_PASSWORD);
Serial.print("Connecting to Wi-Fi");
while (WiFi.status() != WL_CONNECTED) {
Serial.print(".");
delay(300);
}
Serial.println();
Serial.print("Connected with IP: ");
Serial.println(WiFi.localIP());
Serial.println();
pinMode(WATER_SENSOR_PIN, INPUT_PULLUP);
water_state = digitalRead(WATER_SENSOR_PIN);
}
void loop() {
prev_water_state = water_state;
water_state = digitalRead(WATER_SENSOR_PIN);
if (prev_water_state == HIGH && water_state == LOW) {
Serial.println("Water leakage is detected!");
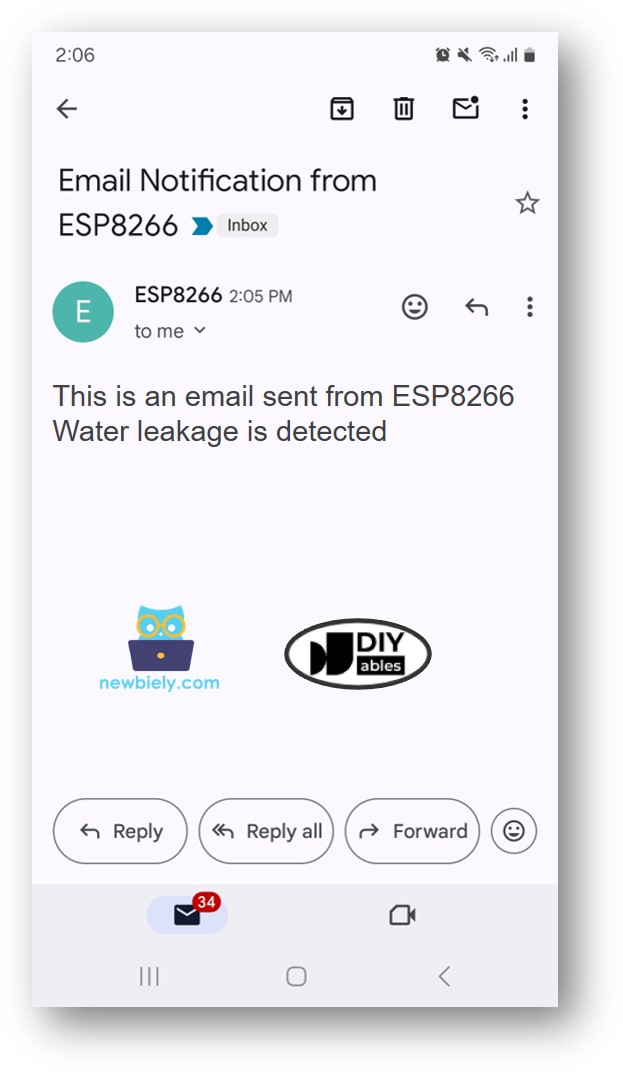
String subject = "Email Notification from ESP8266";
String textMsg = "This is an email sent from ESP8266.\n";
textMsg += "Water leakage is detected";
gmail_send(subject, textMsg);
}
}
void gmail_send(String subject, String textMsg) {
MailClient.networkReconnect(true);
smtp.debug(1);
smtp.callback(smtpCallback);
Session_Config config;
config.server.host_name = SMTP_HOST;
config.server.port = SMTP_PORT;
config.login.email = SENDER_EMAIL;
config.login.password = SENDER_PASSWORD;
config.login.user_domain = F("127.0.0.1");
config.time.ntp_server = F("pool.ntp.org,time.nist.gov");
config.time.gmt_offset = 3;
config.time.day_light_offset = 0;
SMTP_Message message;
message.sender.name = F("ESP8266");
message.sender.email = SENDER_EMAIL;
message.subject = subject;
message.addRecipient(F("To Whom It May Concern"), RECIPIENT_EMAIL);
message.text.content = textMsg;
message.text.transfer_encoding = "base64";
message.text.charSet = F("utf-8");
message.priority = esp_mail_smtp_priority::esp_mail_smtp_priority_low;
message.addHeader(F("Message-ID: <abcde.fghij@gmail.com>"));
if (!smtp.connect(&config)) {
Serial.printf("Connection error, Status Code: %d, Error Code: %d, Reason: %s\n", smtp.statusCode(), smtp.errorCode(), smtp.errorReason().c_str());
return;
}
if (!smtp.isLoggedIn()) {
Serial.println("Not yet logged in.");
} else {
if (smtp.isAuthenticated())
Serial.println("Successfully logged in.");
else
Serial.println("Connected with no Auth.");
}
if (!MailClient.sendMail(&smtp, &message))
Serial.printf("Error, Status Code: %d, Error Code: %d, Reason: %s\n", smtp.statusCode(), smtp.errorCode(), smtp.errorReason().c_str());
}
void smtpCallback(SMTP_Status status) {
Serial.println(status.info());
if (status.success()) {
Serial.println("----------------");
Serial.printf("Email sent success: %d\n", status.completedCount());
Serial.printf("Email sent failed: %d\n", status.failedCount());
Serial.println("----------------\n");
for (size_t i = 0; i < smtp.sendingResult.size(); i++) {
SMTP_Result result = smtp.sendingResult.getItem(i);
Serial.printf("Message No: %d\n", i + 1);
Serial.printf("Status: %s\n", result.completed ? "success" : "failed");
Serial.printf("Date/Time: %s\n", MailClient.Time.getDateTimeString(result.timestamp, "%B %d, %Y %H:%M:%S").c_str());
Serial.printf("Recipient: %s\n", result.recipients.c_str());
Serial.printf("Subject: %s\n", result.subject.c_str());
}
Serial.println("----------------\n");
smtp.sendingResult.clear();
}
}
To get started with ESP8266 on Arduino IDE, follow these steps:
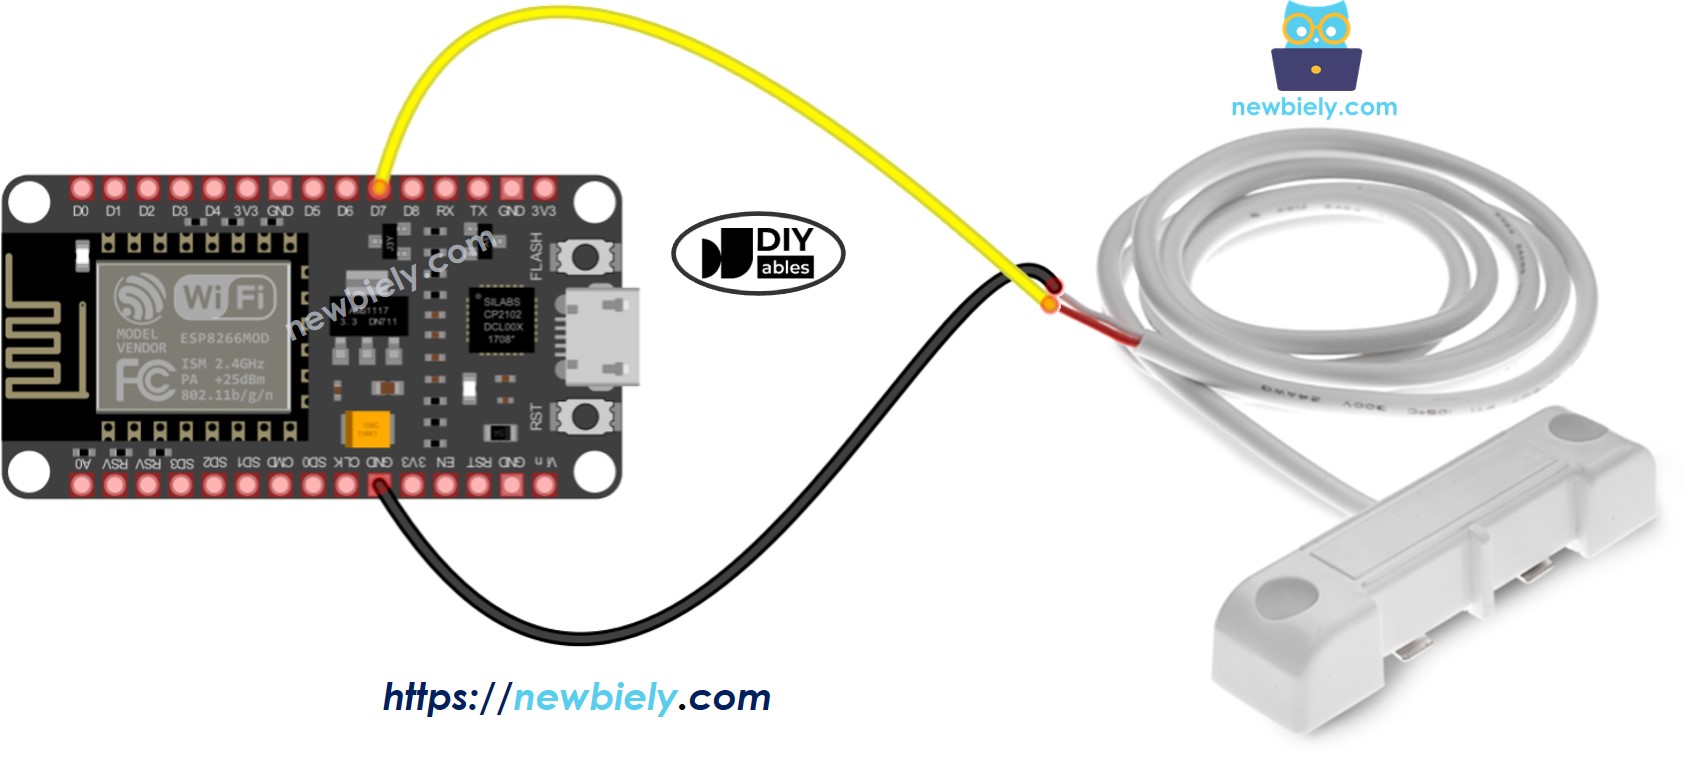
Wire the components as shown in the diagram.
Place the water sensor in a location where it can detect leaks.
Connect the ESP8266 board to your computer using a USB cable.
Open Arduino IDE on your computer.
Choose the correct ESP8266 board, such as (e.g. NodeMCU 1.0 (ESP-12E Module)), and its respective COM port.
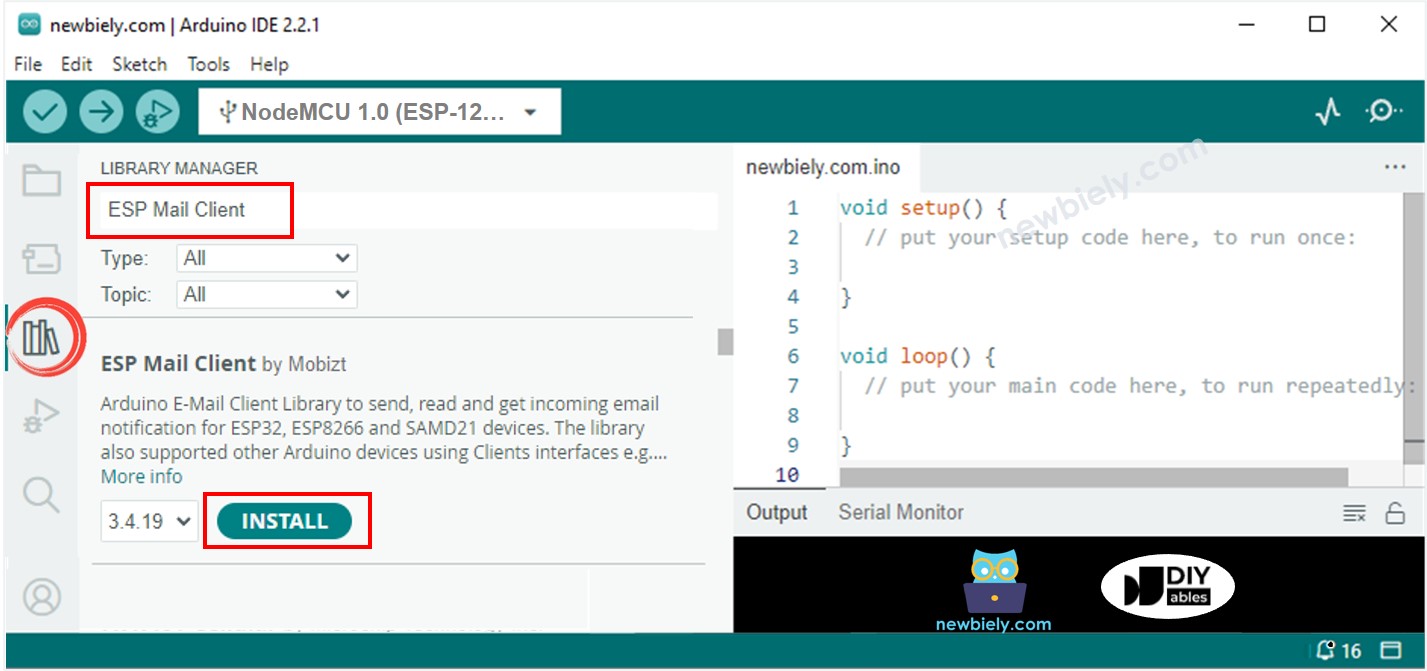
Open the Library Manager by click on the Library Manager icon in the left navigation bar of the Arduino IDE.
Search for ESP Mail Client and find the library by Mobizt.
Click Install button to add the ESP Mail Client library.

Copy the provided code and open it with Arduino IDE.
Enter your WiFi information including network name (SSID) and password by changing WIFI_SSNID and WIFI_PASSWORD.
Change the email sender's details to yours by editing SENDER_EMAIL and SENDER_PASSWORD.
Put the email address of the receiver in the code by updating RECIPIENT_EMAIL. This can be the same email as the sender’s.
※ NOTE THAT:
The sender must use a Gmail account.
The password for the sender should be the App password you got before.
Any type of email can be used for the recipient's email.
Press the Upload button in Arduino IDE to send the code to ESP8266.
Open the Serial Monitor.
Pour water on the water sensor.
Check the result on the Serial Monitor.
Water leakage is detected
#### Email sent successfully
> C: Email sent successfully
----------------
Message sent success: 1
Message sent failed: 0
----------------
Message No: 1
Status: success
Date/Time: May 27, 2024 04:42:50
Recipient: xxxxxx@gmail.com
Subject: Email Notification from ESP8266
----------------


