ESP8266 - Measure Voltage
In this guide, we will learn how to use an ESP8266 and a voltage sensor to measure voltages between 0V and 25V. We will explain in detail:
- How to connect a voltage sensor to an ESP8266
- How to program an ESP8266 to measure voltage from the sensor
Hardware Preparation
Or you can buy the following kits:
| 1 | × | DIYables Sensor Kit (18 sensors/displays) |
Additionally, some of these links are for products from our own brand, DIYables .
Overview of Voltage Sensor
A Voltage Sensor is a ready-made circuit made of two precise resistors that helps in easy voltage measurement. It has two resistors: 30 KΩ and 7.5 KΩ. When using a 5V reference voltage for the ADC, this sensor can check voltages from 0 to 25V DC. If the reference voltage is 3.3V for the ADC, it can measure voltages from 0 to 16.5V DC.
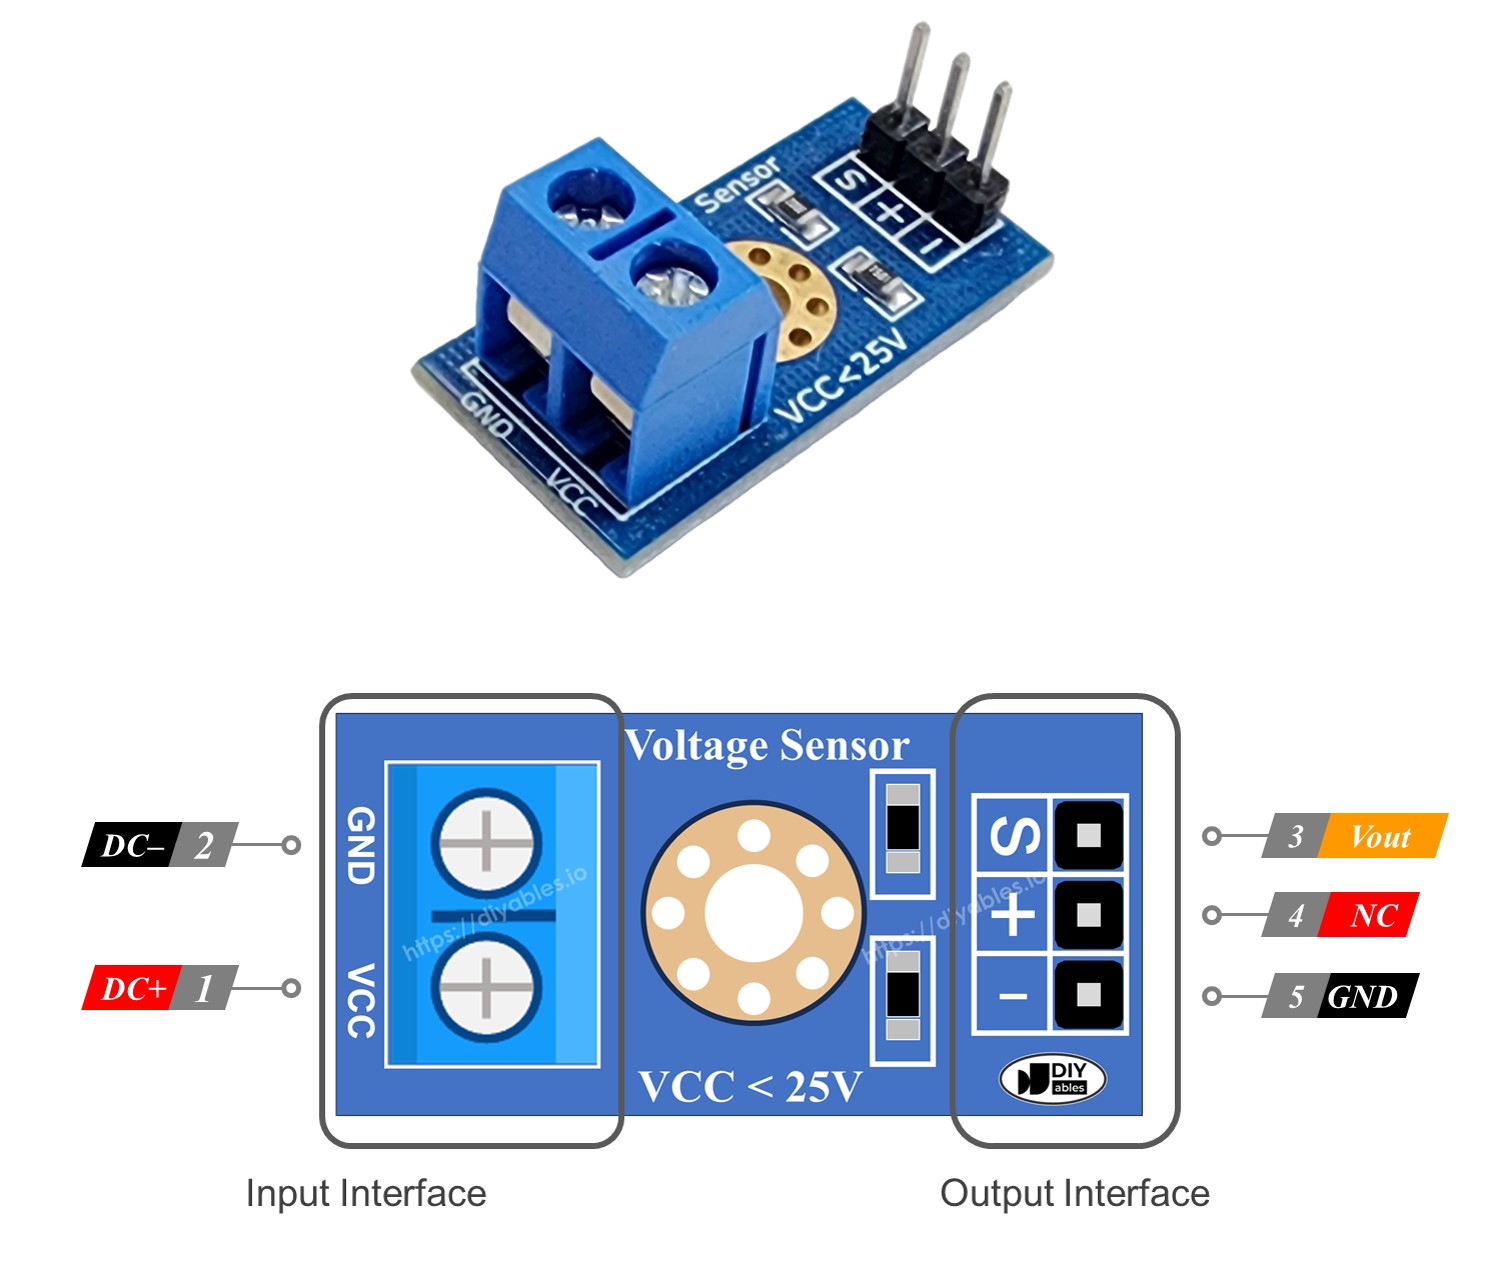
Pinout
A voltage sensor includes two groups of pins.
- Input Interface (connect this to the points where you are measuring voltage):
- VCC pin: This is the positive pin. Connect it to the point that has the higher voltage.
- GND pin: This is the negative pin. Connect it to the point that has the lower voltage.
- Output Interface (connect this to the ESP8266):
- Vout pin (S): This is the signal pin. Connect it to an analog pin on the ESP8266.
- NC pin (+): Do not connect this pin; it is not used.
- GND pin (-): This is the ground pin. Connect it to the GND (0V) pin on the ESP8266.
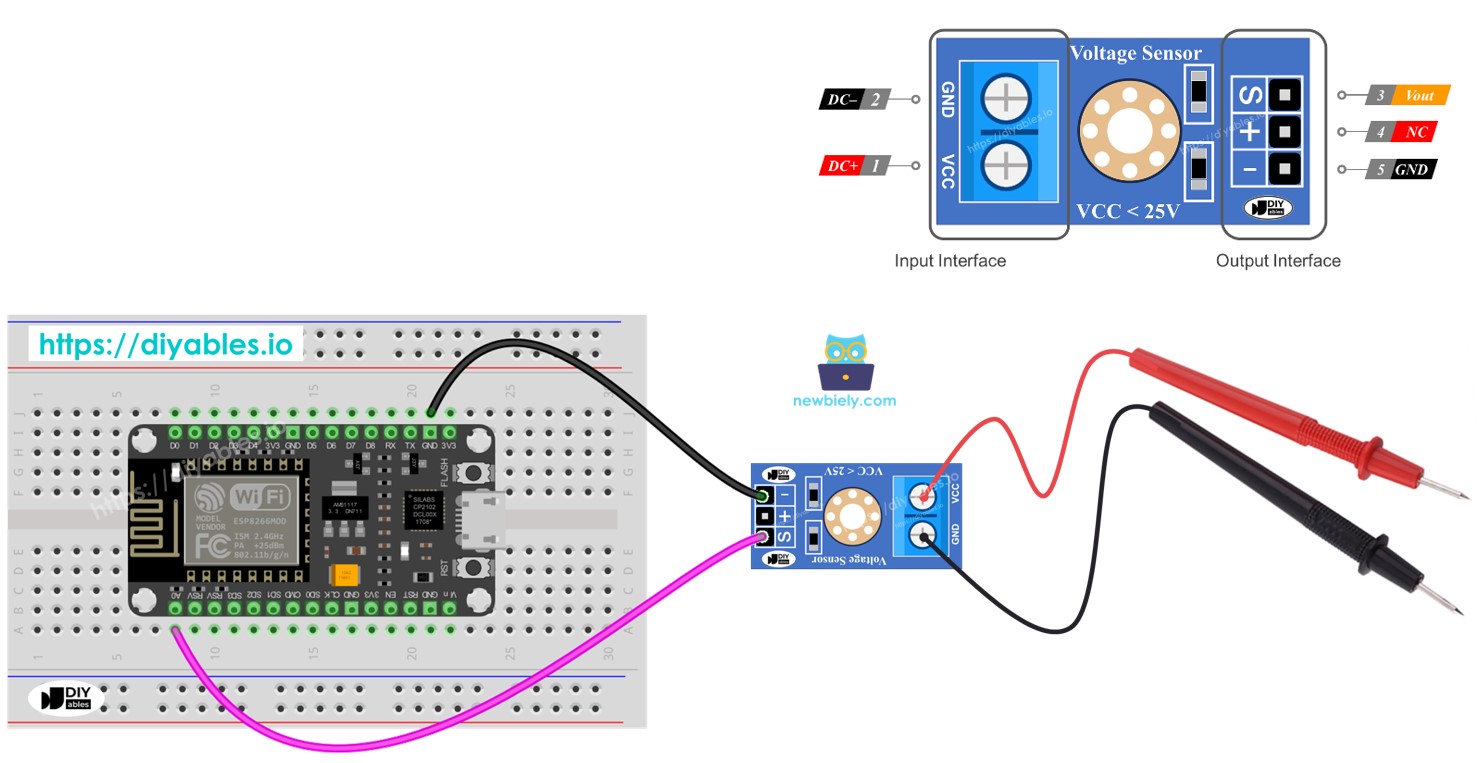
Wiring Diagram

This image is created using Fritzing. Click to enlarge image
See more in ESP8266's pinout and how to supply power to the ESP8266 and other components.
ESP8266 Code
Detailed Instructions
To get started with ESP8266 on Arduino IDE, follow these steps:
- Check out the how to setup environment for ESP8266 on Arduino IDE tutorial if this is your first time using ESP8266.
- Connect the ESP8266 to the voltage sensor.
- Connect the ESP8266 board to your computer using a USB cable.
- Open Arduino IDE on your computer.
- Choose the correct ESP8266 board, such as (e.g. NodeMCU 1.0 (ESP-12E Module)), and its respective COM port.
- Copy the code provided and paste it into the Arduino IDE.
- Click the Upload button in the Arduino IDE to transfer the code to the ESP8266.
- Test by measuring 5V and 3.3V outputs on the ESP8266.
- Check the results on the Serial Monitor.
※ NOTE THAT:
The value might change over time because the usual voltage reference is 5V. This can be unstable and vary with the power supply.