ESP8266 - Web Server
This tutorial instructs you how to program to make an ESP8266 board become a web server. You'll be able to access web pages hosted on the ESP8266 using a web browser on your computer or smartphone, enabling you to view data from the ESP8266 and control it. To make it easy, we will progress from simple to more challenging steps as follows:
- ESP8266 Web Server - Showing simple text on web page.
- ESP8266 Web Server - Monitoring sensor values from the ESP8266 via a web.
- ESP8266 Web Server - Controlling the ESP8266 via a web.
- ESP8266 Web Server - Separating HTML content (HTML, CSS, and Javascript) from ESP8266 code and putting it into another files on the Arduino IDE.
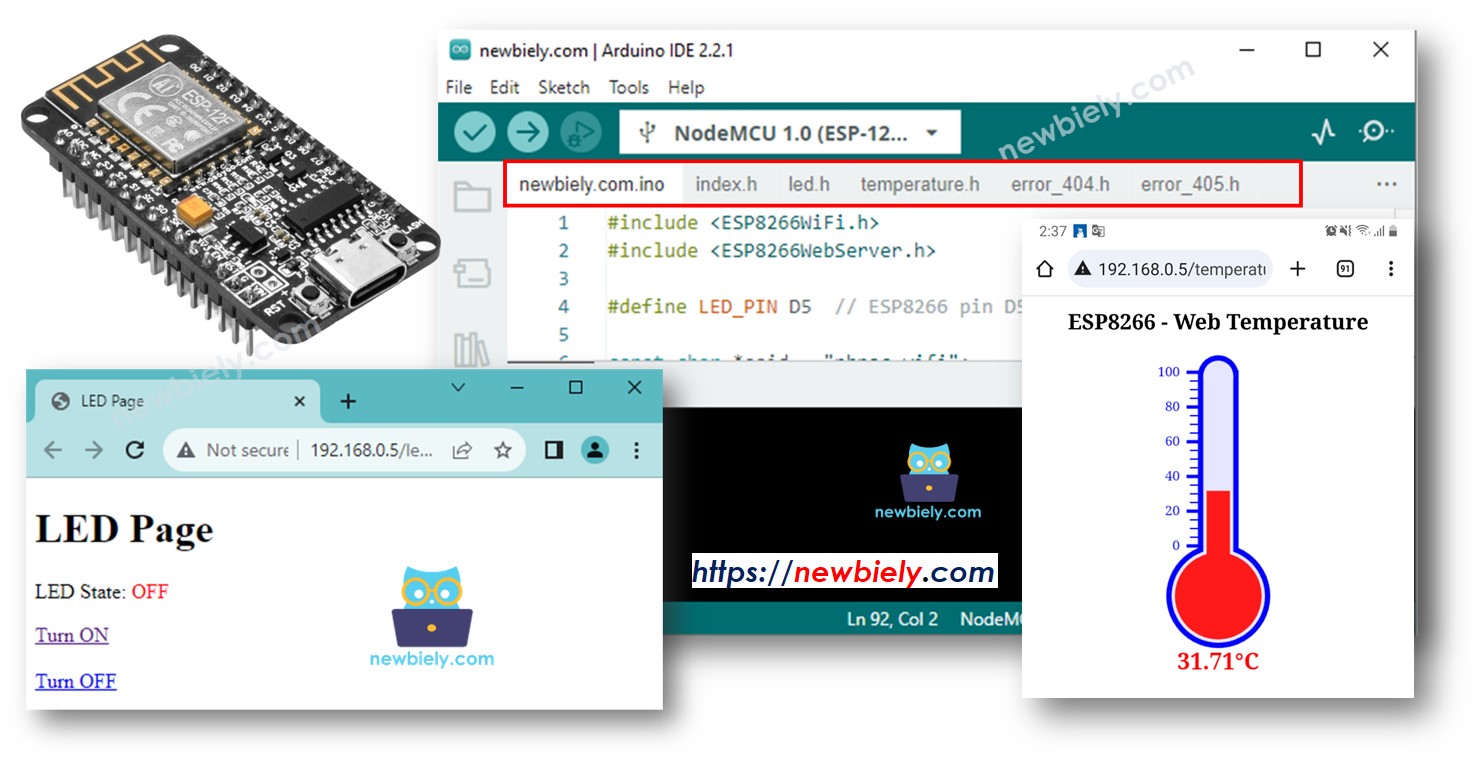
- ESP8266 Web Server - Creating multiple pages such as index.html, temperature.html, led.html, error_404.html, and error_405.html..., and more.
Hardware Preparation
Or you can buy the following kits:
| 1 | × | DIYables Sensor Kit (18 sensors/displays) |
Additionally, some of these links are for products from our own brand, DIYables .
Reading the sensor value from ESP8266 via Web
This is relatively simple. The ESP8266 code does the following tasks:
- Creating a web server that listens for HTTP requests from a web browser.
- Upon receiving a request from a web browser, the ESP8266 responds with HTML content that contains the value read from the sensor.
Below is the ESP8266 code that performs the above tasks:
Detailed Instructions
To get started with ESP8266 on Arduino IDE, follow these steps:
- Check out the how to setup environment for ESP8266 on Arduino IDE tutorial if this is your first time using ESP8266.
- Wire the components as shown in the diagram.
- Connect the ESP8266 board to your computer using a USB cable.
- Open Arduino IDE on your computer.
- Choose the correct ESP8266 board, such as (e.g. NodeMCU 1.0 (ESP-12E Module)), and its respective COM port.
- Copy the above code and open with Arduino IDE
- Change the wifi information (SSID and password) in the code to yours
- Click Upload button on Arduino IDE to upload code to ESP8266
- Open the Serial Monitor
- Check out the result on Serial Monitor.
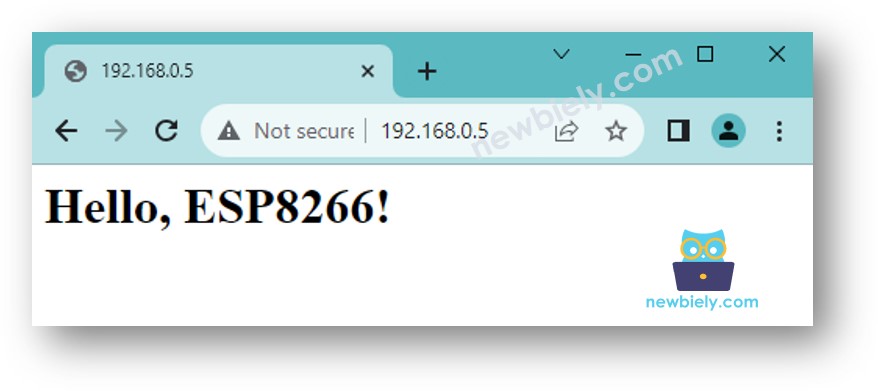
- Take note of the IP address displayed, and enter this address into the address bar of a web browser on your smartphone or PC.
- As a result, you will see the following output on the Serial Monitor.
- Once you access the web browser using the IP address, you will be presented with a very basic web page displaying "Hello, ESP8266!". The page will look like the following:
Reading the sensor value from ESP8266 via Web
Below is the ESP8266 code that prints the temperature value to web page:
Detailed Instructions
- Copy the above code and open with Arduino IDE
- Change the wifi information (SSID and password) in the code to yours
- Upload the code to ESP8266
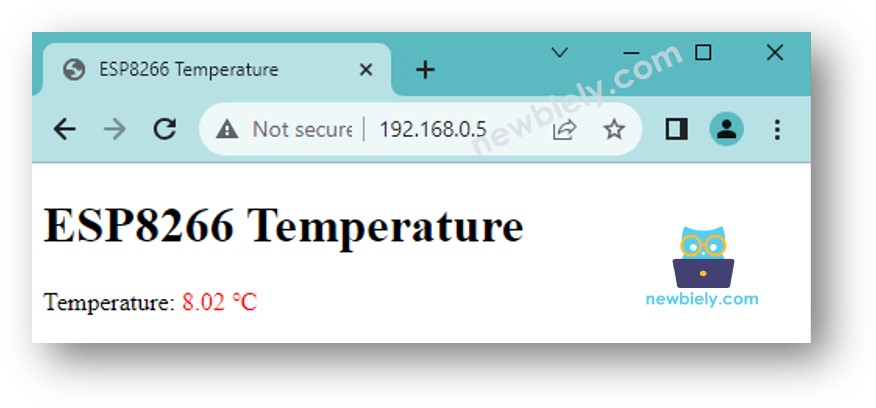
- Once you access the web browser using the IP address, you will be presented with a very basic web page displaying information about the ESP8266 board. The page will look like the following:
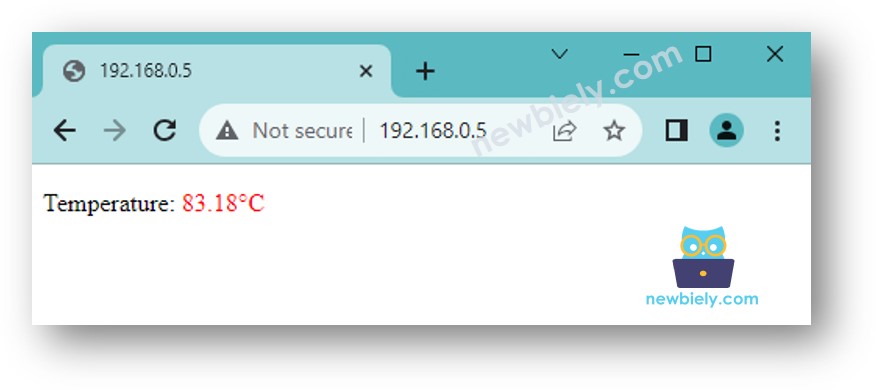
To make the web page look fantastic with a graphic user interface (UI), check out the final section of this tutorial.
※ NOTE THAT:
With the code provided above, to get the termperature update, you have to reload the page on the web browser. In a next part, we will learn how to make web page update the temperature value on backround without reloading the webpage.
Controlling the ESP8266 via Web
Controlling something connected to ESP8266 is a bit more challenging than just reading a value. That's because ESP8266 has to understand the request it receives from the web browser to know what action to take.
For a more comprehensive and detailed example, I recommend checking out the tutorials listed below:
Separating HTML content into another file on Arduino IDE
If you want to create a simple web page with minimal content, you can embed the HTML directly into the ESP8266 code, as explained earlier.
However, if you want to make a more sophisticated and impressive web page with larger content, it becomes inconvenient to include all the HTML, CSS, and Javascript directly in the ESP8266 code. In this situation, you can use a different approach to manage the code:
- The ESP8266 code will be placed in a .ino file, just like before.
- The HTML code (HTML, CSS, Javascript) will be placed in a separate .h file. This allows you to keep the web page content separate from the ESP8266 code, making it easier to manage and modify.
To do so, we need to do two major steps:
- Preparing HTML content
- Programming ESP8266
Preparing HTML content
- Create an HTML file on your local PC that contains the HTML content (HTML, CSS, and Javascript) for your UI design.
- In the HTML file, where data from ESP8266 should be displayed, use an arbitrary value.
- Test and modify it until you are satisfied.
- We will put the HTML content in the .h file on the Arduino IDE. See the next step.
Programming ESP8266
- Open the Arduino IDE and create a new sketch. Give it a name, for example, newbiely.com.ino.
- Copy the code provided below and paste it to the created file.
- Change the WiFi information (SSID and password) in the code to yours
- Create the index.h file On Arduino IDE by:
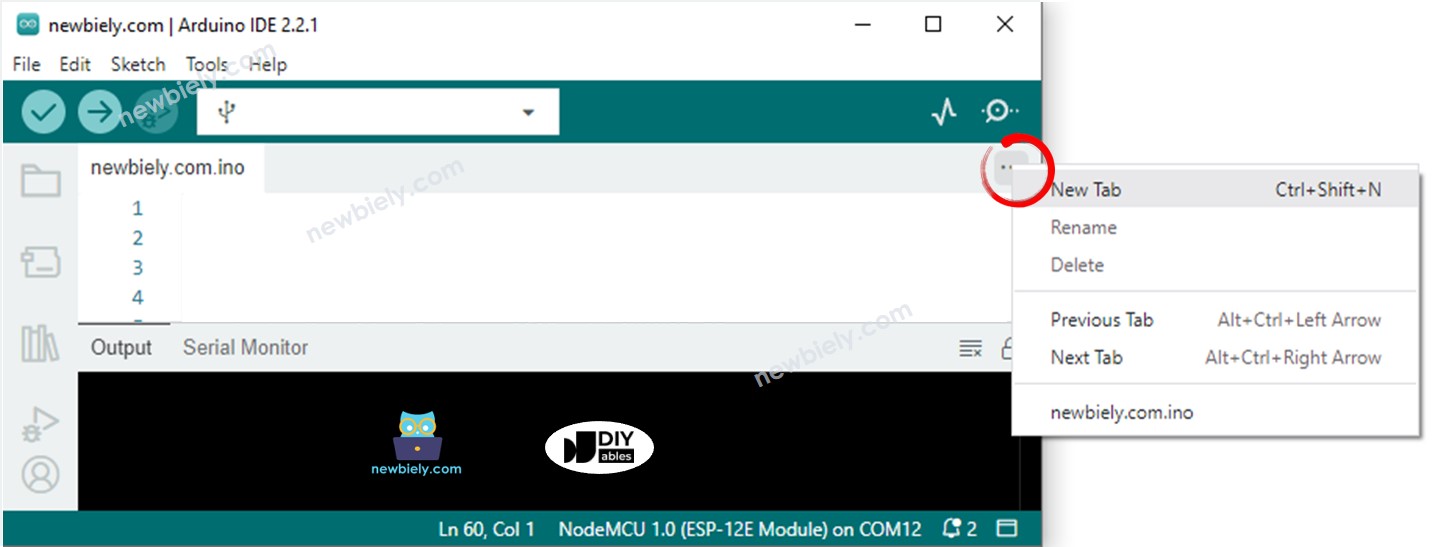
- Either click on the button just below the serial monitor icon and choose New Tab, or use Ctrl+Shift+N keys.
- Give file's name index.h and click OK button
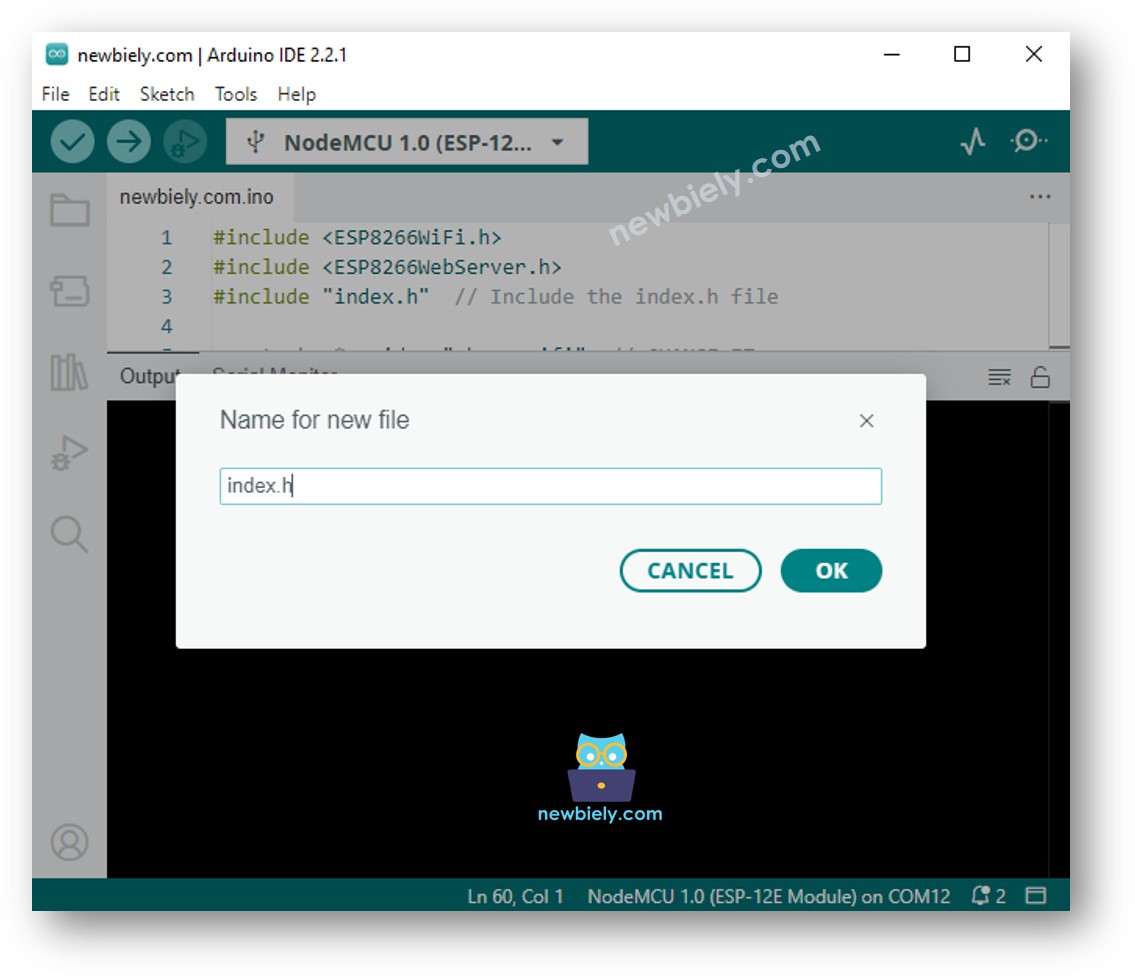
- Copy the below code and paste it to the index.h.
- Replace the line REPLACE_YOUR_HTML_CONTENT_HERE by your HTML content you prepared before. There is no problem with new line character. The below is an example of index.h file:
- Now you have the code in two files: newbiely.com.ino and index.h
- Click Upload button on Arduino IDE to upload code to ESP8266
- Access the web page of ESP8266 board via web browser as before. You will see it as below:
※ NOTE THAT:
In the above codes:
- The HTML code is designed to update the temperature in the background at regular intervals, currently set to every 4 seconds in the code. This means that the temperature value is automatically refreshed without the need to manually reload the webpage. You can adjust the update interval in the code to suit your preferences.
- ESP8266 code serves two requests from the web browser.
- One request to return the HTML content of the webpage
- The other to return the temperature value requested by the webpage on the backround
For a more comprehensive and detailed illustration, please refer to the ESP8266 - DS18B20 Temperature Sensor via Web tutorial
※ NOTE THAT:
- If you make changes to the HTML content within the index.h file but don't modify anything in the newbiely.com.ino file, the Arduino IDE won't refresh or update the HTML content when you compile and upload the code to the ESP8266.
- To force the Arduino IDE to update the HTML content in this situation, you need to make a modification in the newbiely.com.ino file. For example, you can add an empty line or insert a comment. This action triggers the IDE to recognize that there have been changes in the project, ensuring that your updated HTML content gets included in the upload.
ESP8266 Web Server - Multiple Pages
Check out this ESP8266 - Web Server Multiple Pages tutorial.