ESP8266 - Keypad - Servo Motor
This tutorial instructs you how to use ESP8266 and keypad to control servo motor. In detail:
- If the user inputs an accepted password on the keypad, the ESP8266 will rotate the servo motor to 90°.
- After a certain amount of time, the servo motor will be rotated back to 0°.
The ESP8266 code also supports multiple passwords.
Hardware Preparation
Or you can buy the following kits:
| 1 | × | DIYables Sensor Kit (18 sensors/displays) |
Additionally, some of these links are for products from our own brand, DIYables .
Buy Note: For controlling multiple servo motors, use the PCA9685 16 Channel PWM Servo Driver Module to save MCU pins and simplify wiring.
Overview of Keypad and Servo Motor
If you are unfamiliar with keypad and servo motor (including pinout, how it works, and how to program), the following tutorials can help:
- ESP8266 - Keypad tutorial
- ESP8266 - Servo Motor tutorial
Wiring Diagram
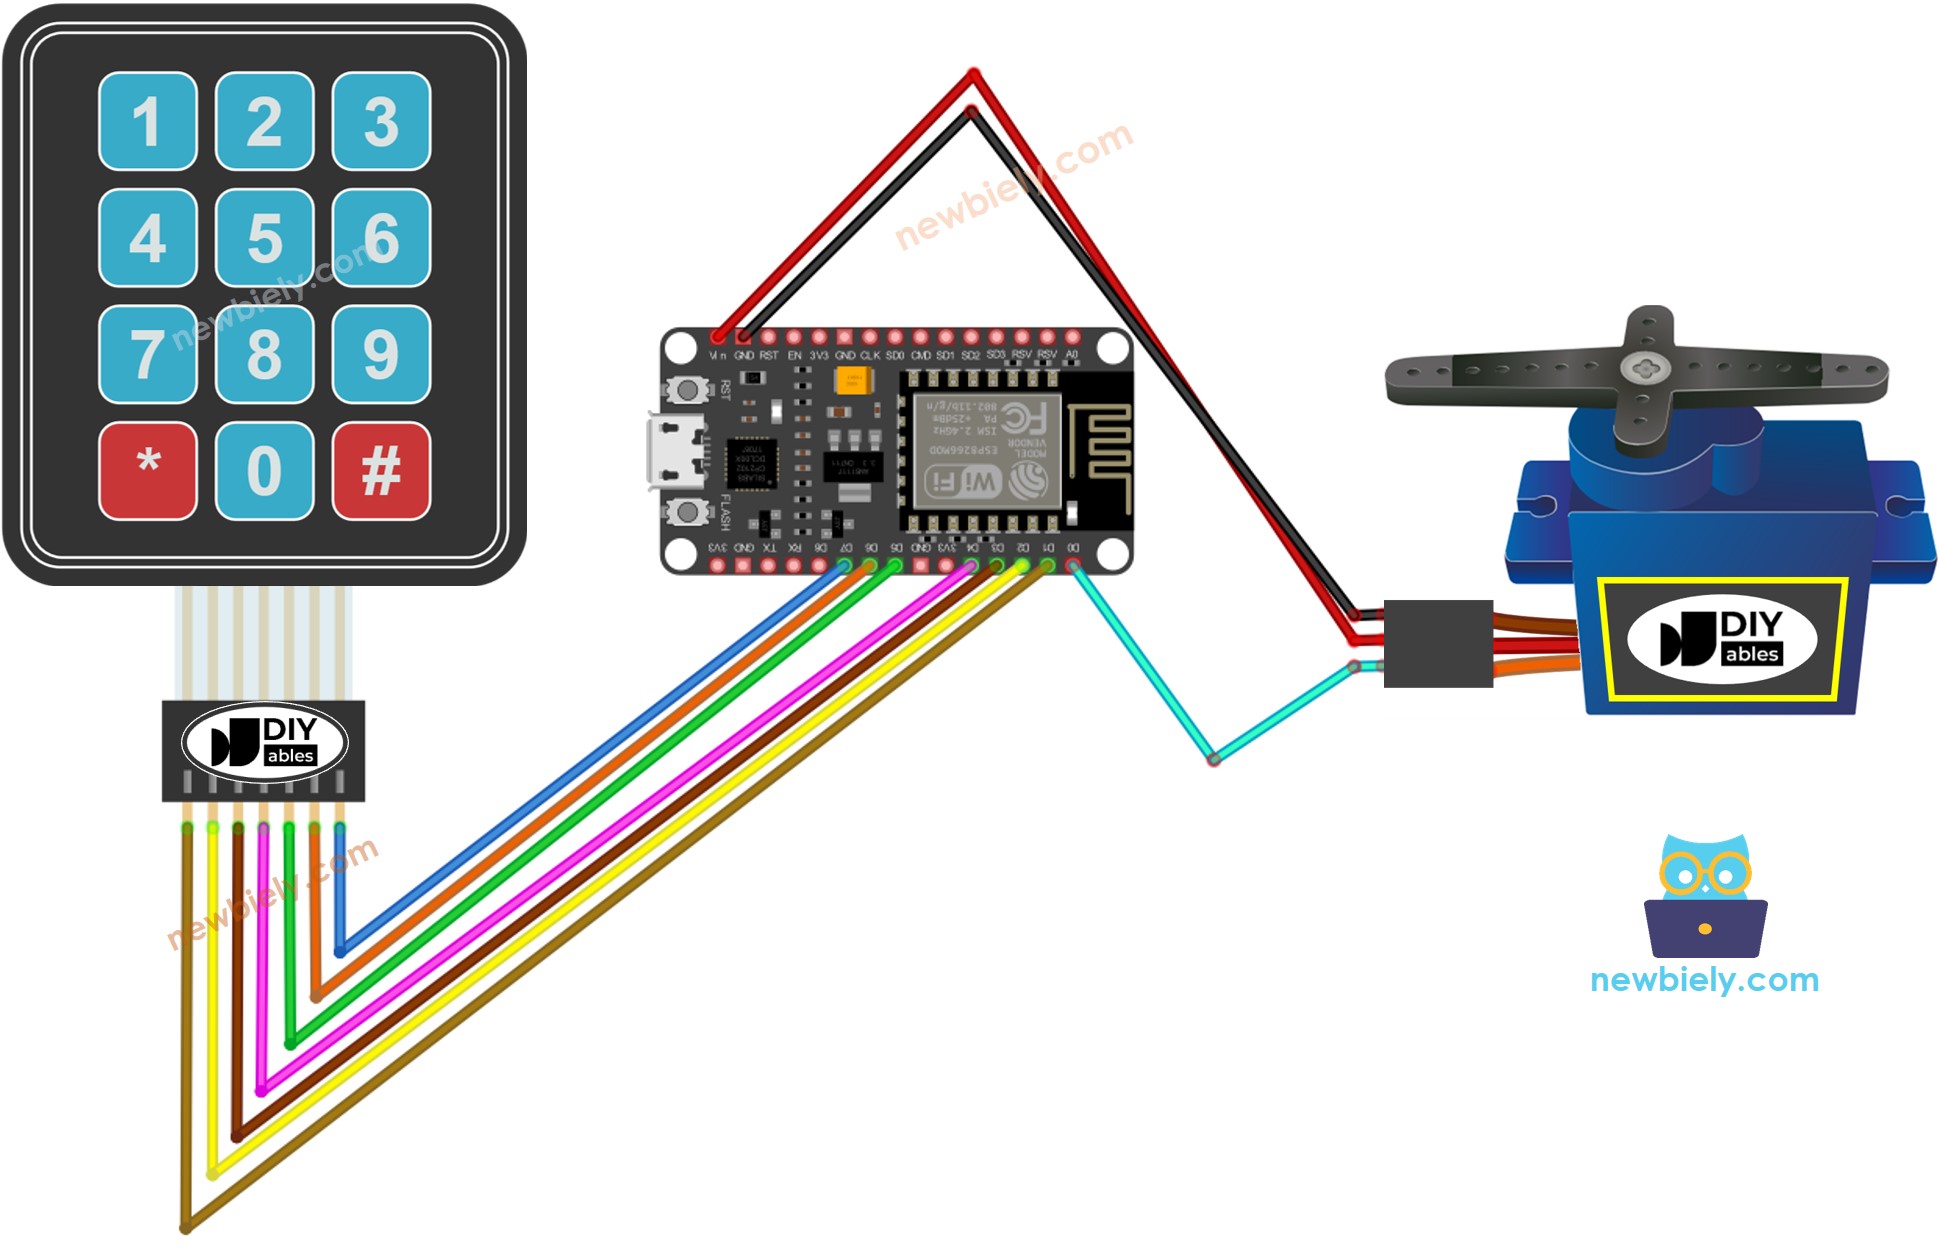
This image is created using Fritzing. Click to enlarge image
See more in ESP8266's pinout and how to supply power to the ESP8266 and other components.
Please note that the wiring diagram shown above is only suitable for a servo motor with low torque. In case the motor vibrates instead of rotating, an external power source must be utilized to provide more power for the servo motor. The below demonstrates the wiring diagram with an external power source for servo motor.
TO BE ADD IMAGE
Please do not forget to connect GND of the external power to GND of ESP8266.
ESP8266 Code - rotates Servo Motor if the password is correct
If the password is correct, the servo motor will be set to 90° for a period of 5 seconds. Subsequently, it will be rotated back to 0°.
Detailed Instructions
To get started with ESP8266 on Arduino IDE, follow these steps:
- Check out the how to setup environment for ESP8266 on Arduino IDE tutorial if this is your first time using ESP8266.
- Wire the components as shown in the diagram.
- Connect the ESP8266 board to your computer using a USB cable.
- Open Arduino IDE on your computer.
- Choose the correct ESP8266 board, such as (e.g. NodeMCU 1.0 (ESP-12E Module)), and its respective COM port.
- Connect an USB cable to the ESP8266 and the PC.
- Open the Arduino IDE, choose the correct board and port.
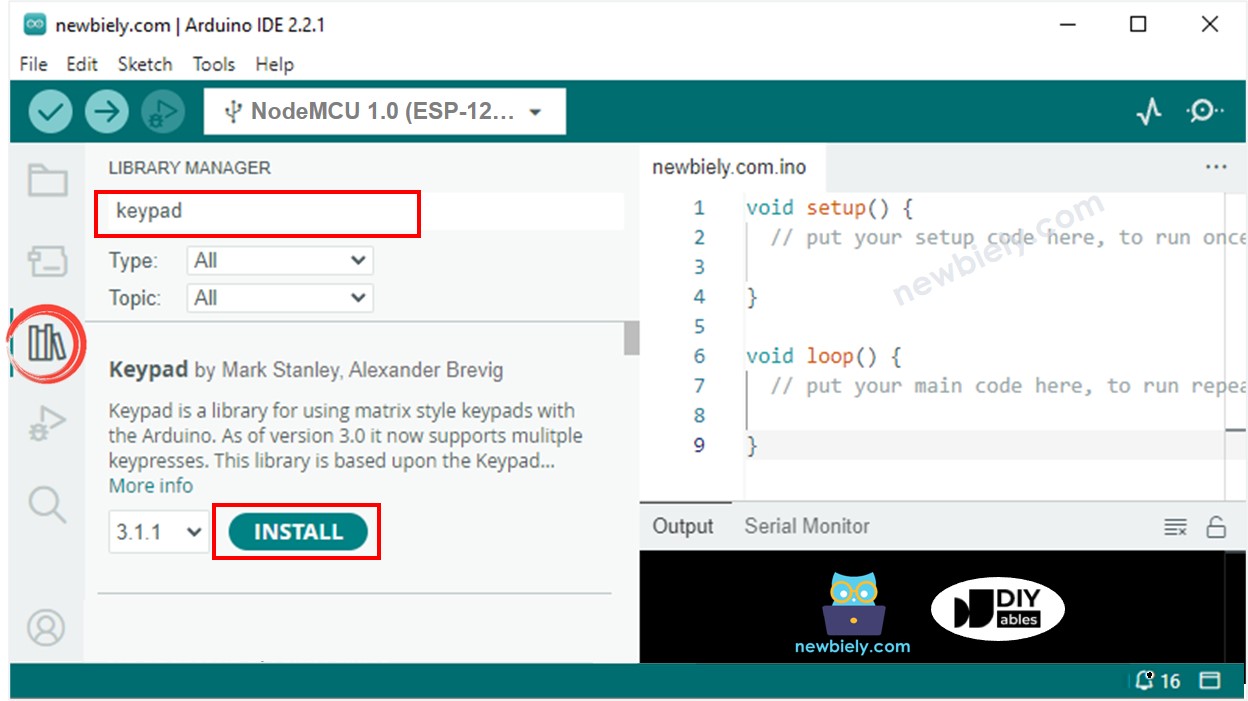
- Click to the Libraries icon on the left bar of the Arduino IDE.
- Search for “keypad” and locate the keypad library created by Mark Stanley and Alexander Brevig.
- Press the Install button to install the keypad library.
- Copy the code and open it with the Arduino IDE.
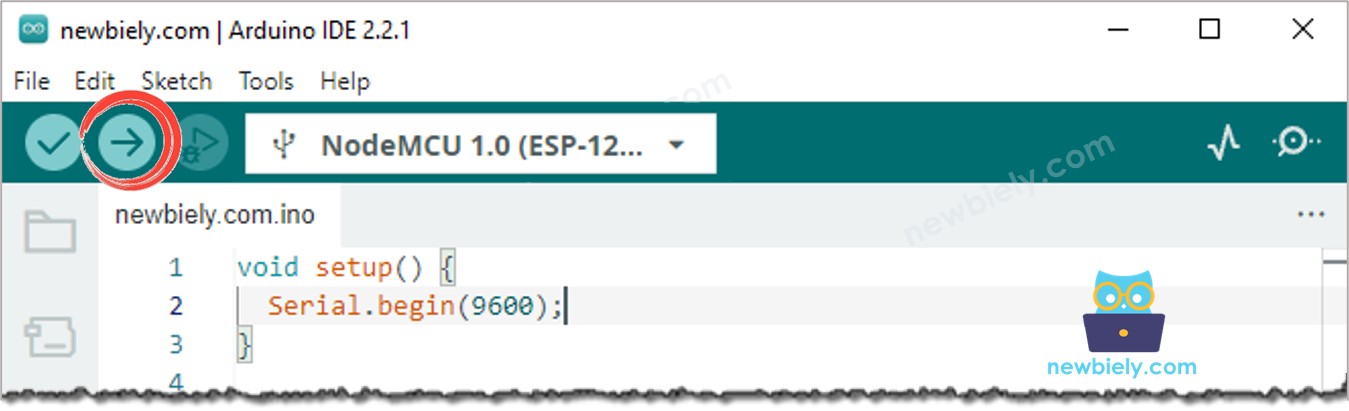
- Click the Upload button on the Arduino IDE to compile and upload the code to the ESP8266.
- Enter 12345# into the keypad.
- Then, type in 5642B#.
- Check the Serial Monitor and observe the servo motor's status.
Code Explanation
The valid passwords are pre-defined in the ESP8266 code. A string, called input_password, is used to store the password inputted by users. The keypad has two keys (* and #) which are used for special purposes: clearing the password and terminating the password. When a key on the keypad is pressed:
- If it is not one of the two special keys, it will be appended to the input_password.
- If the pressed key is *, then the input_password will be cleared, allowing the user to start or re-start inputting the password.
- If the pressed key is #:
- The ESP8266 checks if the password is valid by comparing input_password with the pre-defined passwords. If it matches one of them, the ESP8266 rotates the servo motor to 90°.
- Regardless of whether the password is correct or not, the input_password will be cleared for the next input.
- After a timeout, ESP8266 rotates the servo motor to 0°.