ESP8266 - Button Control Electromagnetic Lock
The tutorial instructs you how to use an ESP8266 and a button to control an electromagnetic lock. When the button is pressed, ESP8266 unlock the door for a period of time (e.g. 10 seconds). After that, the door will be locked again.
We will go from easy to difficult by two steps:
Or you can buy the following kits:
Disclosure: Some of the links provided in this section are Amazon affiliate links. We may receive a commission for any purchases made through these links at no additional cost to you.
Additionally, some of these links are for products from our own brand,
DIYables .
If you are unfamiliar with electromagnetic locks and buttons (including pinouts, operation, and programming), the following tutorials can help:
#define BUTTON_PIN D1
#define RELAY_PIN D8
int prev_button_state;
int button_state;
void setup() {
Serial.begin(9600);
pinMode(BUTTON_PIN, INPUT_PULLUP);
pinMode(RELAY_PIN, OUTPUT);
digitalWrite(RELAY_PIN, HIGH);
button_state = digitalRead(BUTTON_PIN);
}
void loop() {
prev_button_state = button_state;
button_state = digitalRead(BUTTON_PIN);
if (prev_button_state == HIGH && button_state == LOW) {
Serial.println("The button is pressed");
digitalWrite(RELAY_PIN, LOW);
delay(10000);
digitalWrite(RELAY_PIN, HIGH);
}
}
To get started with ESP8266 on Arduino IDE, follow these steps:
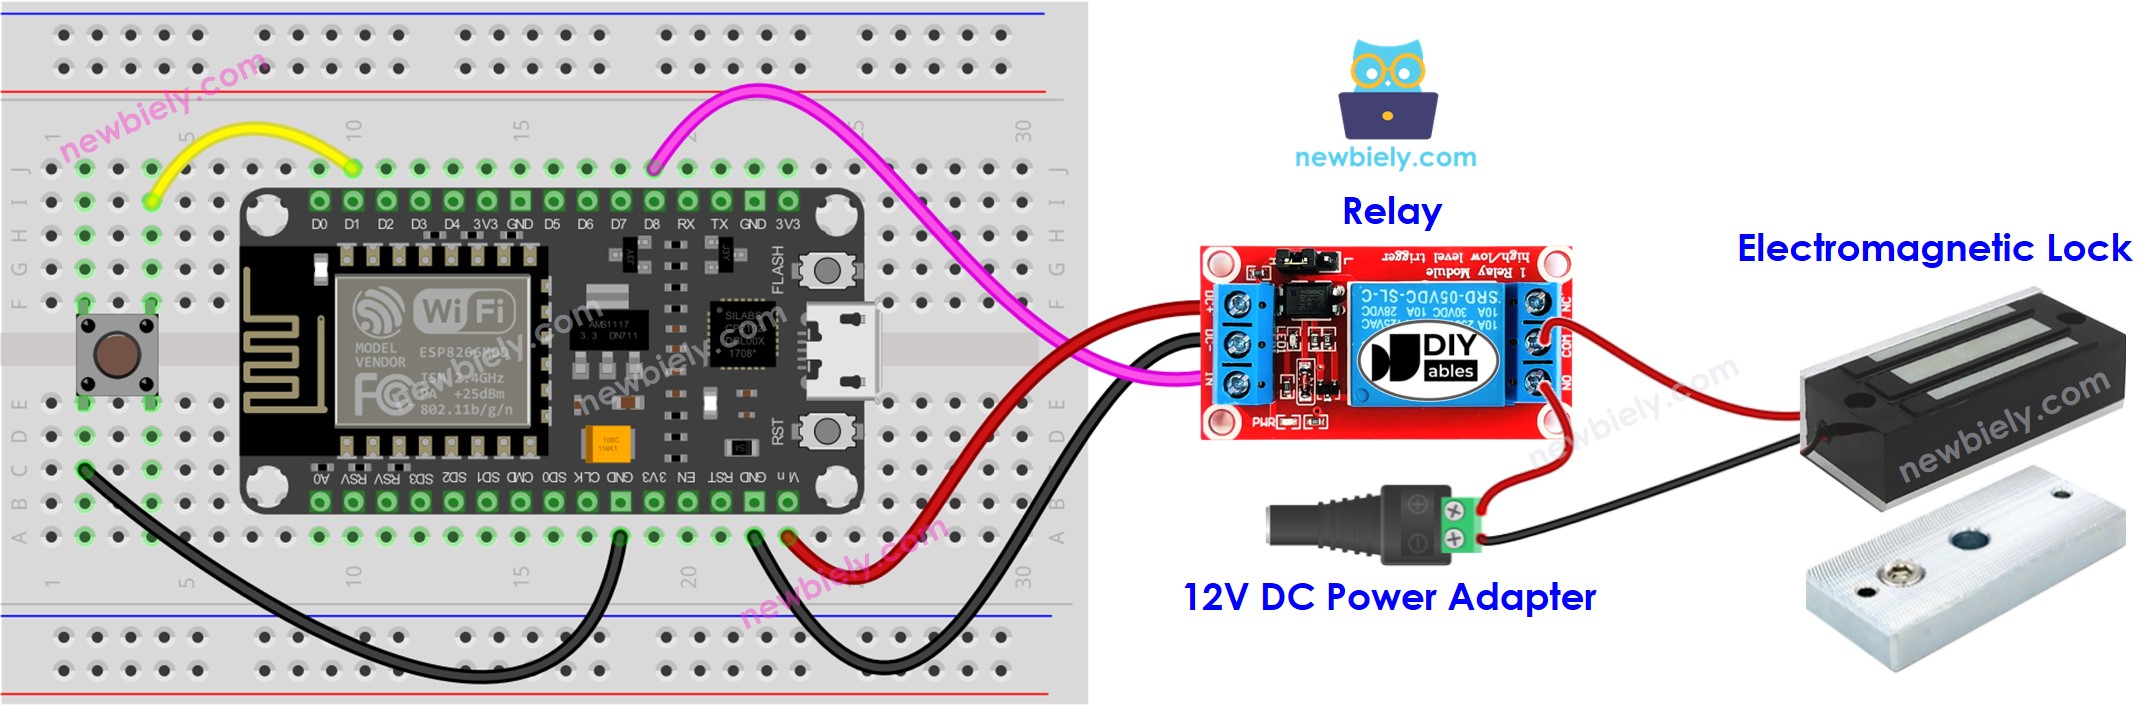
Wire the components as shown in the diagram.
Connect the ESP8266 board to your computer using a USB cable.
Open Arduino IDE on your computer.
Choose the correct ESP8266 board, such as (e.g. NodeMCU 1.0 (ESP-12E Module)), and its respective COM port.
Connect an ESP8266 to a computer using a USB cable.
Open the Arduino IDE, select the appropriate board and port.
Copy the code and open it in the Arduino IDE.
Hit the Upload button on the Arduino IDE to compile and upload the code to the ESP8266.
Bring the armature plate close to the electromagnet.
Press the button once.
Check out the attraction between the armature plate and the electromagnet for 10 seconds.
Check out the line-by-line explanation contained in the comments of the source code!
※ NOTE THAT:
In practice, the code mentioned above does not always work correctly. To ensure it functions properly, we need to debounce for the button. Debouncing for the button can be tricky for those just starting out. Fortunately, the ezButton library makes it much simpler.
What is the purpose of debouncing?. ⇒ See ESP8266 - Button Debounce tutorial to understand why debouncing is necessary.
#include <ezButton.h>
#define BUTTON_PIN D1
#define RELAY_PIN D8
ezButton button(BUTTON_PIN);
void setup() {
Serial.begin(9600);
pinMode(RELAY_PIN, OUTPUT);
button.setDebounceTime(50);
digitalWrite(RELAY_PIN, HIGH);
}
void loop() {
button.loop();
if (button.isPressed()) {
Serial.println("The button is pressed");
digitalWrite(RELAY_PIN, LOW);
delay(10000);
digitalWrite(RELAY_PIN, HIGH);
}
}
Wire the components as shown in the diagram.
Connect the ESP8266 board to your computer using a USB cable.
Open Arduino IDE on your computer.
Choose the correct ESP8266 board, such as (e.g. NodeMCU 1.0 (ESP-12E Module)), and its respective COM port.
Install the ezButton library. Refer to
How To for instructions.
Open the code in the Arduino IDE and click the Upload button to upload it to the ESP8266.
Bring the armature plate close to the electromagnet and press the button once.
Check out the attraction between the armature plate and the electromagnet for 10 seconds.
※ NOTE THAT:
In the code above, we utilized the delay function. As a result, there is no need for debouncing the button. Nevertheless, we still provide the code with debouncing just in case you would like to do more tasks without using the delay function. Check out How to use millis() instead of delay() for more information.