ESP8266 - Temperature Sensor
This tutorial instructs you how to use the waterproof DS18B20 1-wire temperature sensor with ESP8266. This sensor is cost-effective, simple to use and has an attractive appearance.
Hardware Preparation
Or you can buy the following kits:
| 1 | × | DIYables Sensor Kit (18 sensors/displays) |
Additionally, some of these links are for products from our own brand, DIYables .
Buy Note: Many DS18B20 sensors available in the market are unreliable. We strongly recommend buying the sensor from the DIYables brand using the link provided above. We tested it, and it worked reliably.
Overview of One Wire Temperature Sensor - DS18B20
The Temperature Sensor Pinout
The DS18B20 temperature sensor has three pins that need to be connected in a specific way:
- GND pin: should be connected to ground (0V)
- VCC pin: should be connected to the voltage source (5V or 3.3V)
- DATA pin: is the 1-wire data bus and should be connected to a digital pin on the ESP8266 board.
The sensor typically comes in two varieties: TO-92 package (which resembles a transistor) and a waterproof probe. For this tutorial, we will be using the waterproof probe form.

Connecting a DS18B20 temperature sensor to an Arduino requires a pull-up resistor, which can be a hassle. Fortunately, some manufacturers have made it easier by offering a wiring adapter that has a built-in pull-up resistor and screw terminal block, simplifying the wiring process.
Wiring Diagram
- Wiring diagram using a breadboard.
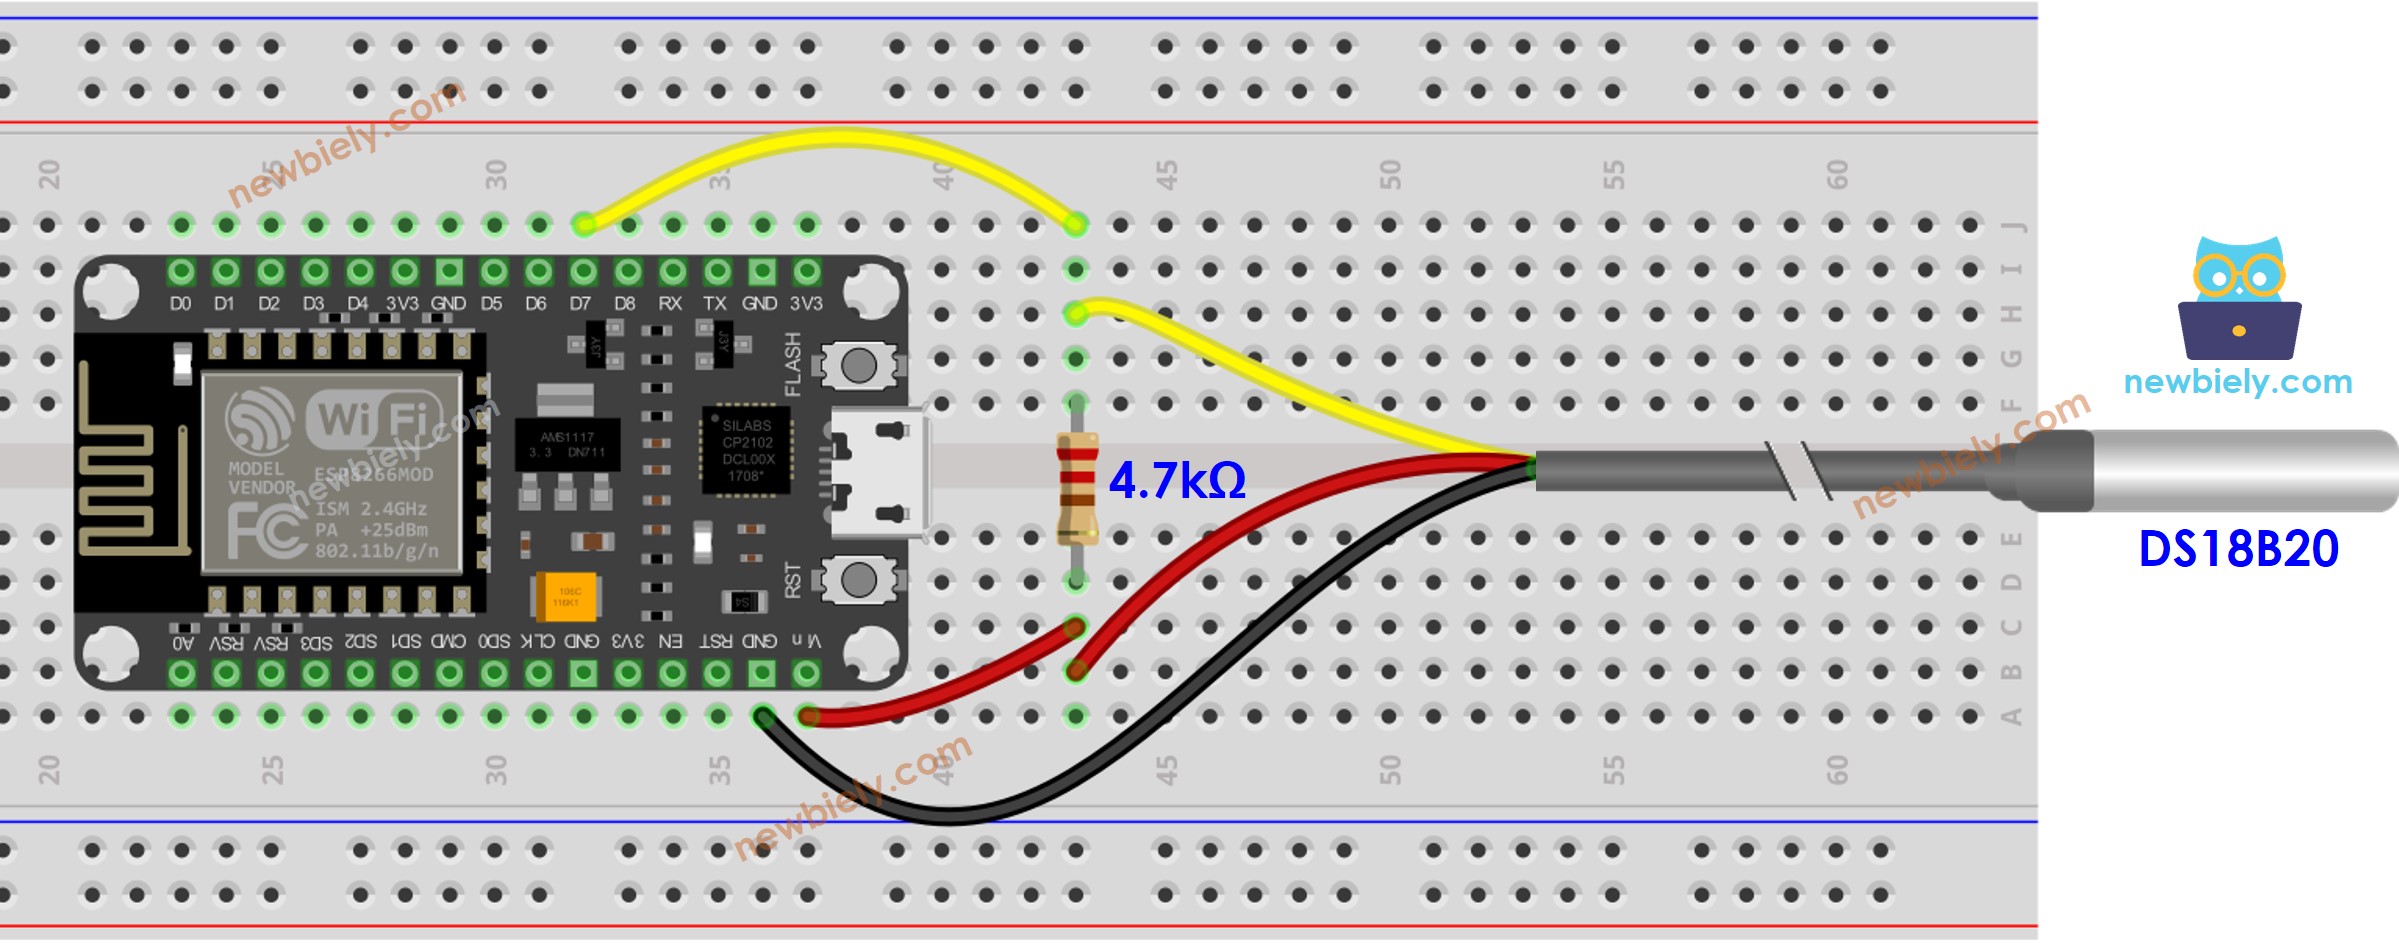
This image is created using Fritzing. Click to enlarge image
- Wiring diagram using a the wiring adapter (recommended).
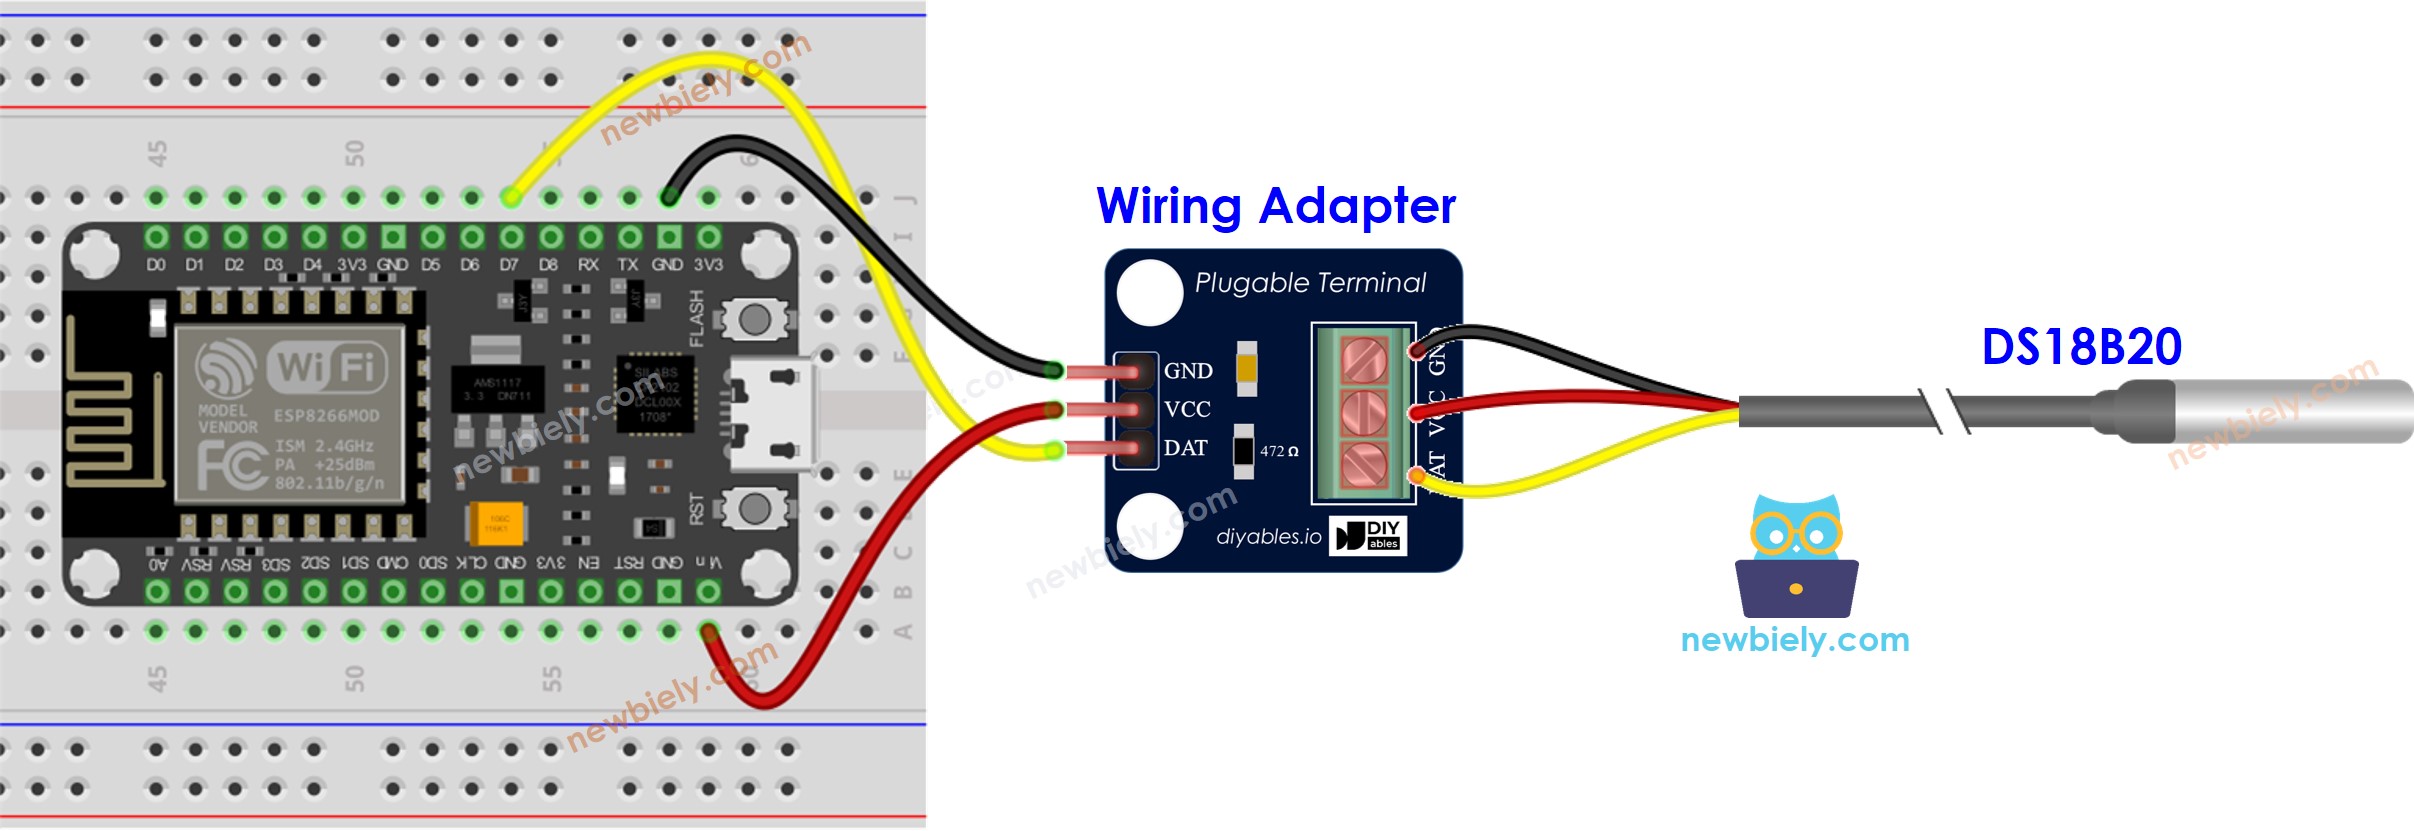
This image is created using Fritzing. Click to enlarge image
See more in ESP8266's pinout and how to supply power to the ESP8266 and other components.
We recommend buying a DS18B20 sensor along with its accompanying wiring adapter for a seamless setup. This adapter includes an integrated resistor, removing the need for an additional resistor in the wiring. We also tested it and worked well.
How To Program For DS18B20 Temperature Sensor
- Include the library in your project.
- Declare an object of type OneWire, corresponding to the pin connected to the sensor's DATA pin. Additionally, declare an object of type DallasTemperature.
- Begin the sensor setup process:
- Issue the command to obtain temperatures.
- Read the temperature in Celsius.
- Calculate Fahrenheit from Celsius:
ESP8266 Code
Detailed Instructions
To get started with ESP8266 on Arduino IDE, follow these steps:
- Check out the how to setup environment for ESP8266 on Arduino IDE tutorial if this is your first time using ESP8266.
- Wire the components as shown in the diagram.
- Connect the ESP8266 board to your computer using a USB cable.
- Open Arduino IDE on your computer.
- Choose the correct ESP8266 board, such as (e.g. NodeMCU 1.0 (ESP-12E Module)), and its respective COM port.
- Connect the ESP8266 to a computer using a USB cable.
- Open the Arduino IDE, select the appropriate board and port.
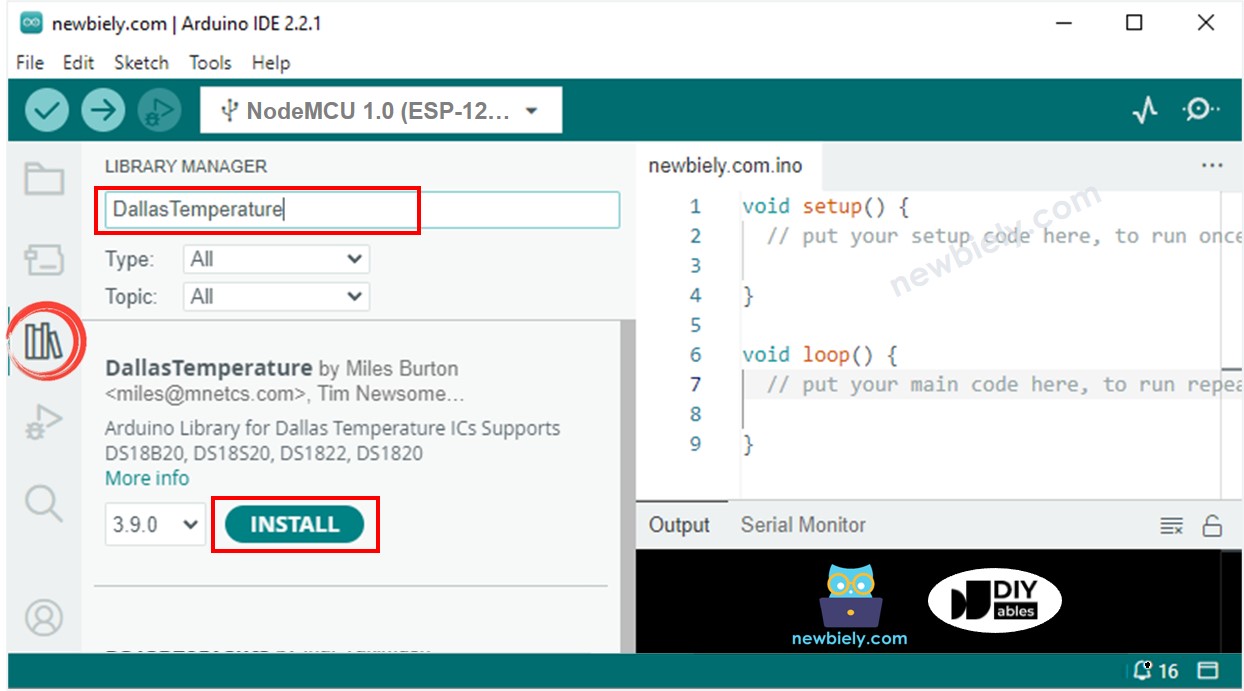
- Click to the Libraries icon on the left bar of the Arduino IDE.
- Search for “Dallas”, then locate the DallasTemperature library created by Miles Burton.
- Press the Install button to install the DallasTemperature library.
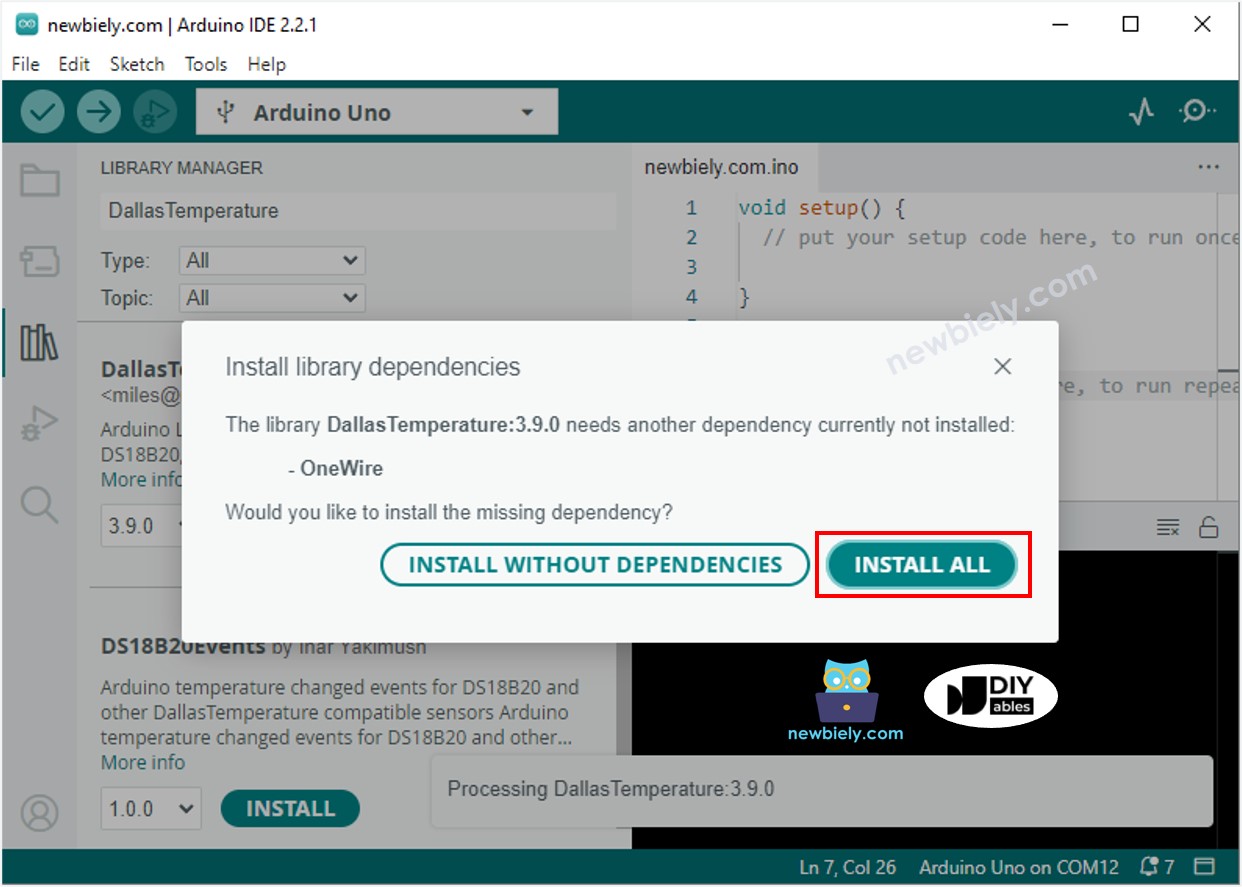
- You will be asked to install the dependency. Click Install All button to install OneWire library.
- Copy the code and open it with the Arduino IDE.
- Click the Upload button in the IDE to transfer the code to the ESP8266.
- Place the sensor in hot and cold water or hold it in your hand.
- Check the results on the Serial Monitor.