ESP8266 - Button Count - OLED
This tutorial instructs you how to use ESP8266 and button to count the press events and then display the value on OLED. In detail:
The ESP8266 counts how many times a button is pressed
The ESP8266 displays the count number on an OLED.
The ESP8266 automatically aligns the count number to the center of the OLED display, both horizontally and vertically.
In this tutorial, we will be debouncing a button without using the delay() function. For more information on why debouncing is necessary, please see Why do we need debouncing?
You can adapt this to work with different sensors instead of the button.
Or you can buy the following kits:
Disclosure: Some of the links provided in this section are Amazon affiliate links. We may receive a commission for any purchases made through these links at no additional cost to you.
Additionally, some of these links are for products from our own brand,
DIYables .
If you are unfamiliar with OLED and button (pinout, functionality, programming ...), the following tutorials can help:
#include <Wire.h>
#include <Adafruit_GFX.h>
#include <Adafruit_SSD1306.h>
#include <ezButton.h>
#define OLED_WIDTH 128
#define OLED_HEIGHT 64
Adafruit_SSD1306 oled(OLED_WIDTH, OLED_HEIGHT, &Wire, -1);
ezButton button(7);
unsigned long prev_count = 0;
void setup() {
Serial.begin(9600);
if (!oled.begin(SSD1306_SWITCHCAPVCC, 0x3C)) {
Serial.println(F("SSD1306 allocation failed"));
while (true);
}
delay(2000);
oled.clearDisplay();
oled.setTextSize(2);
oled.setTextColor(WHITE);
oled.setCursor(0, 10);
button.setDebounceTime(50);
button.setCountMode(COUNT_FALLING);
}
void loop() {
button.loop();
unsigned long count = button.getCount();
if (prev_count != count) {
Serial.println(count);
oled.clearDisplay();
oled.println(count);
oled.display();
prev_count != count;
}
}
To get started with ESP8266 on Arduino IDE, follow these steps:
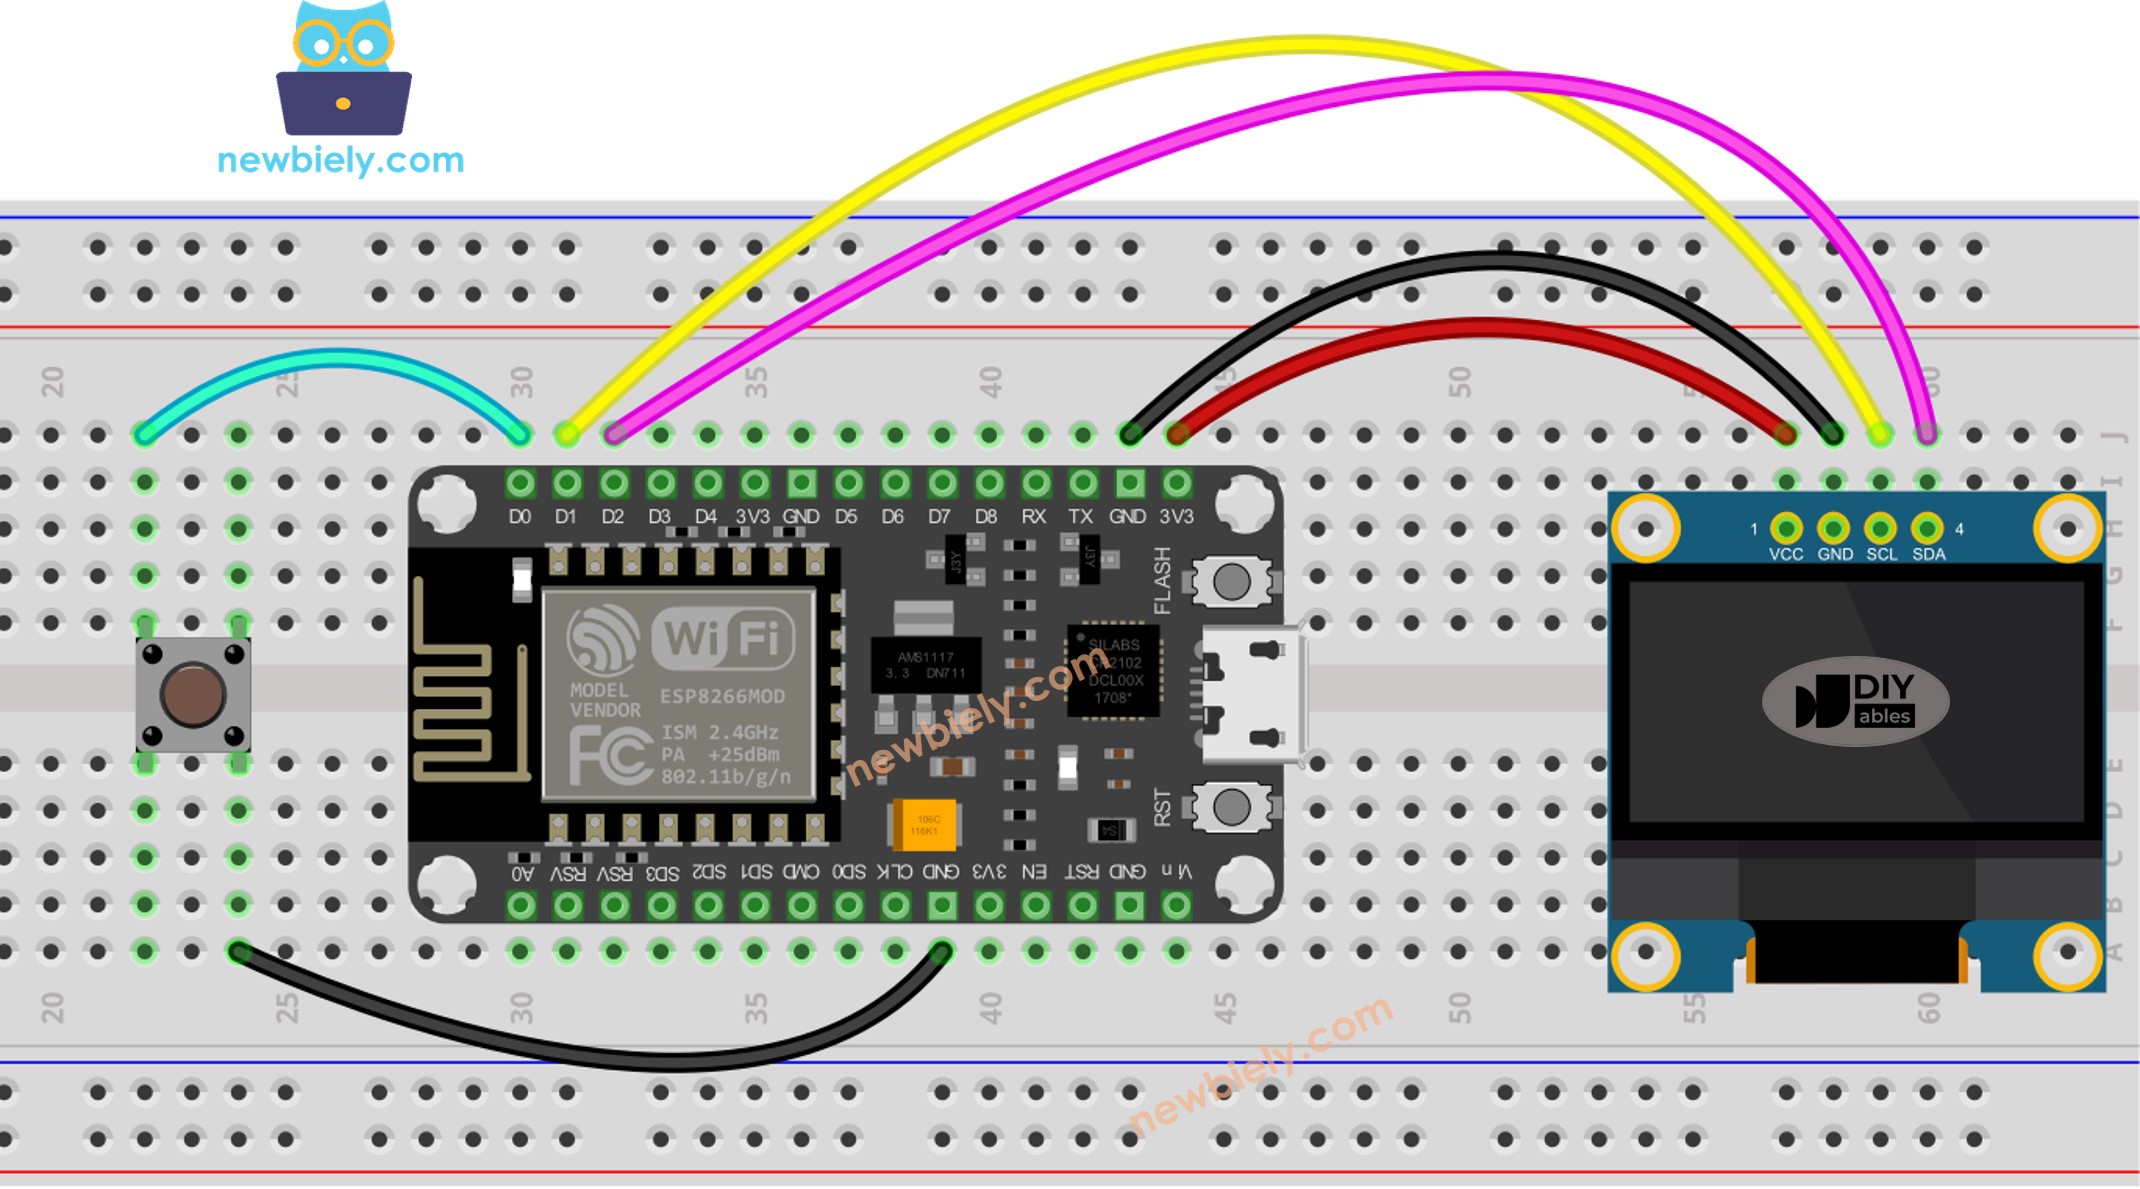
Wire the components as shown in the diagram.
Connect the ESP8266 board to your computer using a USB cable.
Open Arduino IDE on your computer.
Choose the correct ESP8266 board, such as (e.g. NodeMCU 1.0 (ESP-12E Module)), and its respective COM port.
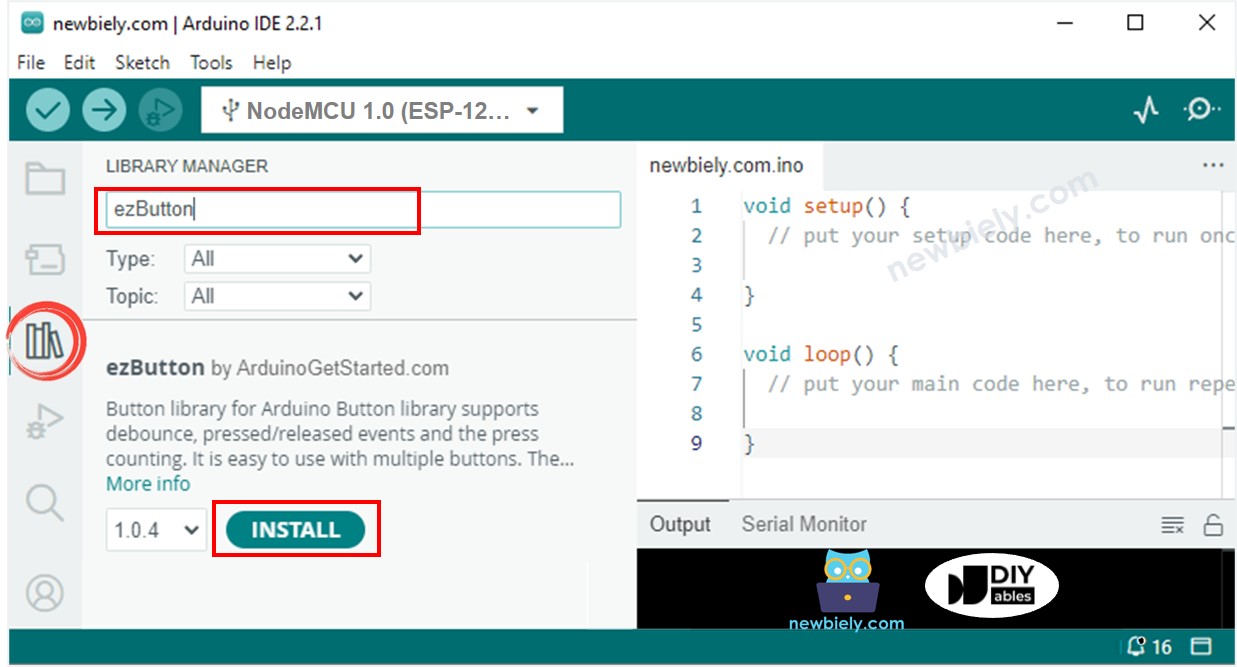
Click to the Libraries icon on the left bar of the Arduino IDE.
Search for “ezButton”, then locate the button library provided by ArduinoGetStarted.
Press the Install button to install ezButton library.
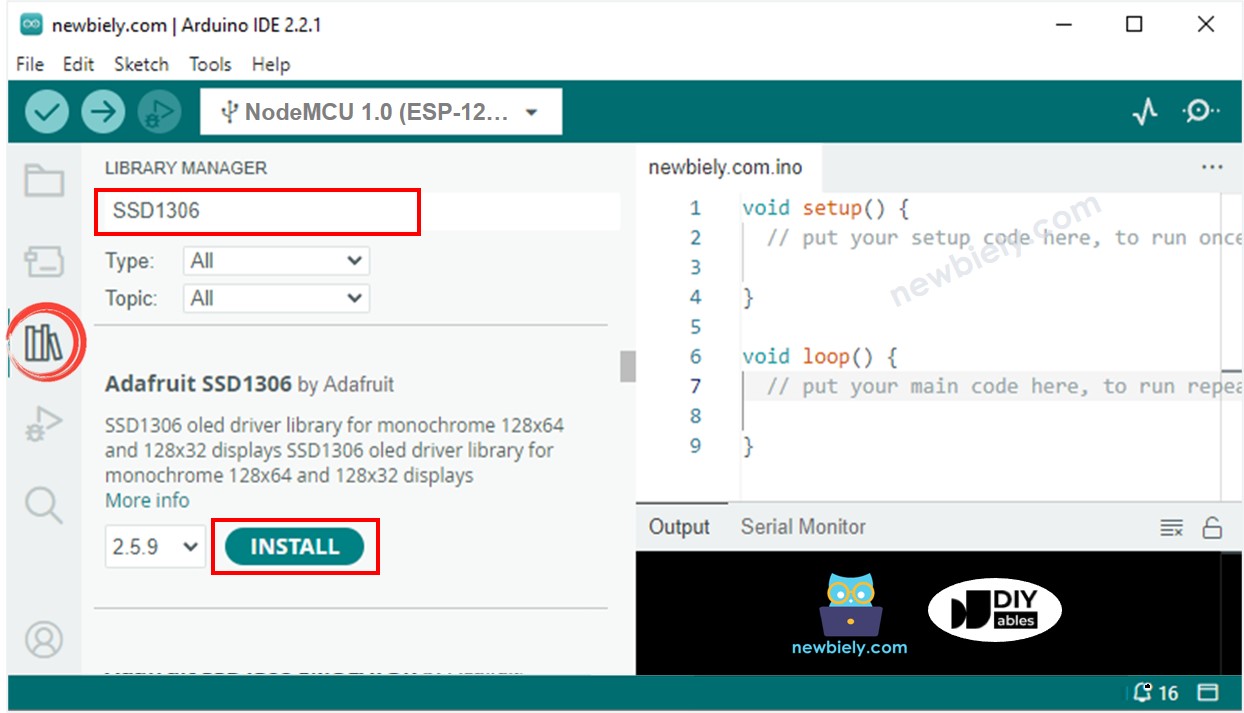
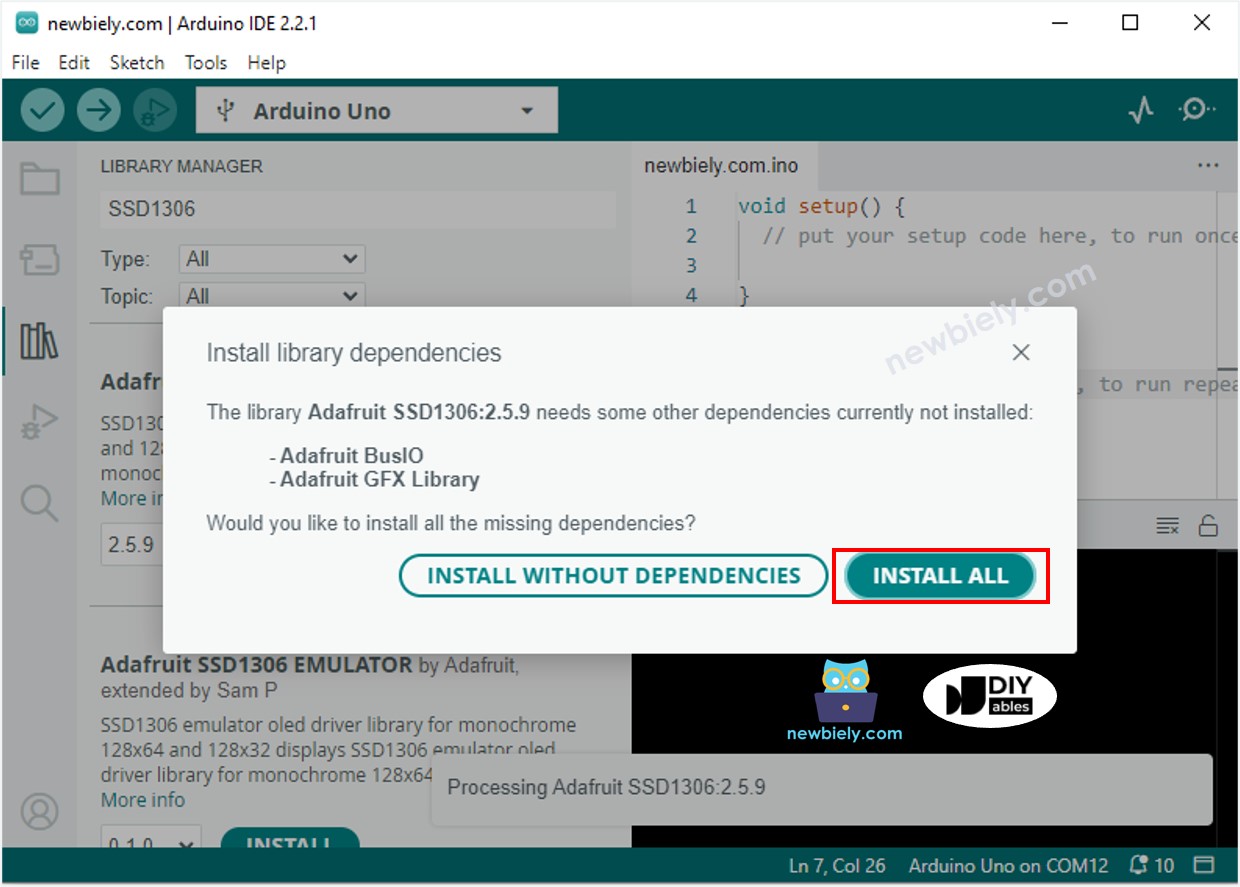
You will be prompted to install additional library dependencies.
To install all of them, click the Install All button.
Copy the code and open it with the Arduino IDE.
Hit the Upload button on the Arduino IDE to compile and upload the code to the ESP8266.
Press the button multiple times.
Check out the changing count number on the OLED.
The code above shows the number of button presses in the top left corner. Let's make a change to center it!
#include <Wire.h>
#include <Adafruit_GFX.h>
#include <Adafruit_SSD1306.h>
#include <ezButton.h>
#define OLED_WIDTH 128
#define OLED_HEIGHT 64
Adafruit_SSD1306 oled(OLED_WIDTH, OLED_HEIGHT, &Wire, -1);
ezButton button(7);
unsigned long prev_count = 0;
void setup() {
Serial.begin(9600);
if (!oled.begin(SSD1306_SWITCHCAPVCC, 0x3C)) {
Serial.println(F("SSD1306 allocation failed"));
while (true);
}
delay(2000);
oled.clearDisplay();
oled.setTextSize(2);
oled.setTextColor(WHITE);
oled.setCursor(0, 10);
button.setDebounceTime(50);
button.setCountMode(COUNT_FALLING);
}
void loop() {
button.loop();
unsigned long count = button.getCount();
if (prev_count != count) {
Serial.println(count);
String text = String(count);
oled_display_center(text);
prev_count != count;
}
}
void oled_display_center(String text) {
int16_t x1;
int16_t y1;
uint16_t width;
uint16_t height;
oled.getTextBounds(text, 0, 0, &x1, &y1, &width, &height);
oled.clearDisplay();
oled.setCursor((OLED_WIDTH - width) / 2, (OLED_HEIGHT - height) / 2);
oled.println(text);
oled.display();
}


