ESP8266 - Log Data with Timestamp to SD Card
This tutorial provides comprehensive instructions on logging data with a timestamp to a Micro SD Card using ESP8266. The key components covered include:
- ESP8266 - How to log data with a timestamp to a single file on the Micro SD Card.
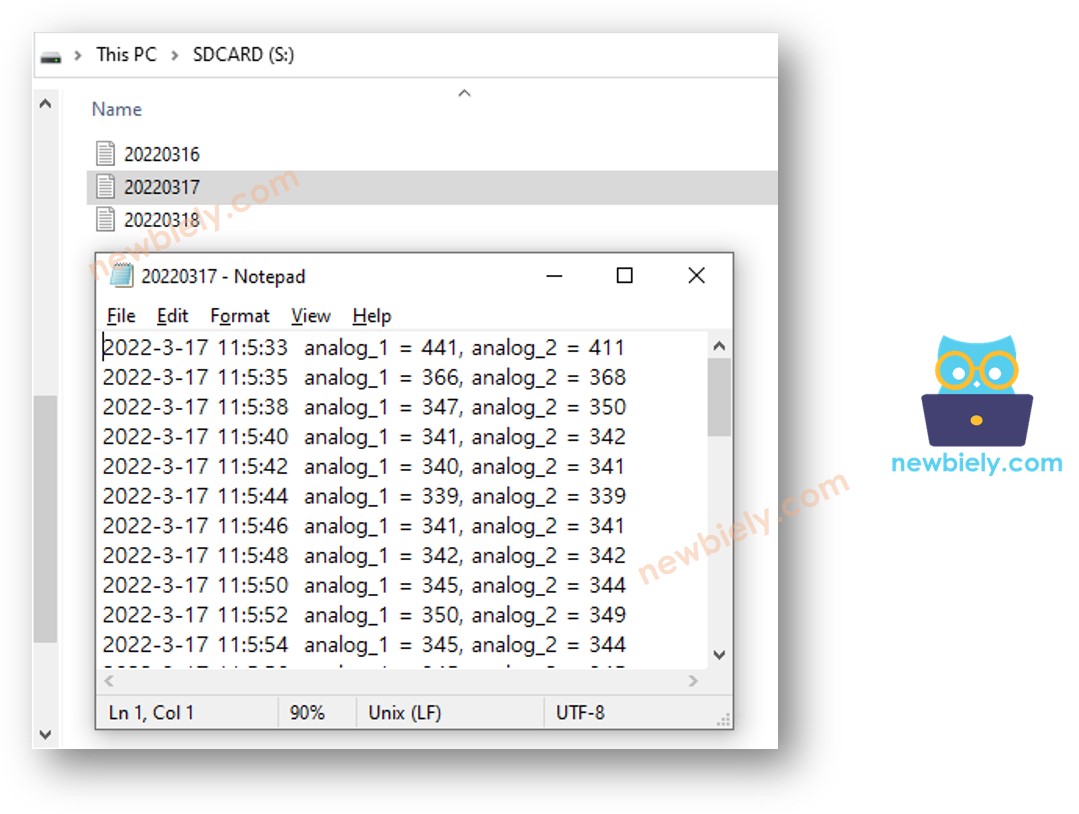
- ESP8266 - How to log data with a timestamp to multiple files on the Micro SD Card, with one file created per day.
The timestamp is acquired from an RTC module and is stored on the Micro SD Card alongside the corresponding data. The stored information on the Micro SD Card can vary, encompassing readings from any sensor or a log of door lock access...
To illustrate the process, this tutorial utilizes readings from two analog pins. However, the provided code is easily adaptable to accommodate diverse types of data.
Hardware Preparation
Or you can buy the following kits:
| 1 | × | DIYables Sensor Kit (18 sensors/displays) |
Additionally, some of these links are for products from our own brand, DIYables .
Overview of Micro SD Card Module and RTC Module
If you are unfamiliar with Micro SD Card Module and RTC module (including pinout, how it works, and how to program), please refer to the following tutorials:
- ESP8266 - Micro SD Card tutorial.
- ESP8266 - Write Variable to SD Card tutorial.
- ESP8266 - RTC module tutorial.
Wiring Diagram
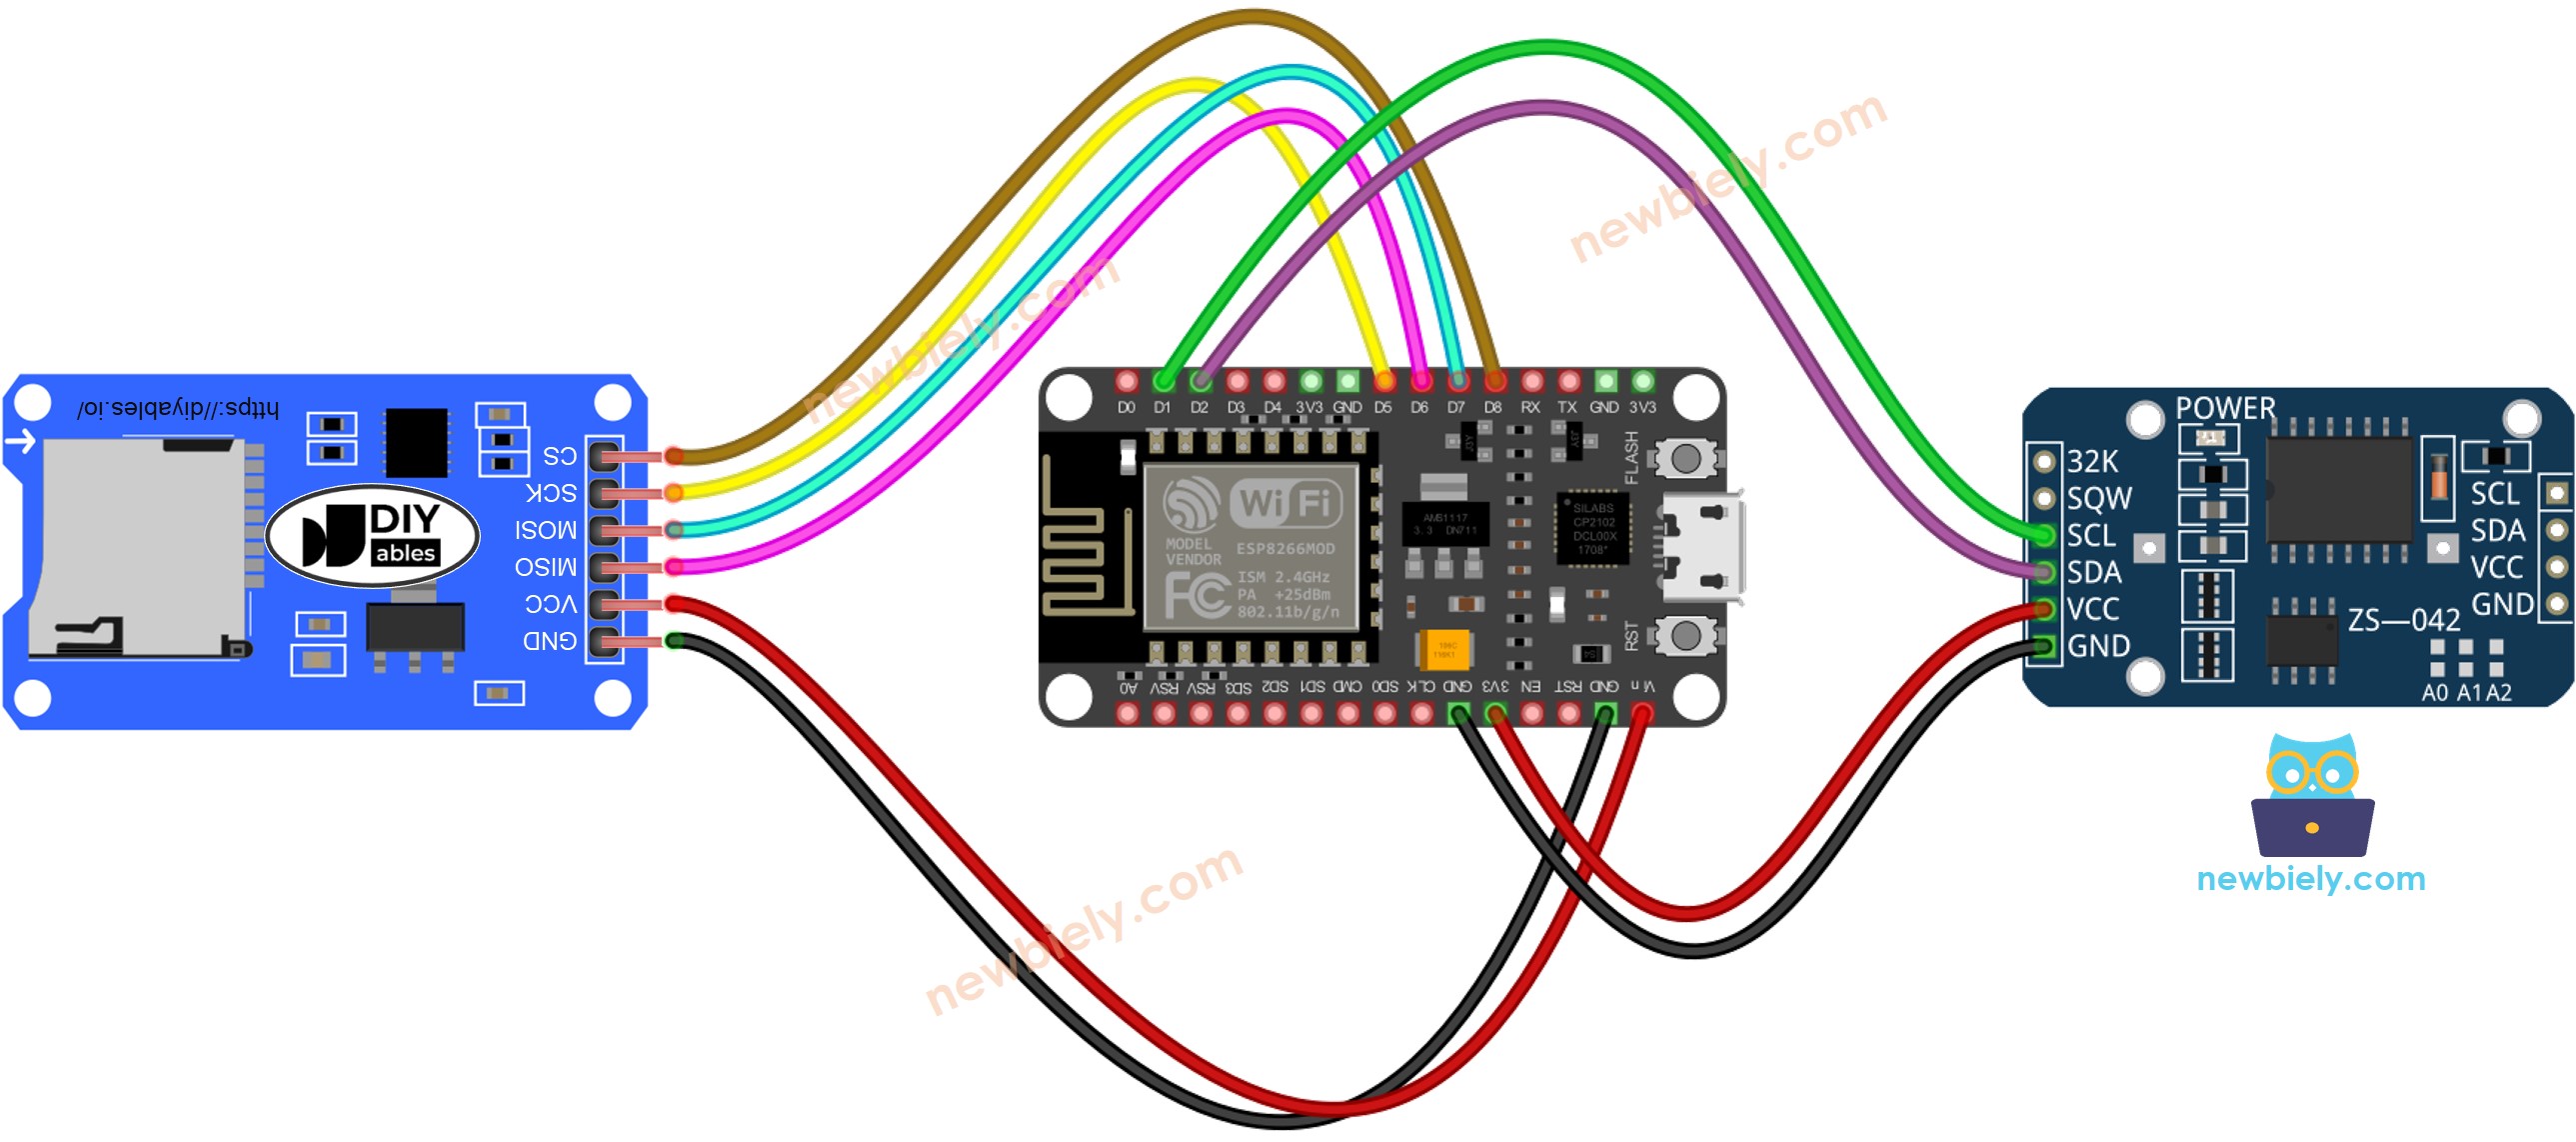
This image is created using Fritzing. Click to enlarge image
See more in ESP8266's pinout and how to supply power to the ESP8266 and other components.
※ NOTE THAT:
If you are using an Ethernet shield or any other shield that has a Micro SD Card Holder, you do not need to use the Micro SD Card Module. All you need to do is insert the Micro SD Card into the Micro SD Card Holder on the shield.
ESP8266 - Log Data with Timestamp to Micro SD Card
Detailed Instructions
To get started with ESP8266 on Arduino IDE, follow these steps:
- Check out the how to setup environment for ESP8266 on Arduino IDE tutorial if this is your first time using ESP8266.
- Wire the components as shown in the diagram.
- Connect the ESP8266 board to your computer using a USB cable.
- Open Arduino IDE on your computer.
- Choose the correct ESP8266 board, such as (e.g. NodeMCU 1.0 (ESP-12E Module)), and its respective COM port.
- Ensure that the Micro SD Card is formatted as either FAT16 or FAT32 (you can find more information about this online).
- Copy the code and open it in the Arduino IDE.
- Click the Upload button in the Arduino IDE to compile and upload the code to the ESP8266.
- Finally, view the outcome on the Serial Monitor.
- Remove the Micro SD Card from the Micro SD Card module.
- Insert the Micro SD Card into an USB SD Card reader.
- Attach the USB SD Card reader to the PC.
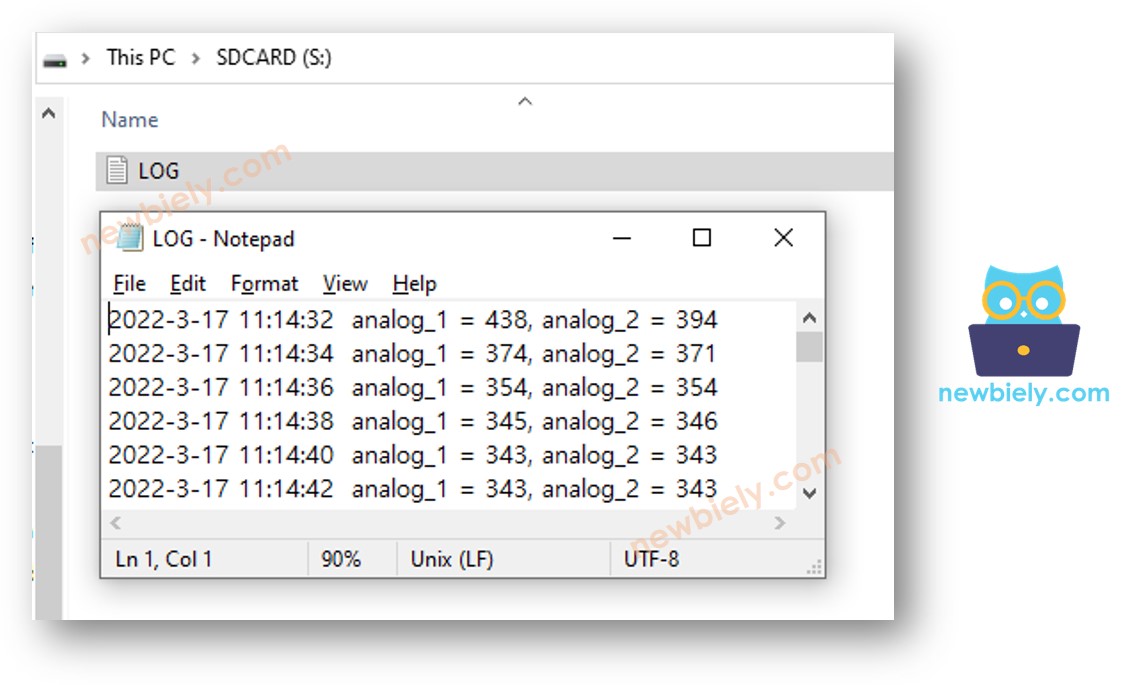
- Open the log.txt file on your PC; it will appear as follows.
If you do not possess an USB SD Card reader, you can inspect the contents of the log file by executing the ESP8266 Code below.
ESP8266 - Log Data in multiple files
Logging to a single file can lead to a large size over time, making it hard to review. The code below will create multiple files, one for each day, with the filename containing the date information in YYYYMMDD.txt format.
Once you have completed a lengthy run, if you:
- Remove the Micro SD Card from the Micro SD Card module
- Place the Micro SD Card into an USB SD Card reader
- Connect the USB SD Card reader to the PC
- You will be able to view the files as follows: